Many Kodi users complain of coming across errors that simply don’t seem to go away. The software is fraught with error logs about which users don’t usually have a clue.
If you are a Kodi user, you must have noticed how when an error occurs, the message “Check the log for more information” gets displayed. That’s because the log file contains information with which you can locate and specify the errors. Nevertheless, it’s annoying (to say the least!).
You have probably resorted to seeking help from online forums or Kodi experts in the past. In such scenarios, more often than not, you’ll be asked for your Kodi log file. And because the log file gives us access to information specific to the error, it becomes pertinent in finding the solution.
In essence, Kodi log files are essential to problem-solving. And with the help of this guide, you’ll be able to access your Kodi log file manually in the device storage. Additionally, we’ll be introducing you to two Kodi addons with which you can access the log file location from within the app.
For the uninitiated, a log file is just a text file that contains information. Therefore, you can easily access and open the file with basic applications such as Notepad.
All you have to do is navigate to the device’s storage, where the file resides. But because the path to the file differs from device to device, it might be a little tricky for some users. Fortunately, our guide covers the manual process to access the log file on all major devices.
Here’s a complete list of log file locations based on devices.
To access the Kodi file log saved on Firestick storage, you can use File Manager apps to explore device storage. ES File Explorer is a great file manager app.
If you want to download and install the app, simply head to your Firestick home screen and type ES File Explorer on the search bar. Select it once it shows up in the search result. Follow the on-screen instructions to get the app installed on your Firestick.
Once installed, launch the ES File Explorer app on your Firestick and follow the steps below.
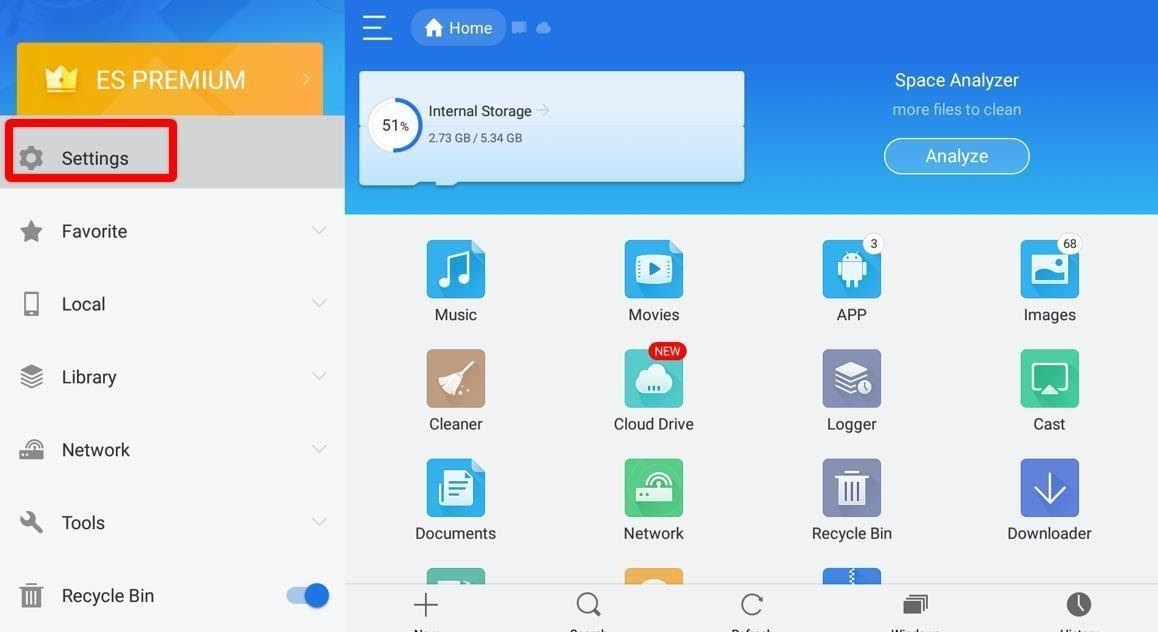
Step 1: Choose the Settings icon on the left column of the app’s home screen.
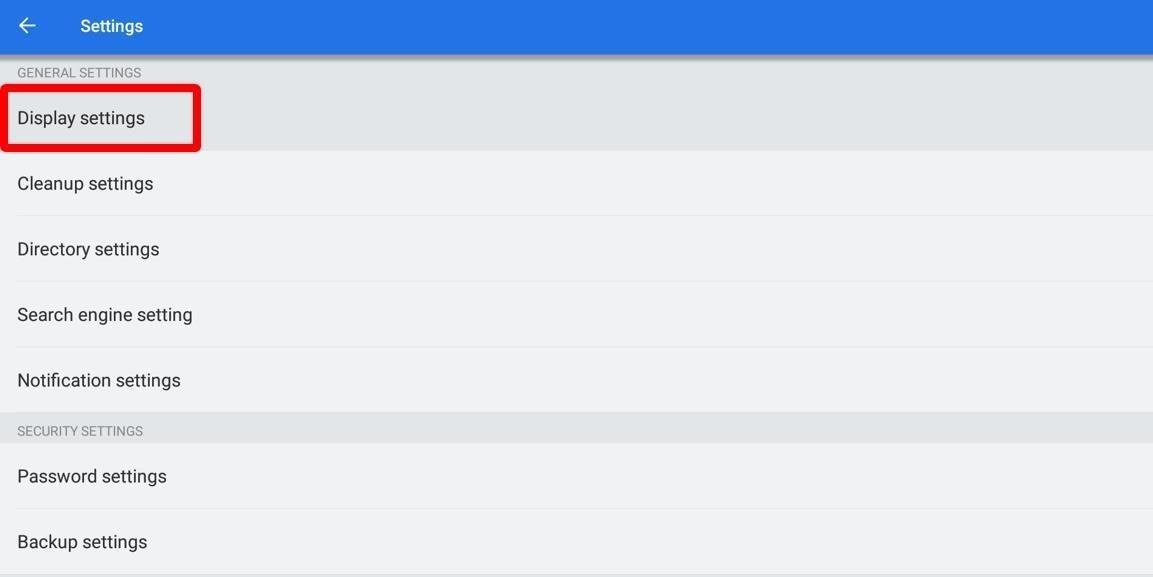
Step 2: Under the General Settings head, click on Display settings.
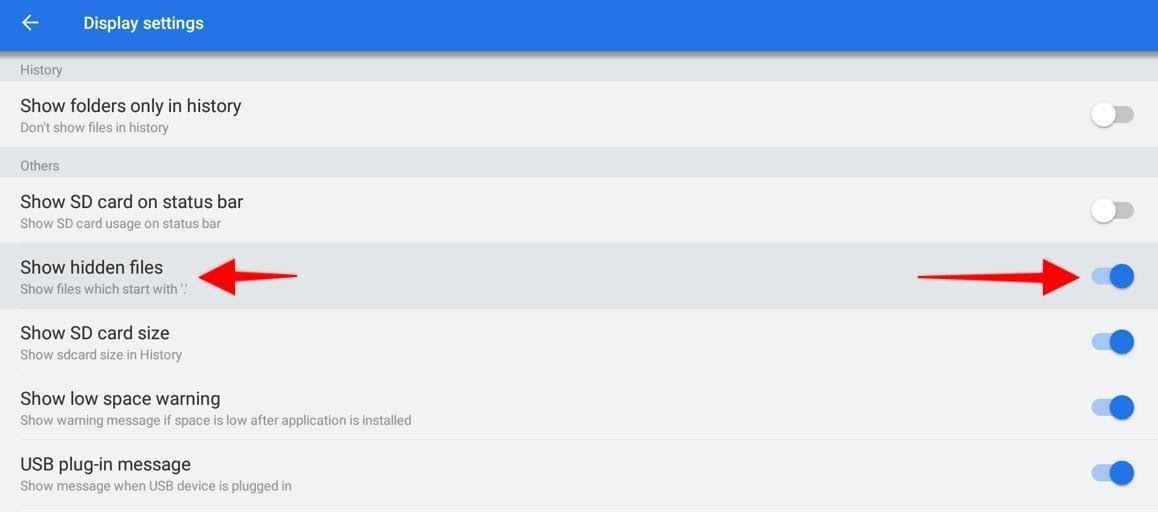
Step 3: Scroll down and locate the Show hidden files in the others section. Enable this option by ticking on the box nearby.
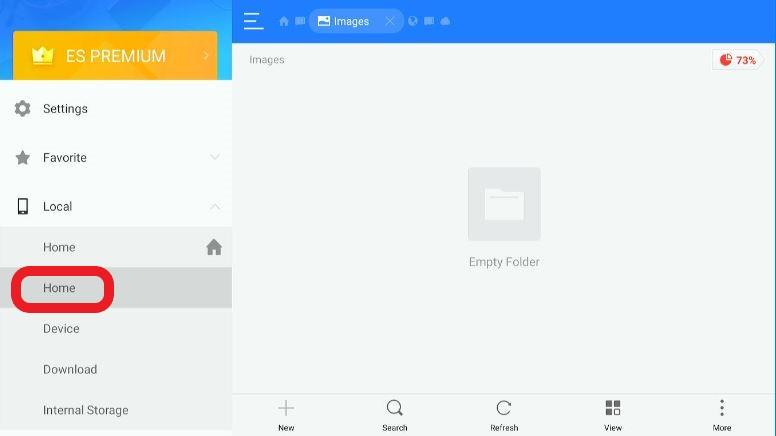
Step 4: Return to the app’s home screen. Now, look for the option Local on the left column, and highlight it. Once you’ve highlighted it, expand it.
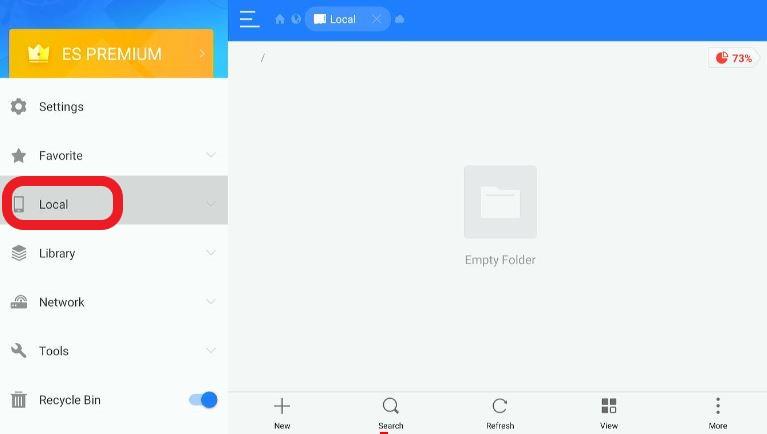
You’ll find two Home options, so select the one without the icon next to it.
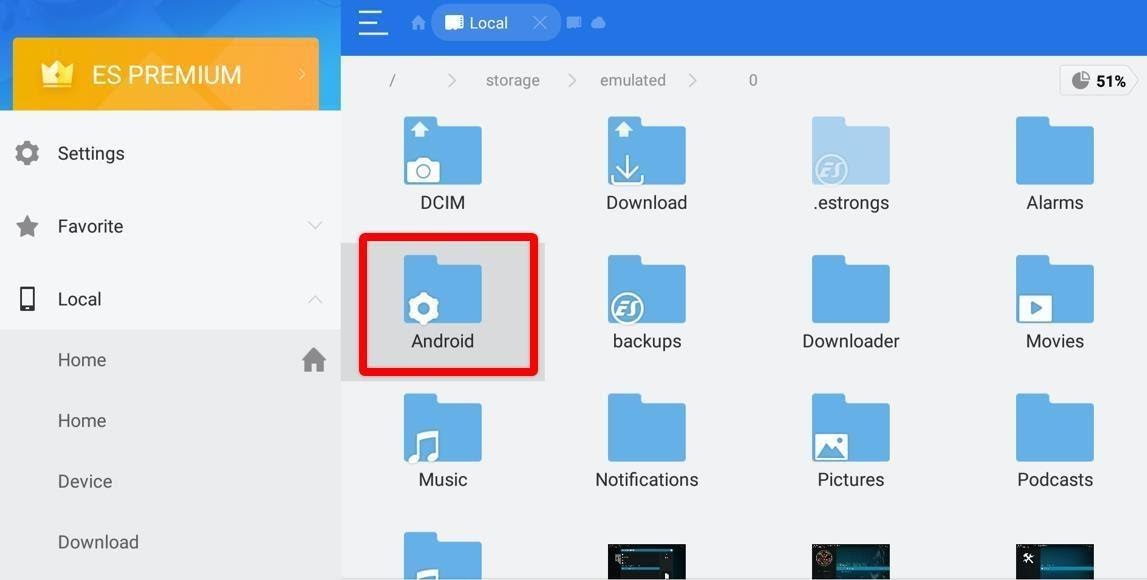
Step 5: Locate and open the Android folder from the main screen.
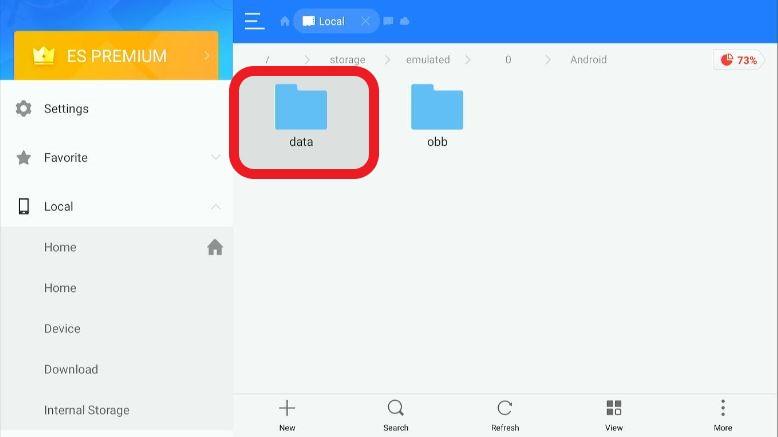
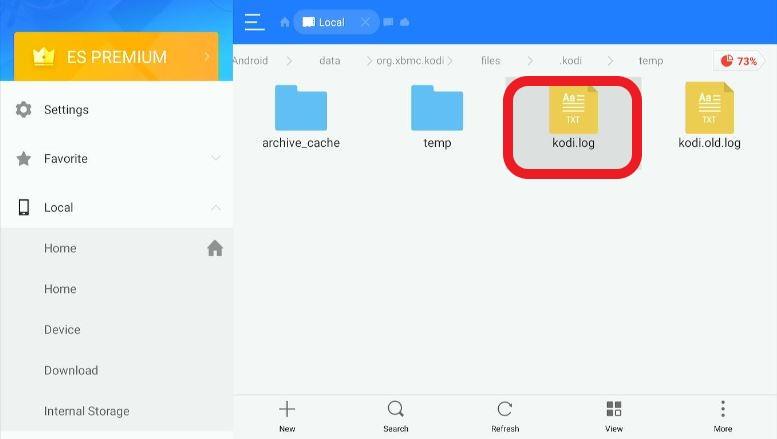
Step 6: From within the Android folder, navigate to data > org.xbmc.kodi > files > .kodi > temp.
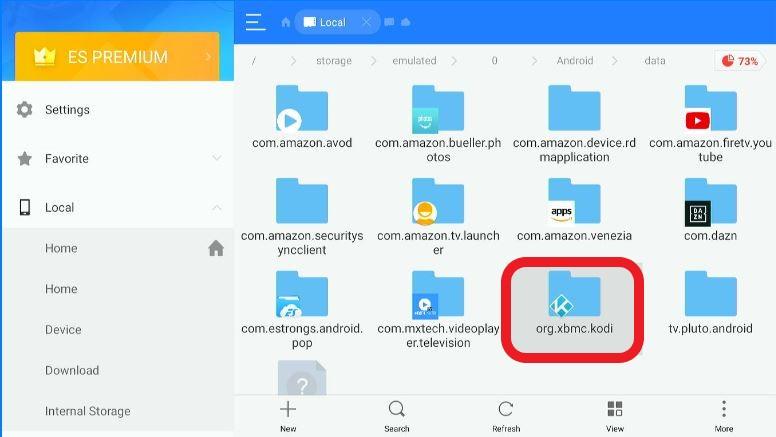
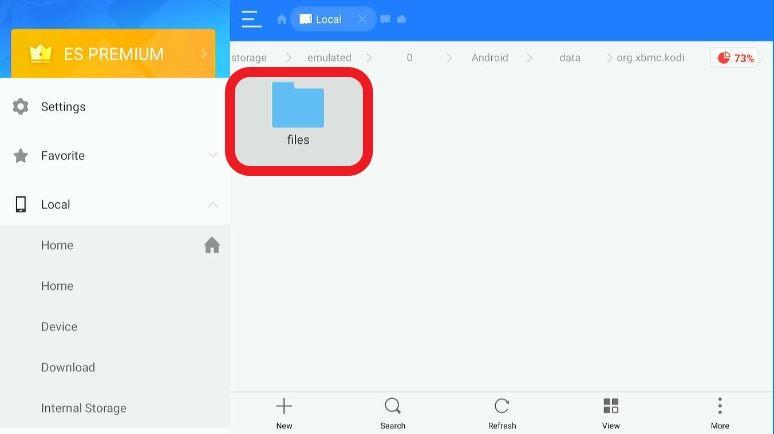
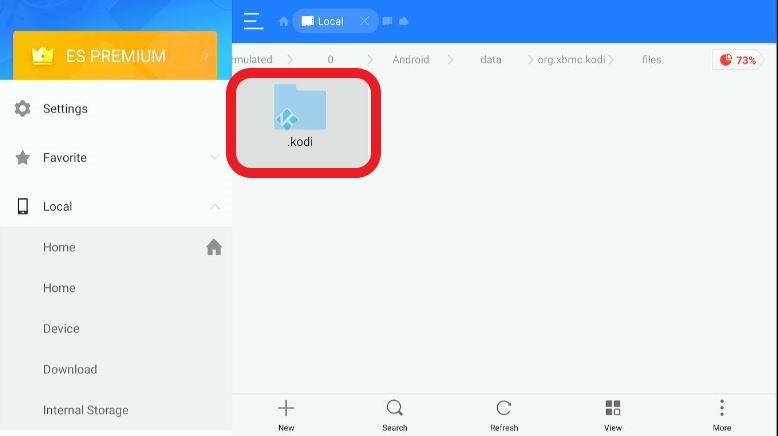
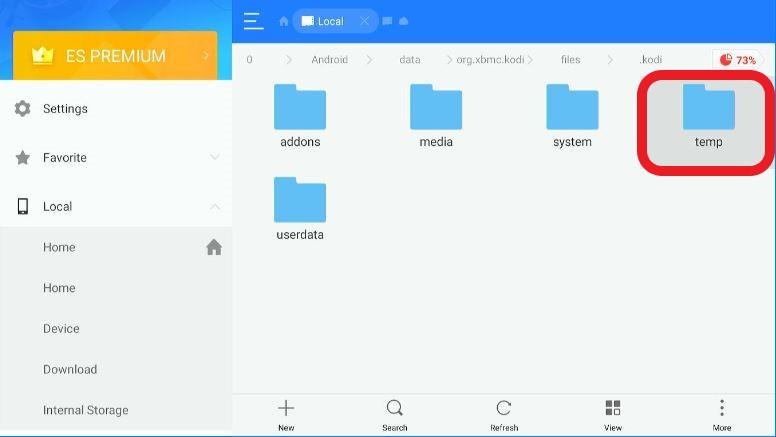
You should see the file kodi.log therein.
We’ve covered all major devices and platforms on which you can locate the Kodi log file. And if you’re a new Firestick user and don’t have Kodi already installed, then read our guide on the process of installing Kodi on Firestick to start streaming your favorite content.
Even so, on the off chance that you can’t manually locate the log file using any or all of the above methods, in the subsequent sections, we’ll be talking about Kodi addons with which you can easily locate the log file and remedy playback errors. So, continue reading!
One can always make use of Kodi addons to help view the log file. Some users might not be technically astute to be able to navigate through files and folders to locate the log file in the device storage.
With specific addons, you can view log files from within the Kodi app without having to go through the inconvenience of manually looking up files and folders.
One such addon is the Log Viewer. Also, fortunately, it is available on the official Kodi repository, so you won’t have to go through the hassle of sideloading it.
Here is a step-by-step guide on getting the addon installed on your Firestick. Follow each step exactly as specified.
Step 1: On the left sidebar of the Kodi home screen, scroll down and locate the Add-ons option.
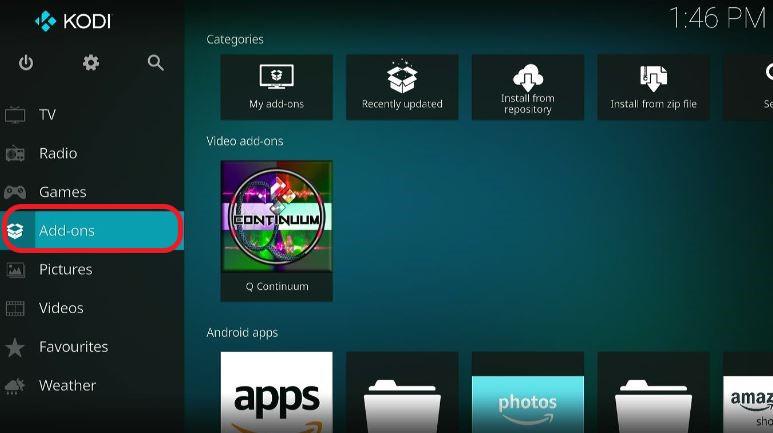
Step 2: Once on the Add-ons screen, navigate to the top-left corner and look for the open box icon. It’s also called Package Installer, and in case you’re wondering how it looks, refer to the Dropbox icon.
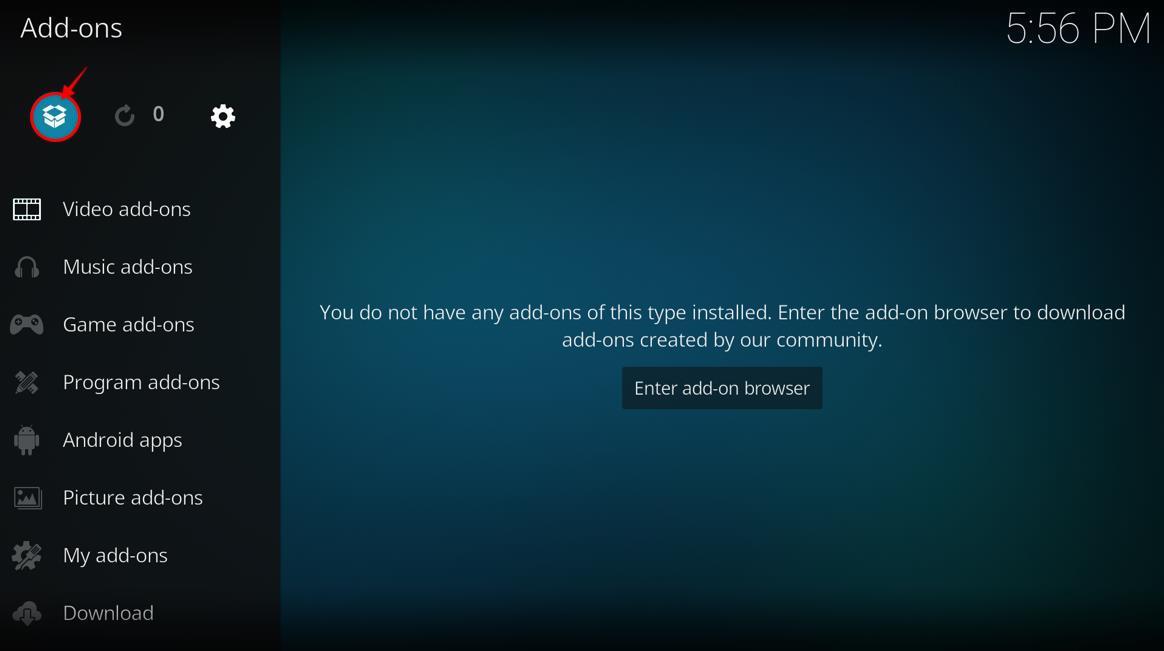
Step 3: On the Add-ons / Add-on Browser screen, find and select the Install from repository.

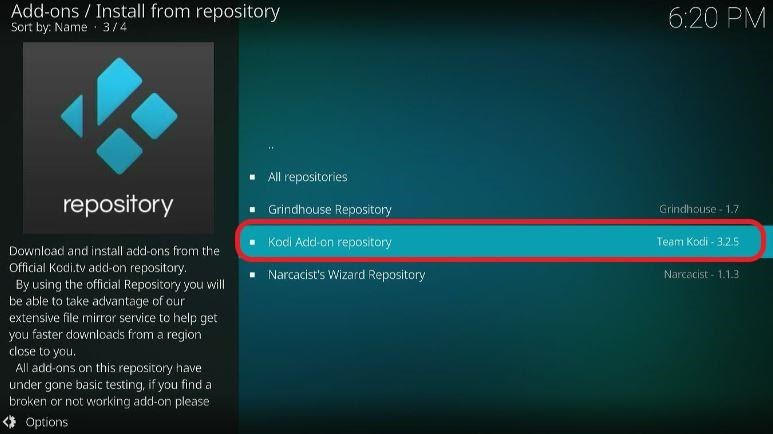
Step 4: The window will appear with a list of choices. Pick Kodi Add-on Repository from it.
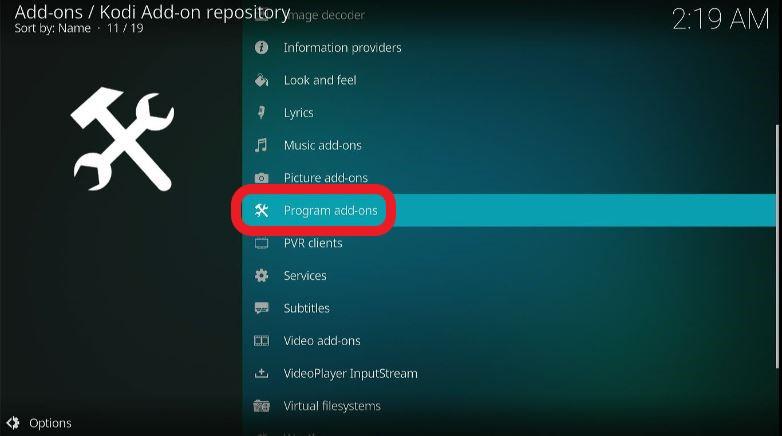
Step 5: The next screen will have a couple of options, so you’ll have to navigate for the Program add-ons. Select it.
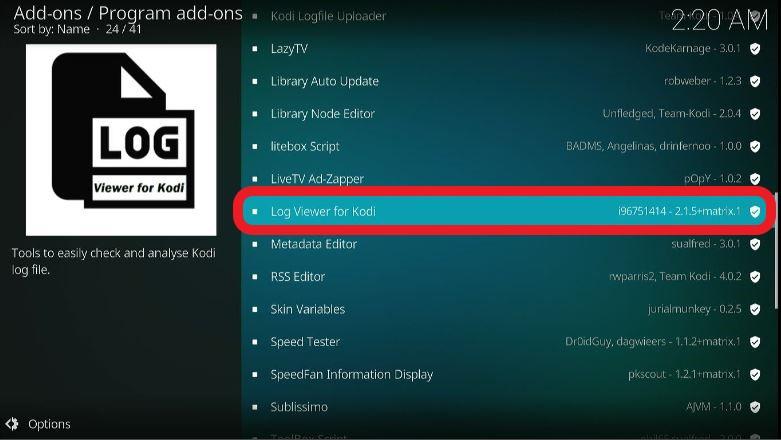
Step 6: The window will appear with several choices arranged alphabetically.
Scroll down till you reach the ‘L’ section, and look for the option Log Viewer for Kodi addon.
Step 7: On the addon overview window, click the Install tab at the bottom left. With that, Kodi Log Viewer will start installing on your device.
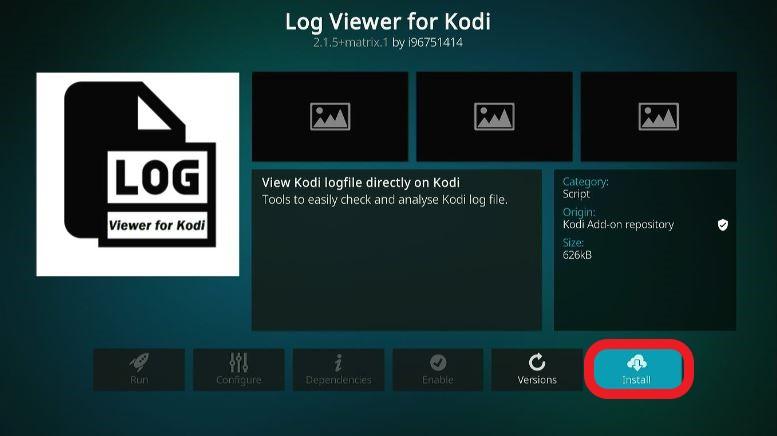
Step 8: Wait for a while, as the installation process might take anywhere from 30 to 50 seconds.
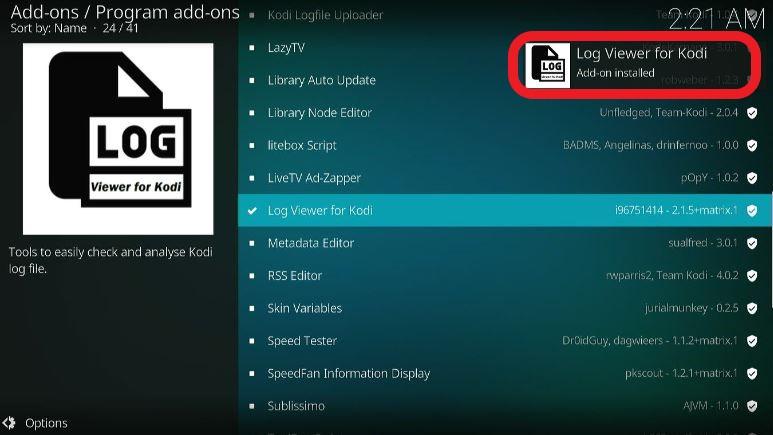
Once it’s done, a notification suggesting the completion of the process will pop up on the top right.
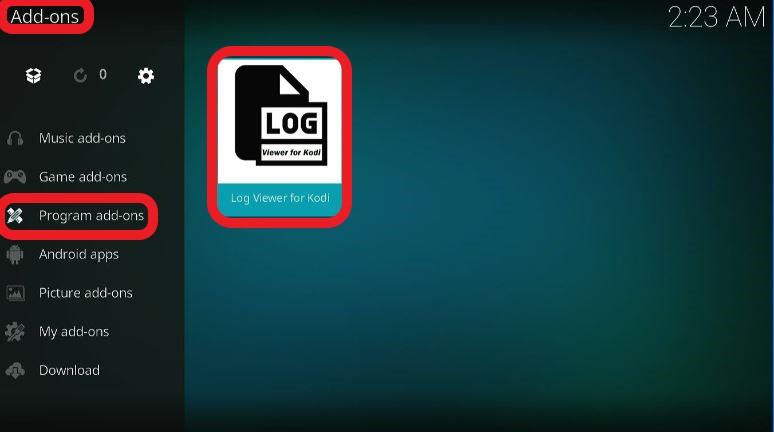
Step 9: After installing, go back to the Kodi home screen and select Add-ons.
Then, navigate to Program Add-ons, and you will see the Log Viewer for Kodi addon. Tap on it and launch the addon.
Once you’ve opened the addon, you’ll see a small window with a simple interface and three options on the screen; Show Log, Show old Log, and Settings.
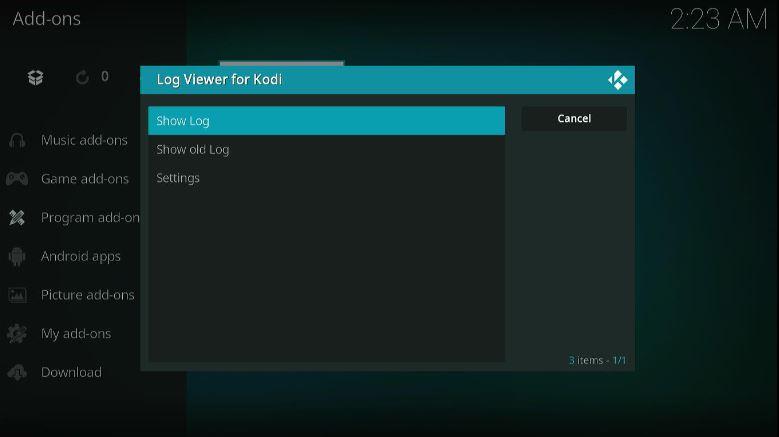
As the name suggests, the latest Kodi logs are found in Show Log. So, if you come across any playback error or a general Kodi runtime error, you should open this section.
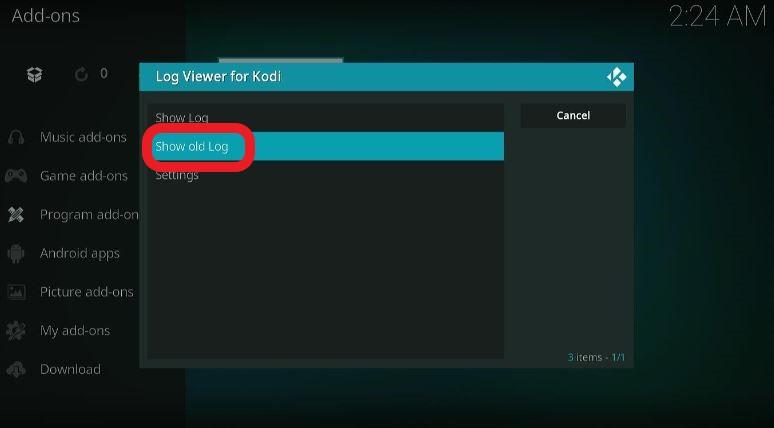
But in case you’re looking for older log files, pick the second option Show Old Log.
And lastly, with the Settings tab, you can customize and make specific tweaks to change the addons functionality.

But since the addons interface is simple and does nothing more than show log files, there’s only a limited set of customizability choices. At most, you can modify the log display.
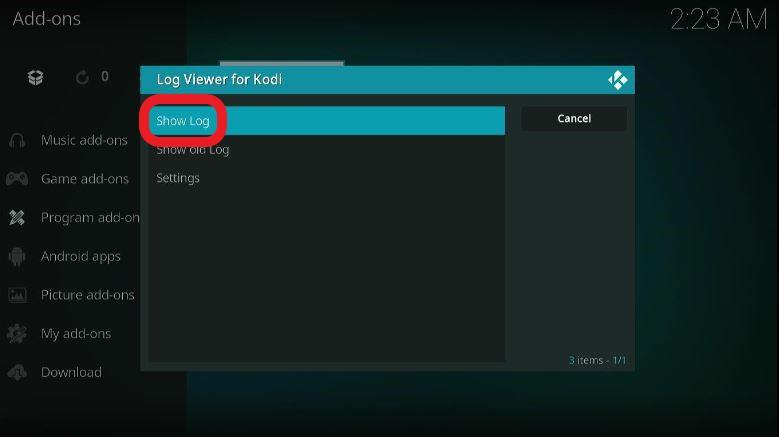
In any case, we’ll get into Settings later. For starters, let’s begin by opening Show Log.
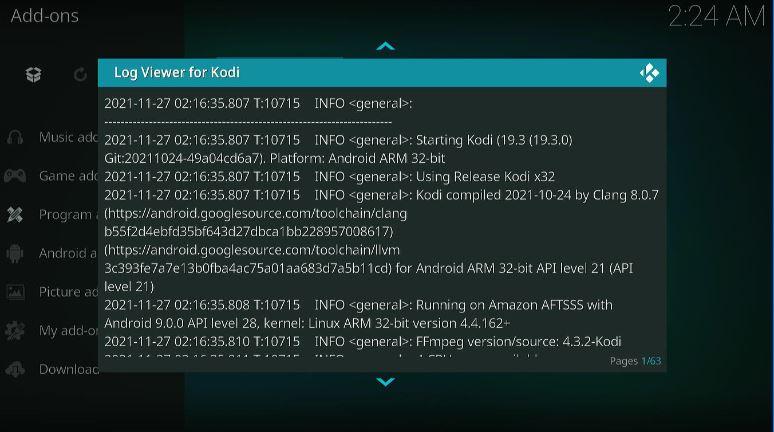
As you will see once you click on Show Log, by default, the logs are sorted in a way by which older logs appear at the top and the latest at the bottom. So, you’ll have to scroll down in order to find the newest log details.
You, however, can change how the logs are sorted according to your convenience.
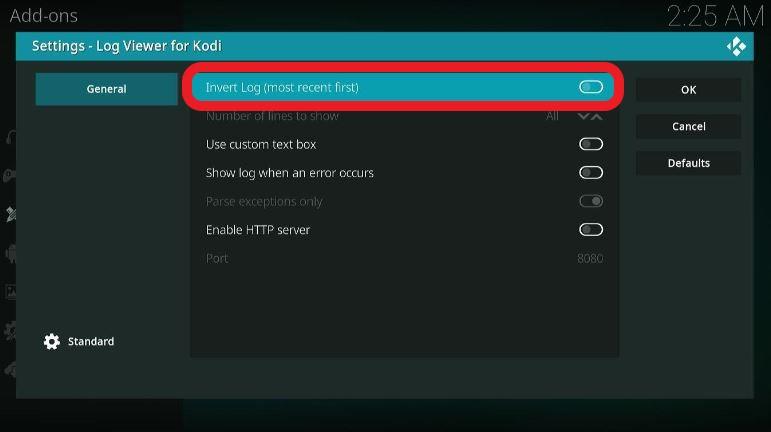
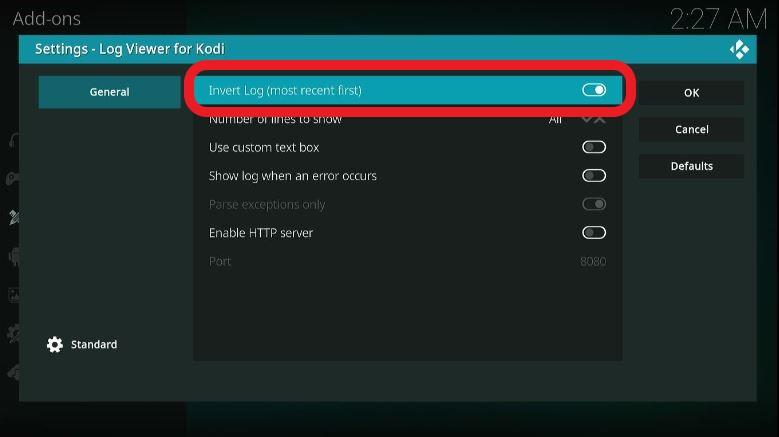
Launch the Log Viewer addon and select Settings. Here, you’ll find a couple of options, most notably the first one, Invert Log, is the one you want.
Enabling this toggle will order the log files in such a way that the latest ones are displayed first.
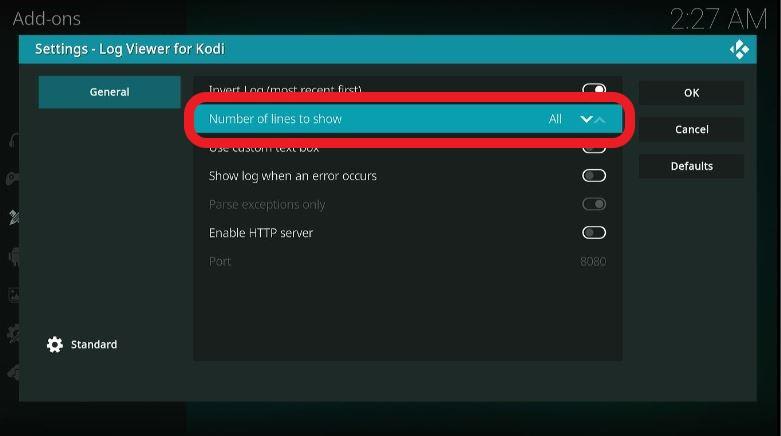
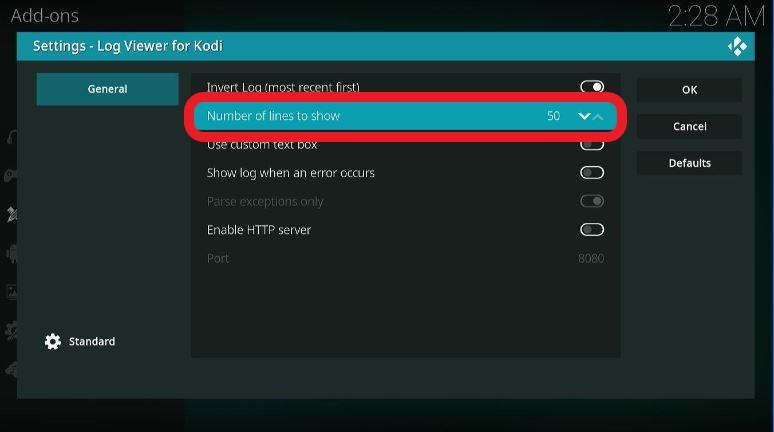
By turning on this, you also automatically activate the second option, which is the Number of Lines to Show.
You can pick All or enter a number of your preference, which could be 20, 50, or 100.
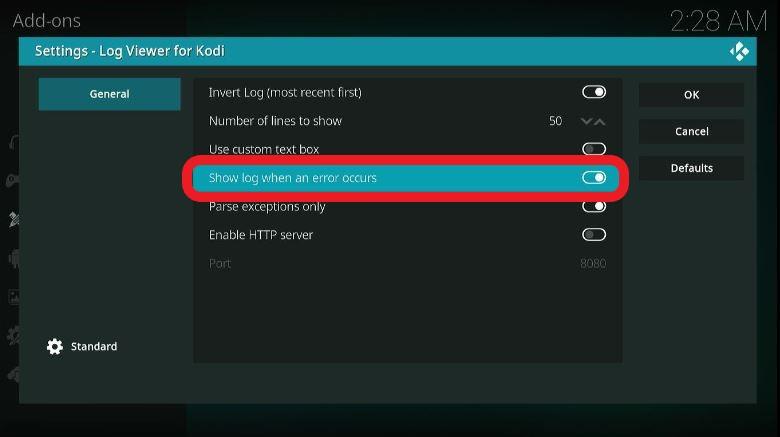
The other button under Settings is Show log when an error occurs. You can toggle it ON if you want the Kodi log to display automatically every time an error occurs.
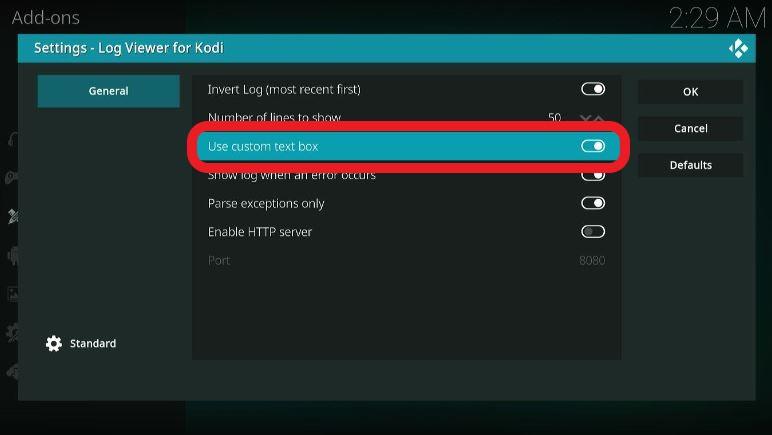
And lastly, by enabling the option Use custom text box, you can get your log files displayed in a full-screen mode as opposed to the default window screen.
As we have mentioned before, Kodi isn’t a perfect system, and many times Kodi and its addons can behave rather oddly. In such cases, just having access to Kodi log files won’t do you much good.
Specifically, when referring the issue to subject experts, it’s pertinent to have as much information as possible about the error. People working at the Kodi Support Forum will be helpful only once they understand the issue better and in-depth.
They will be able to offer more support relevant to the errors once they’re provided with more and more information.
Keeping this fact in mind, enabling Debug logging is an ideal way to go about collecting more information. Aside from the log files that Log Viewer for Kodi generates, Debug logging, when enabled, generates more information on Kodi logs.
The additional information greatly assists subject matter experts in resolving the error.
Suffice to say, it’ll be wise to Enable Debug logging before even generating log files via Log Viewer or any other addon for that matter. Here’s how you can enable it.
Step 1: On the Kodi home screen, go to the top left corner and select the Settings option.
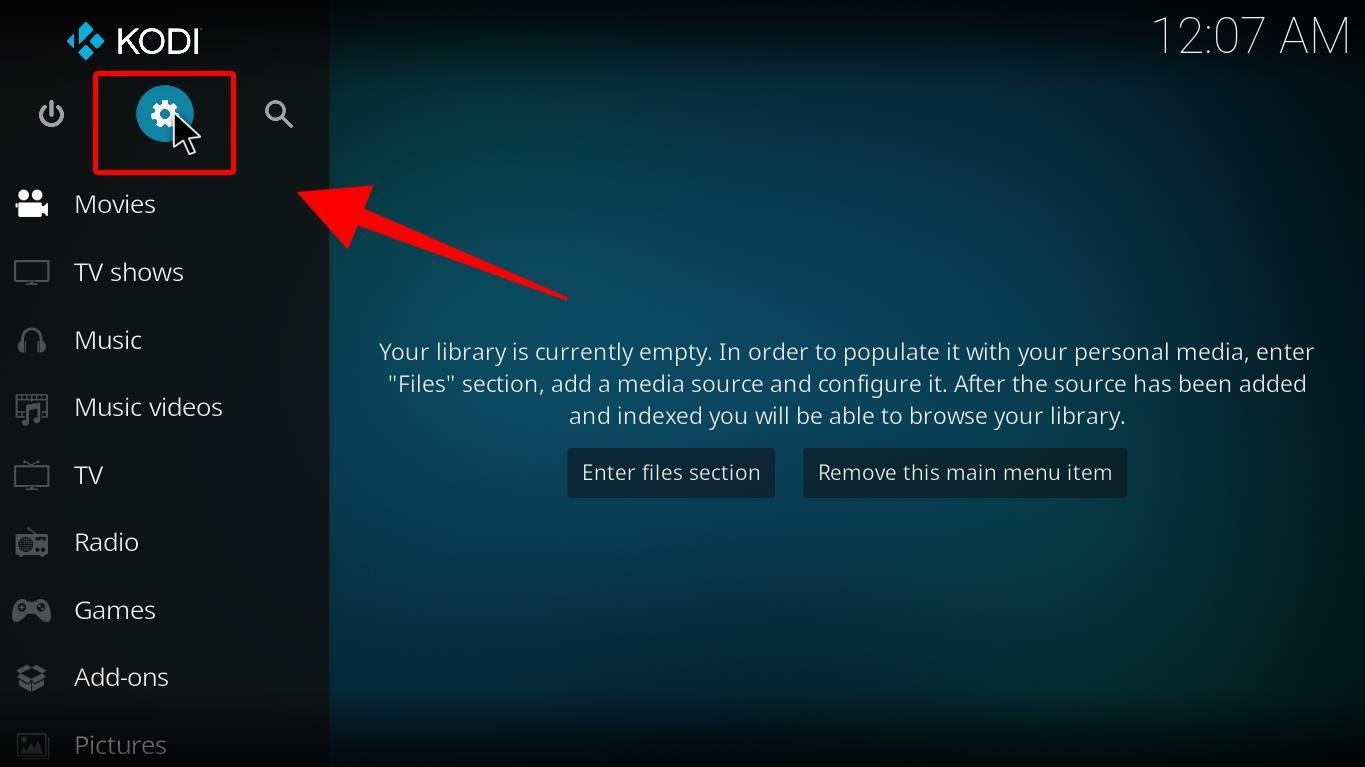
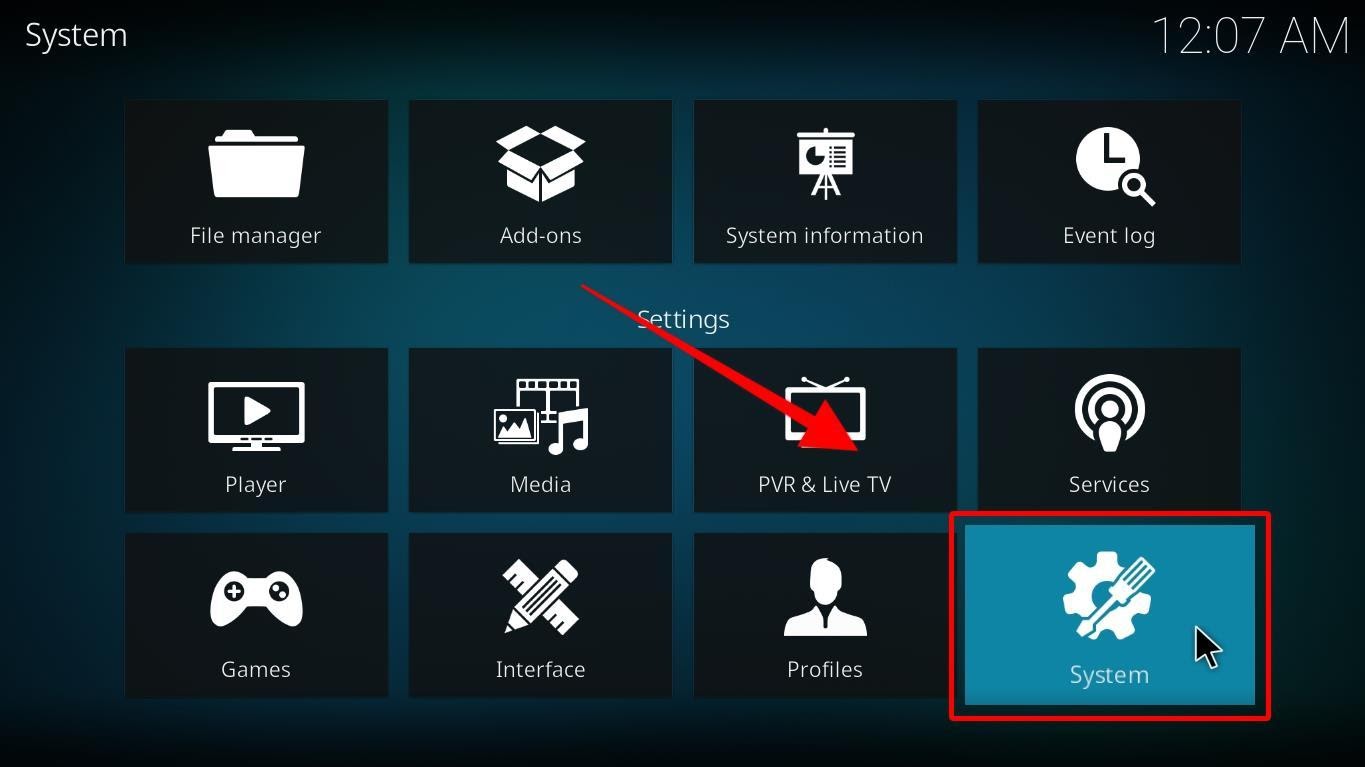
Step 2: Under the Settings window, you’ll have various choices displayed.
Look for System and Tap on it.
Step 3: Select the option Logging from the left sidebar. It will display a related menu on the right side of the screen.
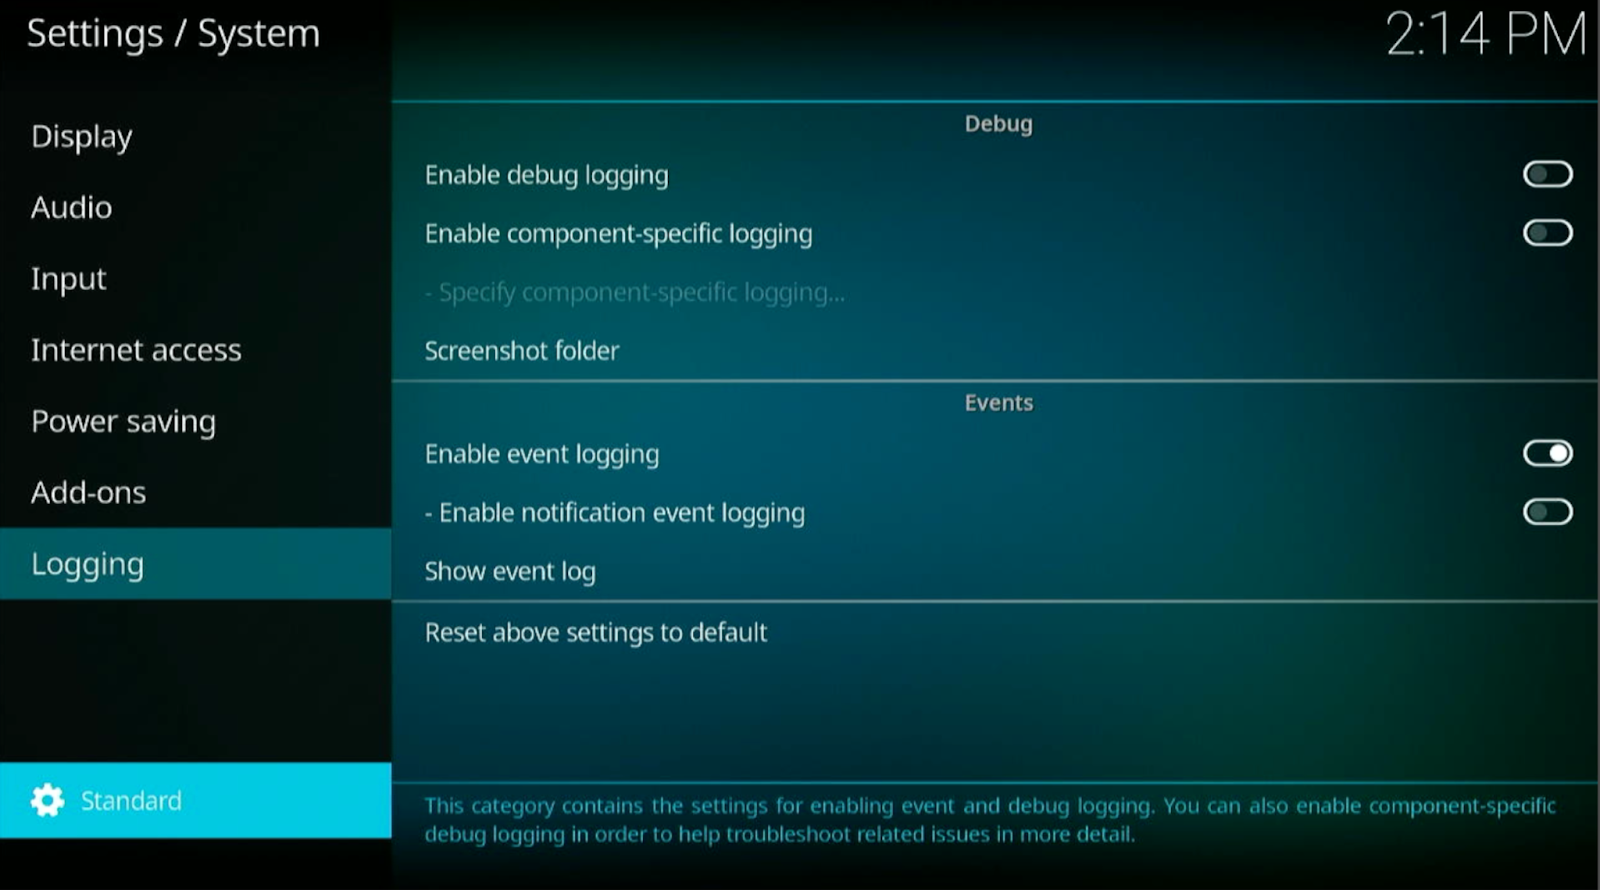
Below the Debug head, you’ll see the Enable debug logging tab. Move the toggle to switch it ON.
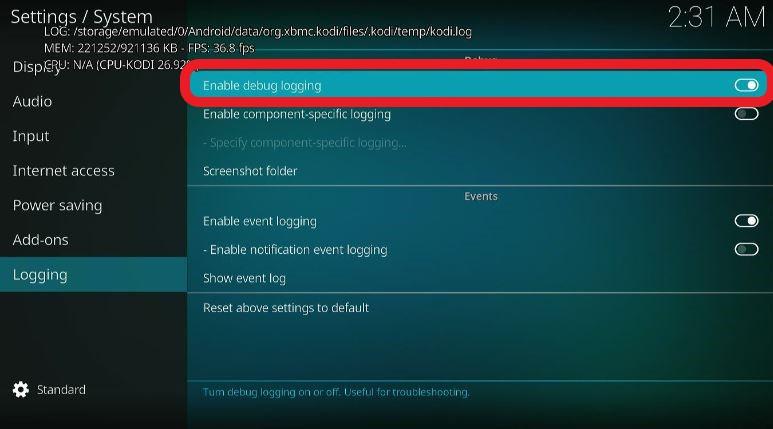
Once you do that, you’ll start getting additional log information displayed on the top-left side of the screen when faced with errors.
At the outset, you should know that you don’t necessarily have to concern themselves with this additional information. The purpose of this process is to add valuable data to the existing log, which experts can later use to resolve issues and errors.
Once you enable this option, you must restart Kodi. After restarting the app, a plethora of additional details on errors will automatically append to the log file.
However, the enabling Debug logging can overlay information on every Kodi screen. This can be pretty annoying as it will occupy a portion of the screen and at times draw your attention away from the main screen.
But again, you don’t necessarily need to have the option enabled all the time. Once the information regarding an error is regenerated and details added to the log, you can disable Debug logging.
Viewing the Kodi log files manually or via addons is only one part of the process. The other part is to share these files with experts or the support forum.
You can manually locate the log file on your device and then upload it online for the support team to have access. But then again, this process is elaborate, and if you aren’t tech-savvy, you might find it confusing.
Fortunately, though, there’s an easy way of getting around this issue. You can use another addon named the Kodi Logfile Uploader.
As the name suggests, this addon lets you upload log files directly to the server and share URLs with concerned experts.
And the good thing about this addon is that it’s available on the official Kodi repository, and therefore needs no sideloading.
Before we show you how to use Logfile Uploader, you must disable the Debug Logging.
That’s because Debug logging overlays information on the screen which tends to hide icons and images. Once you’ve disabled the option, follow this step-by-step guide.
Step 1: Again, on the Kodi home screen, select the Add-ons option from the left sidebar. And once there, click on the Open Package icon on the top.
Step 2: Open Install from repository, and locate and choose Kodi Add-on Repository on the next screen.
Step 3: Pick Program Add-ons from the list.
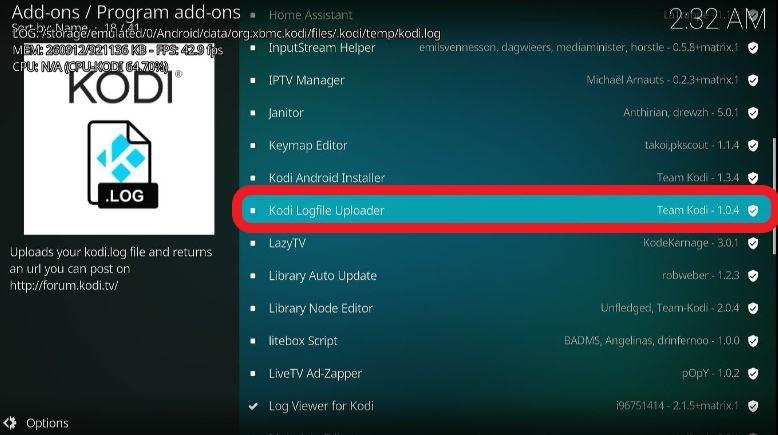
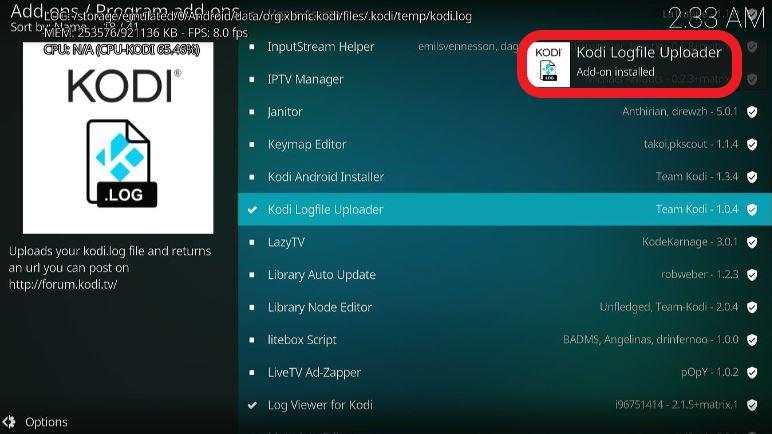
Step 4: A window will appear with alphabetically arranged options. Scroll down till you reach the ‘K’ section and select the Kodi Logfile Uploader addon.
Step 5: Tap on the Install tab at the bottom of the screen, and as ever, wait till the installation process is complete.
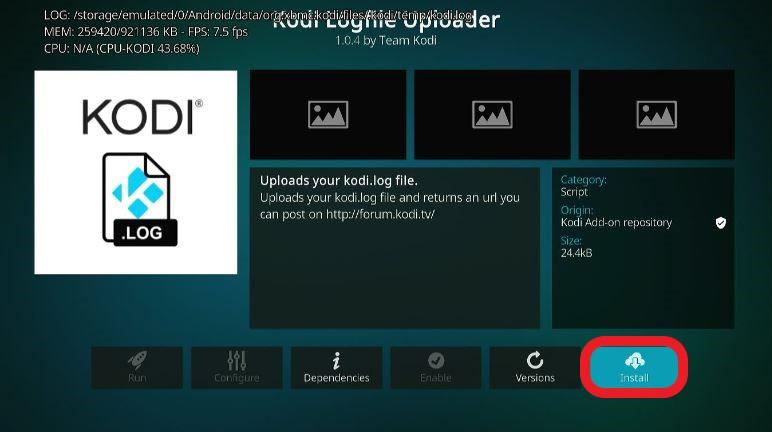
An Add-on Installed notification will appear once it’s installed.
Return to the Kodi home screen, and under Add-ons>Program Add-ons, you’ll find the newly installed addon icon.
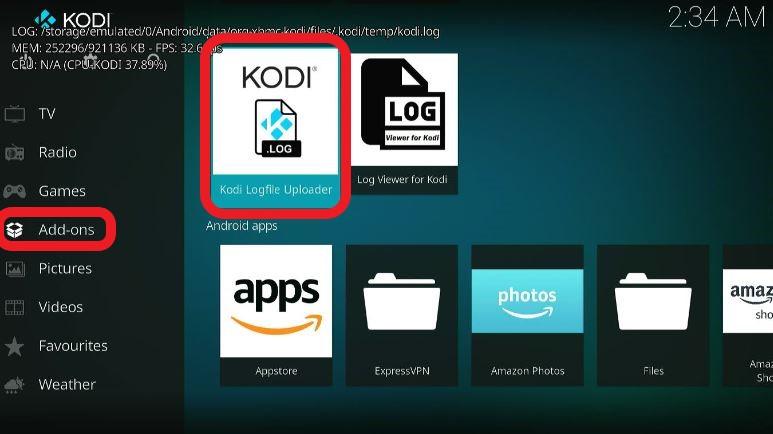
Open it, and the first thing you’ll see is a prompt asking if you would like to view the log files or upload them. Depending on what you need, pick the preference.
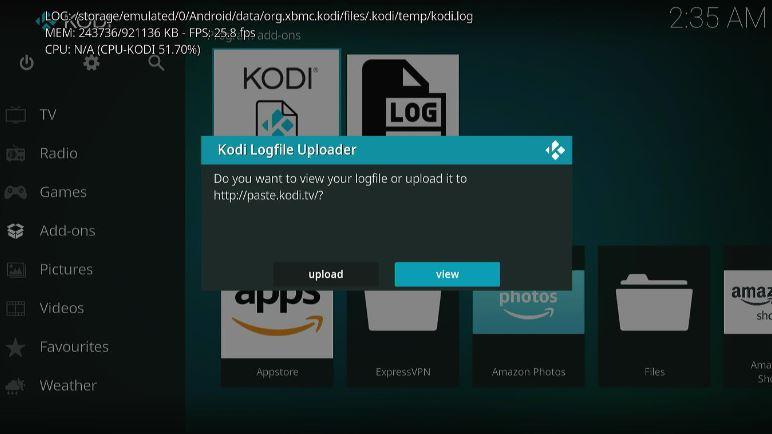
If you want to upload log files, just click Upload, and a new pop-up will appear. This will also contain a URL that you can use to access and view the log files.
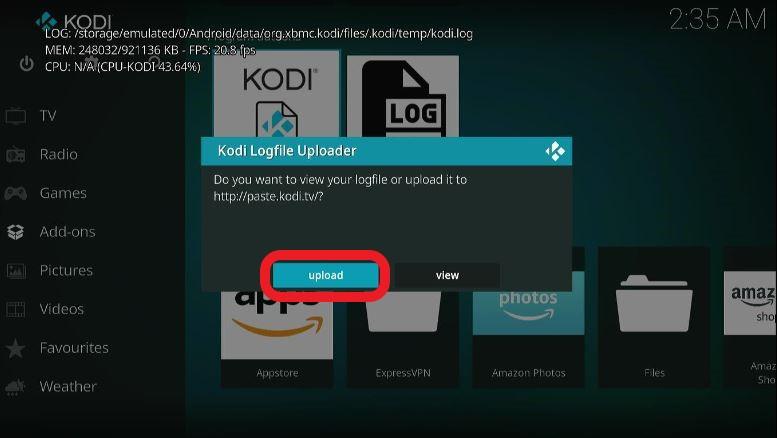
To get your issues resolved, you can share this URL with experts on the Kodi Support Forum.
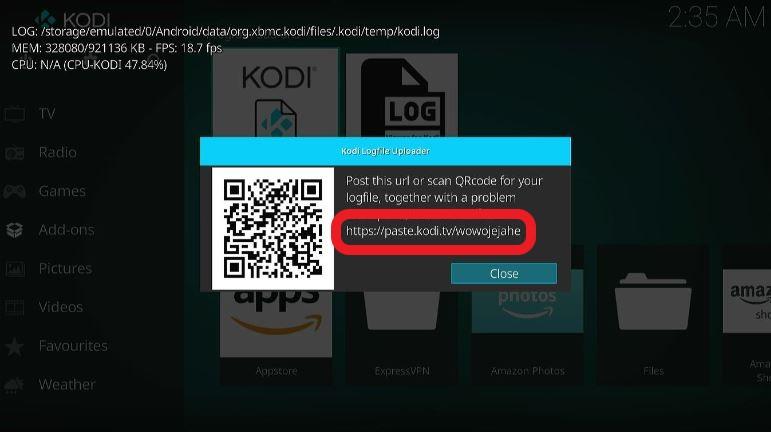
You must know, however, that this URL is not permanent. Every time you launch the addon, a new URL is generated, implying you can’t use the same URL to access log files all the time.
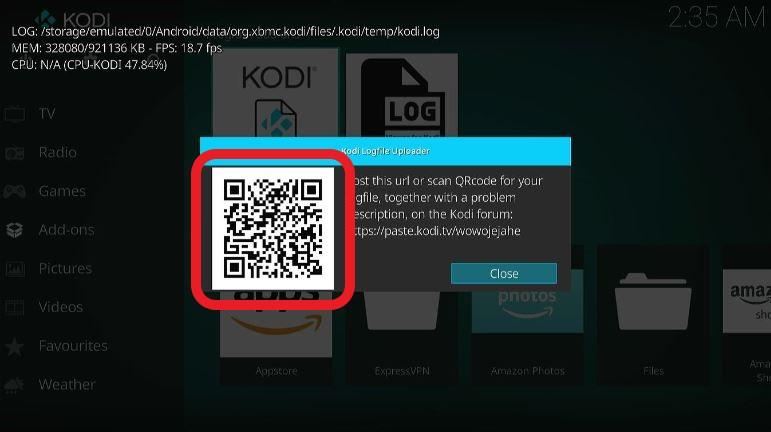
Additionally, there is also a QR code that you can simply scan on your devices and get a link to your log files for downloading purposes.
Users of Windows OS can locate the file in their drive. On the Windows Drive (by default, the C drive), go to Users > {username}.
Under the username folder, locate and select the App Data folder, then Packages.
Look for the folder named XBMCFoundation.Kodi_4n2hpmxwrvr6p. Select it and then navigate to LocalCache > Roaming > Kodi.
In the Kodi folder, you will find the file Kodi.log.
For users of the Linux operating system, locating the log file is rather easy. Simply follow this path – Root folder > .kodi > kodi.log.
Usually, the “.kodi” folder is hidden by default on most android devices. So, to access the log file, you must first unhide the folder.
The process of unhiding the hidden files and folders is almost similar across major devices. Go to the device’s Settings, and under the Display Settings tab, you can toggle on the Show hidden files.
Once you’ve enabled it, you should navigate to Device Storage. From there, access Android > Data. Locate the option named org.xbmc.kodi.
Then choose Files > .kodi > Temp. Below Temp, you should be able to find kodi.log.
If you’re an Apple user, you can find the log file on your MacBook by navigating to the following location – Users > {username}
Under Library, locate and select the folder Application Support, then Kodi. You should be able to see Kodi.log in the Kodi folder.
For iOS, you’re supposed to follow the path private > var > mobile > Library > Preferences. Under Preferences, look for Kodi and within that, search for the kodi.log.
It goes without saying how important it is to understand or have access to Kodi log files. There is a high probability that you’ll be asked about your log files when seeking help from official Kodi support forums.
These files have all relevant details pertaining to errors and issues and will obviously hasten the process of fixing those annoying issues plaguing Kodi on your device. As mentioned earlier in this guide, you can make use of either option.
You can even manually navigate to the path where log files are located. Or, you can use Kodi addons to speed up the process.
You don’t have to know log file details every day you intend to access Kodi. But, when met with errors and Kodi behaves erratically, it’s important for you to know how to access and use these log files.
