Installing Kodi on Firestick opens up a new world of streaming possibilities as you will be able to stream anything online, from classic movies and documentaries to live sports and the latest blockbusters. While the “vanilla” Amazon Firestick provides loads of streaming possibilities thanks to the hundreds of apps available on the store, this simply doesn’t cut it as these apps don’t really speak the “free and unrestricted” language that is music to the ears of most streamers. However, the streaming platform and media center is not yet available on the Amazon Fire Store, and we don’t see it coming any time soon either. This shortcoming has led many Firestick users to look for ways to “jailbreak Firestick,” often done through Kodi.
In this guide, we’ll show you the easiest – and safest – way to install the latest version of Kodi on Firestick (Kodi 19.4 Matrix), a method that also works on the Fire TV Cube. We’ll also explore three alternative installation methods, how to configure the app for streaming, and how to use ExpressVPN to stay hidden.
If you are in a hurry, here’s how you can get Kodi running in a few steps:
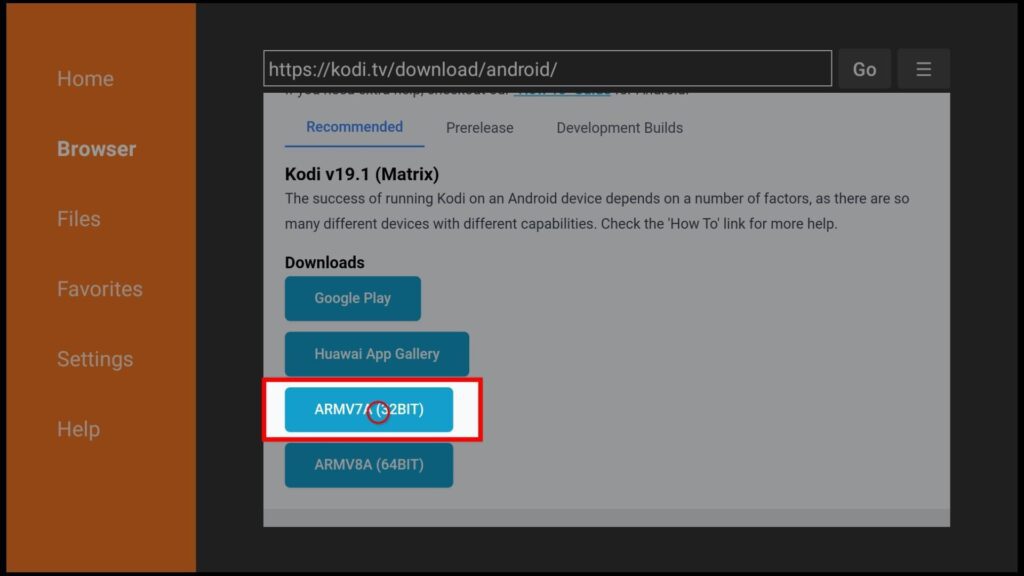
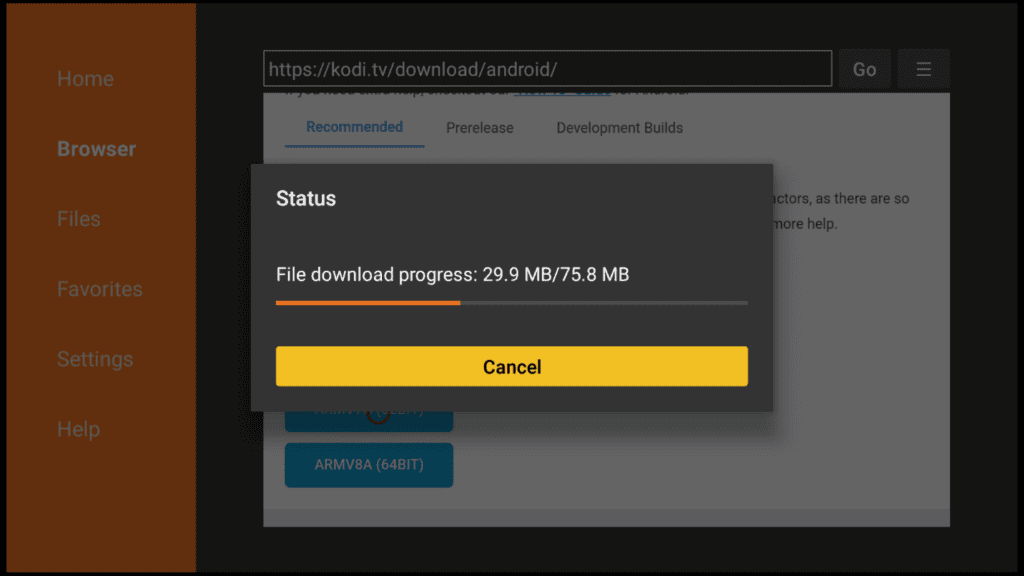
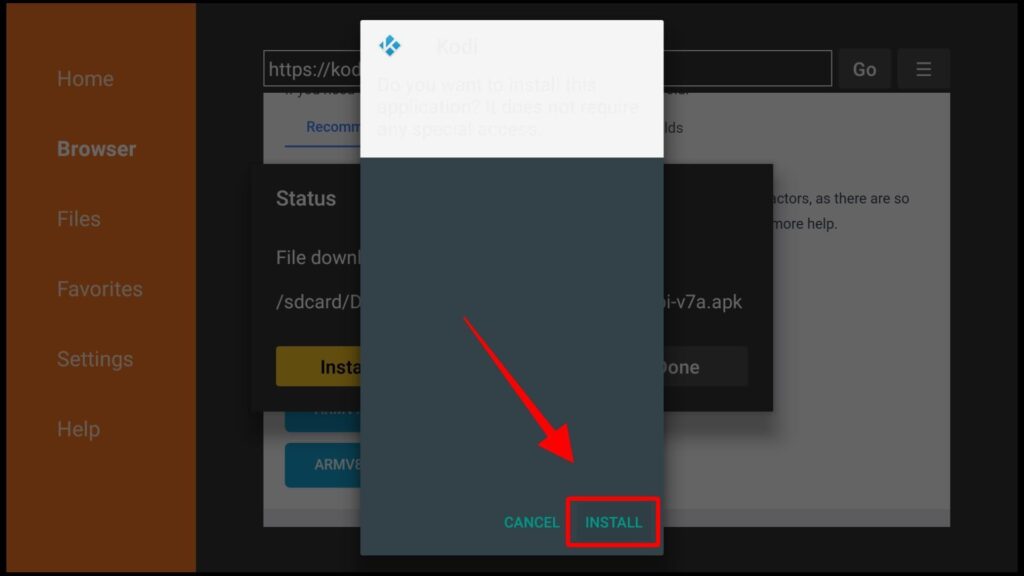
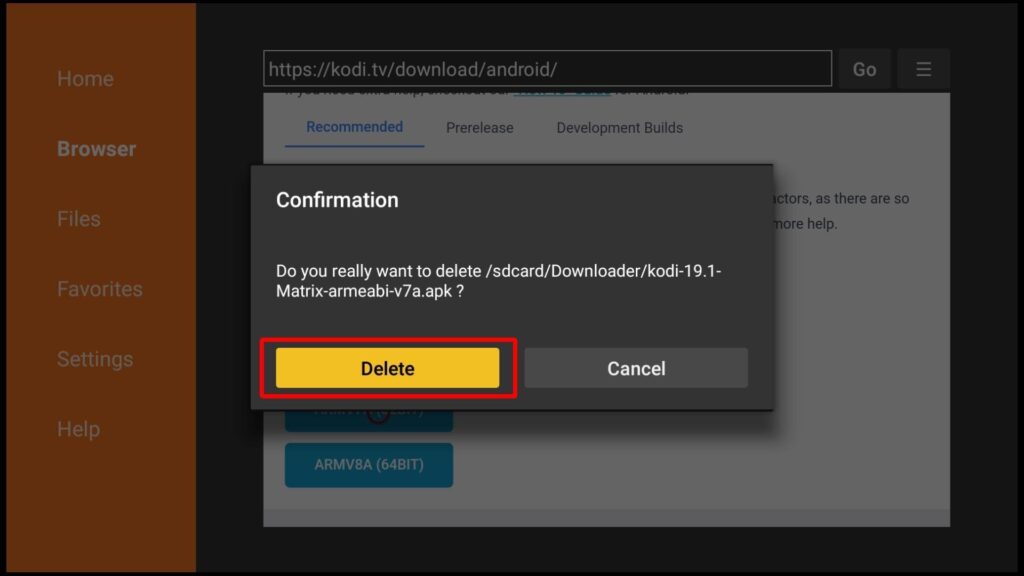
Installing Kodi 19.4 on Firestick is done through a method referred to as sideloading. This is simply the process of installing apps that are not available on the official store, and it normally requires a few steps.
Government and ISPs constantly monitor your online activity and can basically see whatever you do online. That includes all cases in which you’d access copyrighted material, even on your Firestick.
Now currently, your IP is visible to everyone.
I order to keep whatever you do online hidden from them, you should definitely use a VPN to mask your online behavior.
I personally use ExpressVPN, which is the fastest and most secure VPN. It is straightforward to install on any device, including Amazon FireStick. You get 3-months free and save 49% on its annual plans. Also, it comes with a 30-day money-back guarantee. If you are not satisfied, you can always ask for a refund.
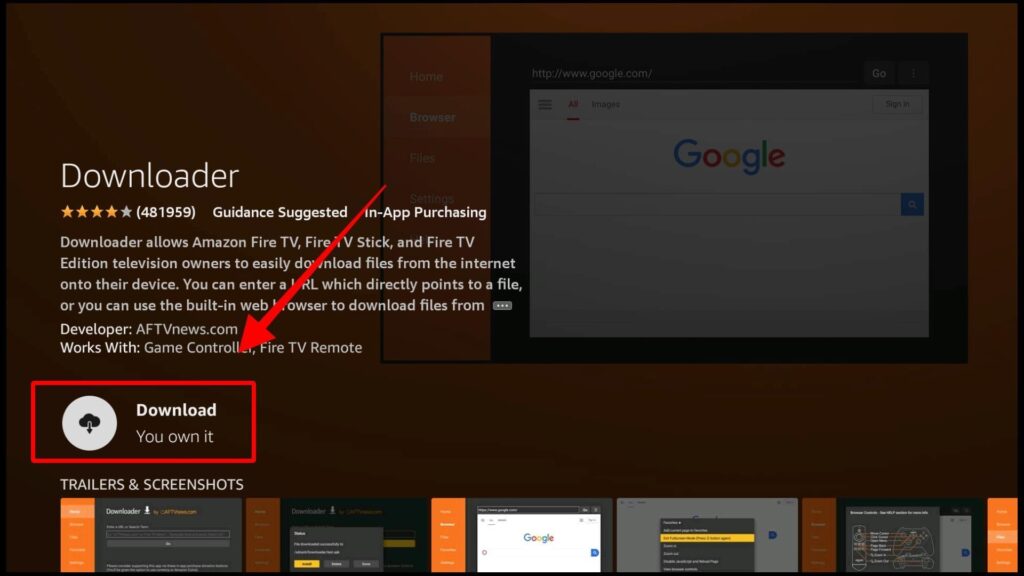
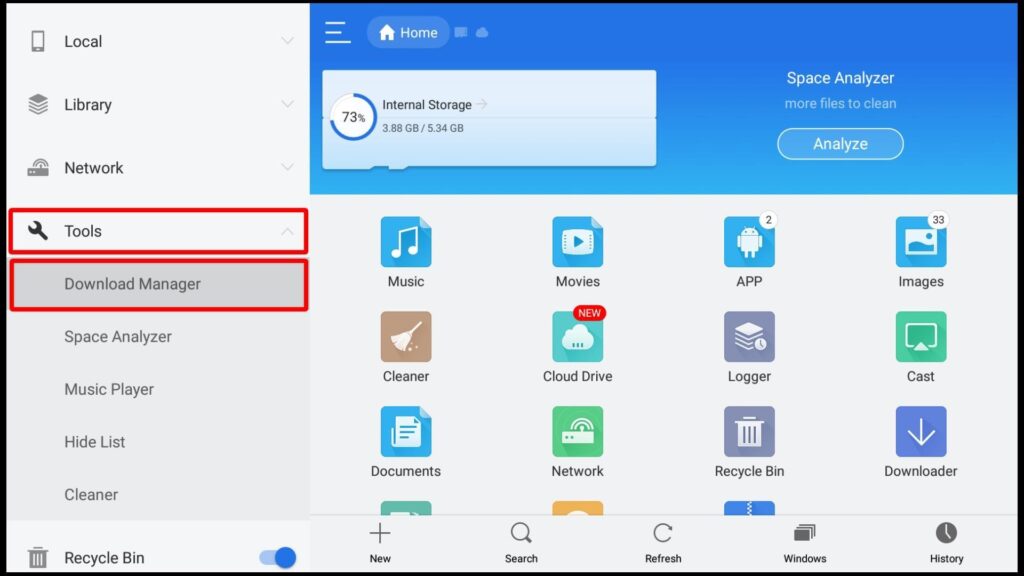
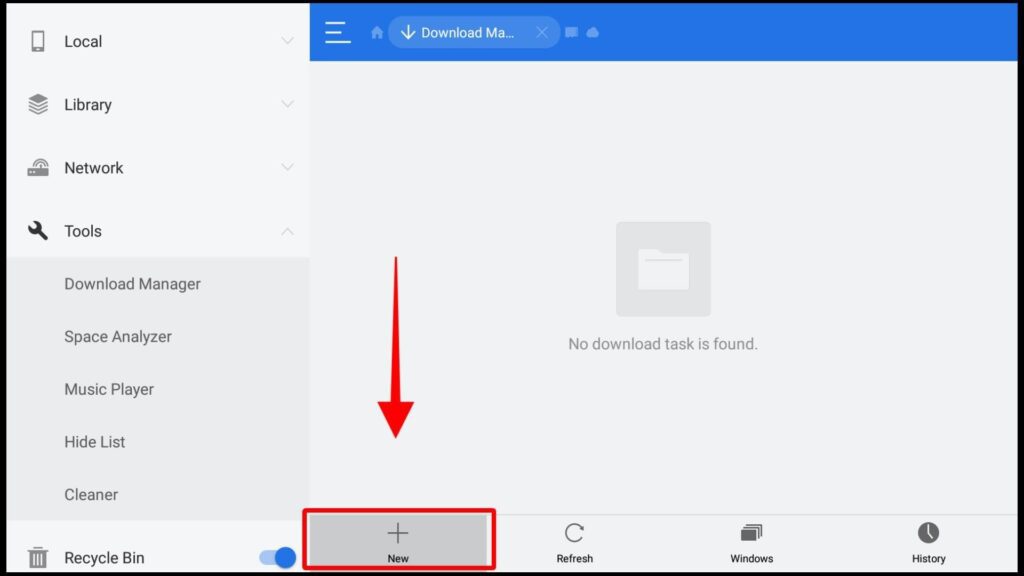
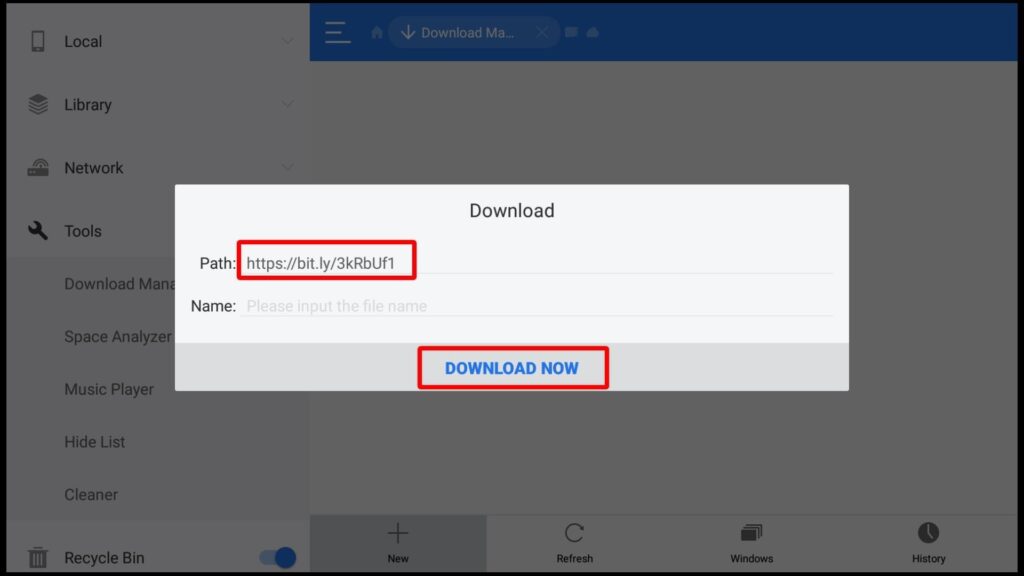
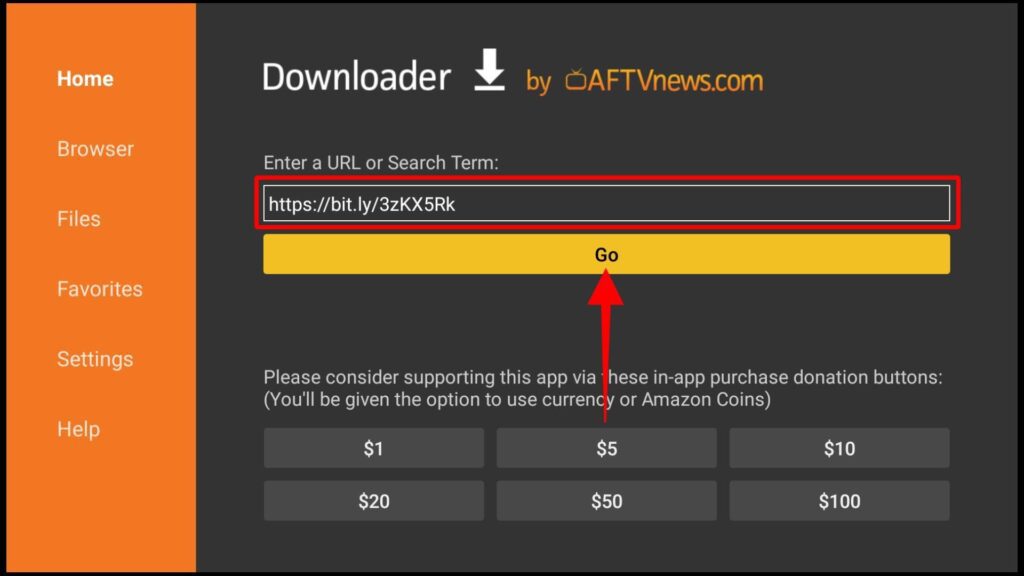
Downloader is an app that facilitates the entire process of downloading and installing third-party apps. The app is available on the official store, so users can install it in a few minutes.
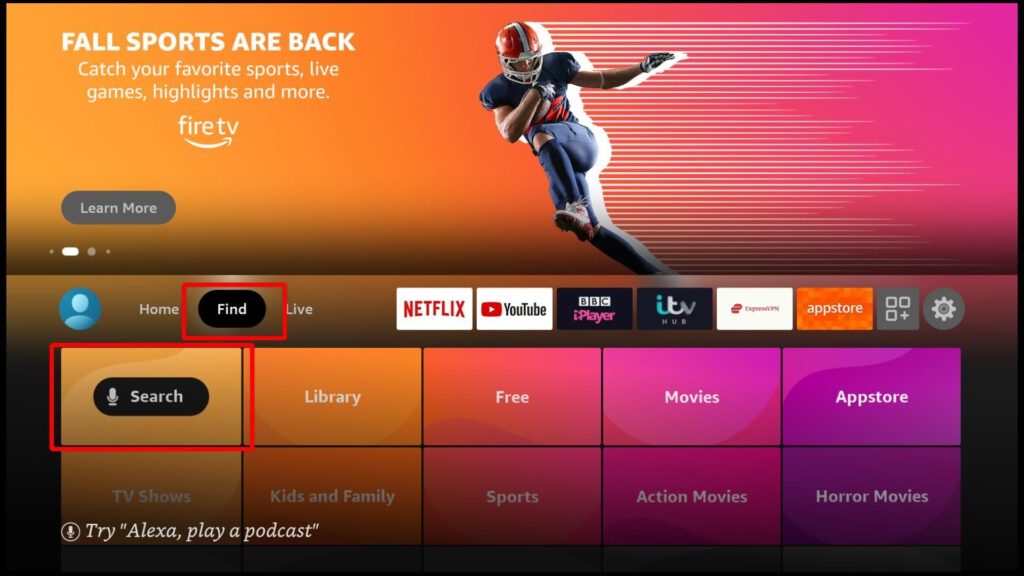
On the window that opens, start typing Downloader, then choose from the search suggestions to find the app.

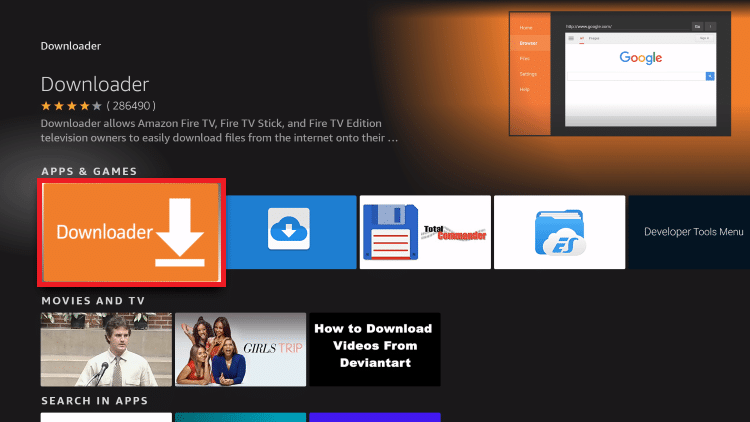
Downloader should now display as the first option. Click it.
This step involves setting up your device to allow Downloader and other apps to install third-party apps. You may also need to maximize privacy by preventing Amazon from spying on you.
To do this:
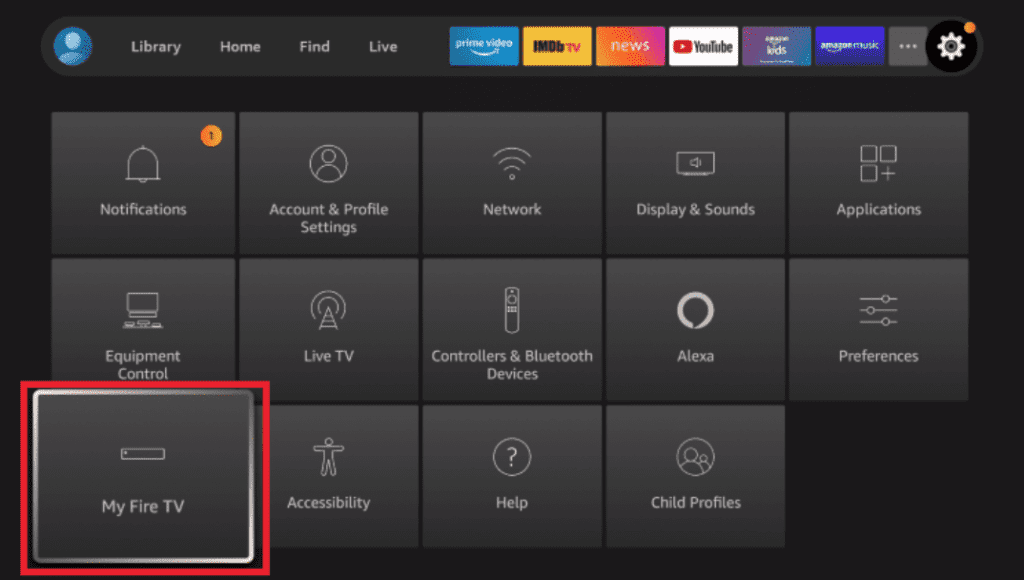
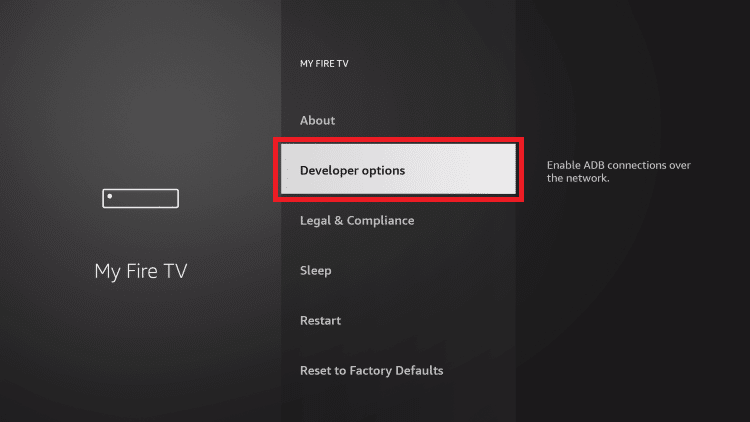
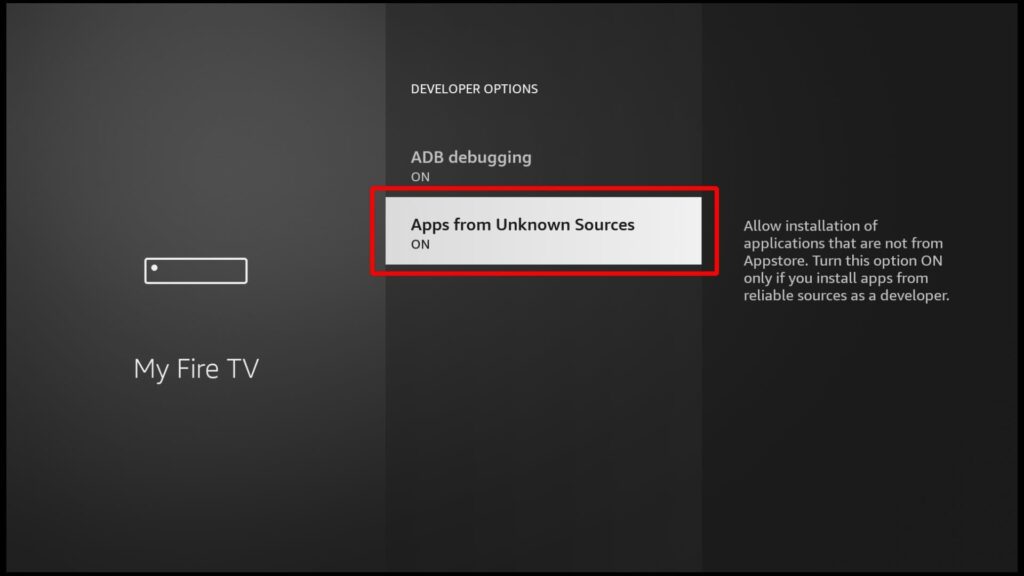
Your device should now allow you to install third-party apps.
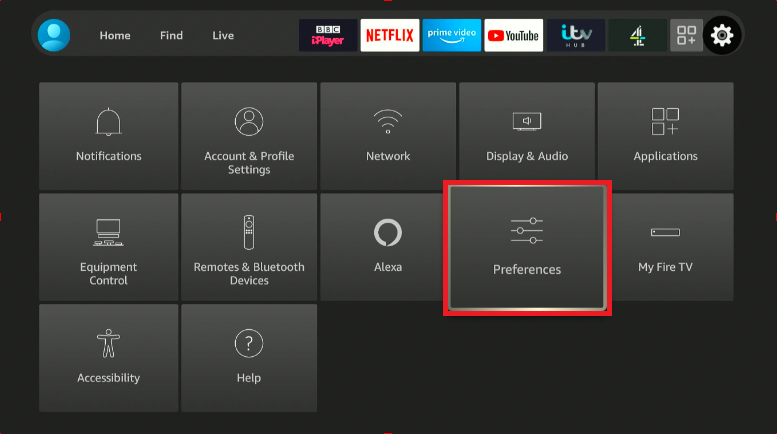
By default, Amazon collects data on how you use your device and the various apps you have installed. You can turn off this setting through two functionalities.
The first is “Device Usage Data,” which collects personal data for marketing and product improvement. The information collected is used to customize marketing information for you. The second is “App Usage Data,” which collects data to determine the frequency and usage duration of particular apps. When you leave both of these turned on, you allow Amazon to analyze your data, which also consumes your bandwidth and processing power.
If this sounds invasive to you (if?), go back to settings then:
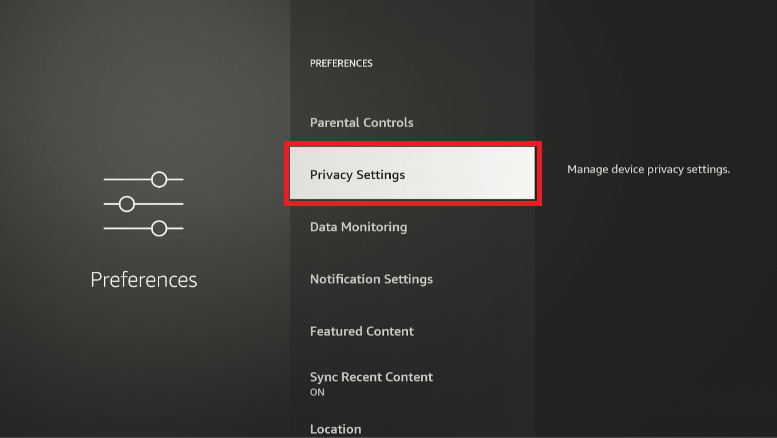
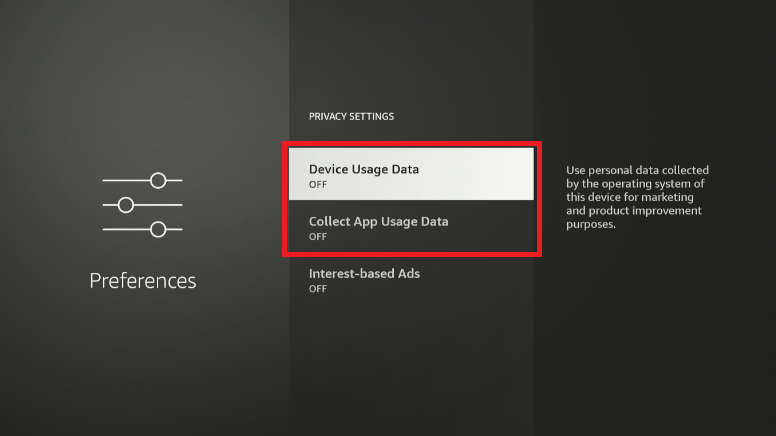
That should stop big brother from spying on you.
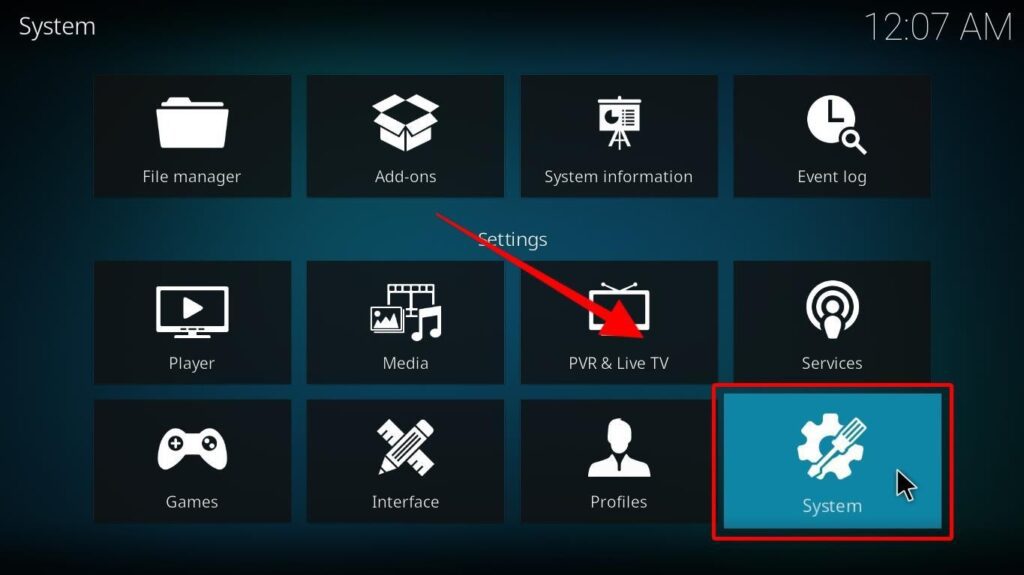
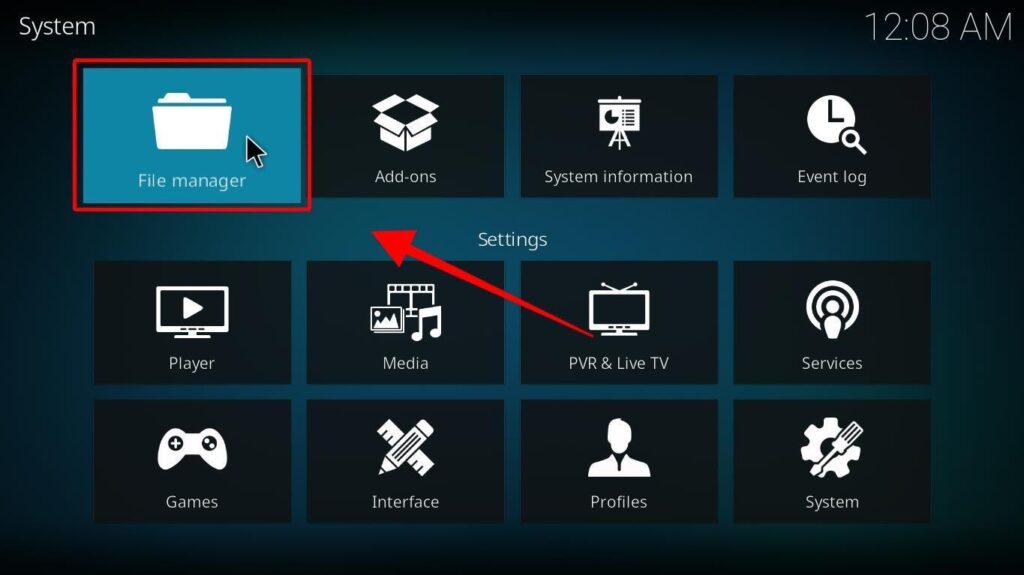
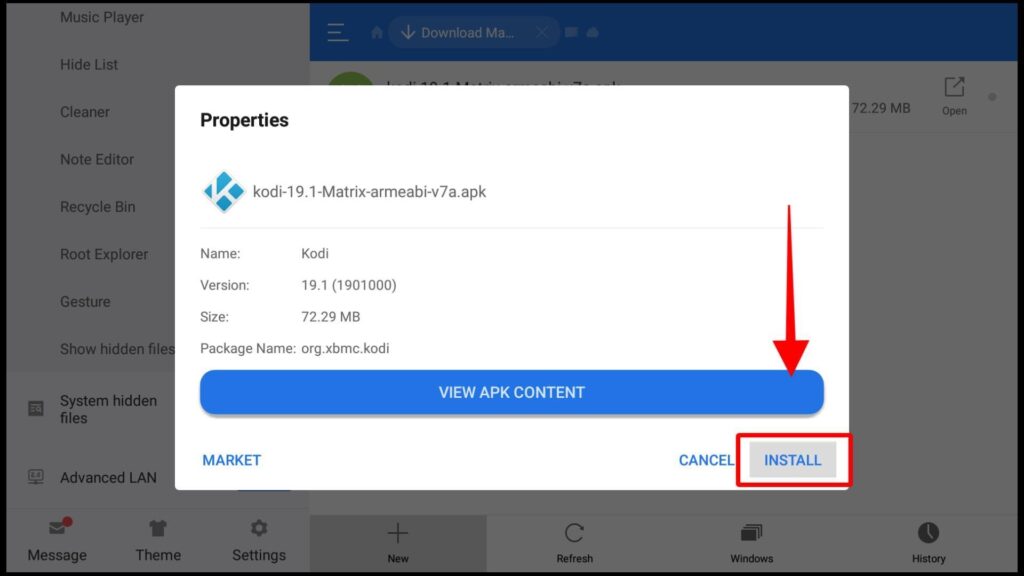
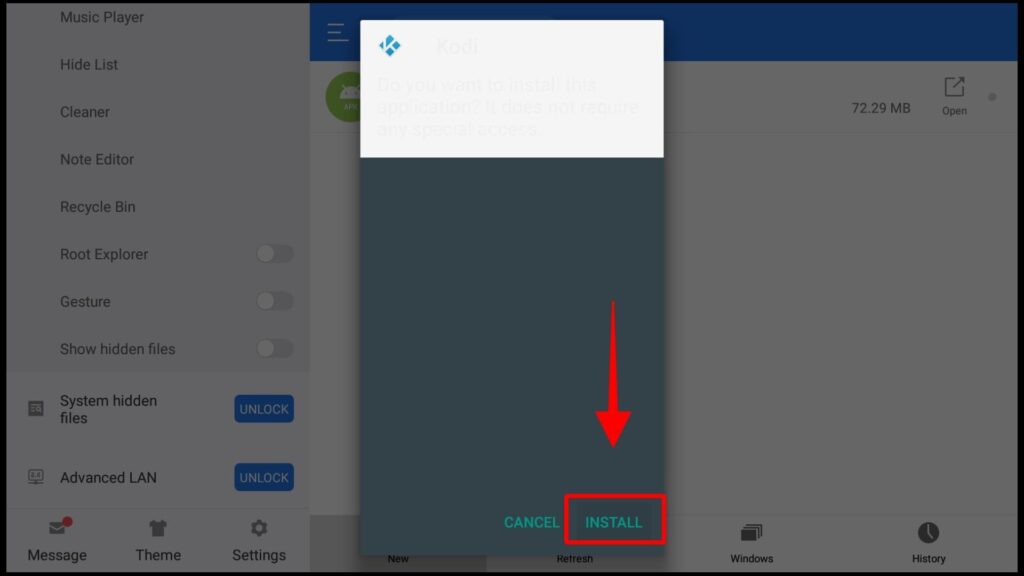
Now that everything is set, we can go ahead and install Kodi 19.4.


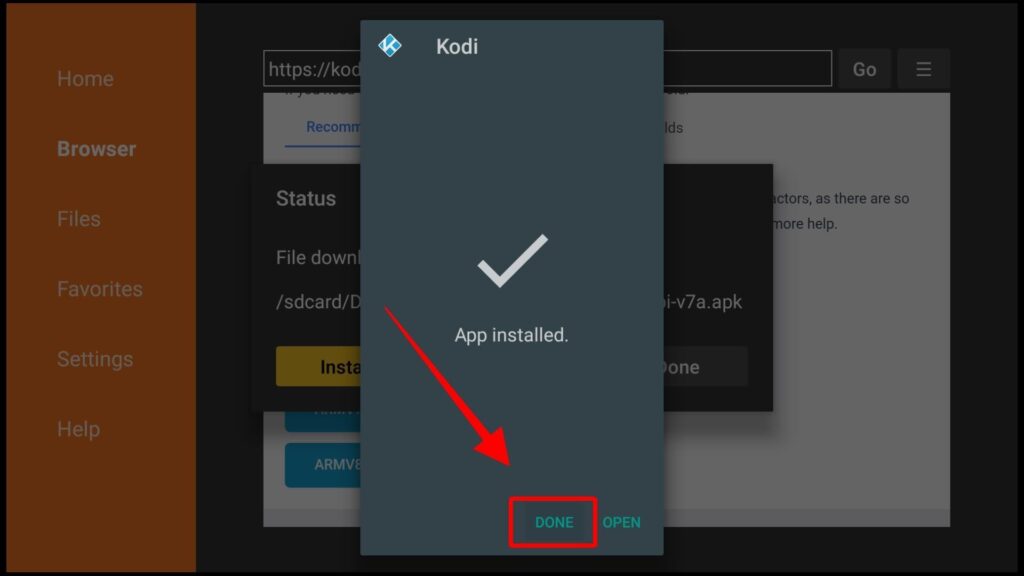
Kodi should now be the last app in your applications folder. If you wish to move it, highlight it, then click the menu button on your remote. This will give you several options. Click Move. From there, drag the app to where you’d like it and click Ok.
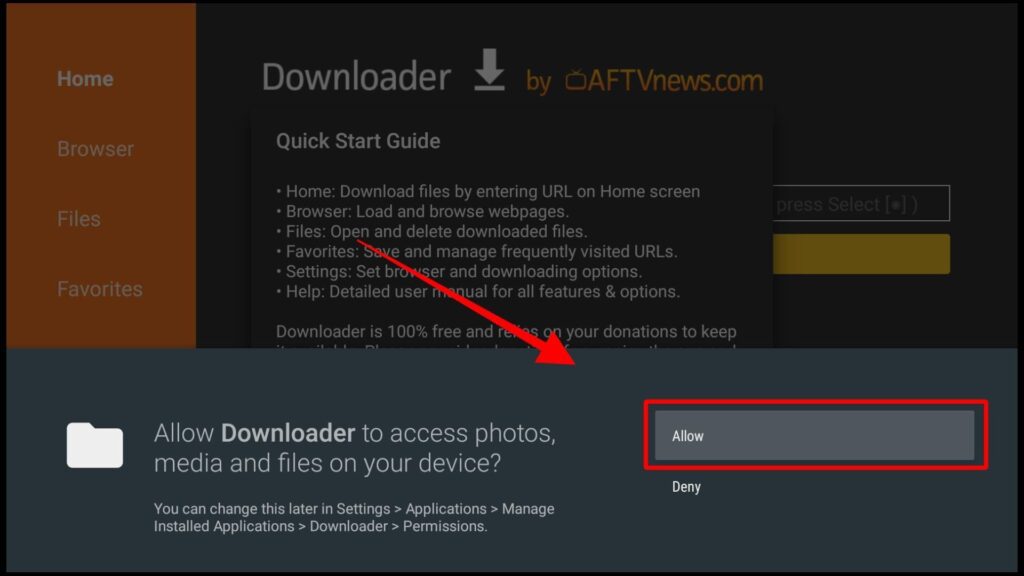
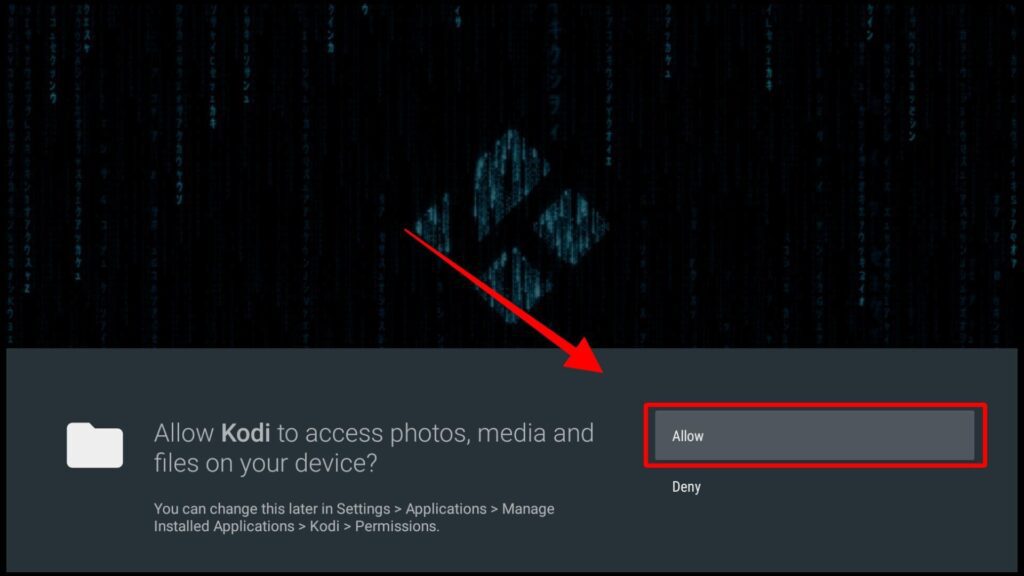
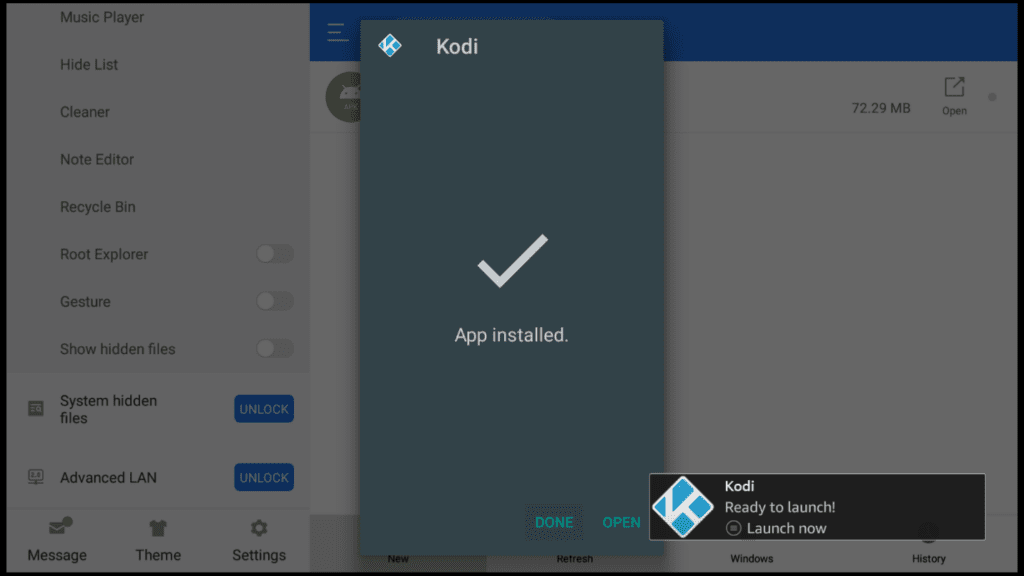
You can now open Kodi. On the first launch, the app will notify you that it requires access to your device media and files to function then ask you for storage permission, which you can grant by clicking allow.
Kodi 19.4 should now launch.
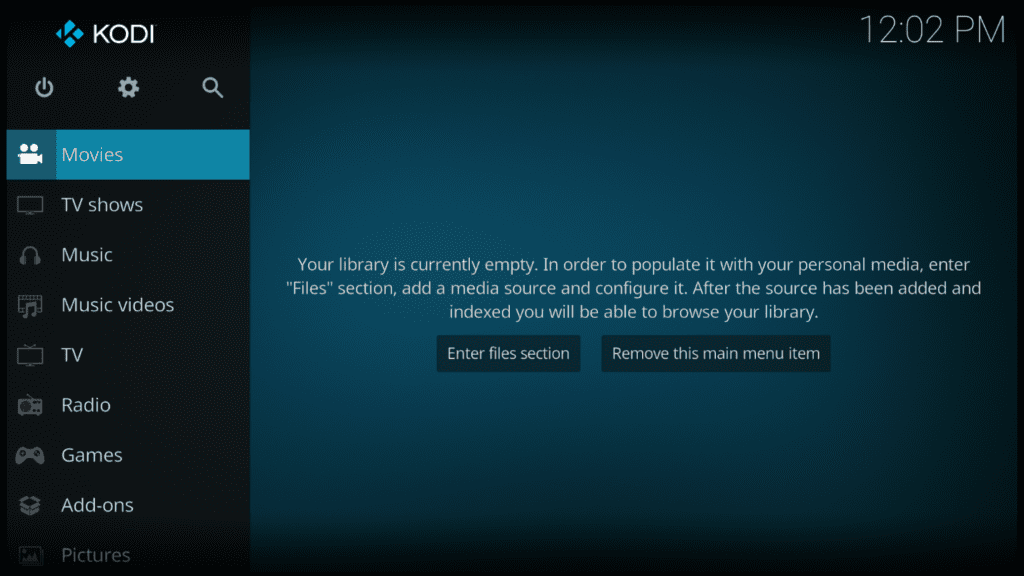
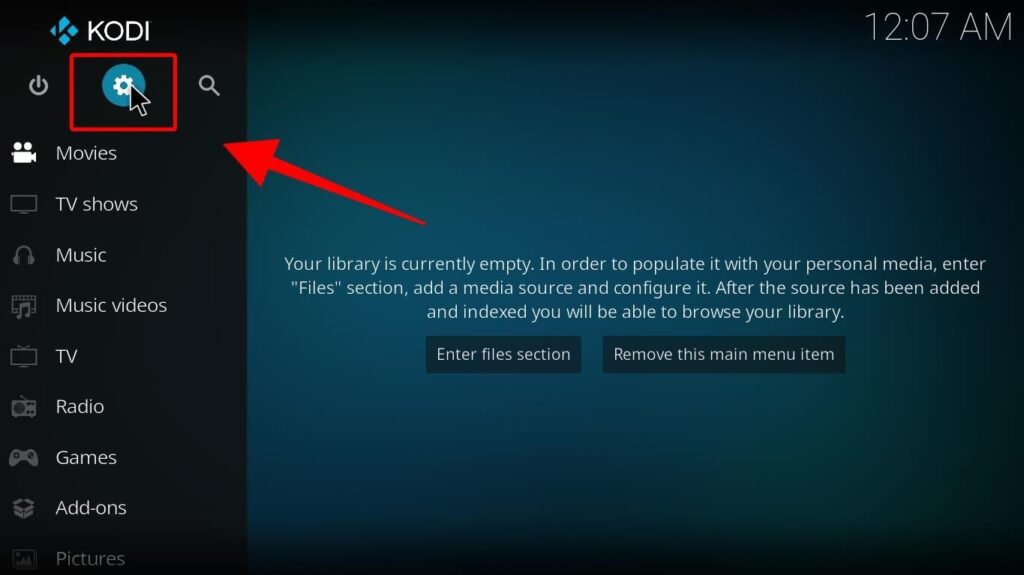
Once you install Kodi on Firestick, you will realize that the app doesn’t provide any content. All you can do with Kodi in its original state is organize and stream content that you own.
However, you can set up the program to let you stream pretty much everything on the internet. This is done by installing Kodi addons.
Kodi addons are small programs that enable Kodi to access online content by scrapping for links from the internet and then neatly organizing them according to the type of content.
These addons are grouped into two categories:
Official Kodi addons are addons that have been approved by the XBMC Foundation, the group behind Kodi. These addons do not in any way facilitate copyright infringement, and they can be installed from the official Kodi repository (all addons are housed in containers known as repositories).
Third-Party Kodi addons are developed by thousands of independent developers and have not been approved by Kodi as official addons. This can be because they have not yet been submitted or facilitate the streaming of legally questionable content.
Unofficial Kodi addons are the popular of the two types as they provide access to unrestricted content. Installing such addons on Kodi to bypass streaming restrictions is what is generally referred to as jailbreaking Firestick.
However, if you decide to use any third-party Kodi addon, you should do so privately and anonymously. We’ll show you how to use ExpressVPN to stay hidden.
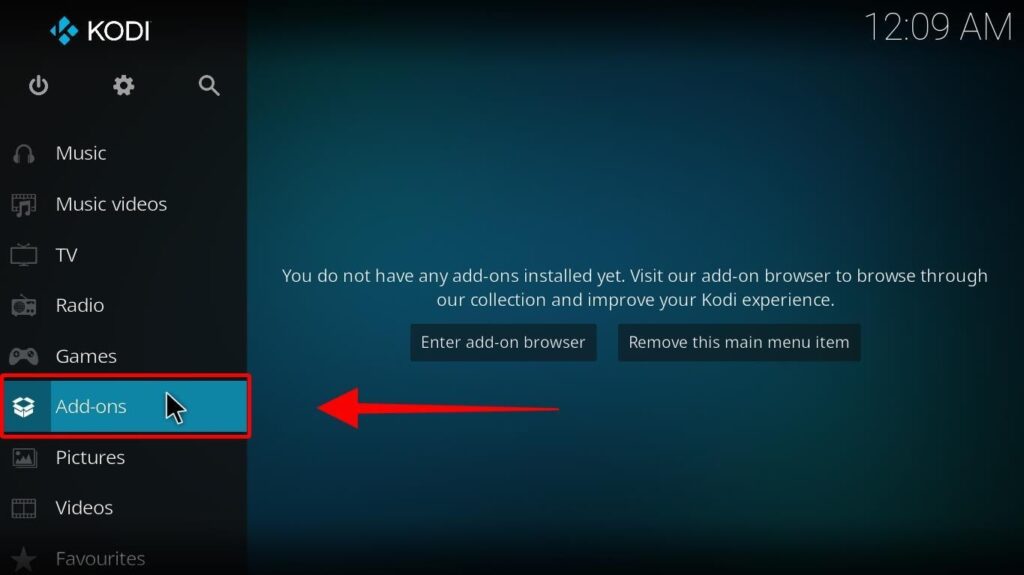
To start using Kodi, you need to choose the addons that you will install. Most of them specialize in either Sports, Live TV, or Movies & TV Shows. A few specialize in other niches such as gaming, and others offer pretty much everything.
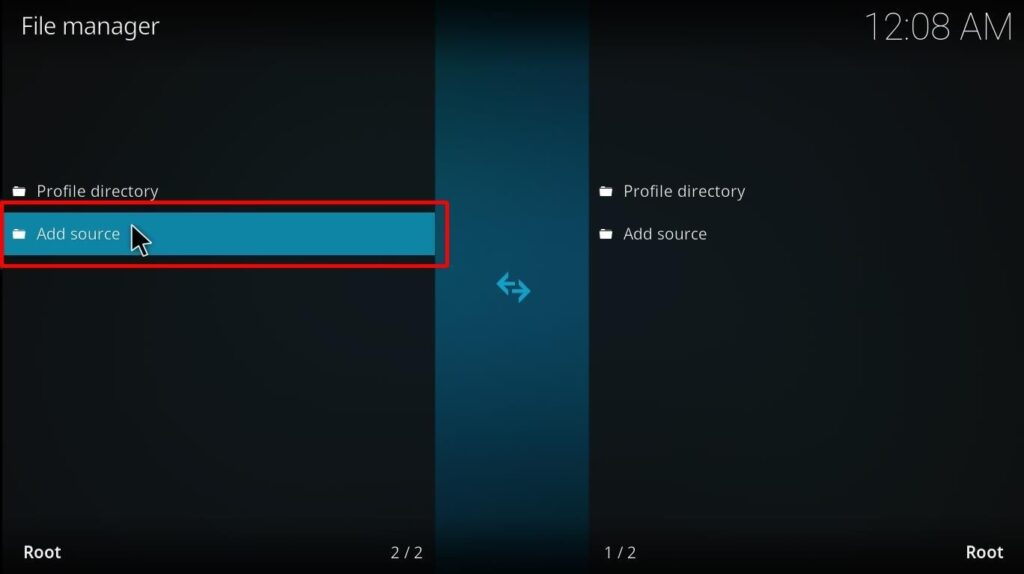
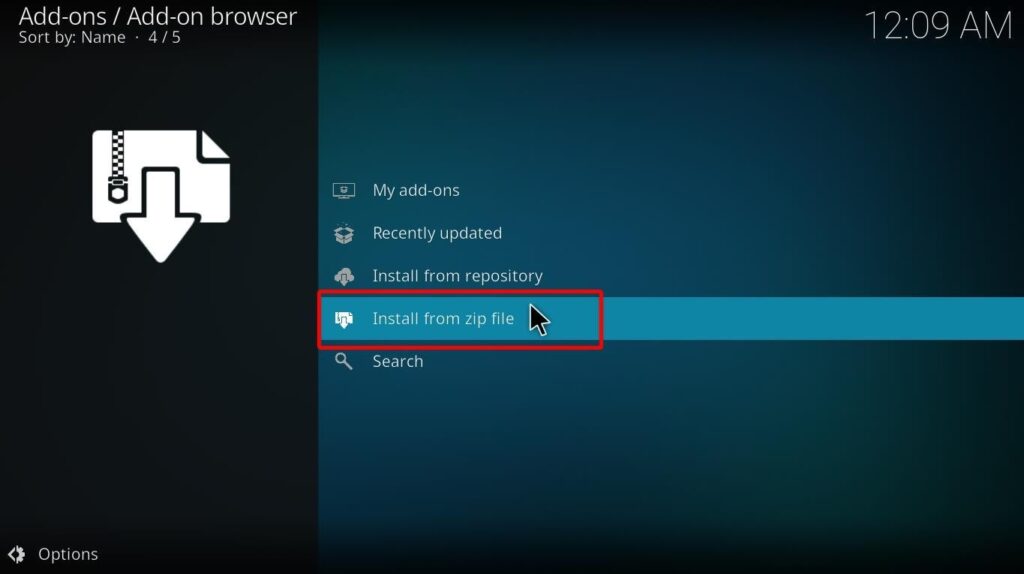
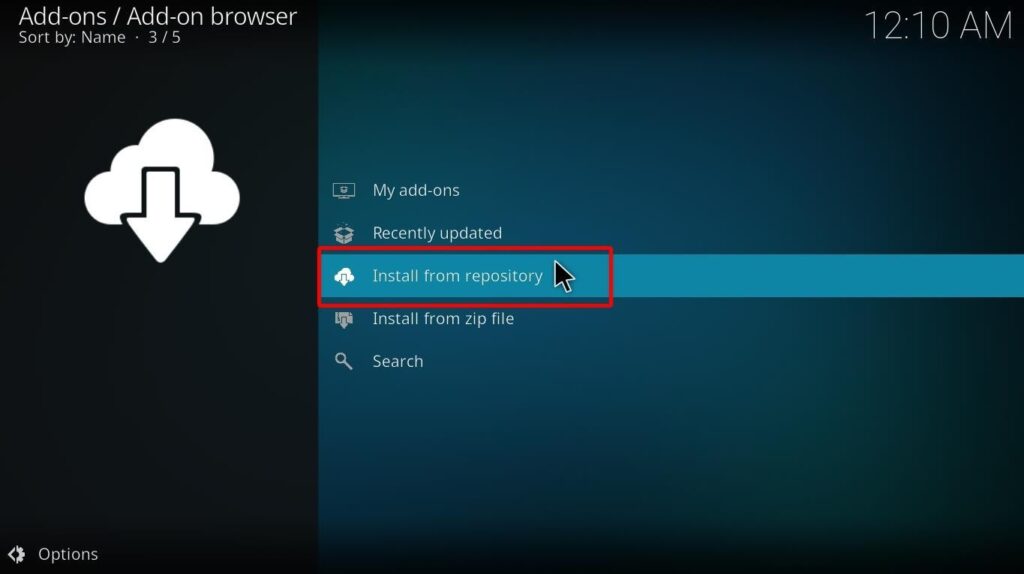
Official Kodi addons can be installed from within Kodi using a process similar to step 4 in this section. However, to install third-party addons, you’ll first need to install the repository that hosts the addon. This will require you to enable unknown sources (used to this by now, huh?), install the addon’s host repository, and then install the addon from the repository.
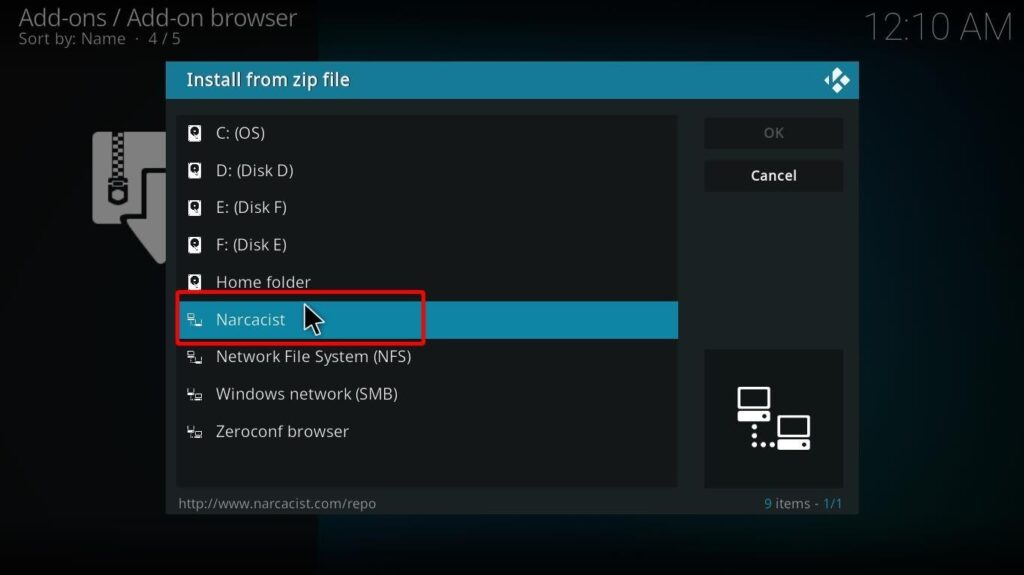
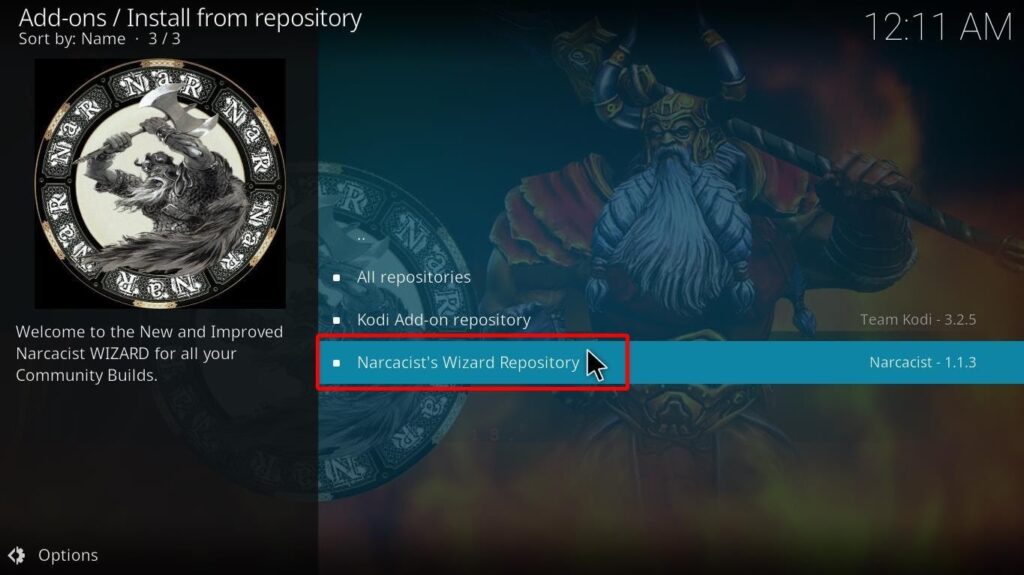
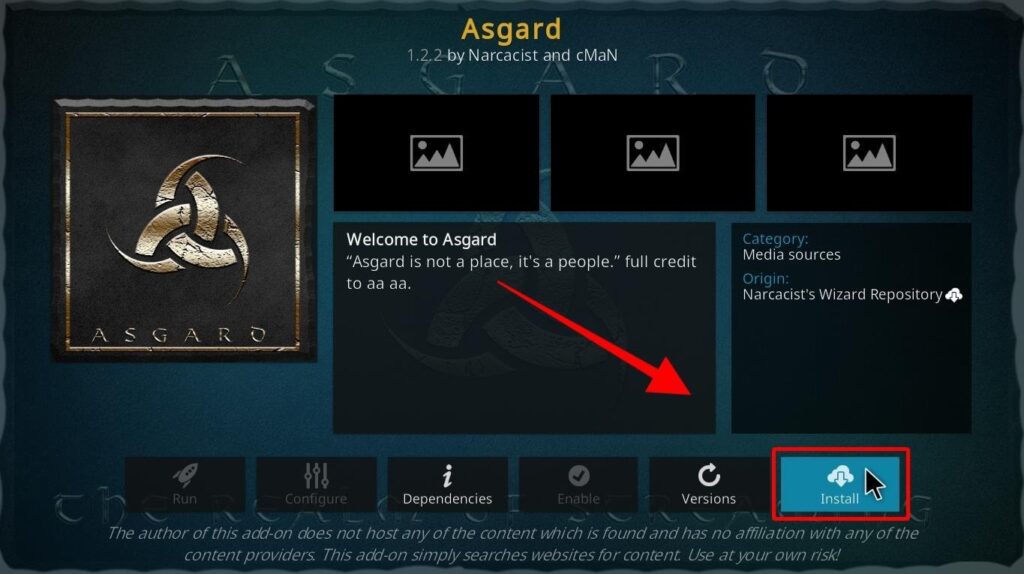
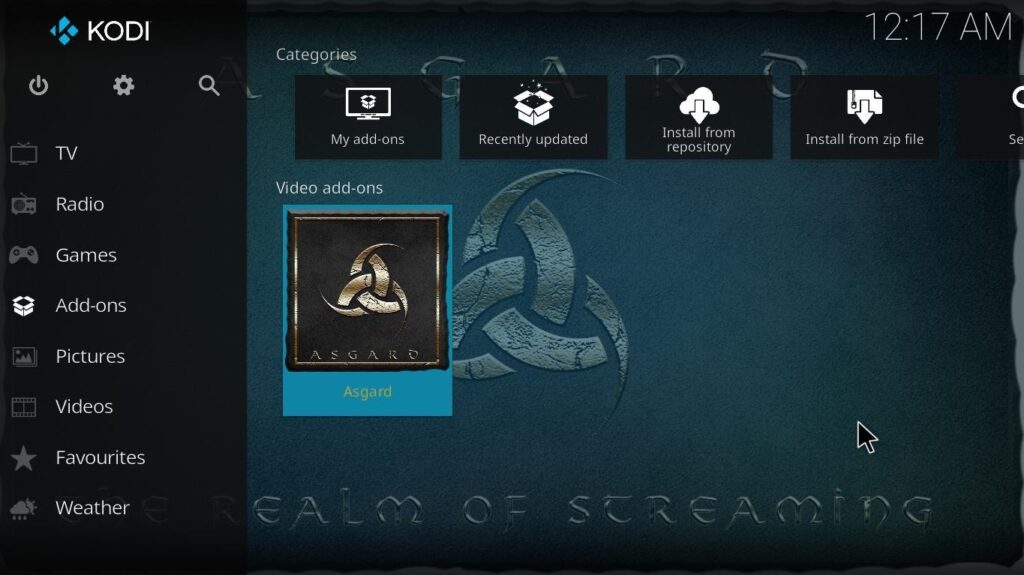
In this guide, we’ll install Asgard Kodi Addon, an all-in-one addon hosted by the Narcacist Repo. You will also be able to install other addons hosted by the same repo.
This only needs to be done once, and it only requires three steps:

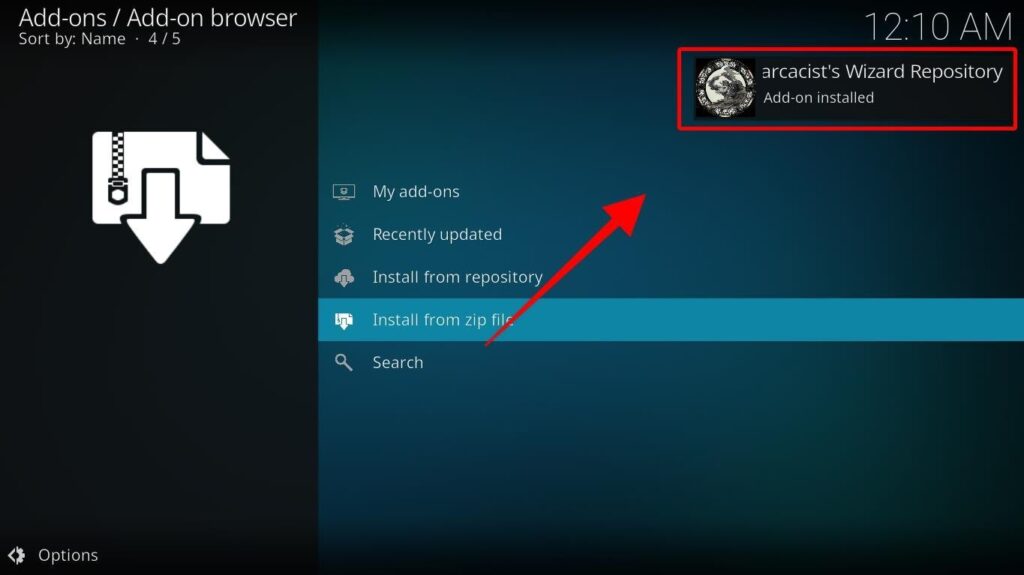
Your Kodi app can now install repositories from third-party sources.
Every Kodi repo has a source URL. For Narcacist Repo, it’s http://www.narcacist.com/repo.
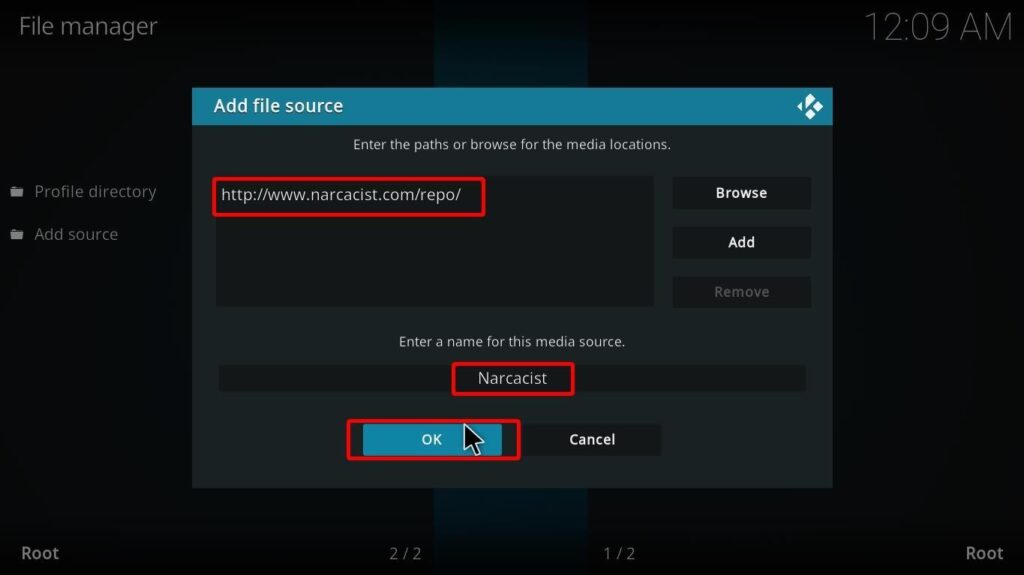
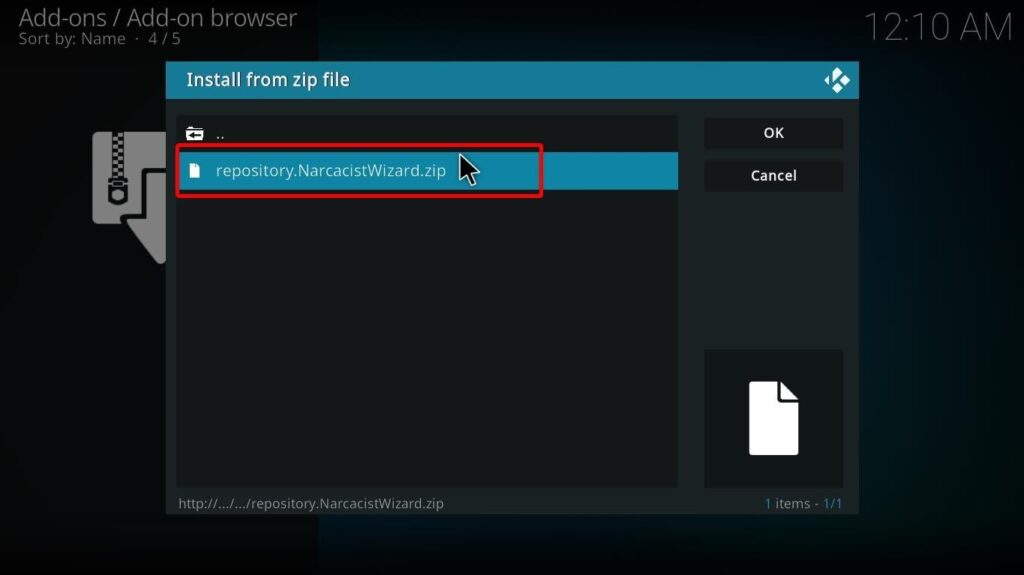
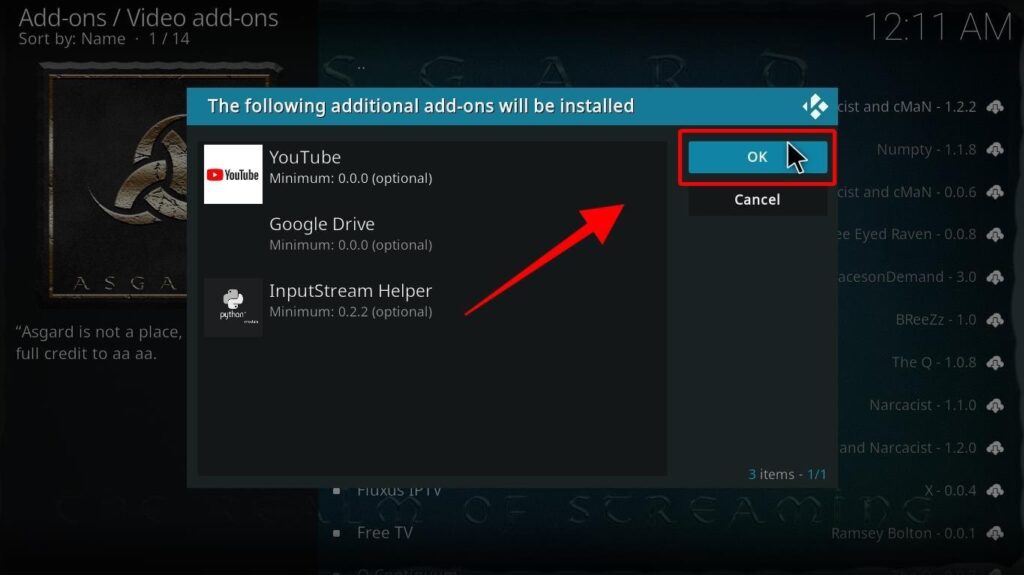
Now, we can finally install Asgard.
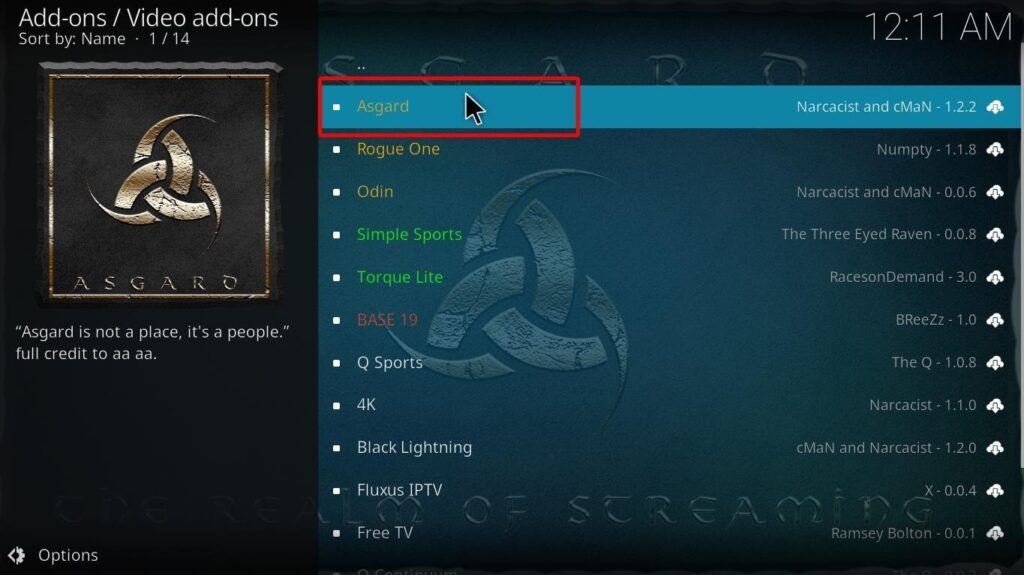
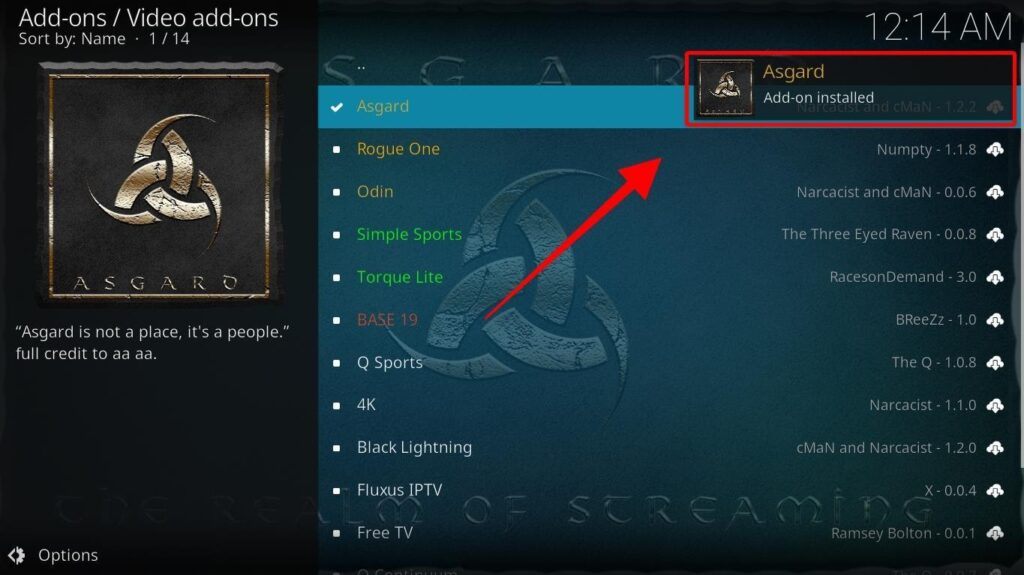
You can find the new addon on the Kodi home page under Addons.
However, before you open it, it’s crucial that you get your VPN up and running first.
If you’re still considering which Kodi addon to use, we’ve already done the research for you and listed our top recommendations in this article: Best Kodi Addons
Kodi has been made popular by the thousands of third-party addons available on the internet. However, these addons are also the reason why Kodi is not available on the Amazon App Store. This is because the links they provide are not vetted, and the content is sometimes pirated.
Your ISP can tell what you are accessing whenever you use such addons, and copyright trolls can also track you down. Further, some Kodi addons use torrent links, and ISPs in lots of countries block such content.
Before you access anything on Kodi, you should install a reliable VPN such as ExpressVPN. This is the best VPN for streaming due to its excellent speeds and ability to bypass all restrictions. You can check our industry experts’ updated review of this VPN service here: ExpressVPN Review. And here’s how to set it up on Firestick.
The first thing you need to do is create an account with the VPN service. Doing so is quite straightforward, and it only requires an email address and a payment method. Signing up for the VPN is risk-free as you will be protected with a no-questions-asked 100% money-back guarantee. If you are not satisfied with the service, you can ask for a refund within 30 days!
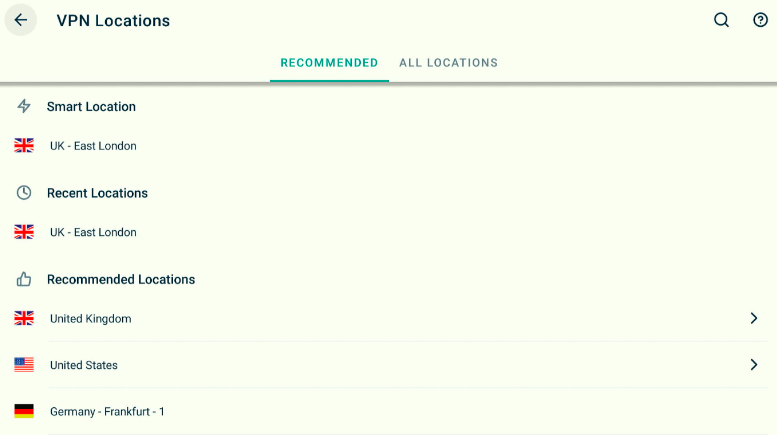
ExpressVPN provides a Firestick app on the Amazon Store, so installing it is quite straightforward.
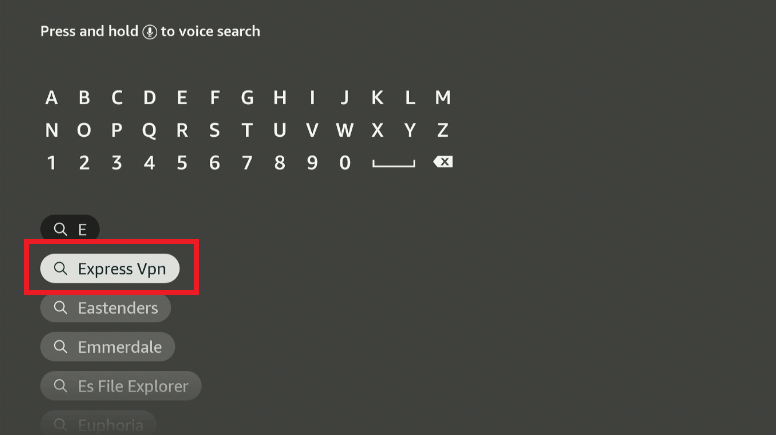

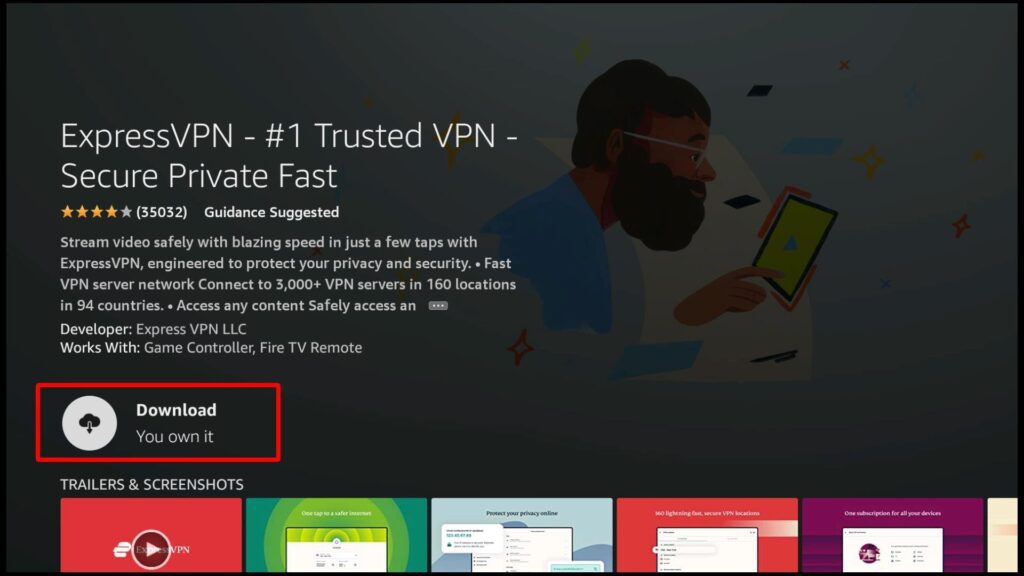
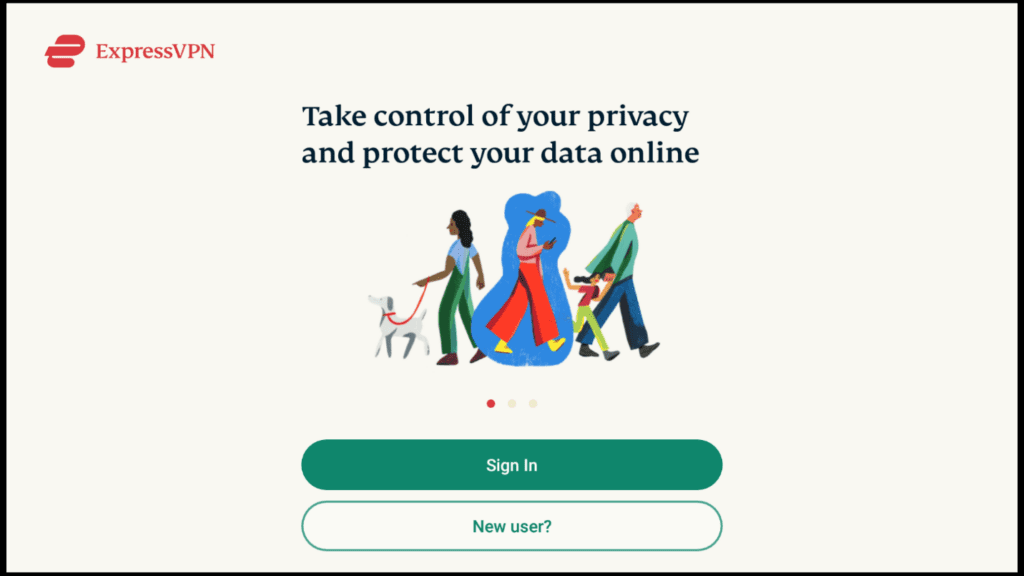
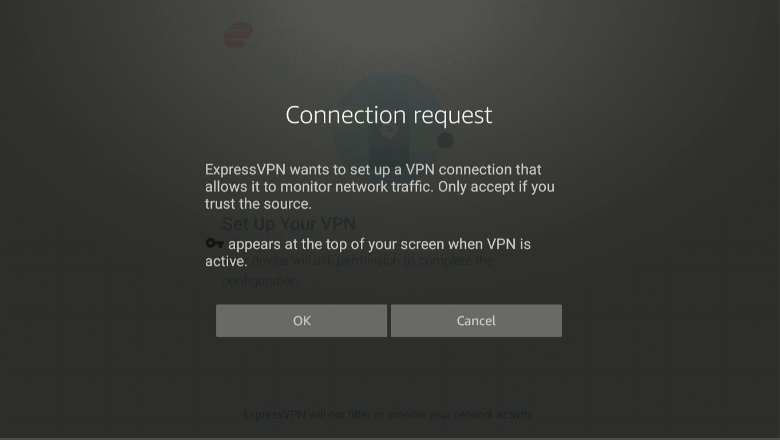
ExpressVPN should now be available in your app gallery. Go ahead and open it.
From there:
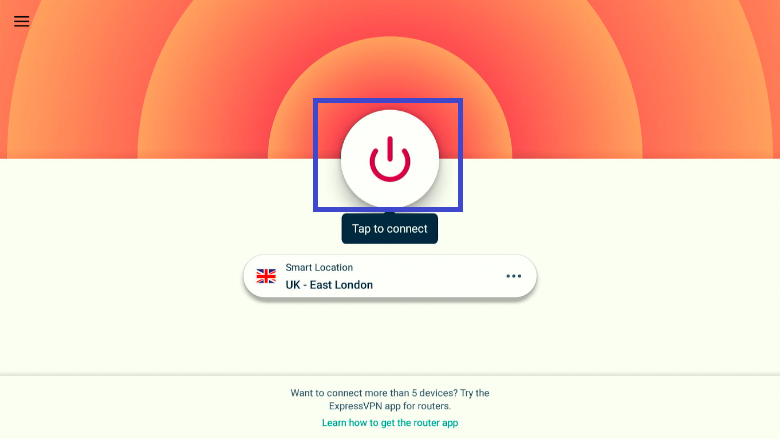
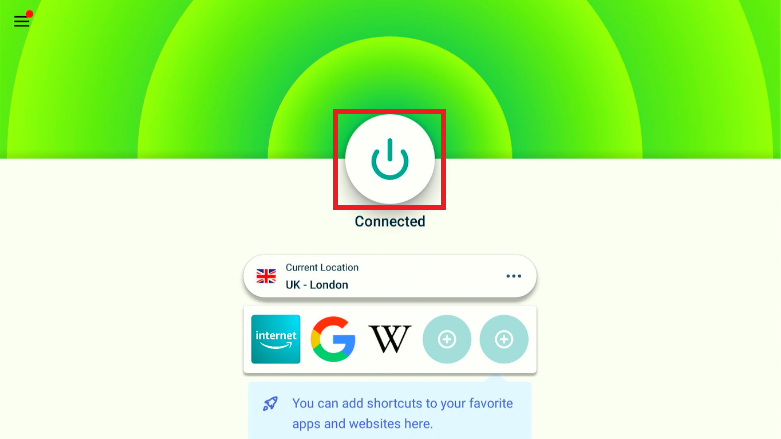 After hiding your online activities, you can now go back to Kodi and start streaming!
Using Downloader is the easiest way to install the latest version of Kodi on Firestick, but it is not the only method. If, for whatever reason, it doesn’t work for you or you’d like to use a different one, below are two alternate methods you can use.
Note that all three methods will still require you to enable “Apps from Unknown Sources.” You can follow the instructions under “Step 2: Prep your Firestick” to do so.
File Explorer works pretty much like Downloader in terms of installing apps on Firestick. However, the app is much more than that as it is a fully-fledged file manager. You can explore it further after installing it, but here’s how to install Kodi 19.4 using File Explorer.
File Explorer is readily available on the Amazon Store. This means that you can install it within a few minutes, so go to Find> Search > File Explorer > Install. The process is the same as that of installing Downloader.
If you are using Firestick Lite and Firestick Gen 3, you’ll need to give File Explorer exclusive permission to install apps on Firestick. Just like with Downloader, head to Settings > My Fire TV > Developer Options > Apps from Unknown Sources > File Explorer.
Open File Explorer and give the app permission to access your file storage system. From there:
Go ahead and enjoy Kodi.
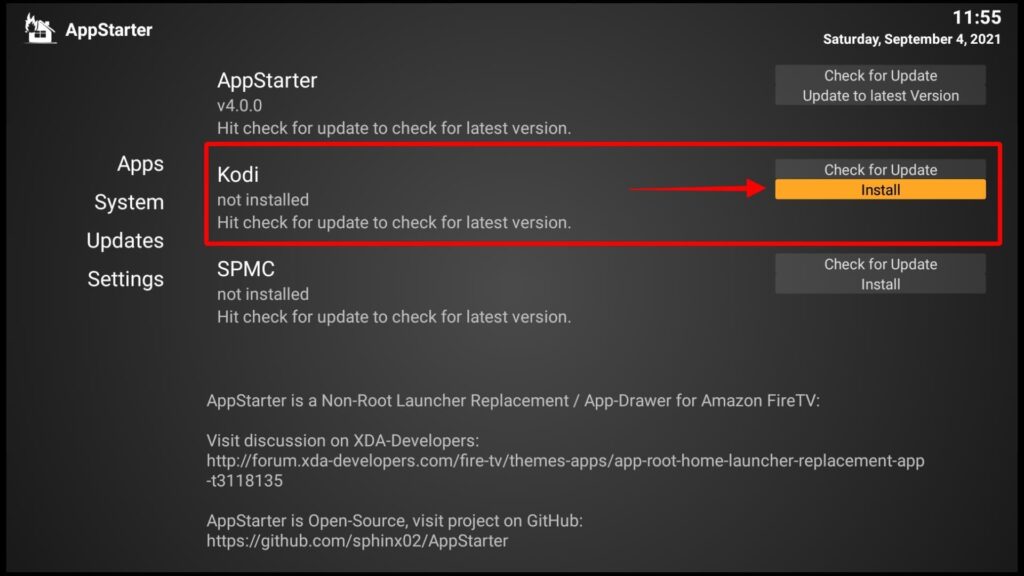
AppStarter requires a longer process than the previous two methods, but it provides the ability to update your Kodi to the latest version. This makes it one of the best ways to install the app on Firestick.
The first thing you need to do is install Downloader or File Explorer using the procedures given above. For now, we’ll use Downloader to install AppStarter, which we can then use to install and update Kodi.
To allow Downloader to install AppStarter and other apps in the future, you’ll need to enable “apps from unknown sources.” This procedure is found under ‘How to Install Kodi 19.4 on Firestick’ Step 2.
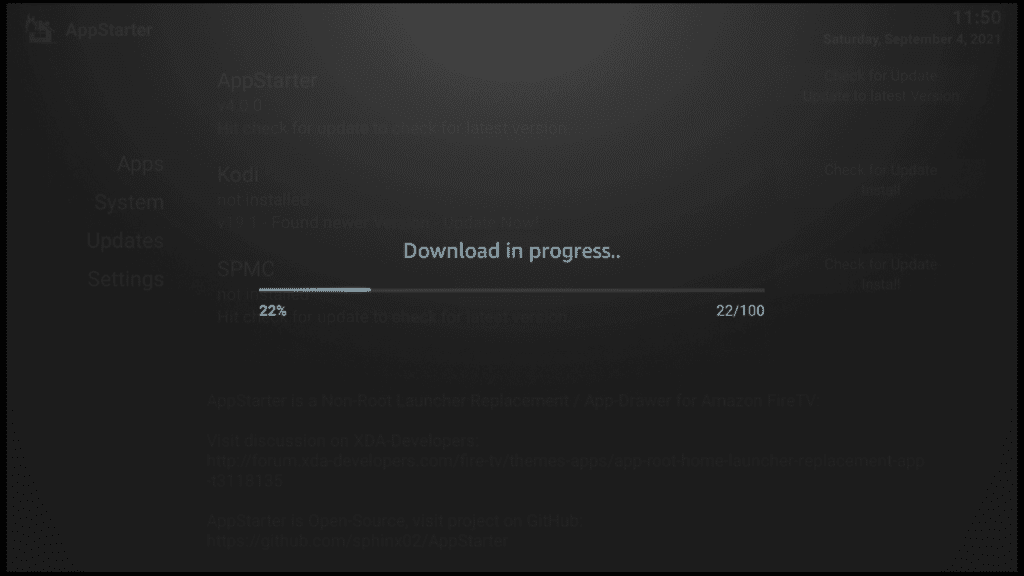
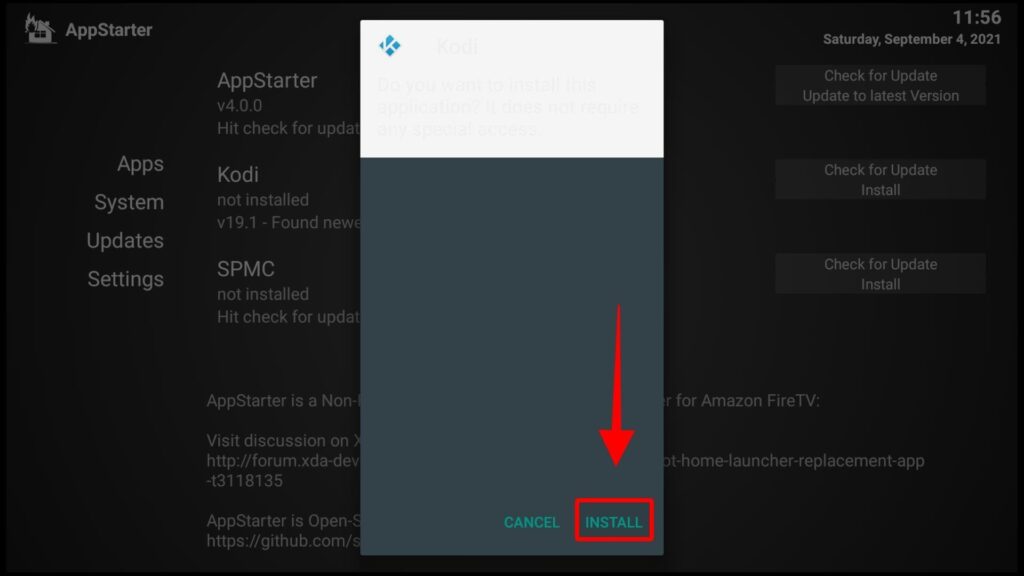
Now, we can go ahead and install the app.
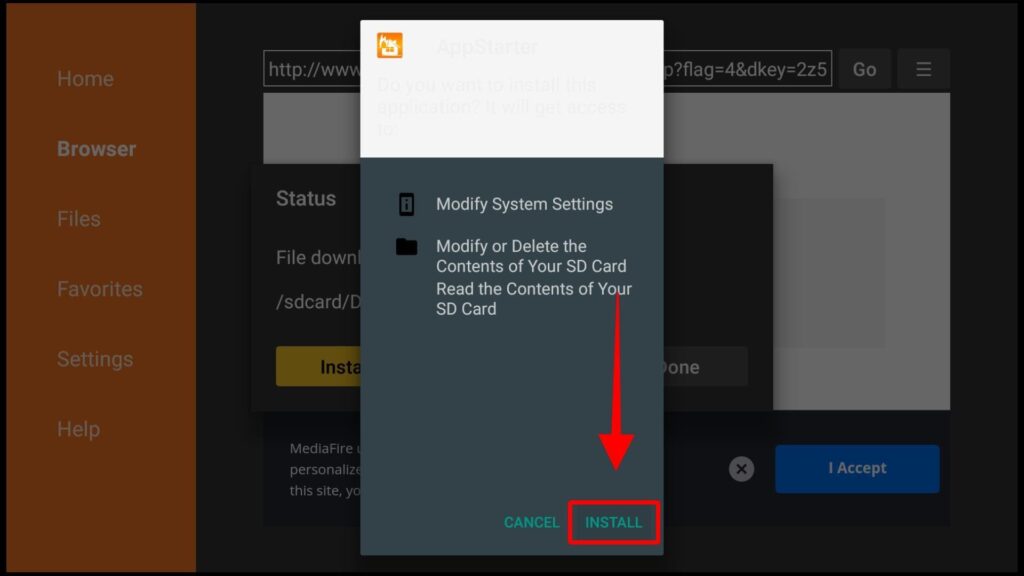
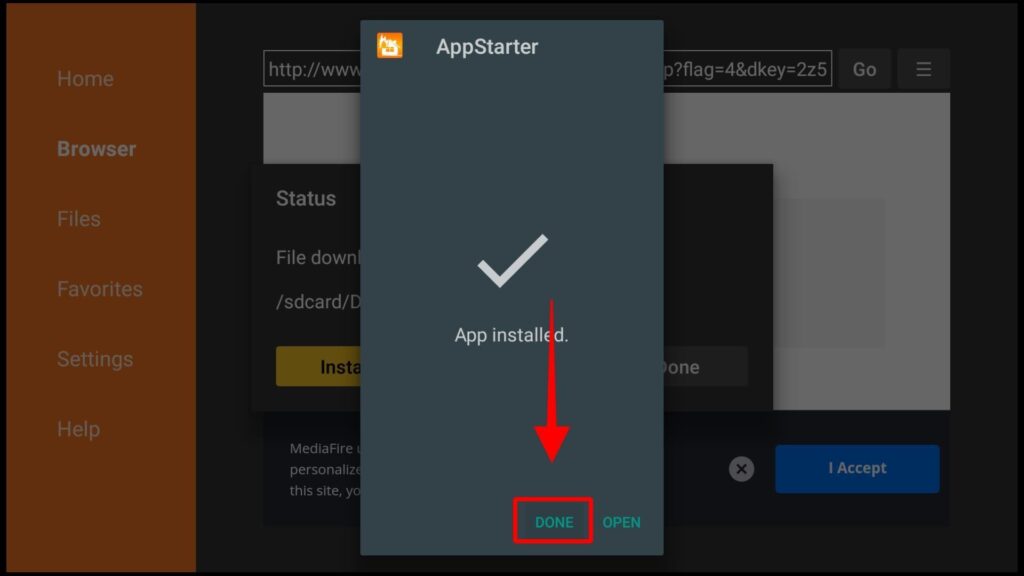
AppStarter should now be available in your applications library.
Launch AppStarter then:

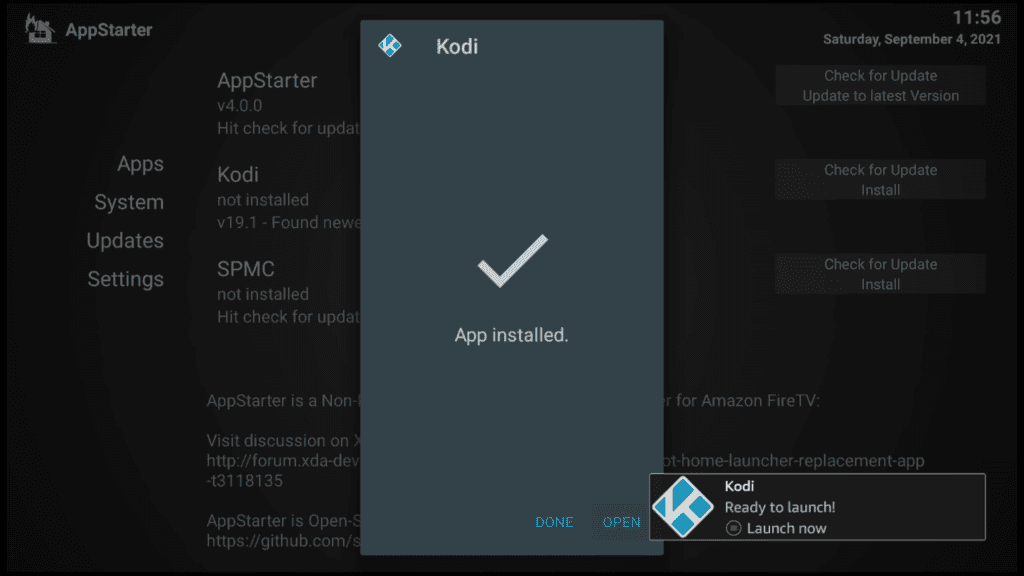
The app should now be available on your device.
Unlike mobile devices, jailbreaking Firestick simply means installing third-party apps that allow free streaming. Kodi is the app that is mostly associated with the term.
Although Kodi is not available on the official store, installing it is completely legal. What matters is what you access and your local laws. But since you can’t really determine the legality of everything you can access on Kodi, we highly advise that you turn on ExpressVPN before streaming anything on Kodi.
Kodi can be deleted just like any other Firestick app. Go to Applications, highlight Kodi, and click the menu button. You’ll get an option to uninstall the app.
Whenever a new version of Kodi is released, you can update it using the same process as installing the app for the first time. If you used AppStarter, just open the app and use the update option.
Installing Kodi on Firestick will help you maximize the power of the device and take your home entertainment to another level. You will be able to enjoy movies, shows, live TV, sports, documentaries, and more without worrying about geo-restrictions. The guide above should show you how to install and use the app as well as how to stream privately and anonymously.

You need to load content from reCAPTCHA to submit the form. Please note that doing so will share data with third-party providers.
More InformationYou are currently viewing a placeholder content from Turnstile. To access the actual content, click the button below. Please note that doing so will share data with third-party providers.
More InformationYou are currently viewing a placeholder content from Facebook. To access the actual content, click the button below. Please note that doing so will share data with third-party providers.
More InformationYou need to load content from reCAPTCHA to submit the form. Please note that doing so will share data with third-party providers.
More InformationYou are currently viewing a placeholder content from reCAPTCHA. To access the actual content, click the button below. Please note that doing so will share data with third-party providers.
More InformationYou are currently viewing a placeholder content from Instagram. To access the actual content, click the button below. Please note that doing so will share data with third-party providers.
More InformationYou are currently viewing a placeholder content from X. To access the actual content, click the button below. Please note that doing so will share data with third-party providers.
More Information