
Before every other Kodi addon, the original Exodus Kodi addon ruled Kodi. Sadly, like everything else, Exodus couldn’t last forever, and soon many similar addons were trying to impersonate the Exodus addon. But if you are like us and are looking for an addon that is a great alternative for Exodus Kodi (and Exodus Redux), then Covenant is the one. Lambda, the developers of Exodus Kodi, produced Covenant, too. Therefore, the two programs are very alike by interface and functionalities. All this makes Covenant the best alternative for Exodus.
Covenant is not only the true heir of Exodus but also better than Exodus in many aspects. Covenant has more features than Exodus and is more stable as well. Lambda is no longer updating Exodus, which makes Covenant a better Exodus alternative.
Even though Kodi has many new and better-performing addons, some users still like Covenant and Exodus addons. Developers later revived exodus, and they both received updates, and they even worked flawlessly together for the time being.
Even if you use other top Kodi addons, we still encourage you to try Covenant for once.
Read more: Your data can be monitored by your ISP and government. Stream safely and privately with the help of a VPN. Here’s our pick and installation process for the best VPN for Kodi.
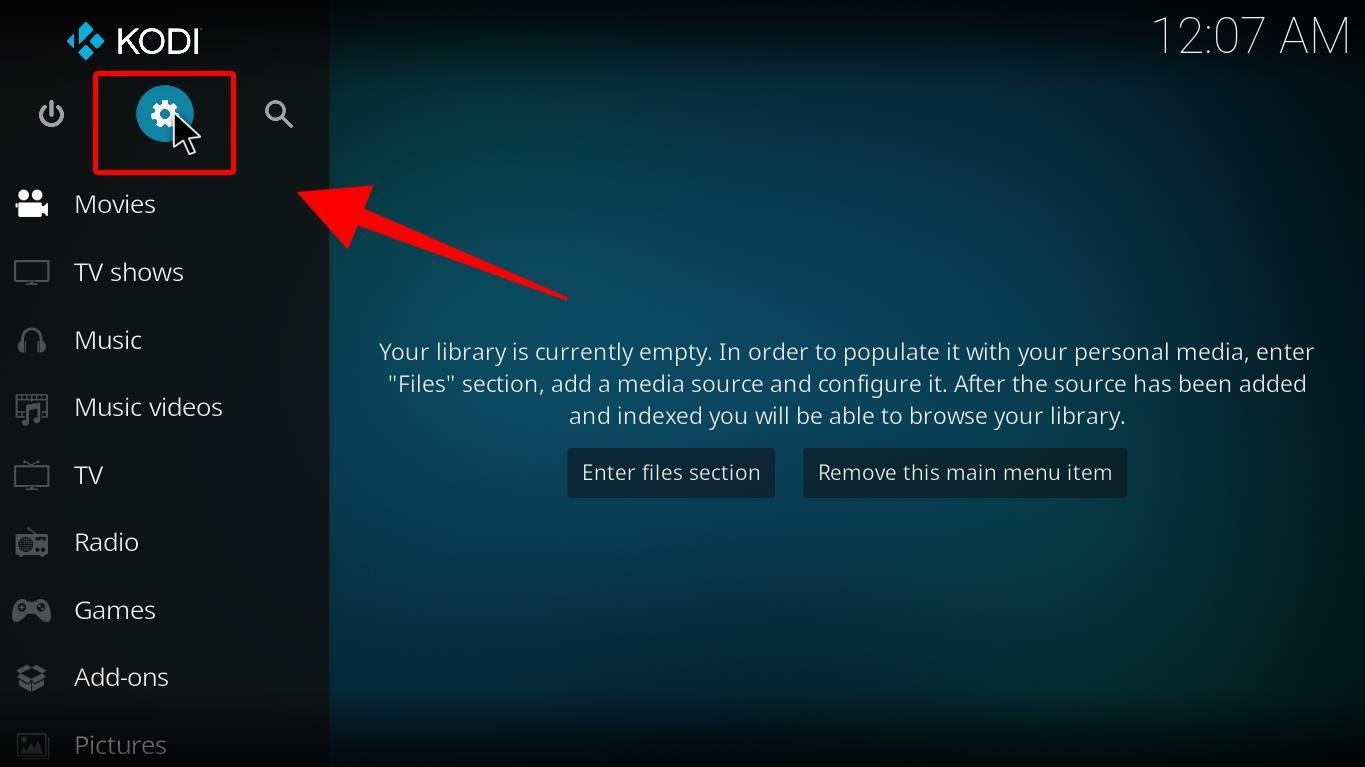
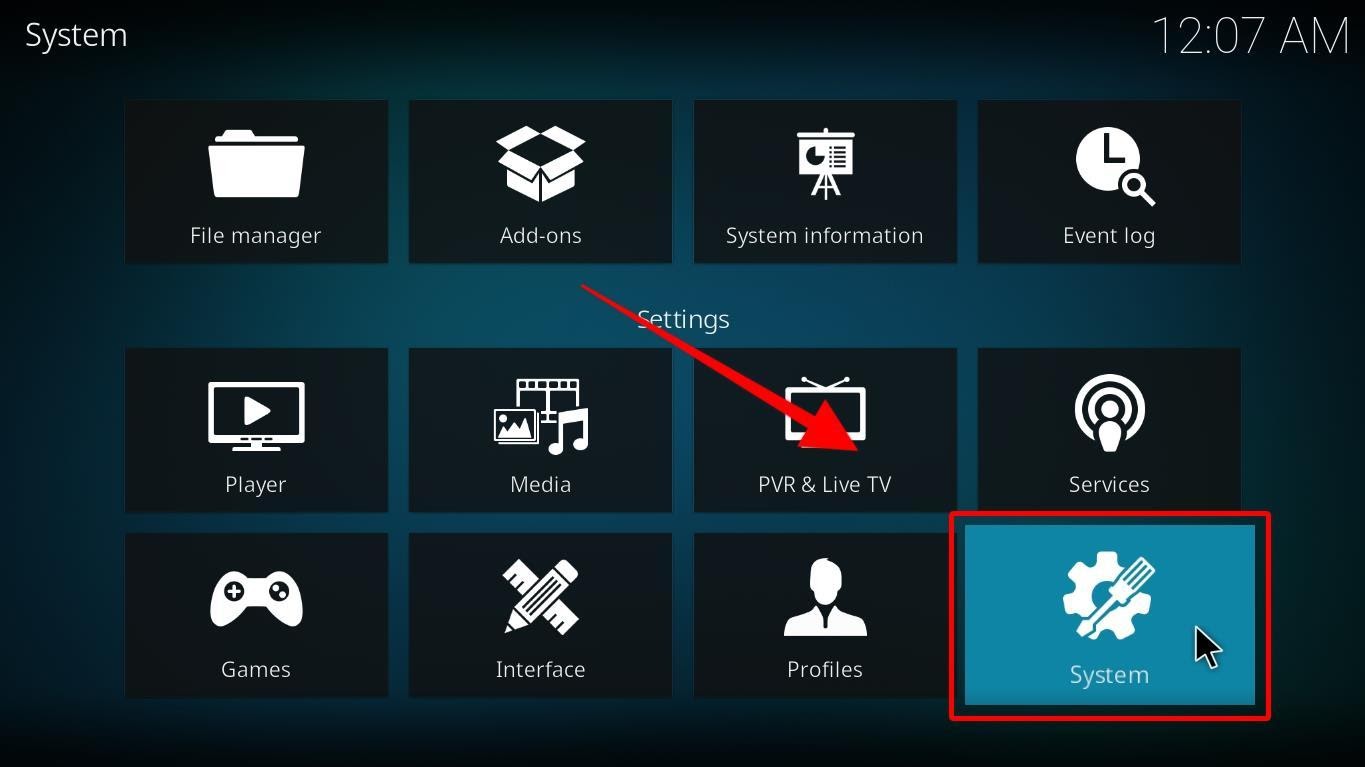
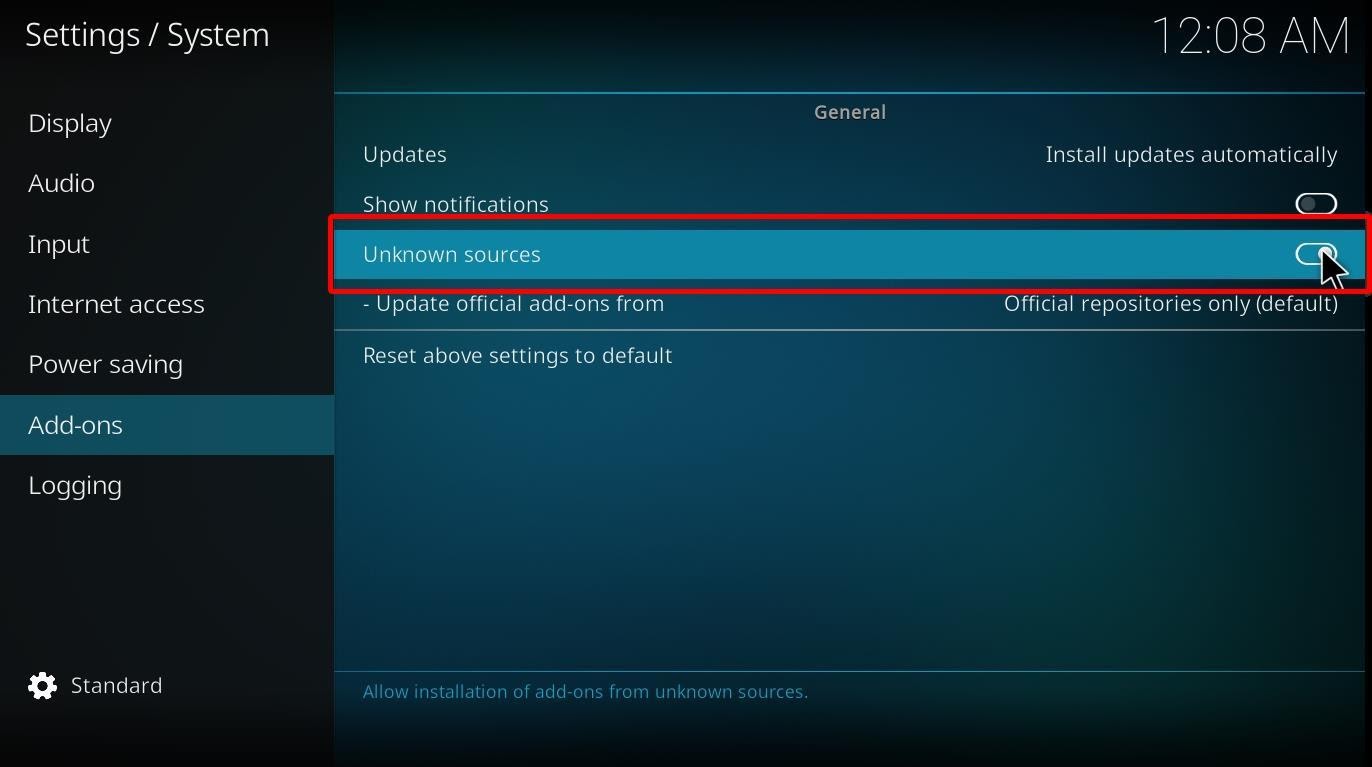
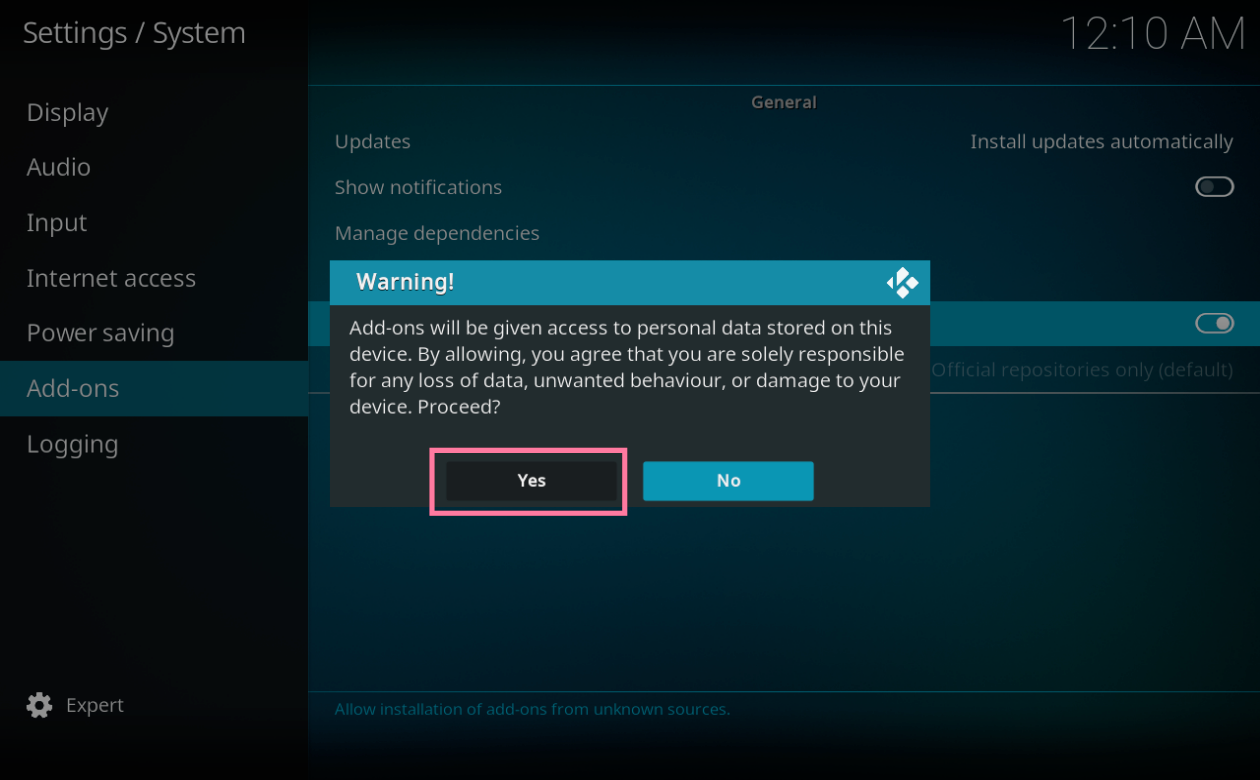
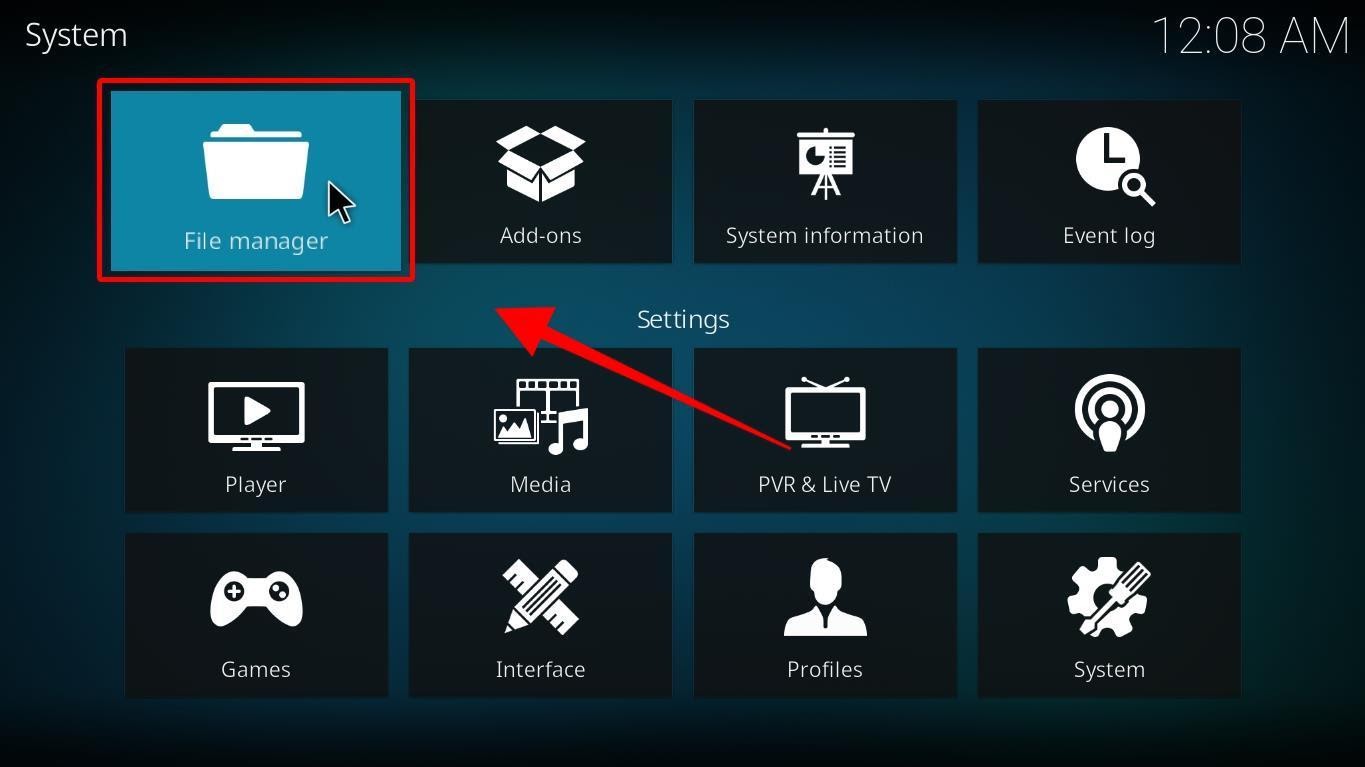
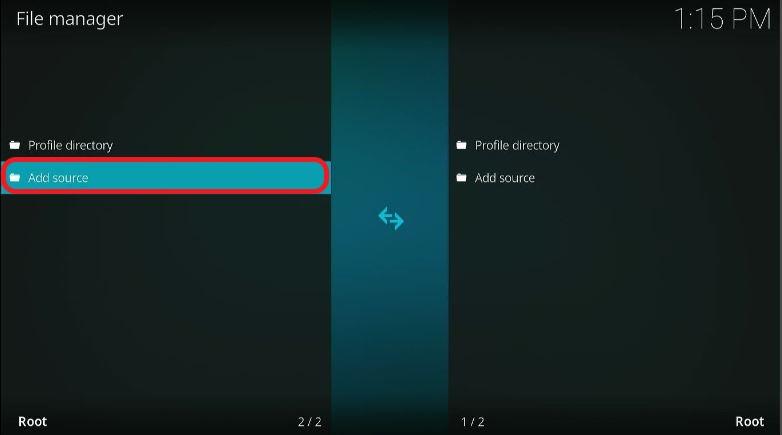
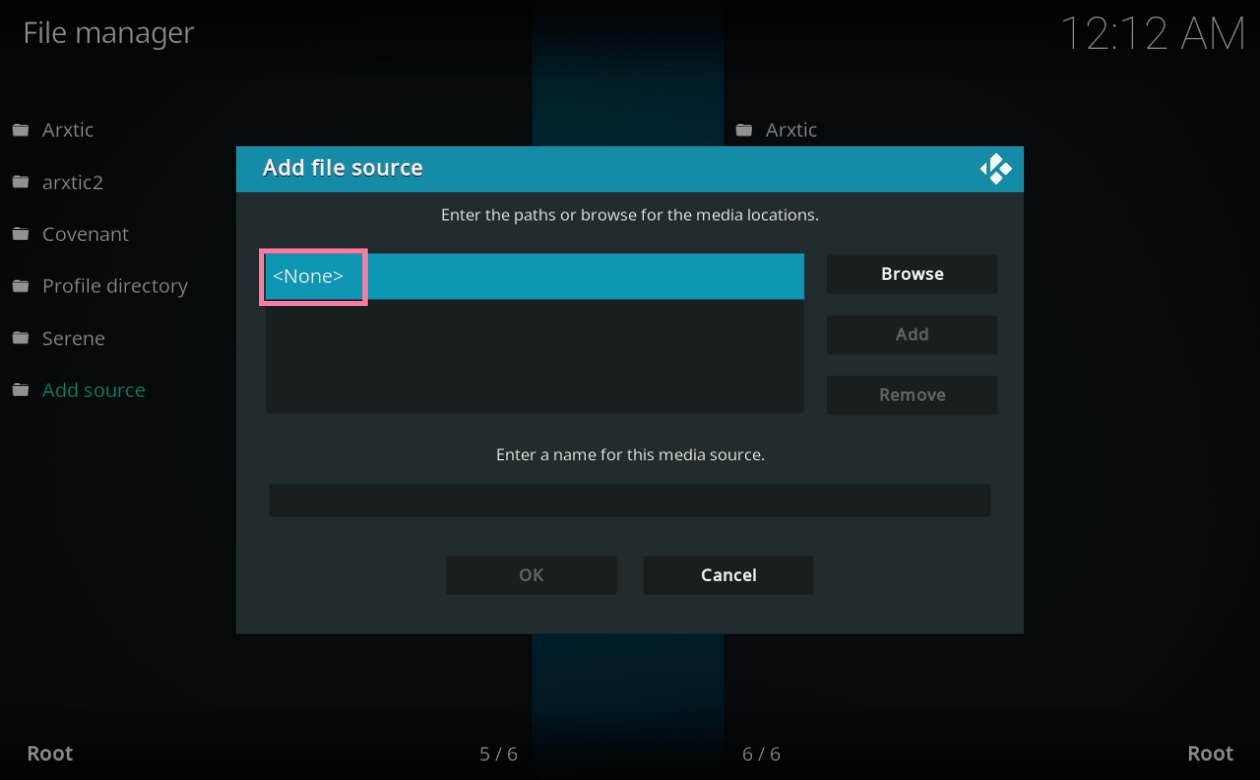
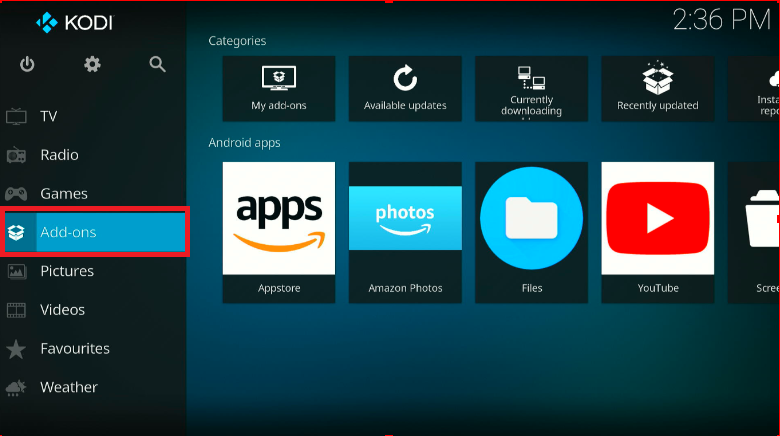
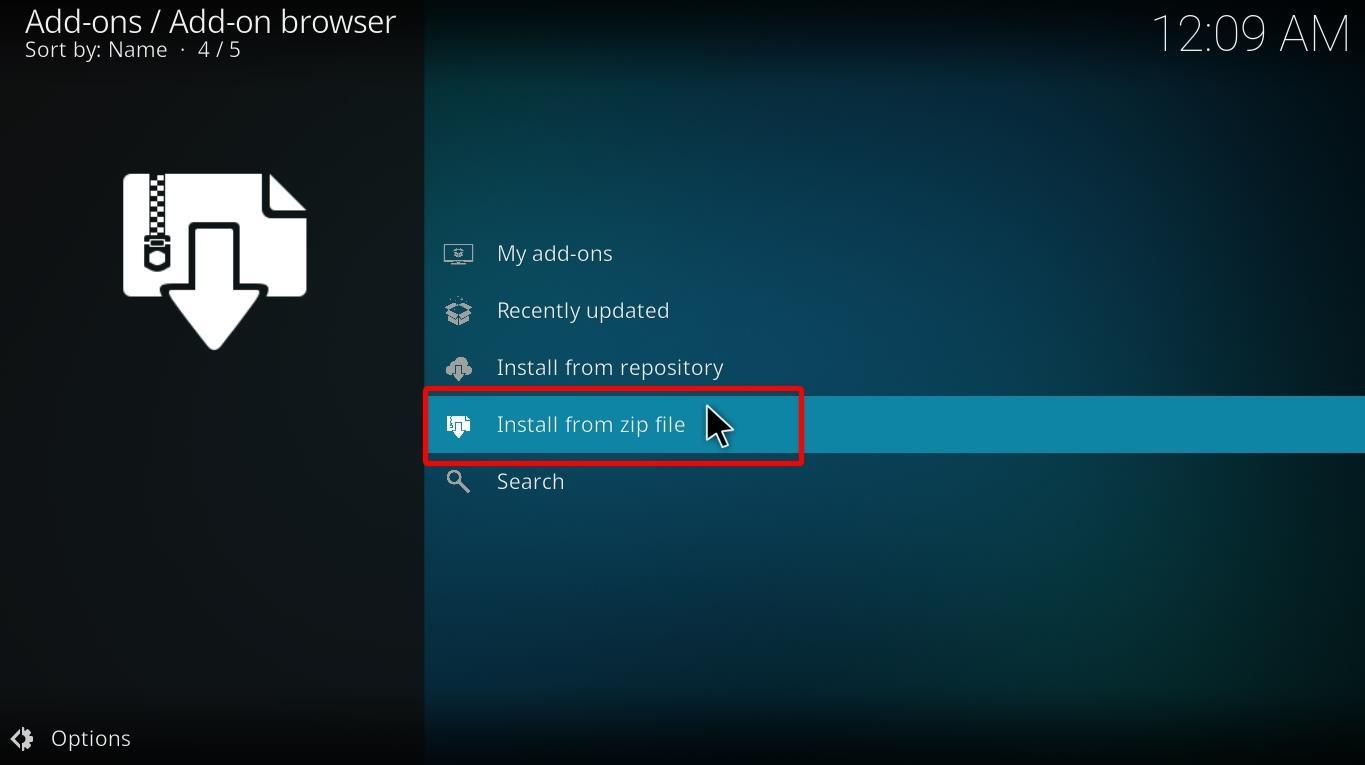
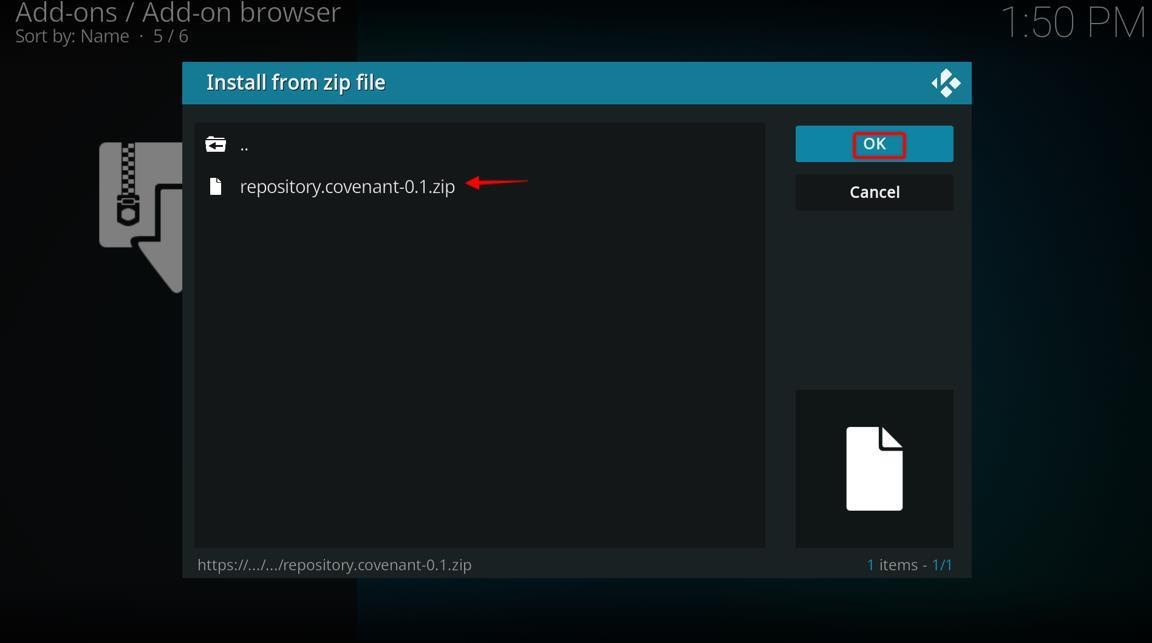
We have divided the installation process into a few easy steps and will take you through them all. The process is straightforward, and you are going to enjoy the results. So, let’s dive right into the process.
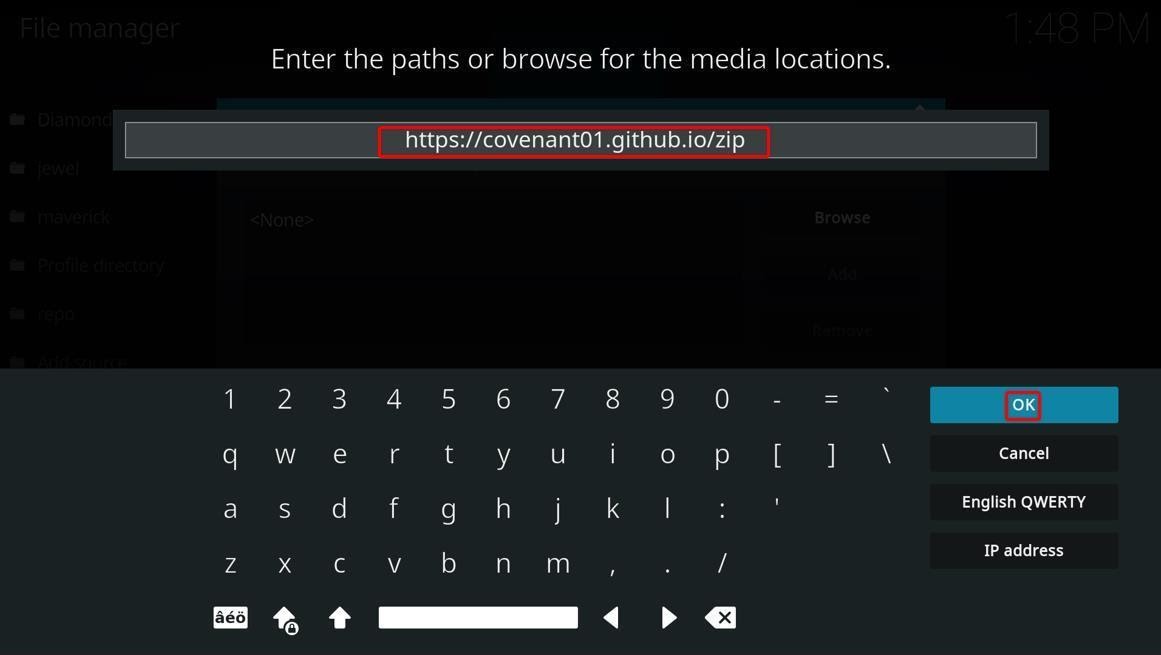
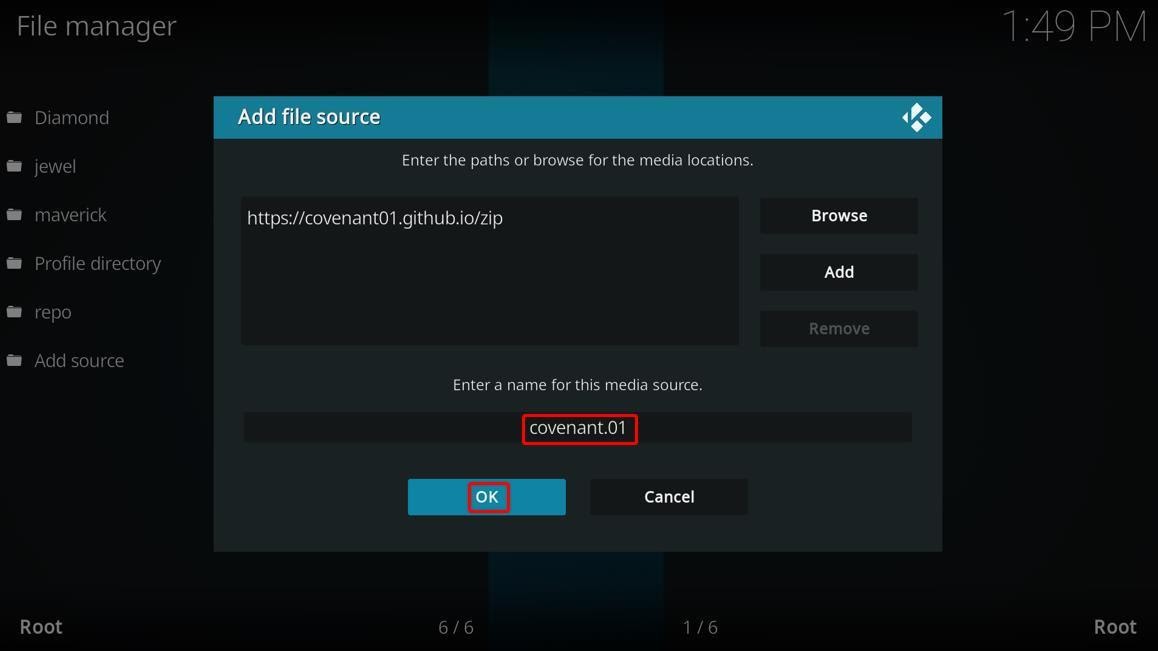
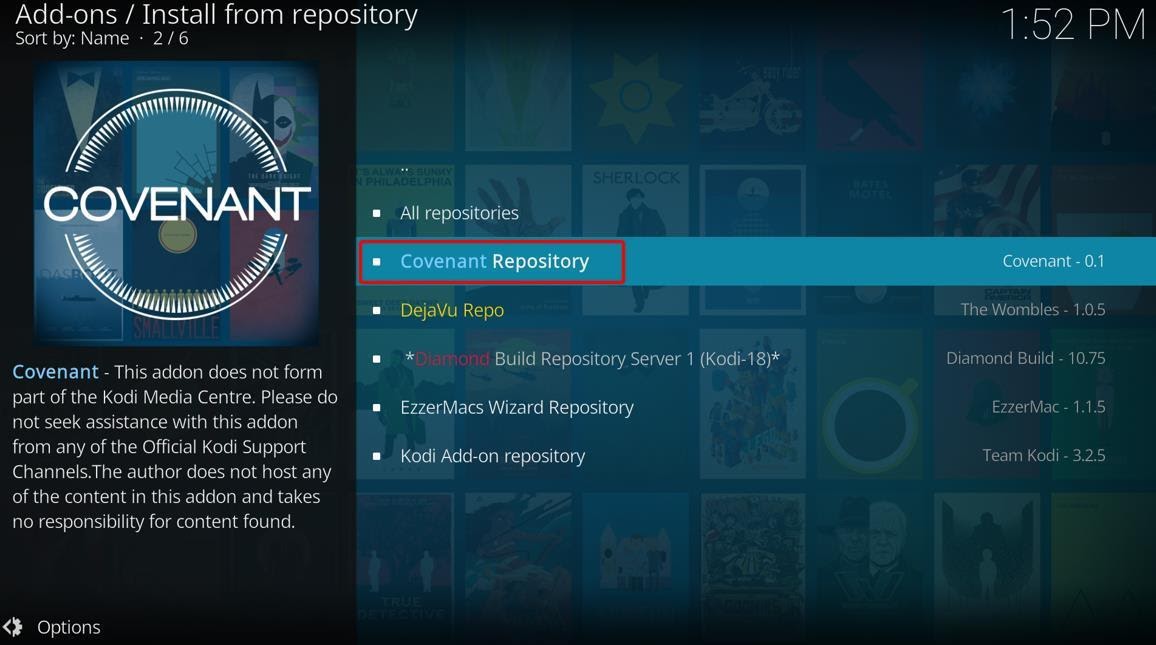
Find and install repository.covenant-x.x.zip and wait for it to finish the installation.
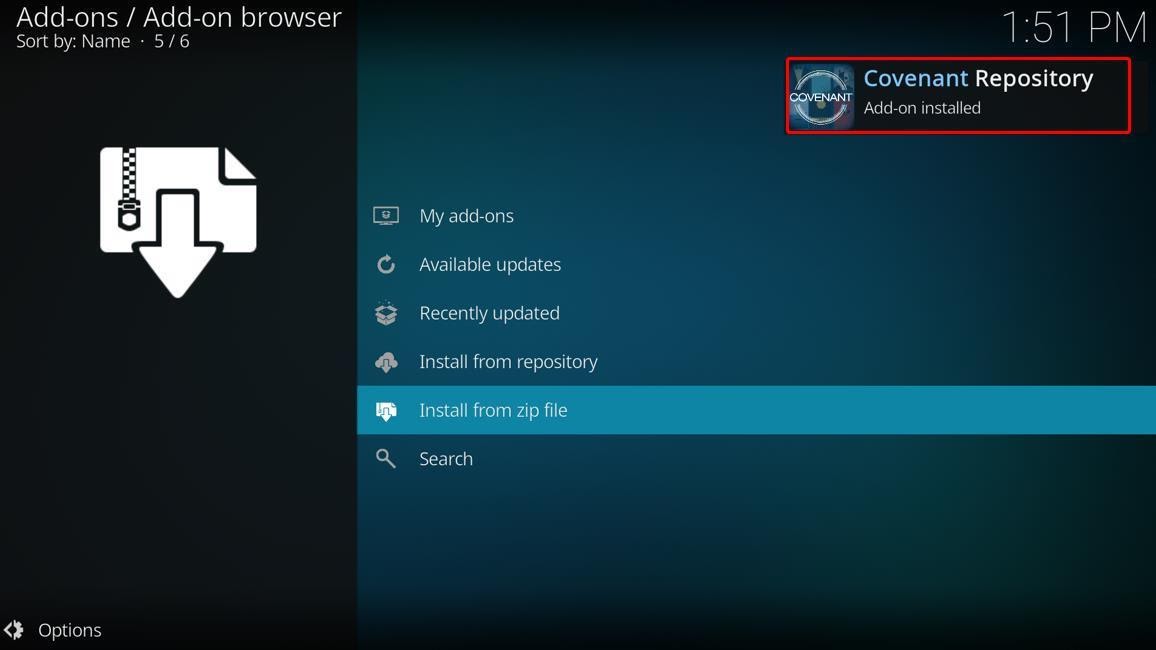


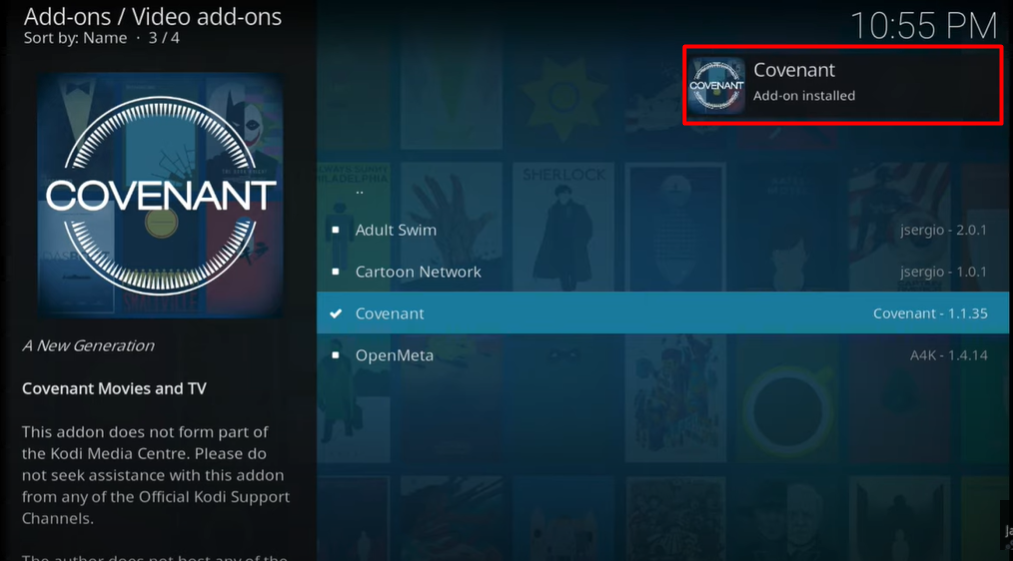
When this pop-up appears, it means you successfully installed Covenant on your Kodi/Firestick. Enjoy.
 Let us know if this tutorial has helped you and if there are any problems or any questions, feel free to let us know, and we will answer you.
Before you start streaming on Kodi, we would like to recommend you to consider using a VPN. Most of the time, your ISP, third parties, and government can monitor your online activity and keep track of everything you do online. This data can then get sold to interested parties for money. Usually, ads companies are interested in this data, but you don’t want your data to travel around the globe, whoever the interested party may be.
If you start streaming anything copyrighted, you can get into legal trouble and face legal consequences, including jail time. A good VPN can keep you safe by encrypting your data and keeping it private. This way, no surveillance parties can track your data and keep a record of it for themselves.
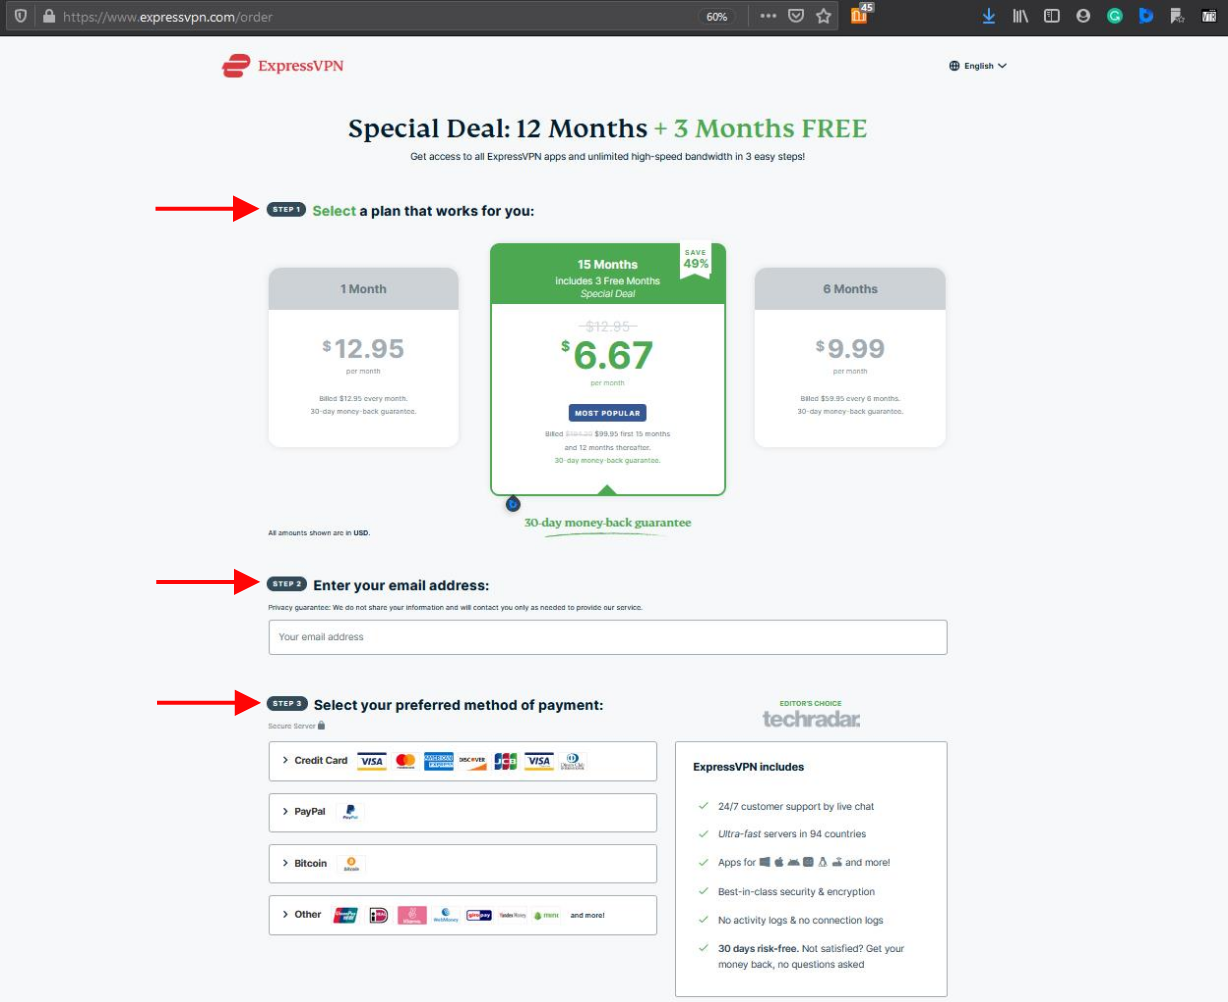
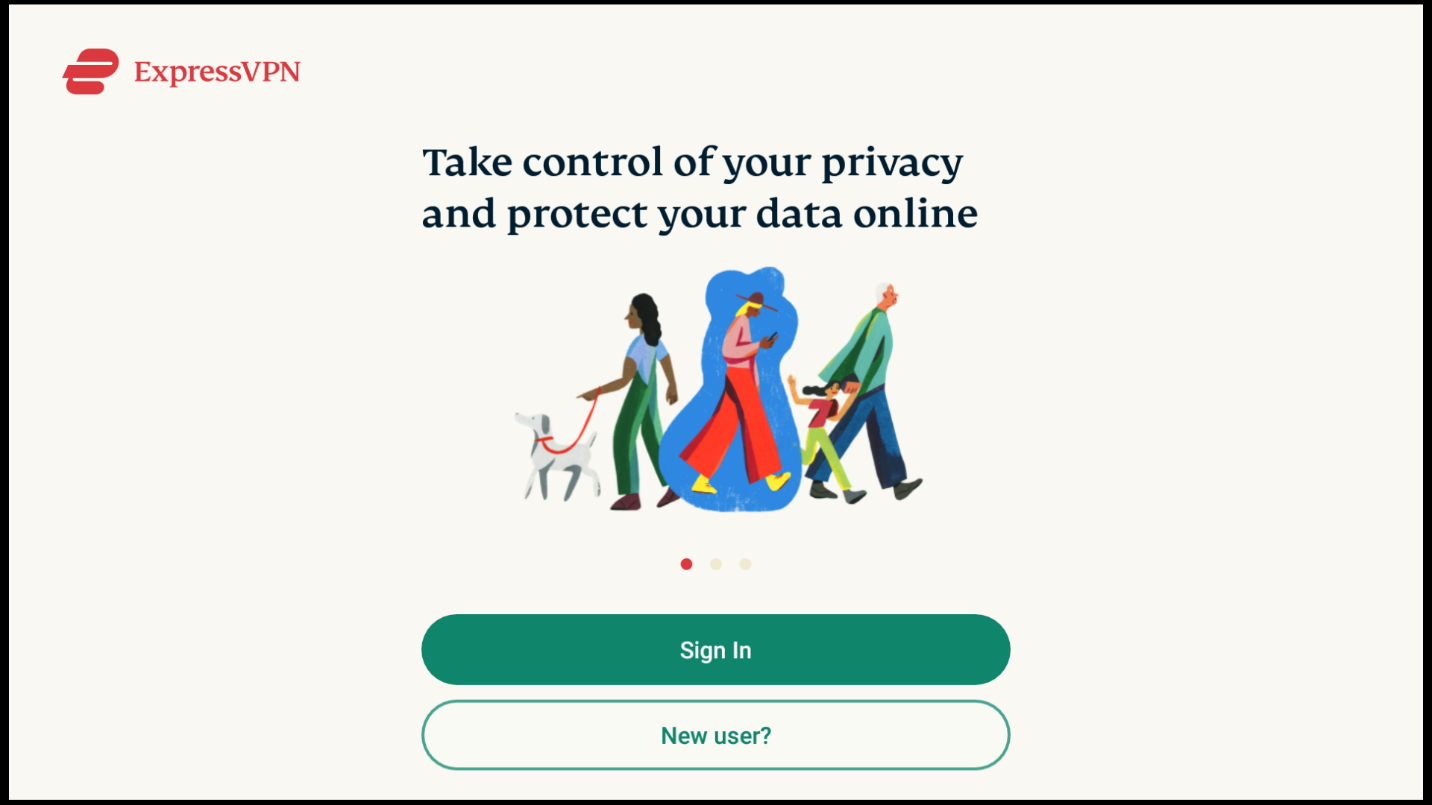
We highly recommend ExpressVPN, as we use it ourselves. ExpressVPN has become the favorite VPN for every internet user who wants to use a VPN. Even if you are new to VPN and just want to check it out, ExpressVPN gives you a 30-days money-back guarantee. Meaning you can use ExpressVPN for 30 days, and if you are not satisfied with its services, you can ask for your money back. It is a win-win deal, and we highly advise you to take advantage of it.
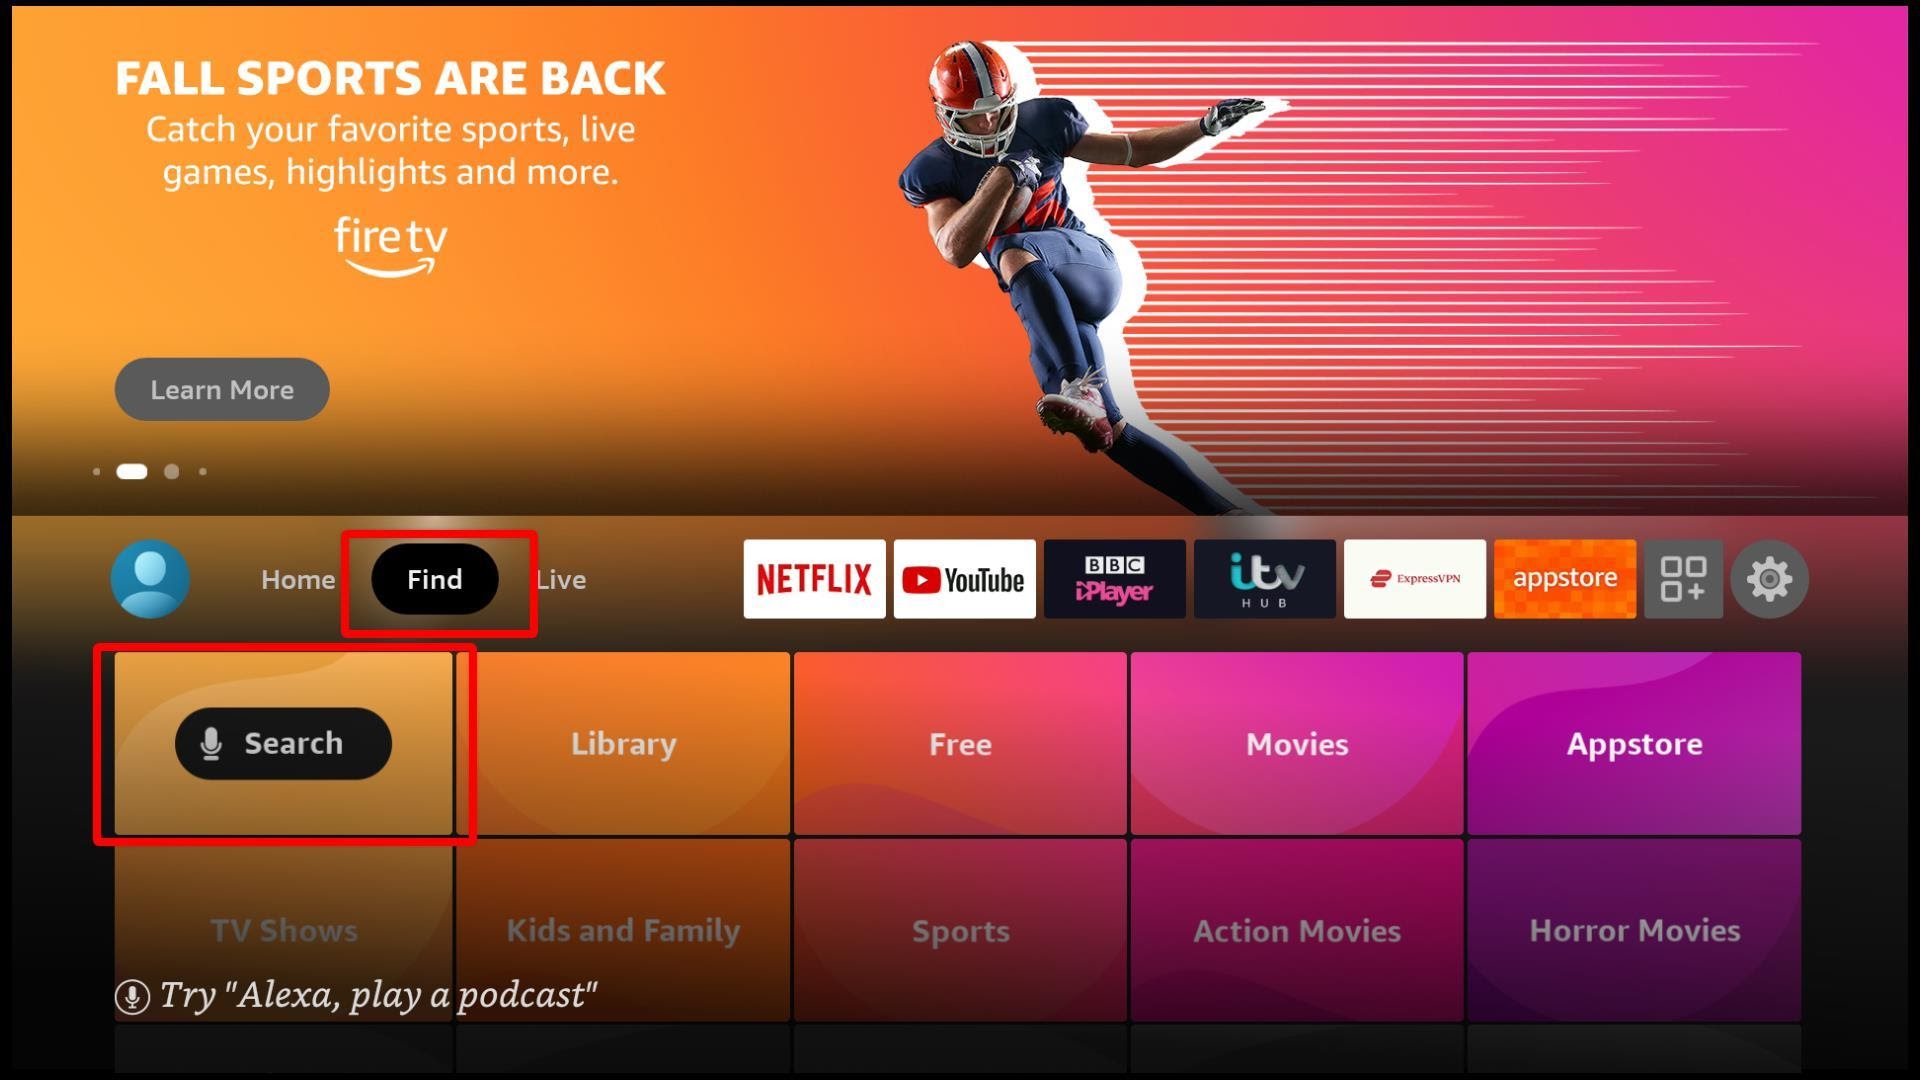
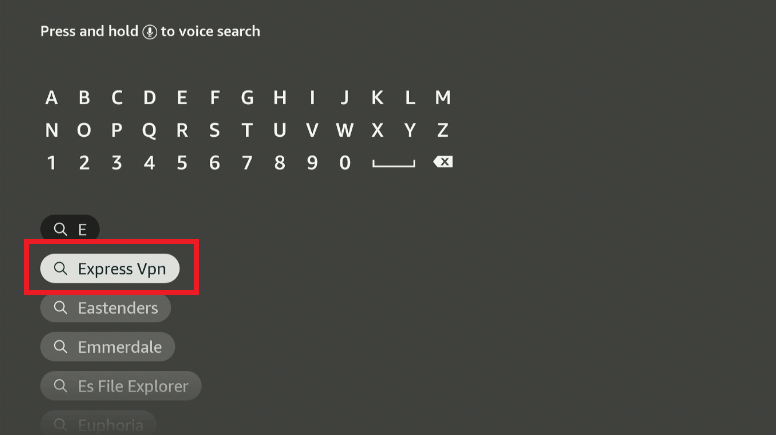
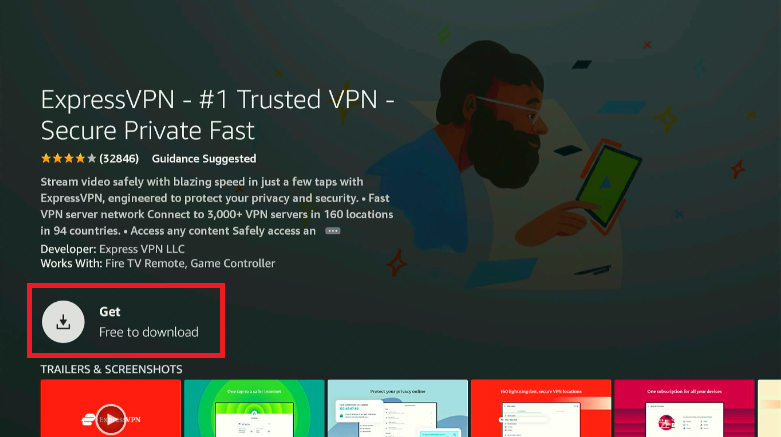
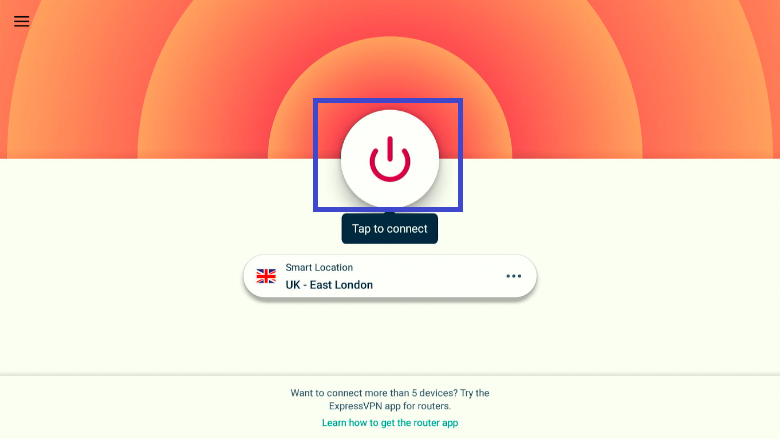
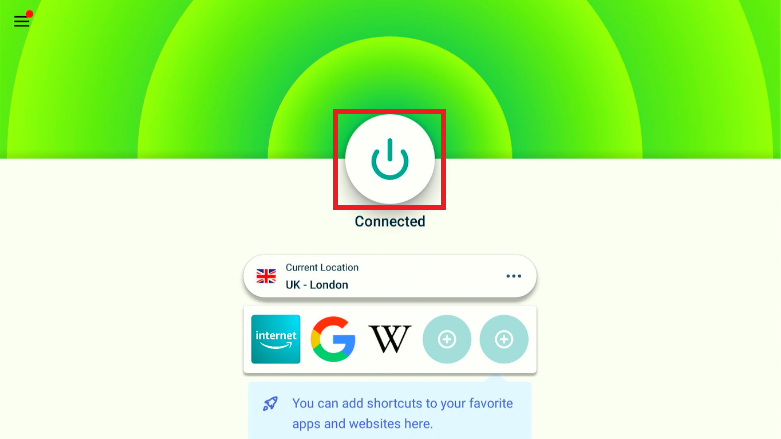
Setting up ExpressVPN is simple. Here is our simple guide on how to install and start using ExpressVPN:
You might sometimes face problems while using Covenant addon in Kodi. Sometimes Covenant Kodi addon isn’t working, and sometimes there are no streams available. We are going to discuss these issues below and will give you solutions as well.
A prevalent common problem for Kodi users is ‘No Streams Available’ for Kodi addons. This happens with Covenant addon as well, but you don’t have to worry. There is a way to fix this problem. You can install Real Debrid on Kodi for Firestick to fix it. Real Debrid gives you plenty of streaming links in HD quality, and will ensure that you will not face missing content or unstable streaming links again. Even though Real Debrid is a fantastic thing to add to Kodi for enhancing your streaming experience, there is a catch. Real Debrid will keep a log of all the data you access, which is why we highly recommend you to use a VPN while using Real Debrid.
Lambda has stopped updating Covenant Kodi addon. You can’t get Covenant from the old Colossus repo as it has been shut down. You can still install the Covenant addon from the Covenant repo, as we have demonstrated in this article.

You need to load content from reCAPTCHA to submit the form. Please note that doing so will share data with third-party providers.
More InformationYou are currently viewing a placeholder content from Turnstile. To access the actual content, click the button below. Please note that doing so will share data with third-party providers.
More InformationYou are currently viewing a placeholder content from Facebook. To access the actual content, click the button below. Please note that doing so will share data with third-party providers.
More InformationYou need to load content from reCAPTCHA to submit the form. Please note that doing so will share data with third-party providers.
More InformationYou are currently viewing a placeholder content from reCAPTCHA. To access the actual content, click the button below. Please note that doing so will share data with third-party providers.
More InformationYou are currently viewing a placeholder content from Instagram. To access the actual content, click the button below. Please note that doing so will share data with third-party providers.
More InformationYou are currently viewing a placeholder content from X. To access the actual content, click the button below. Please note that doing so will share data with third-party providers.
More Information