Using Kodi and the best Kodi addons opens up a world of movies, TV shows, live TV, and sports. Most people don’t know how to get the best out of Kodi and just end up with a fairly standard media player installed instead. Learning how to install Kodi (or sideload it, if needs must!) and the top addons or builds is actually a relatively painless process. For most operating systems, you just need the Kodi downloadable file for your device and technical know-how to sideload addons or builds.
If any of those are alien to you, don’t worry. This guide will help you install Kodi and its addons or the best Kodi builds on the most popular devices on the market. All you need to do is read on and get ready to enjoy everything that Kodi has to offer.

Kodi is available on a wide range of devices, including the Amazon Firestick, Windows, and macOS. But because these devices and their OSs are so different, you need different approaches.
You will find guides for installing Kodi on the following devices:
Find the guide that fits your chosen device or devices and get ready to install and use Kodi.
Installing Kodi on your Amazon Firestick takes a few steps thanks to Amazon’s habit of snooping on what their customers are up to. Thankfully, they are not particularly difficult – you only need your Amazon Firestick and your Firestick remote.
Firstly, let’s stop the Firestick from sending our data. Failing to do this and then using Kodi addons leads to errors. Why? In the end-user agreement with Amazon, you agreed not to access copyrighted material to which you haven’t subscribed.
Amazon also blocks Firestick users from installing apps that aren’t in the AppStore. Since Amazon doesn’t support Kodi, we will have to go to the web to find Kodi.
We’re going to change two Firestick settings to allow us to use Kodi. One in Privacy Settings and one in Developer Settings.
Let’s tackle the privacy issue first.
On your Amazon home screen, go to Settings and then Preferences.
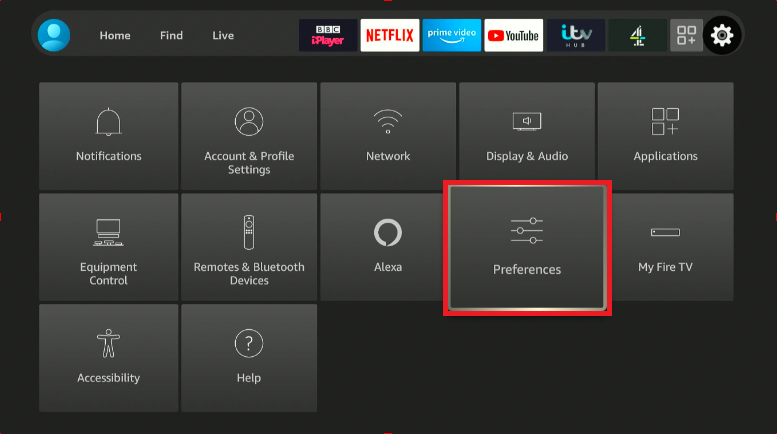
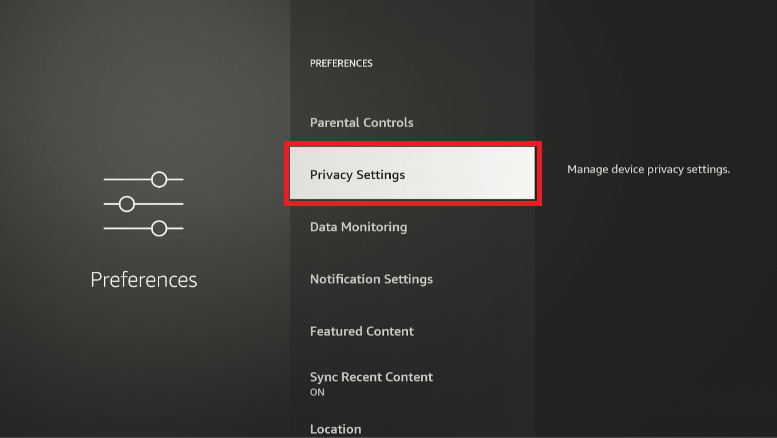
In Preferences, you will find Privacy Settings. Click on the Privacy Settings menu, and you will find these settings:
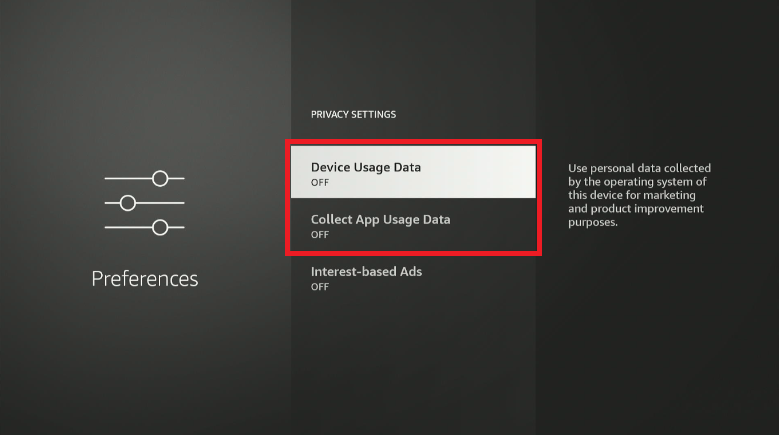
Make sure to turn OFF Device Usage Data and Collect App Usage Data. While they are ON, Bezos and his mates can see exactly what you’re watching. That’s bad at the best of times, but Amazon will block the installation and use of Kodi if you send that data back to them.
After that, navigate back to the home screen and then to Settings. This time, open up My Fire TV.
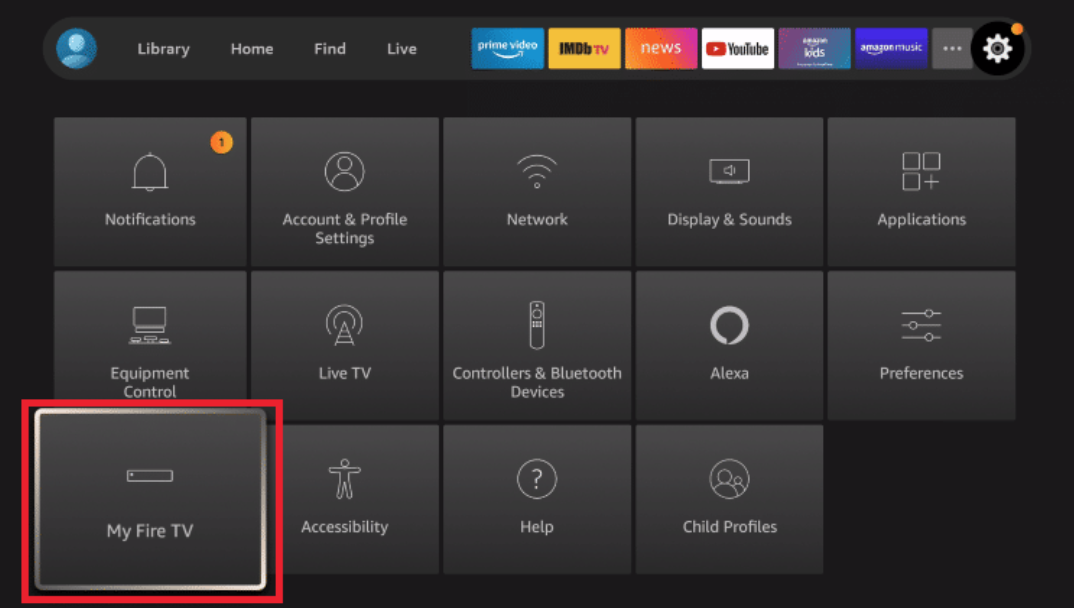
In My Fire TV, find Developer options.
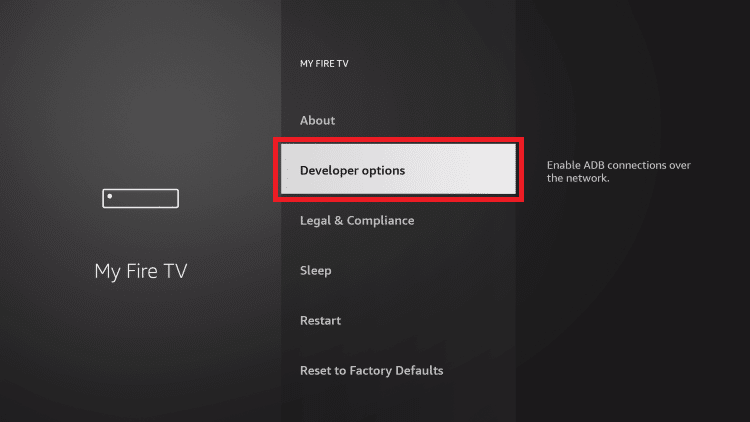
We want to allow the installation of unknown apps.
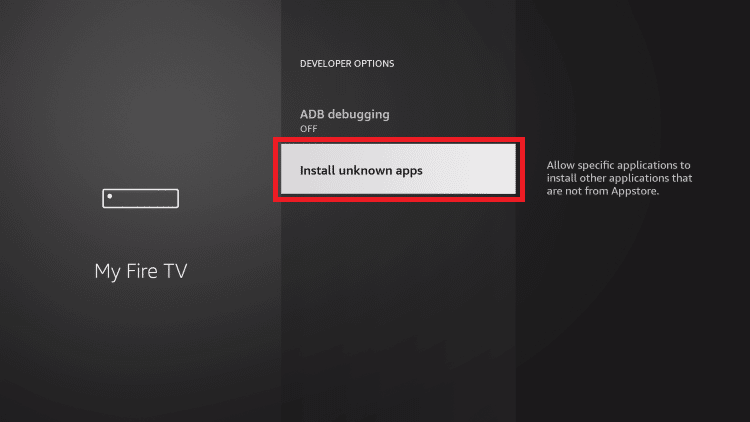
Sounds dangerous, right? It’s not. Because Kodi is not in the Amazon AppStore, it is considered an unknown app. That’s all it means.
Change the Install unknown apps setting to ON. Download the file and then install Kodi.
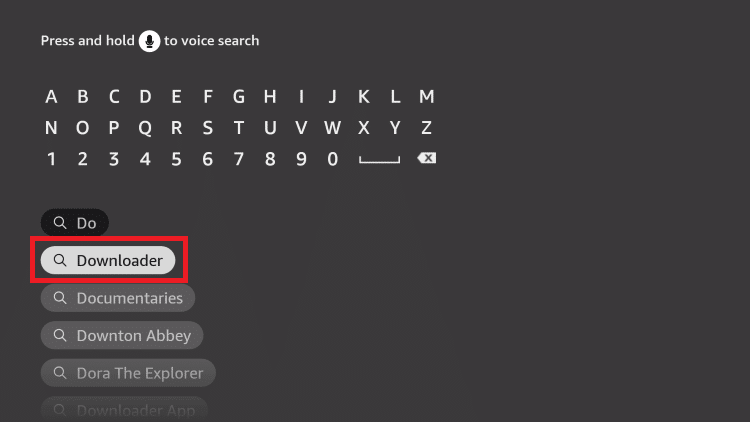
To install Kodi on your Amazon Firestick, you need to install a different application – Downloader.
Downloader is a free app available on the Amazon AppStore. You can find it through the Search function.
And then, you will find the application that looks like this:
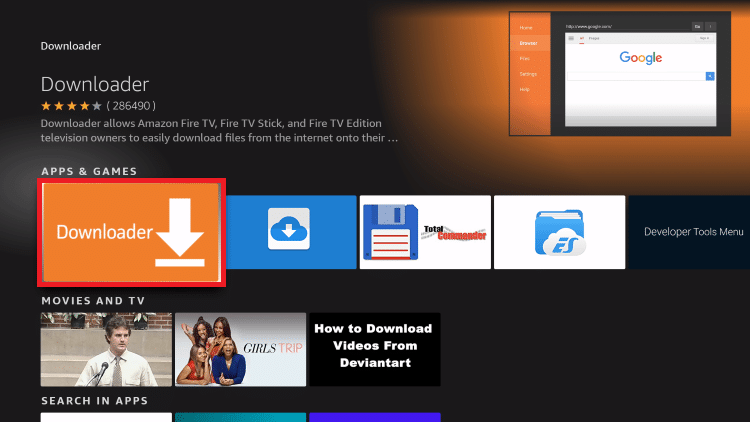
Now that Downloader is installed, open it and navigate to the search bar.
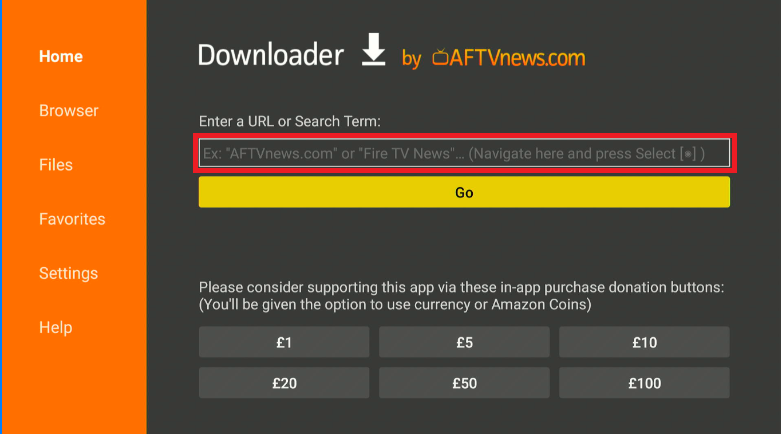
Because we are sideloading Kodi (i.e., not downloading it from the Amazon AppStore), we have to download the APK file from the internet. This is a package that contains the Kodi app, but it doesn’t have the same checks you’d receive from the App Store or the Play Store.
The Downloader features a search engine, so we can simply type “Kodi” into the search bar and navigate to this webpage:
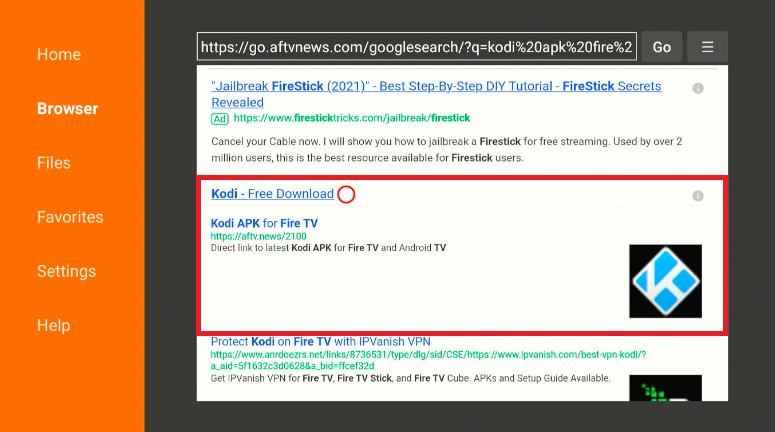
If you’re the kind of person who prefers to use URLs, search for https://aftv.news/2100 to get a direct link to the Kodi APK for Fire TV.
When you’re on the AFTV site, navigate to the most recent stable version of Kodi and click. This will start the download.
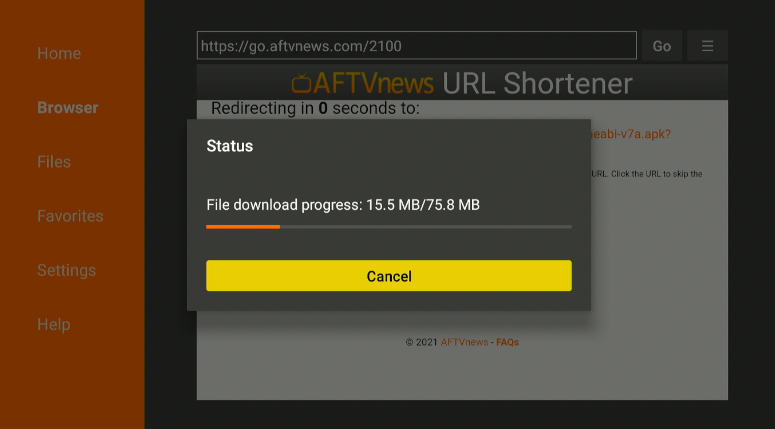 Once Kodi is downloaded, a popup will automatically appear. Click install, wait for the process to finish, and you will have Kodi installed on your Amazon Firestick.
Installing Kodi on an Android phone is easy. You can simply access it through the Google Play Store and download it straight to your phone. Here’s how I did it on a Redmi Note 9, but the same process applies to all Android phones.
The first step is to navigate to the Google Play Store and search for Kodi.
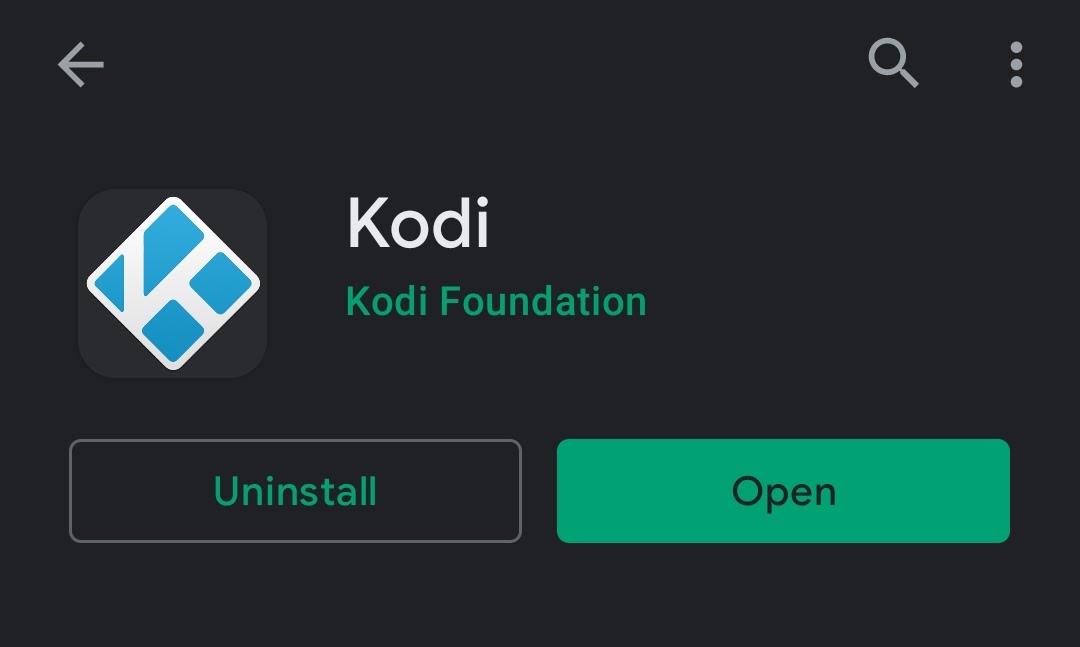
When you find it, click download.
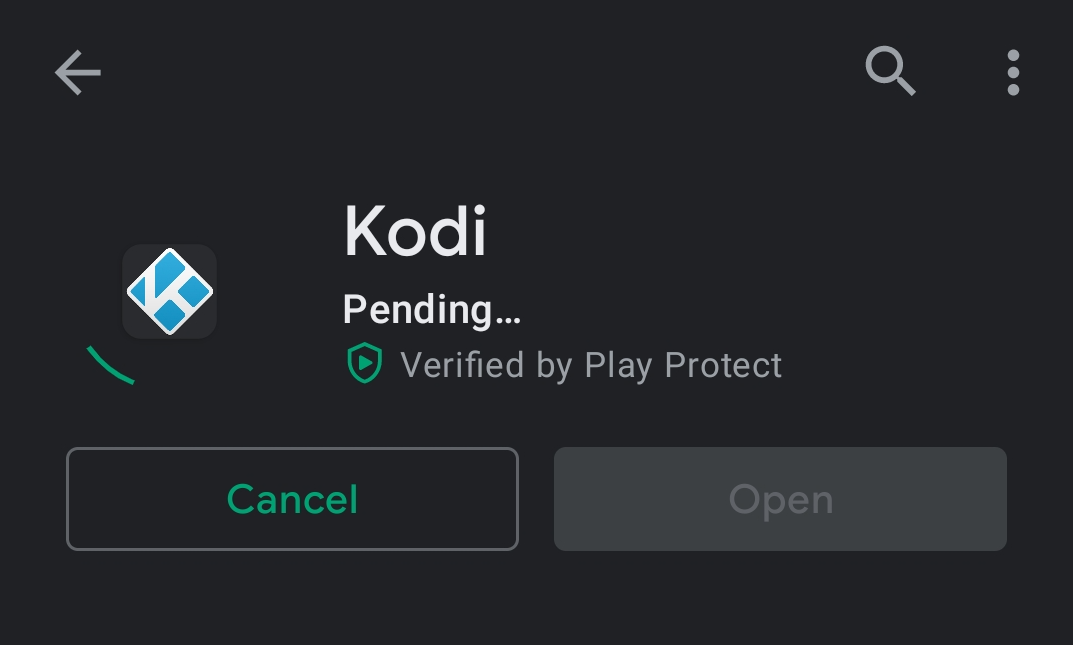
The installation process is pretty straightforward on Android, so just allow your phone to do its thing. As it has come through the Play Store, everything should be safe.
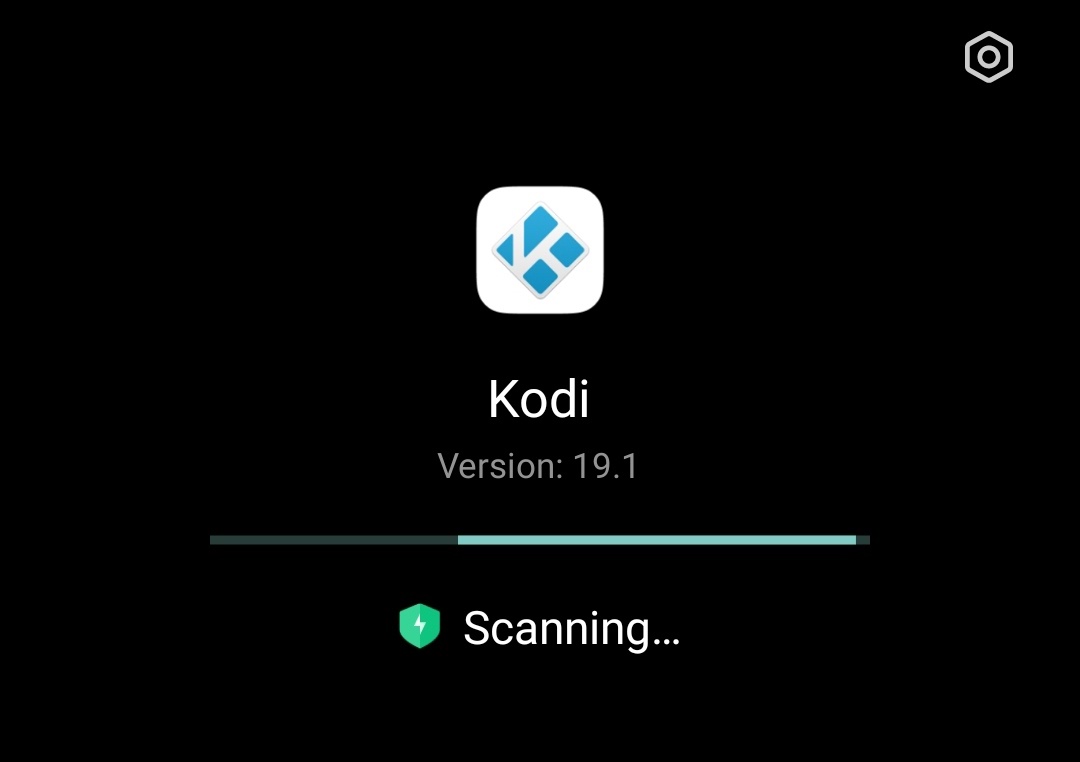
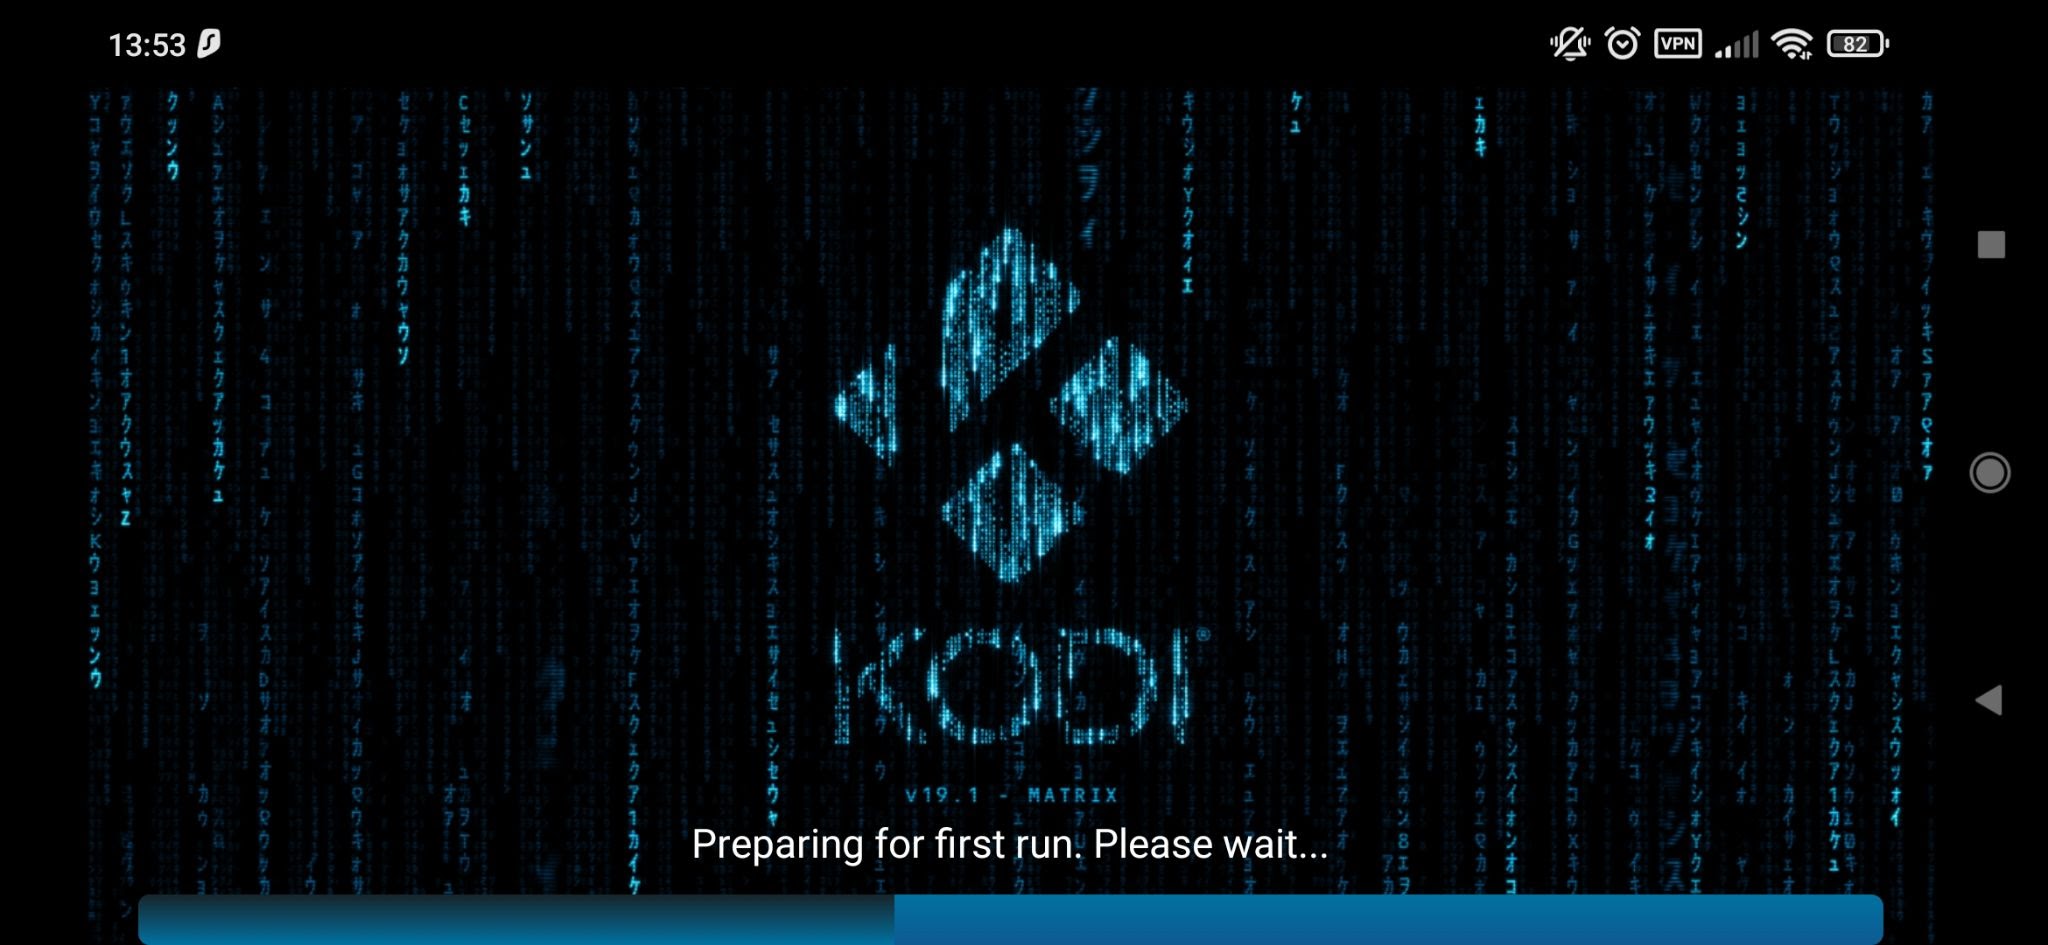
When the app is downloaded, open it and allow permissions to your media (otherwise, it’ll have nothing to play!).
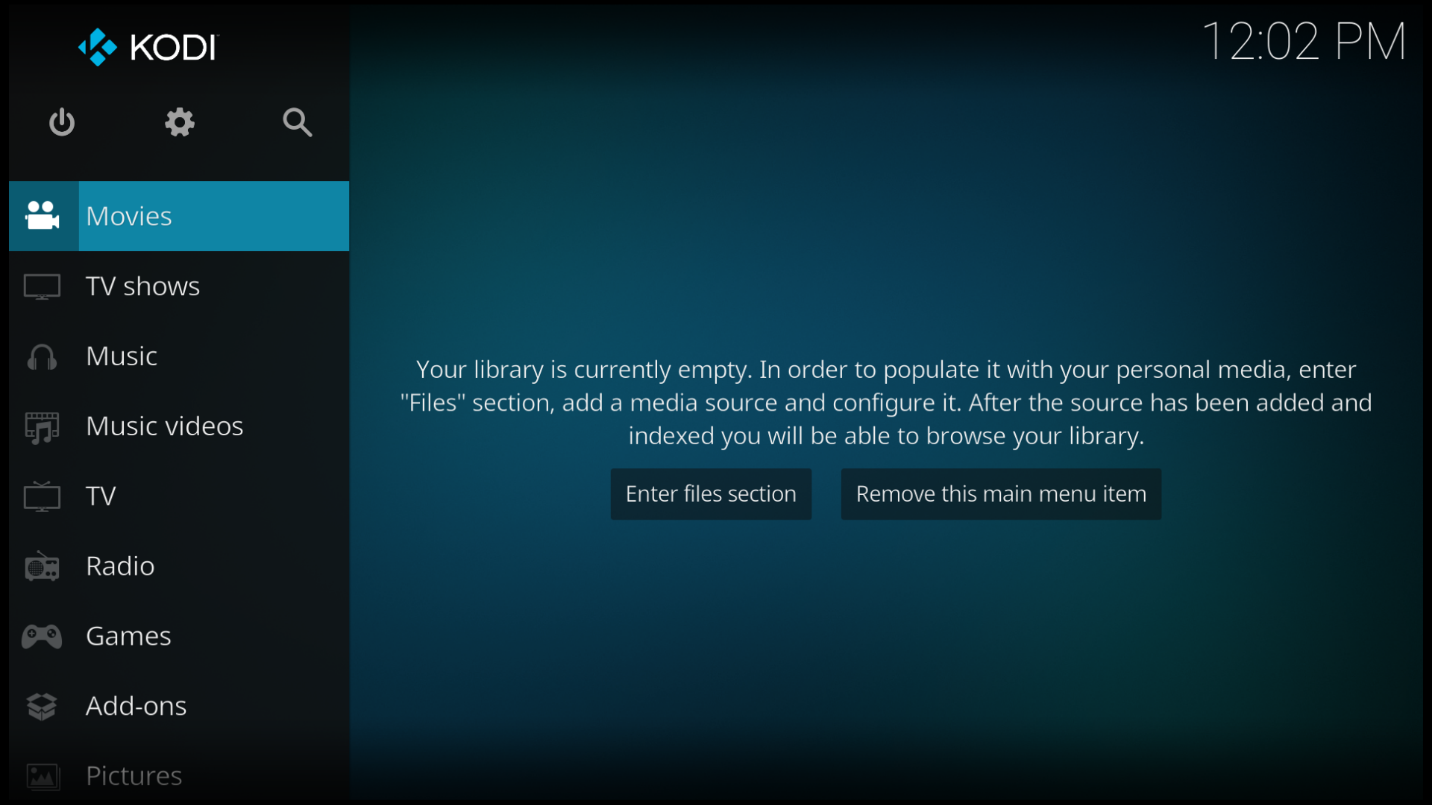
When that’s done, you can enjoy using Kodi on your Android mobile device.
Installing Kodi on an Android TV box is simple as well. If you have the Google Play Store installed on your Android box, follow the same process as the guide for an Android phone.
If the Play Store is not on your Android box, you have to sideload it. You will need a separate computer or laptop to do this, however.
Sideloading onto an Android box is more complicated than with an Amazon Firestick. Firstly, on your computer, navigate to the official Kodi download page.
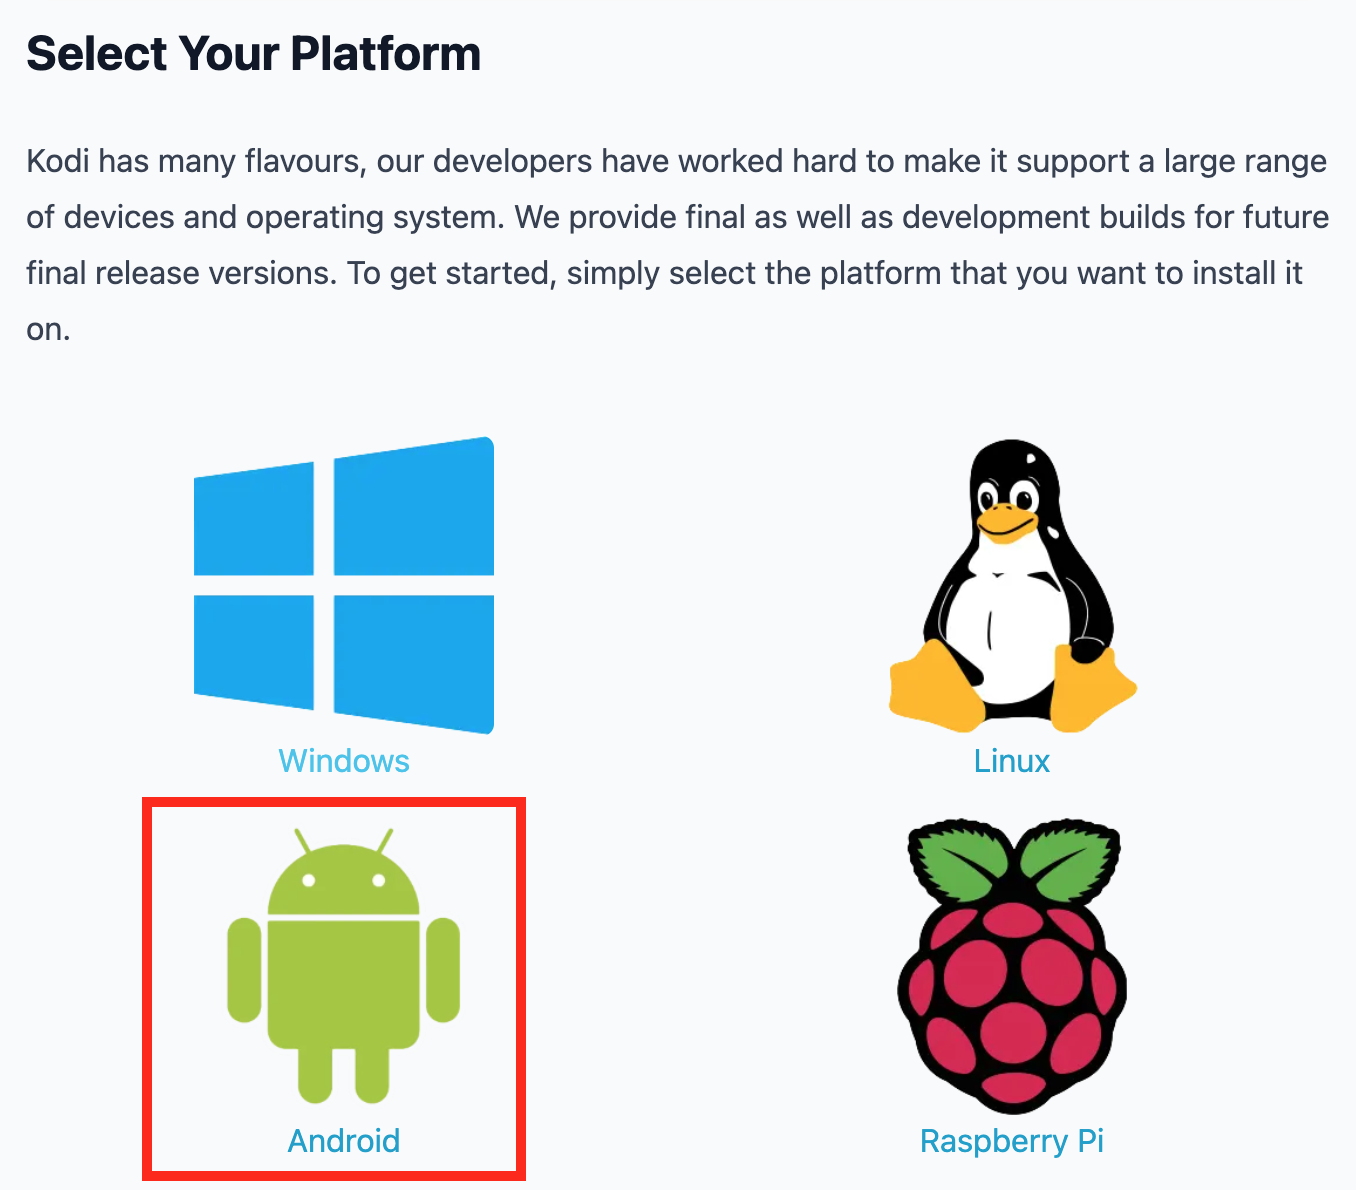

From there, you can download the necessary file as either ARMV7A (32-bit) or ARMV8A (64-bit), depending on your system.
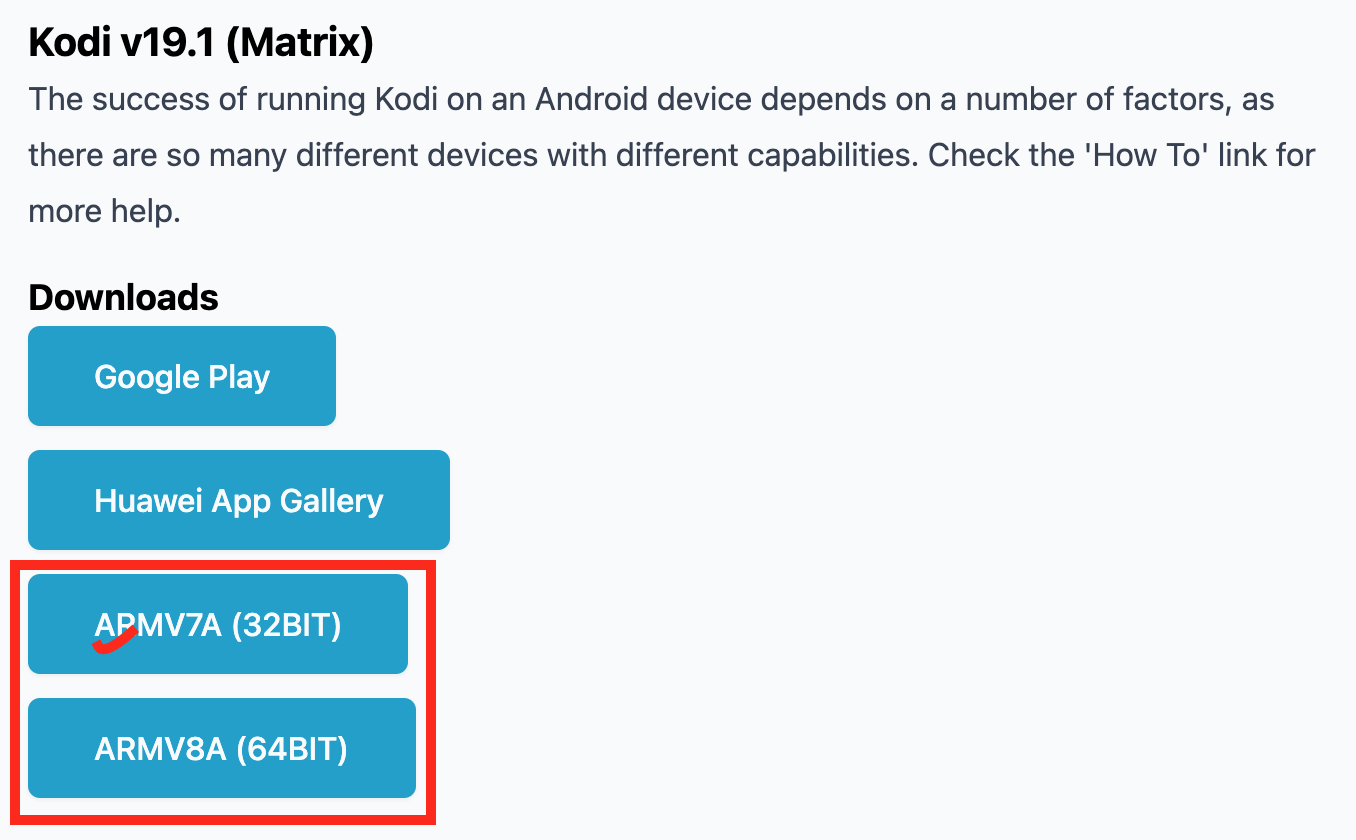

You could ignore the top options as we would have used them if they were available to us!
Save the file to your computer and connect your Android box via a USB. When your computer is connected to the Android box, open it up. Now drag the file you downloaded from the official Kodi download page over to your Android device, copy it over, and then unplug the box.
Now, you can plug the Android box back into your TV and stream your favorite media with Kodi.
Note: If you have to upload files via the computer method, you will need to do this to add any add-ons, builds, or other apps that are otherwise unsupported.
Note: This guide is for Windows 10. Following the same steps with previous versions of Windows should still work, but be sure to check if your system is 64-bit or 32-bit.
Windows is another system where it is easy to install Kodi. Microsoft products don’t mind third-party apps, so you can load Kodi directly from the Windows Store. If you would prefer not to use the official Microsoft App Store, be sure to take your Windows computer out of S mode.
S mode is Windows trying to protect your system from third-party and potentially malicious apps. While your version is in “secure mode,” you can only download apps and games from the Windows Store. Windows vets those products before rolling them out to you, but we can trust Kodi.
If you prefer to download Kodi from the Kodi website, you will need to turn off S mode. Navigate to the Windows Store and search for S mode.
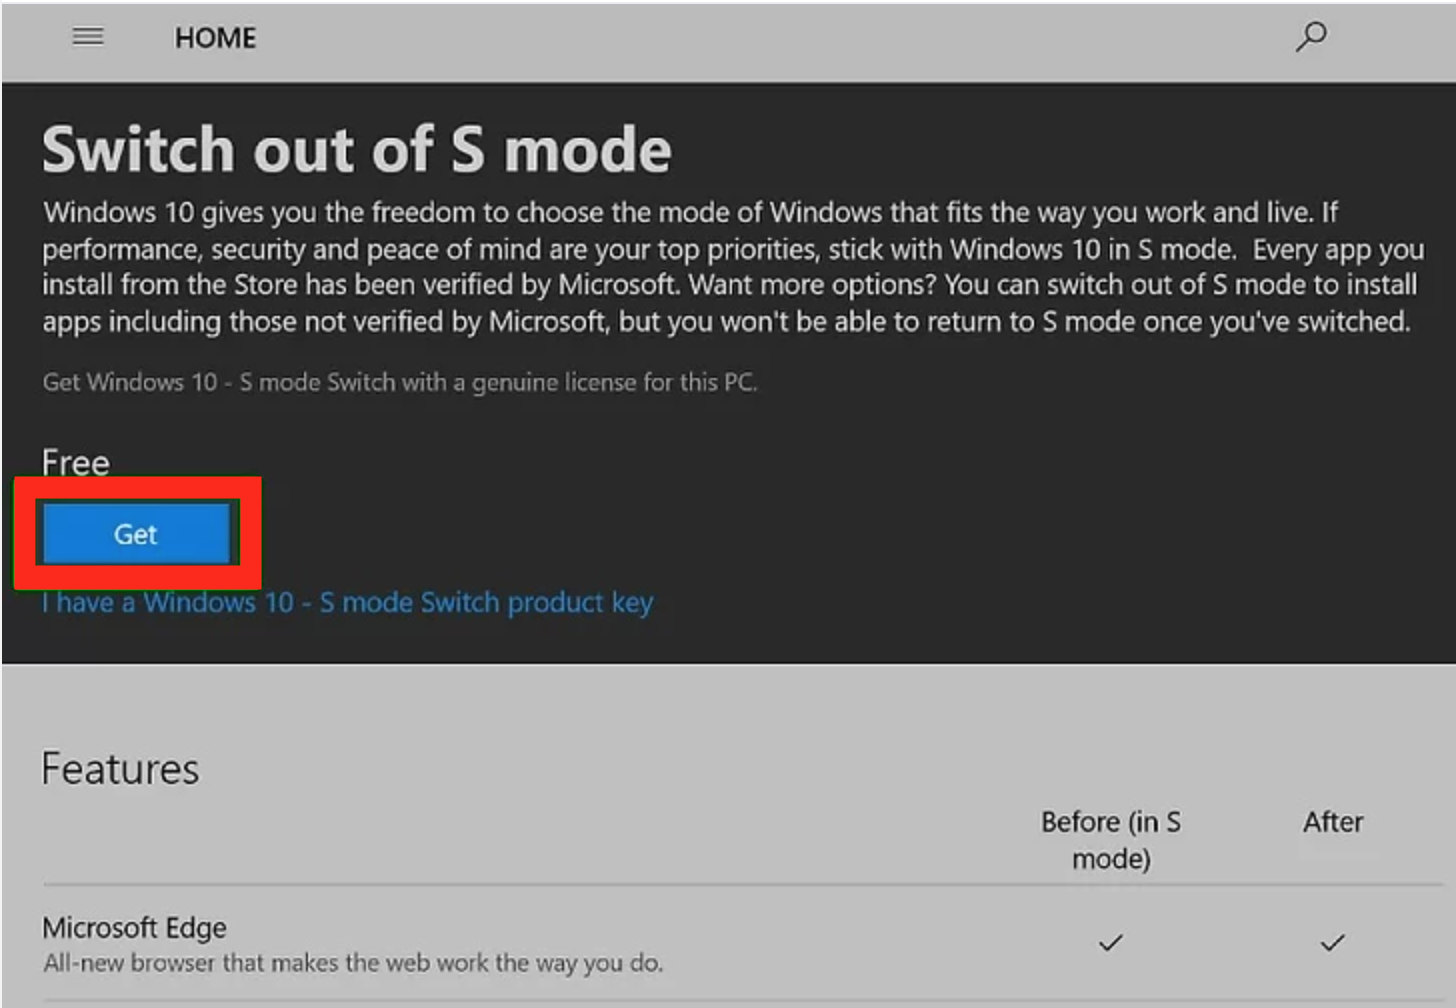

It’s free and allows you to download Kodi from the Kodi website.
Now that you’re out of S mode, you can navigate to the Kodi downloads page. Using your favorite browser, navigate to www.kodi.tv/download.
![]()
![]()
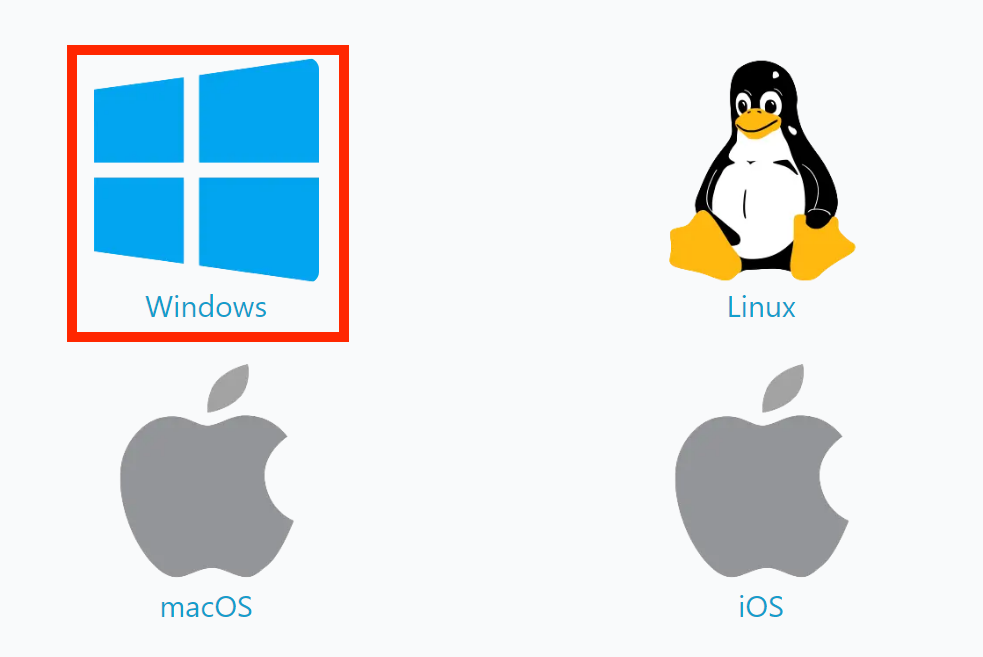

It’s in the top left, so you can’t miss it.
Click on the Windows icon, and you’ll see a selection of download options – Installer (64BIT), Installer (32BIT), and a link to the Windows Store.
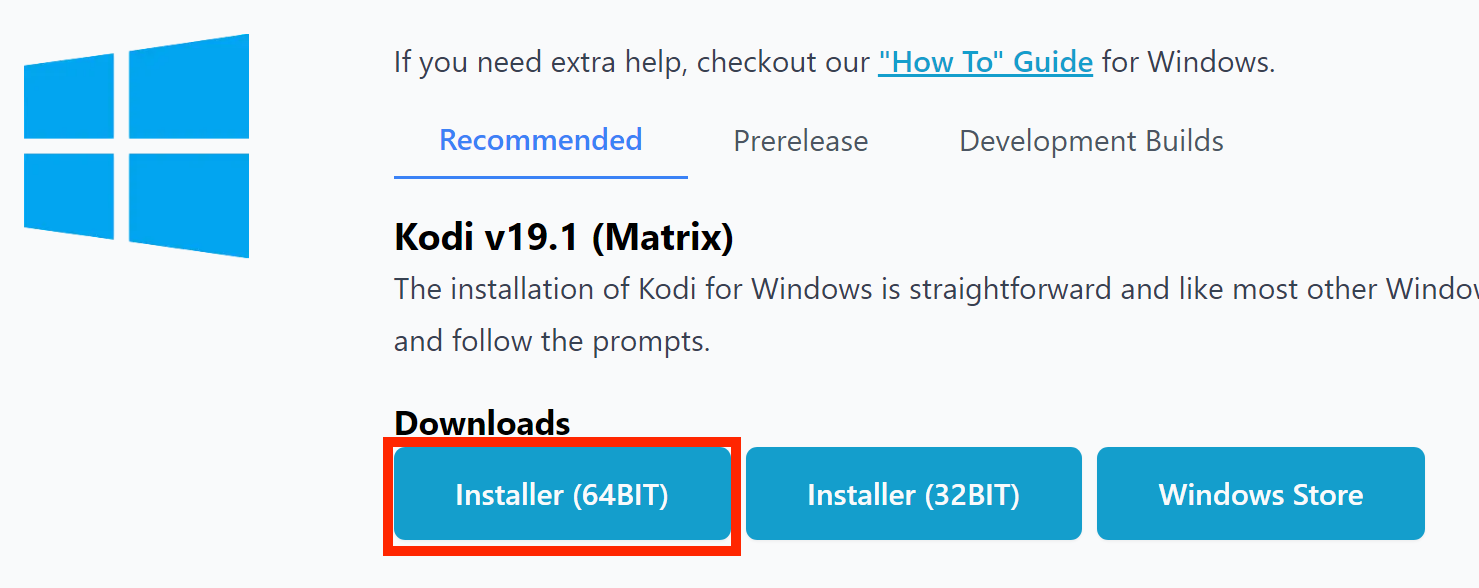

Most laptops and desktop computers run on the Windows 64-bit operating system, so we’re going to download that one.
If you’re not sure what version you are using, open the Start menu and type in “About your PC.” This will open the About window, where you will find a section labeled System type. This will either have 64-bit or 32-bit. Download the file from Kodi that matches the OS of your computer.
When you’ve downloaded the file, double click the file to open the Kodi Setup Wizard, which should look something like this:
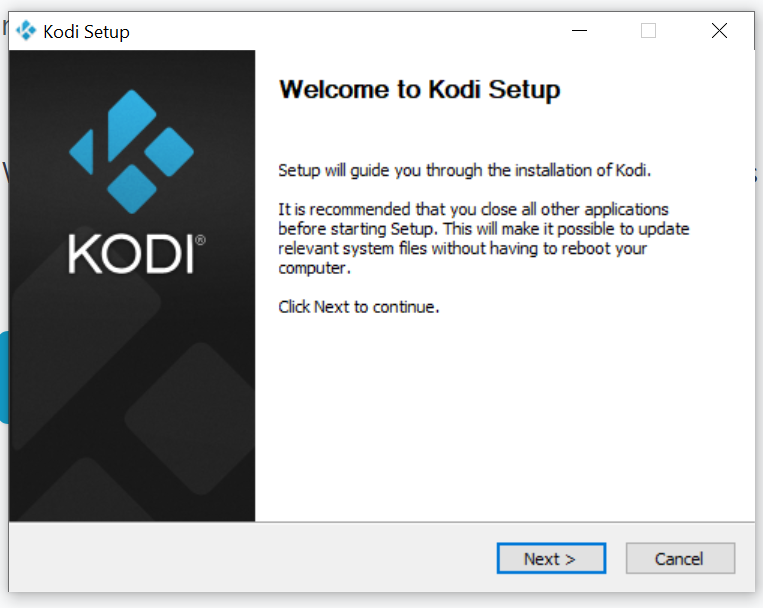

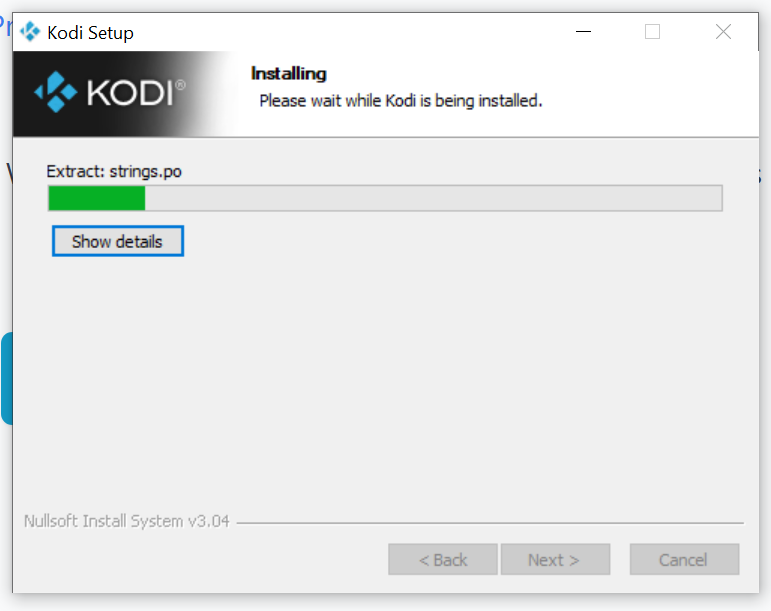

Allow Kodi to install, and you’re done.
When you open Kodi, it should look something like this:


Note: This guide is for macOS users currently running macOS version 11 – Big Sur. The same process applies to earlier versions of macOS, however.
Despite Apple’s tight-fisted approach to sideloading third-party apps onto macOS, it’s very easy to get Kodi on your Mac or MacBook. All you need to do is:
Because there is no way to install Kodi through the Apple App Store, we need to navigate to the Kodi Mirrors website. Open up your favorite web browser, then copy and paste http://mirrors.kodi.tv/nightlies/osx/ into the URL bar.


This website uses HTTP, so be sure to run the proper checks on anything you download.
And you will find a website that looks like this:


We want to use Matrix as it’s the most recent version, but there is still support for Kodi 18 Leia.
Click on Matrix, and you will be taken to the list of the available downloads for Kodi 19 Matrix.


Search for the most recent version to find the most stable and updated version of Kodi.
We want the most recent version as that will have the newest features and best security. Click on the top link to download the .dmg file.
When the .dmg file is downloaded to your Mac, double click on it and then drag Kodi over to your applications folder.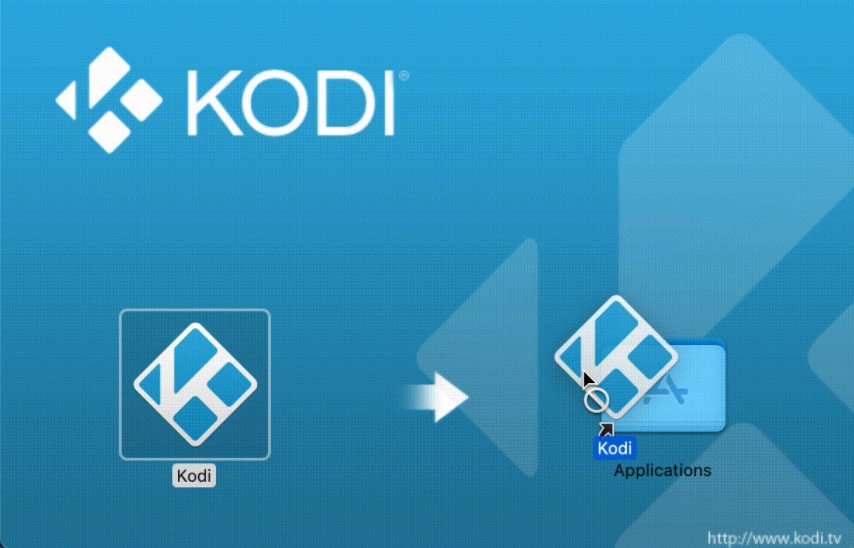

It’s just a simple click and drag into the Applications folder.
Then you can open it from your Applications folder.
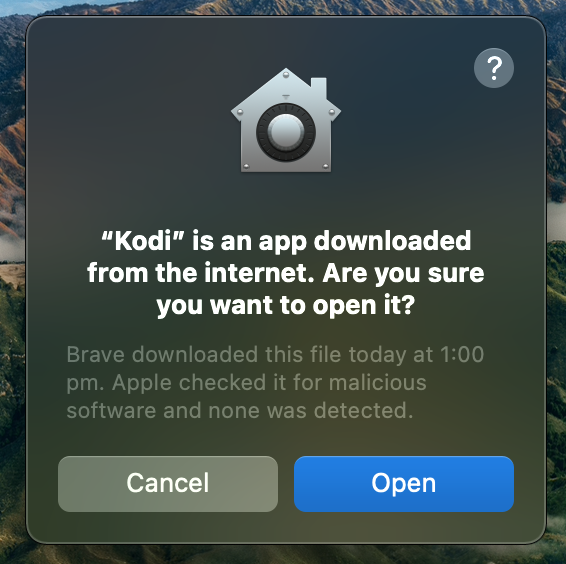

This is a standard warning about third-party apps – don’t worry about it too much.
Your Mac will prompt you to open Kodi because you have downloaded a third-party app. Apple automatically runs a check on all third-party apps, so any malware that is contained within the .dmg download should show up at this stage.
If there is no specific warning, click open.


And there it is – Kodi!
When you have done that, you will have Kodi installed on your system.
Sadly, getting Kodi onto iOS isn’t as easy as finding it in the App Store, either. You need to download the .deb file from the internet and install it locally.
Here’s the difficult part – you need to jailbreak your phone. It’s not an easy process, and you will need some technical knowledge to jailbreak your iPhone without bricking it.
If you feel confident, consult this guide from wikiHow on the easiest way to sideload apps on your Apple device: How to Jailbreak an iPhone
First of all, navigate to the Kodi Wiki – https://kodi.wiki/view/HOW-TO:Install_Kodi_for_iOS – which should look like this:
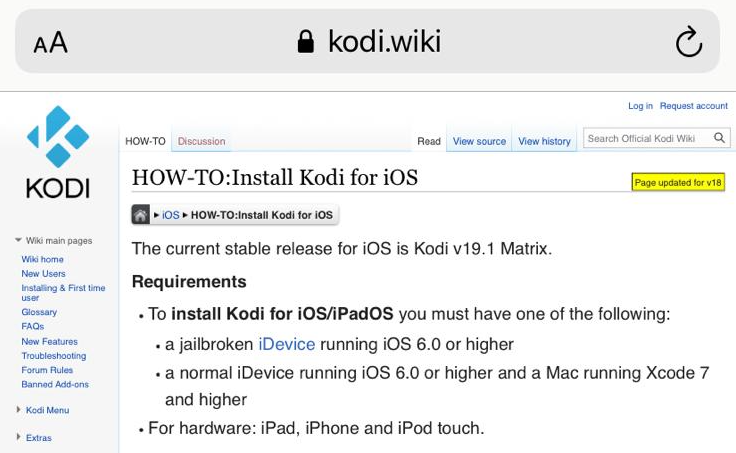


Click on the link to start the download.
When you click the link, you will see a popup like this.
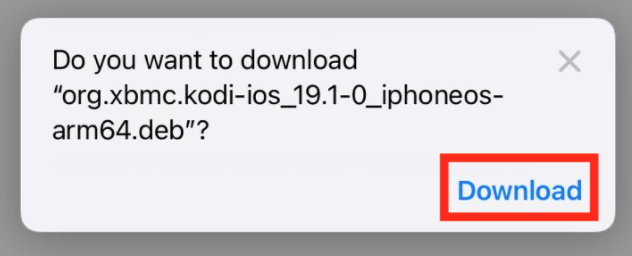

Click the download button to get Kodi.
When you have downloaded the package, open it and confirm the Kodi installation. Then you can use Kodi on your iPhone without any worries.
Kodi add-ons are additional pieces of software that you can install on your device to get extra functionality. The Kodi team describes the wide selection of addons like an App Store for the platform, but you won’t have to spend a penny.
Addons come in a couple of categories. You can find:
The most common addons combine music and video functionality to bring the best content to your front room.
All you need to do is find out how to install addons on Kodi.
There are two ways to install addons for Kodi – through the official Kodi webpage or through third-party, unofficial repositories.
Remember, third-party and unofficial aren’t dirty words when it comes to Kodi – it just means that the Kodi team hasn’t officially signed off on them. Most third-party Kodi addons are completely trustworthy.
Here’s the easy way. First of all, navigate to https://kodi.wiki/view/Category:All_add-ons either through the URL of your browser or via the Kodi website.


On this page, you will find two sections:
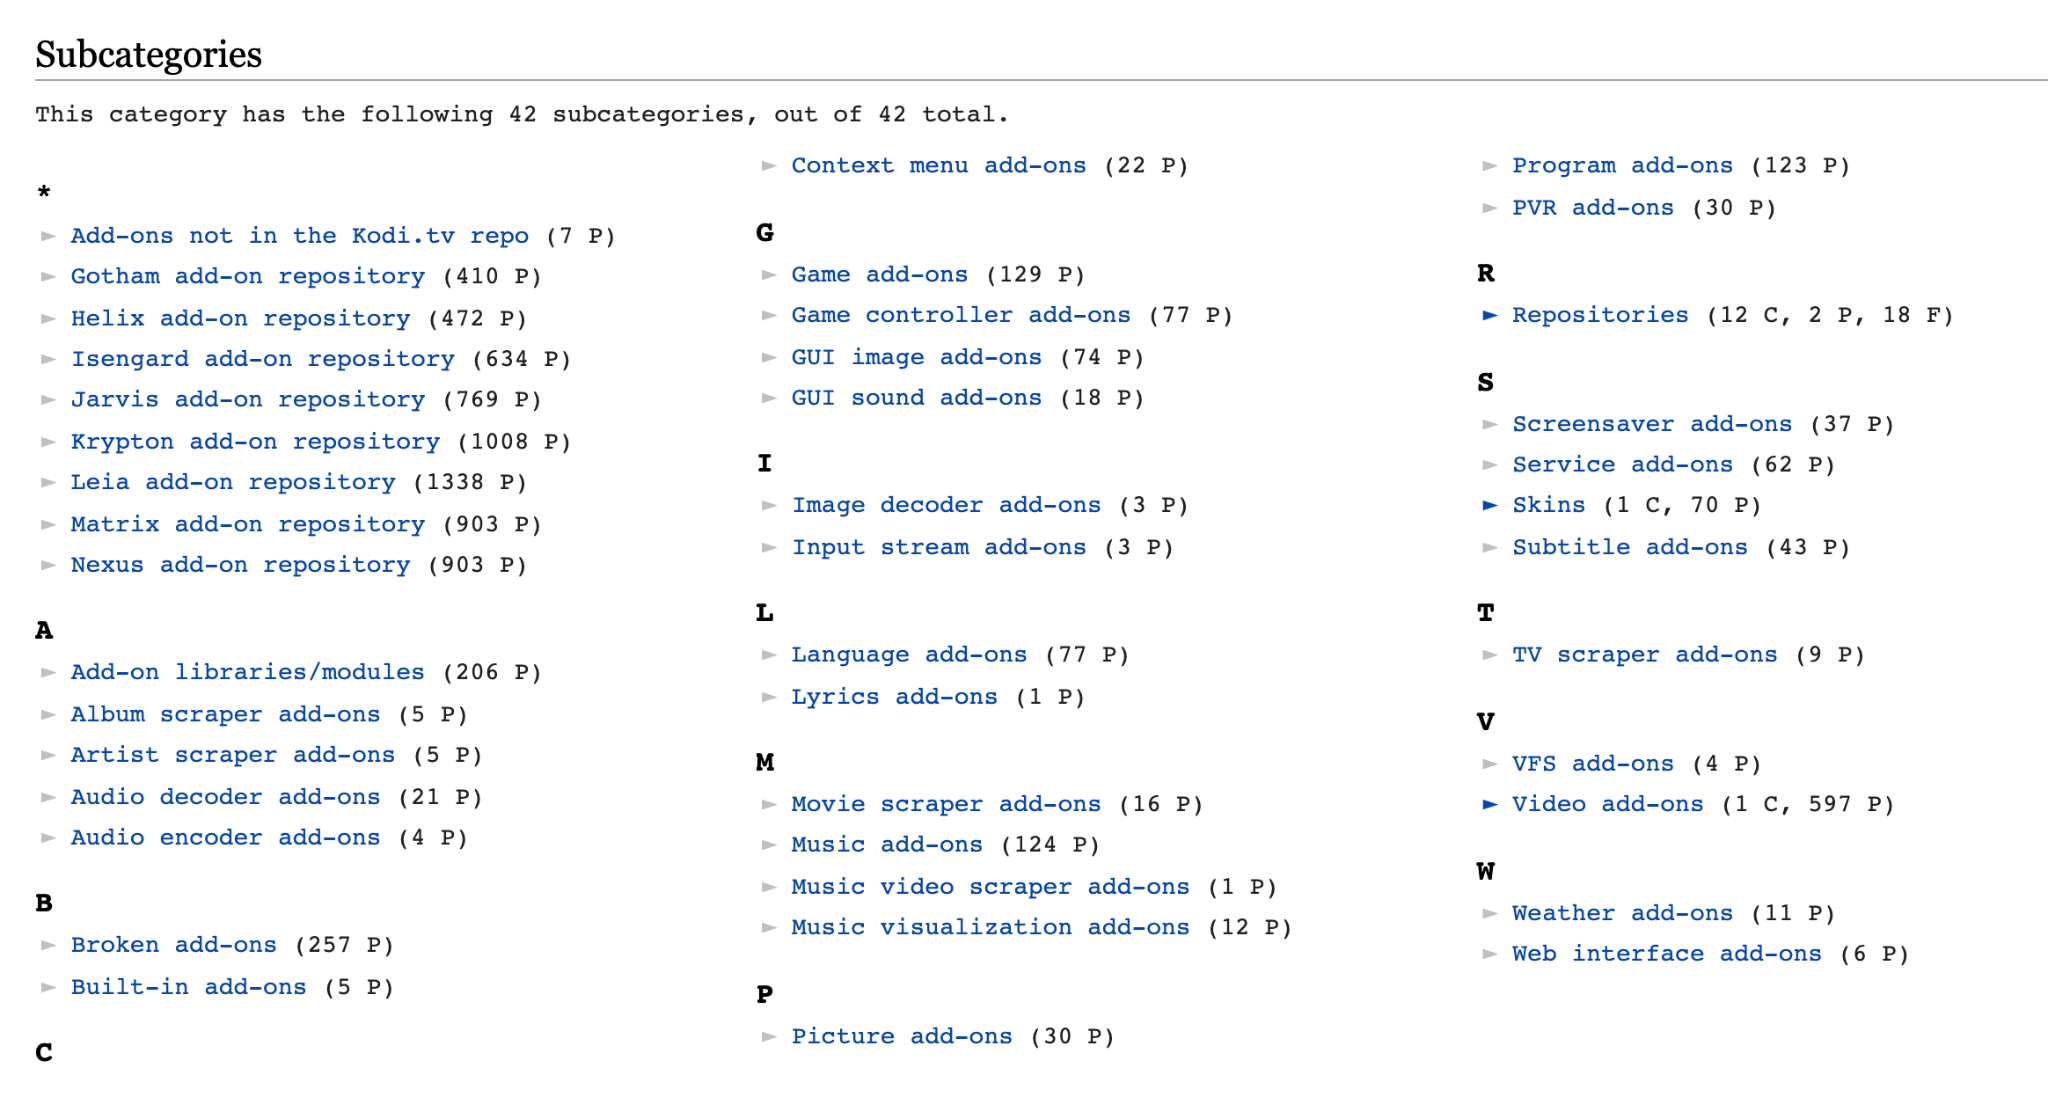

As the names suggest, the Subcategories section includes a variety of subcategories that will allow you to search for addons that are only for Kodi 19 Matrix or only Music Addons (or even only Broken Addons if you fancy flexing your developer skills).
The second section contains all official Kodi addons, which you can click to configure the add-on. Each addon has links that contain the appropriate instructions to install it on Kodi. Follow them, and you will have the add-on installed.
This way is a little bit more complicated, but it is a necessary step if you want to install highly-rated unofficial addons such as the Kodzi Kodi addon. Even then, putting unofficial addons onto Kodi is not extremely difficult – you only need to add in two extra steps.
First of all, navigate to your Kodi dashboard. For this demonstration, I used a MacBook running Big Sur.


Navigate to the Settings menu from the home screen by clicking on the cog in the top left-hand corner.
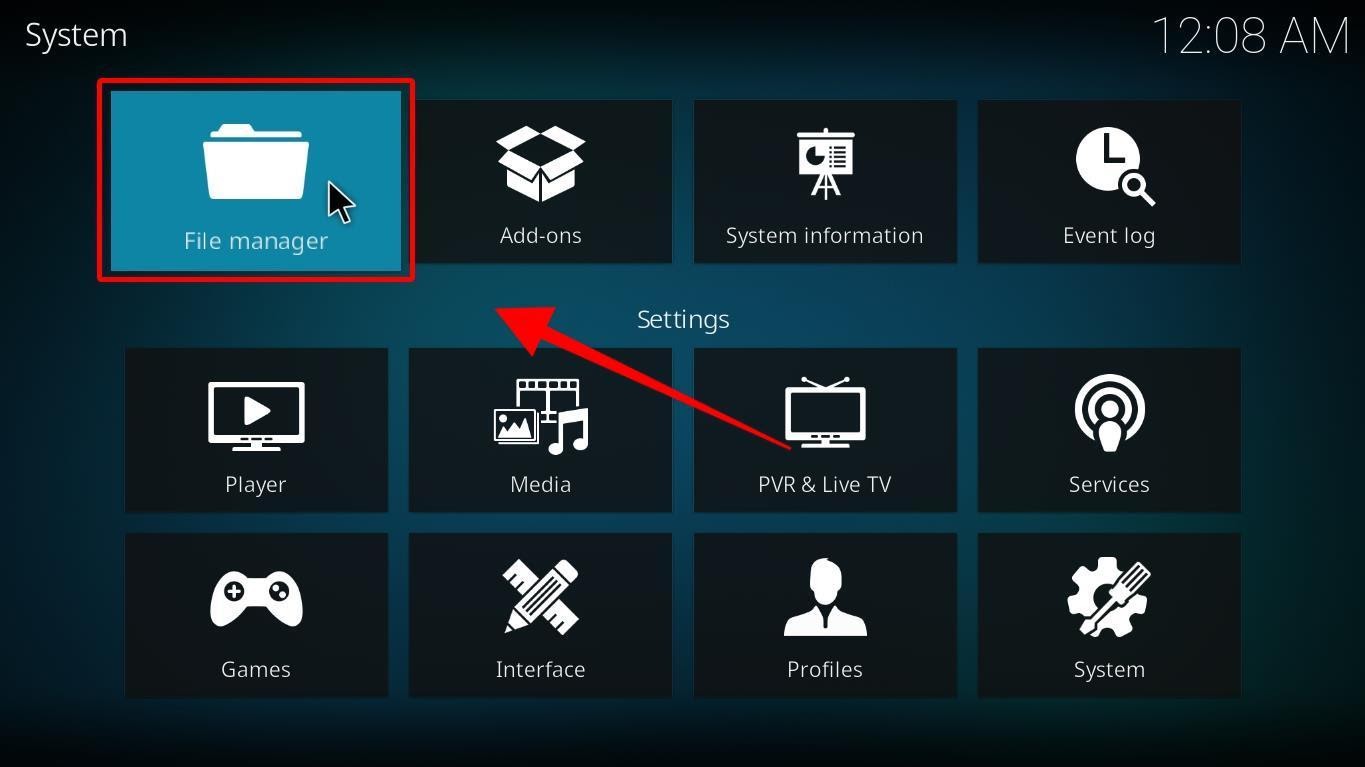

From there, open up File Manager.
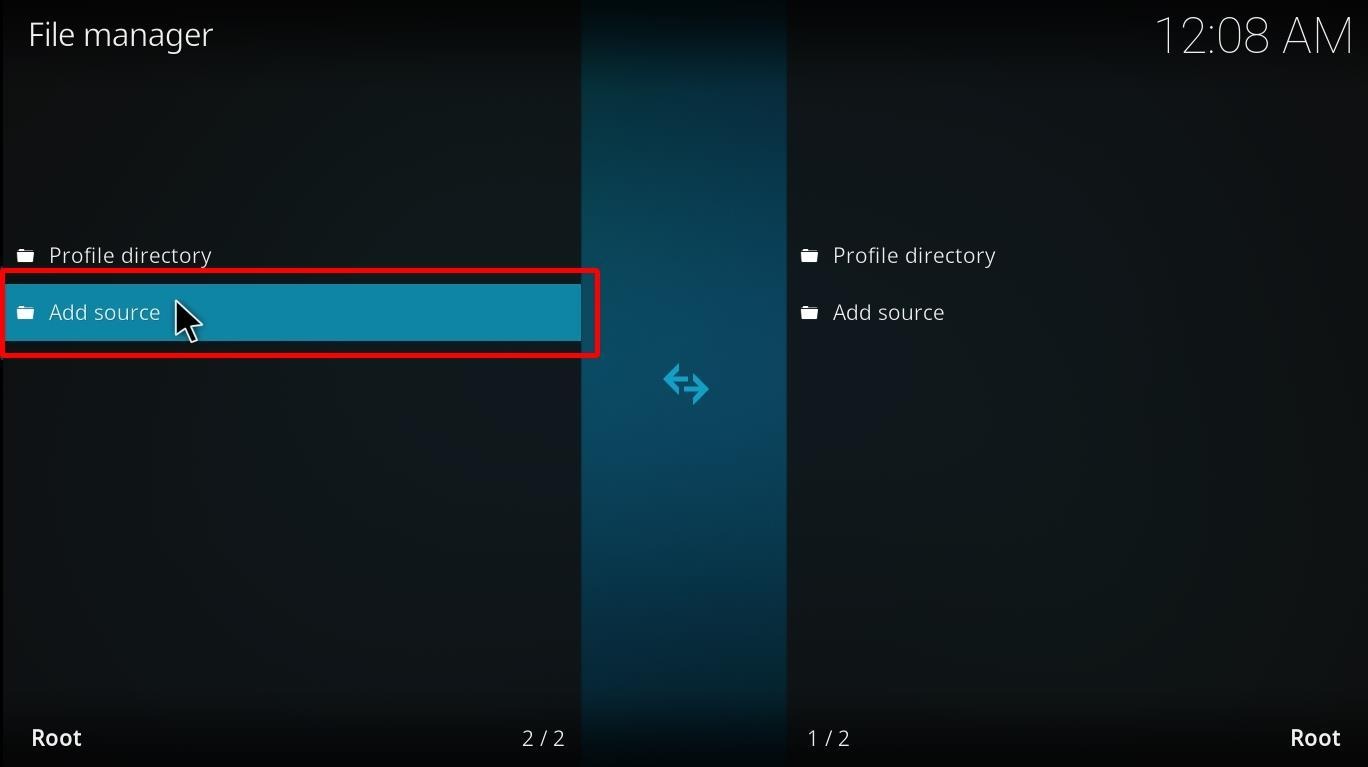

Here’s the technical bit. You will see two options in the right-hand window – Profile directory and Add source. We want the second option – to install third-party apps, we need to add the SO directly.
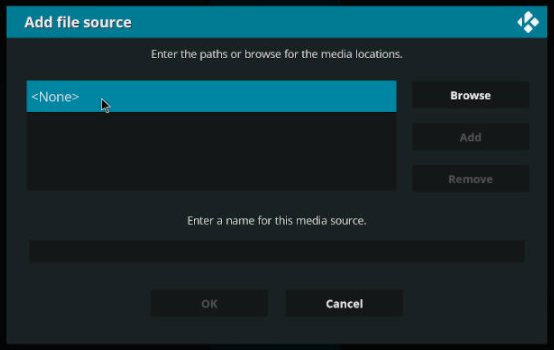

Click on the <None> section to add a third-party source.
Open up <None> to set a URL for the third-party source of your choice. In this example, we are accessing the Kodzi Kodi repository on https://mrkodz.github.io/repo/.


Type this URL into the search bar.
Then click OK. This will then add the repository to Kodi, and you will be able to add the add-on.
Because there is a range of addons for Kodi, there is likewise a range of ways to access movies, TV shows, and live TV. Here are a couple of the best addons for Kodi:
Navigate to https://kodi.wiki/view/Category:All_add-ons and find the Video add-ons section.


Click on this link to find movies and TV shows.
Then choose your favorite apps and channels to add to Kodi.
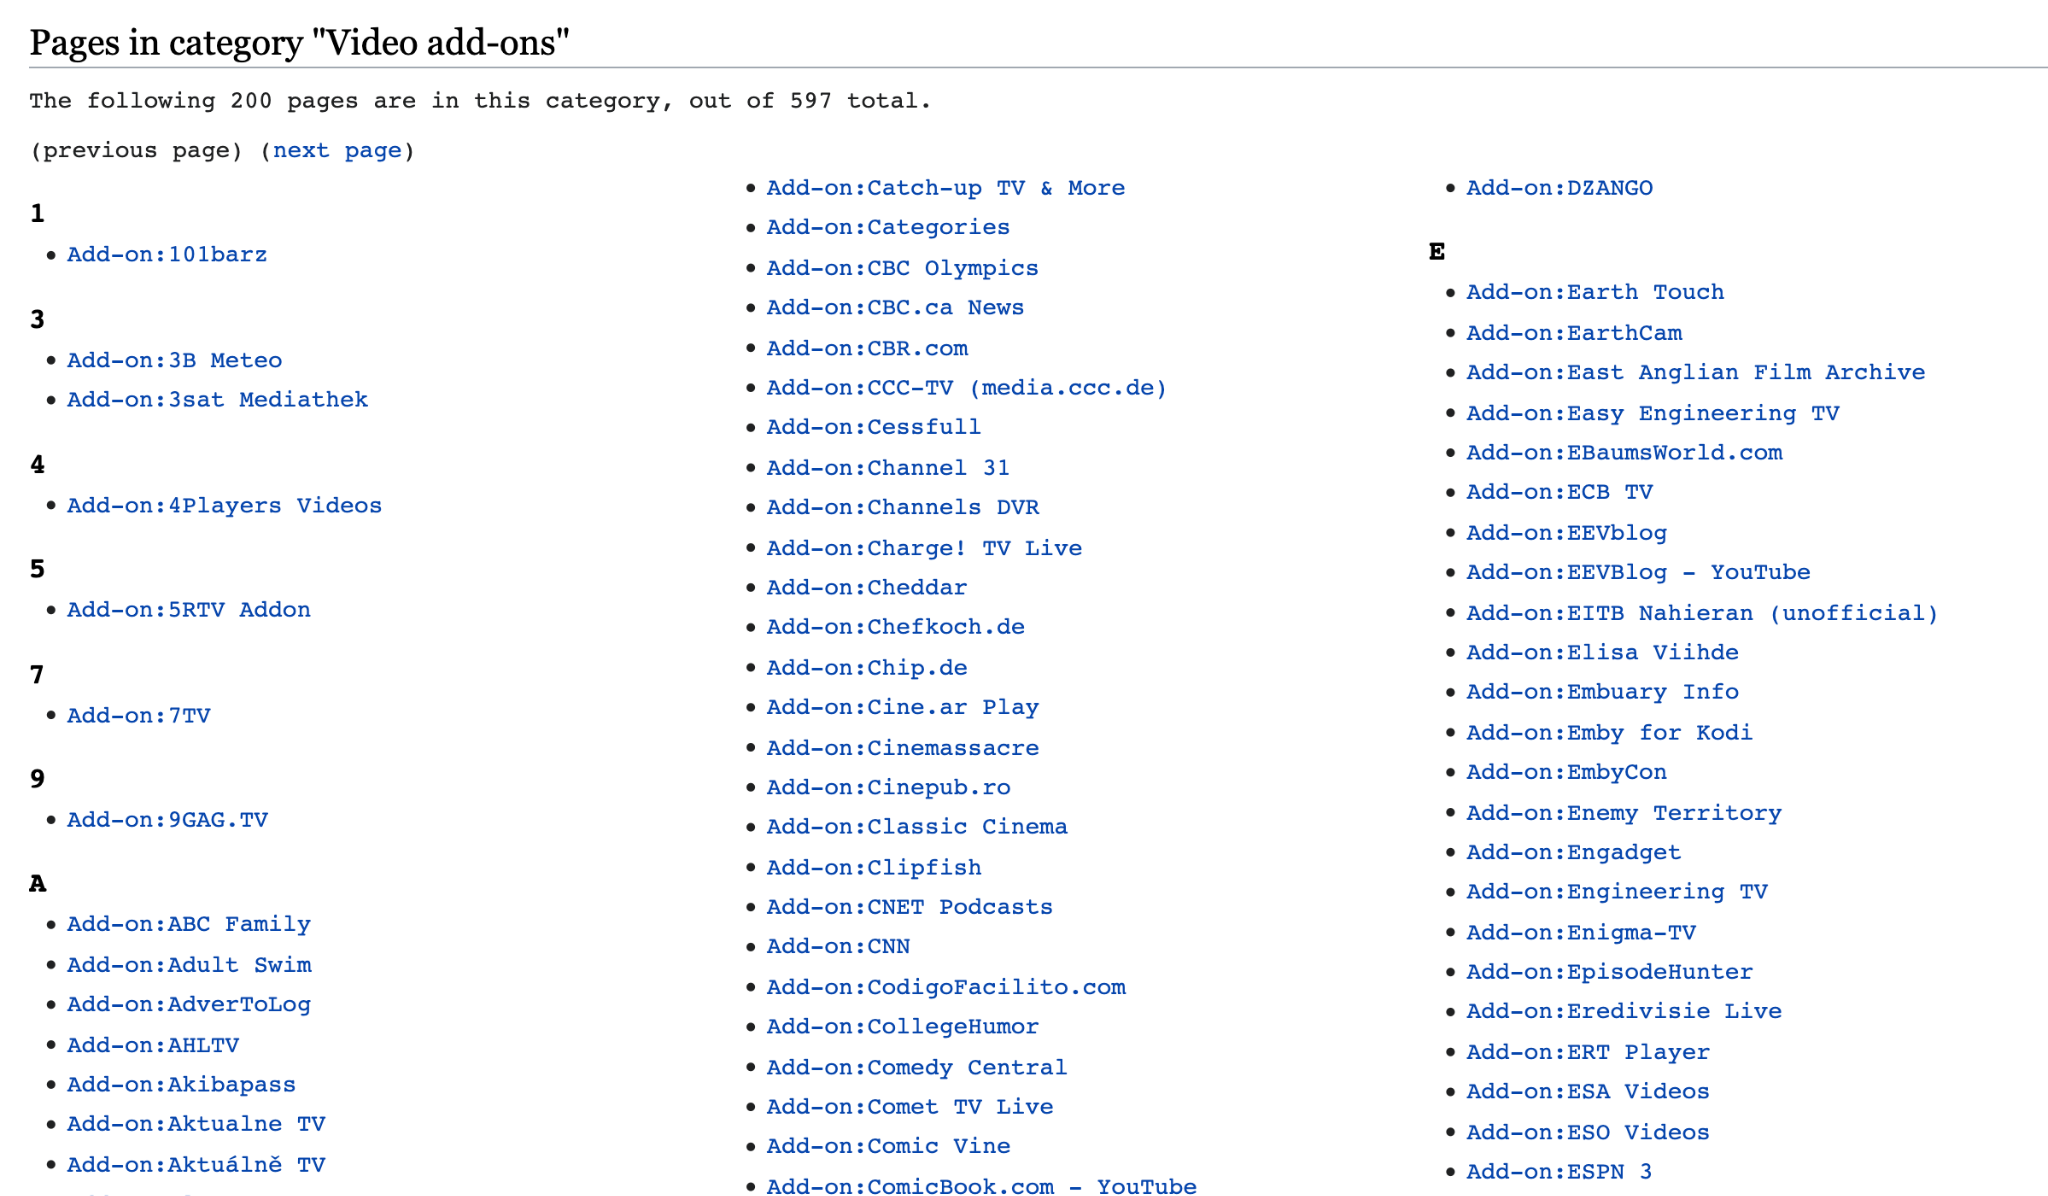

You can find great addons like Adult Swim, Livestream, and Kids Place.
Add as many as you want and customize Kodi to your liking!
For live TV, you will have to turn to third-party addons.
Some of the best addons for live TV include:
When you’ve chosen your favorite add-ons, follow the above guide on adding the repository to Kodi and download them straight to your favorite devices. Check for updates regularly to ensure you have the best links to Live TV shows that won’t go down during a binge session!
Kodi builds are a bit like Kodi addons on overdrive. Generally packaged with a skin and a range of the top add-ons available on the market, Kodi builds like No Limits Magic, Misfits Mods, and Alienware all bring additional functionality to your media player.
Installing a Kodi build is easy, but sometimes you’ll want to add a few extras to make it distinctly yours. Here’s how you do both of those things without having to become an expert developer.
Before you start installing builds, you need to check your version of Kodi. Some Kodi builds are only compatible with Kodi 18 Leia (such as No Limits Magic), and others just work with Kodi 19.2 Matrix (like Alienware). Don’t try to install a Kodi 18 build on Kodi 19.2 – it simply won’t work.
We technically already know how to do this because we did it with the Kodzi Kodi. We will follow the same process with the No Limits Magic build for Kodi 18 Leia, and the Alienware build for Kodi 19 Matrix.
First of all, navigate to the Kodi settings menu.
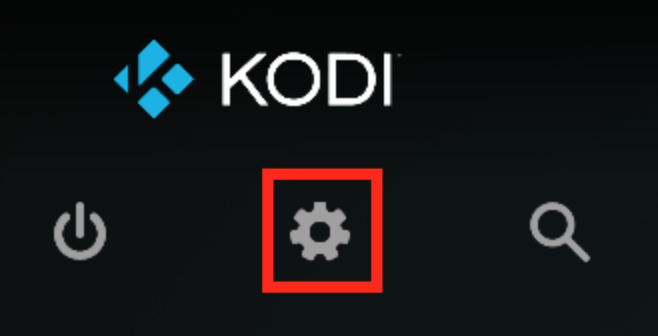


Click on the cog to open up the Settings menu.
From here, we need the File Manager.


Click on File Manager and then open the Add file source menu.
In the Add file source, type in this URL – https://www.nolimitswiz.appboxes.co


This will give you access to the No Limits Magic repository.
A good practice is to name the repositories you want to use frequently, so add “No Limits Magic” to this repository. It’ll make it easier to find it in the future.
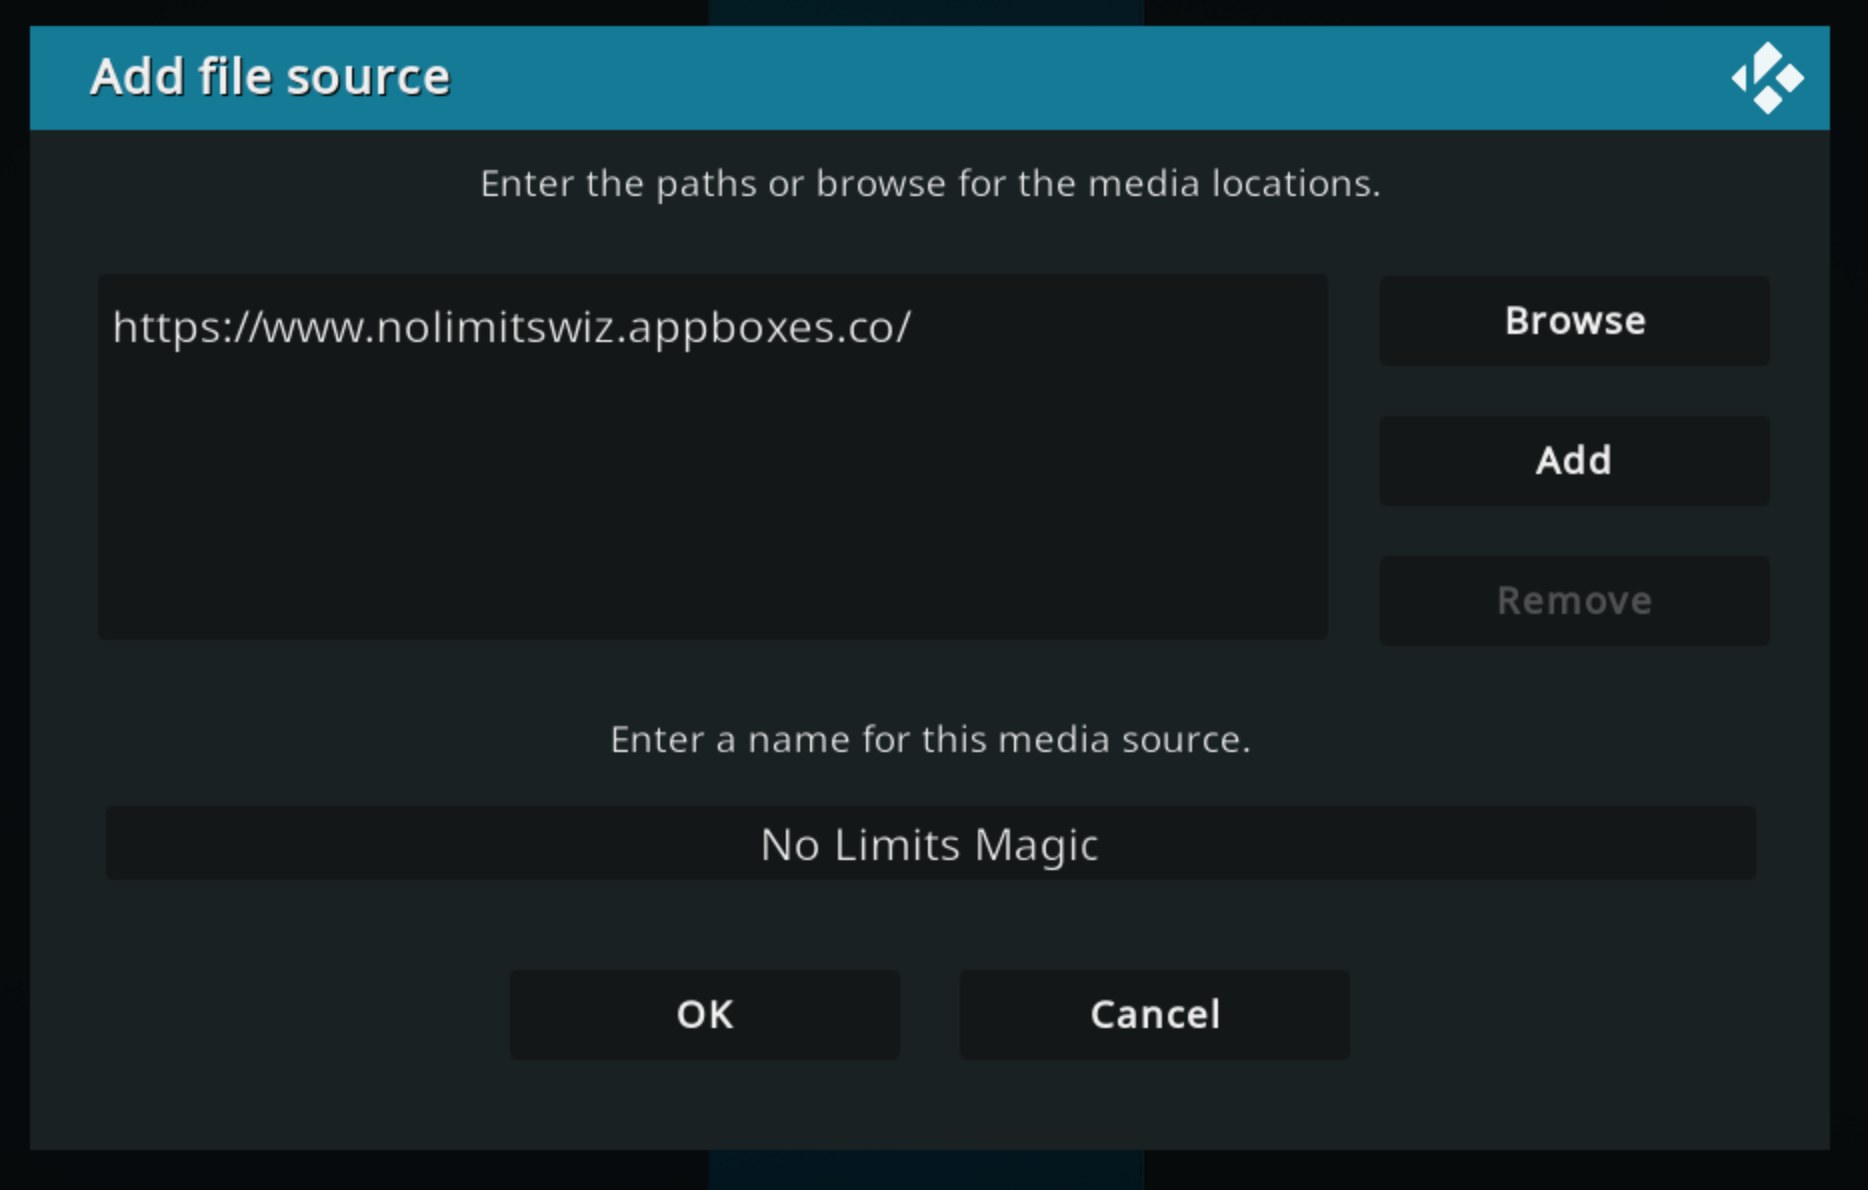

Once you have named it, click OK.
Now navigate back to the home screen and find Add-ons in the dock. Click on Add-ons and then click on the Package Installer in the top left corner.
![]()
![]()
![]()
Click on this icon to install the No Limits Magic build.
Because No Limits Magic is stored as a ZIP file, we need to install it from the ZIP on https://www.nolimitswiz.appboxes.co.
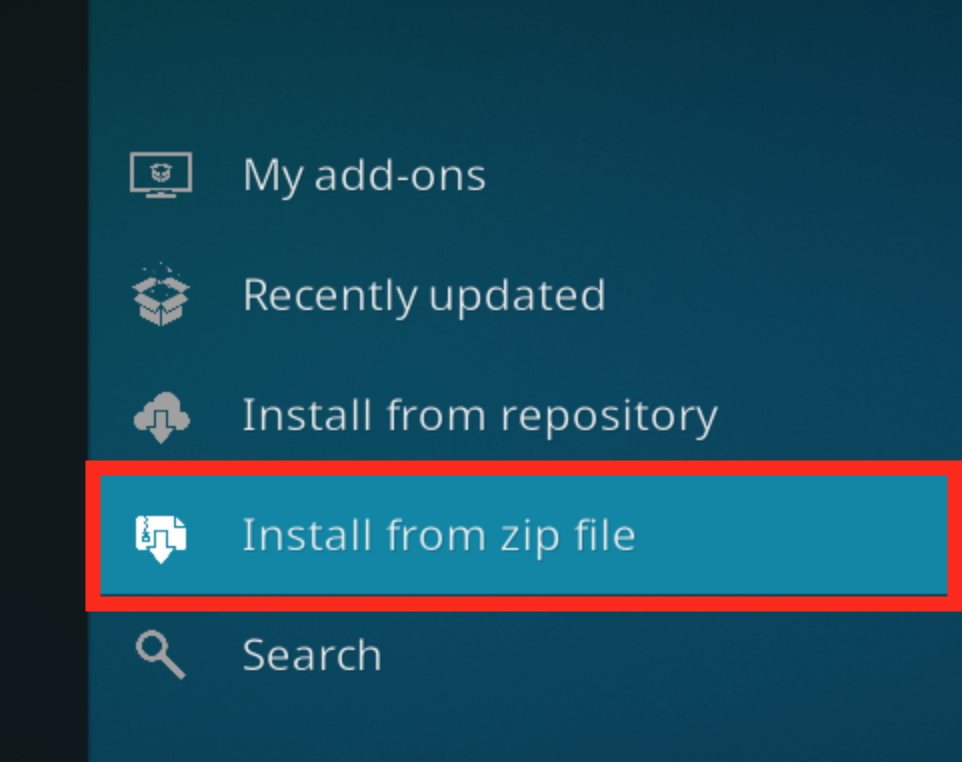


Click on install from the ZIP file and find the No Limits Magic file.
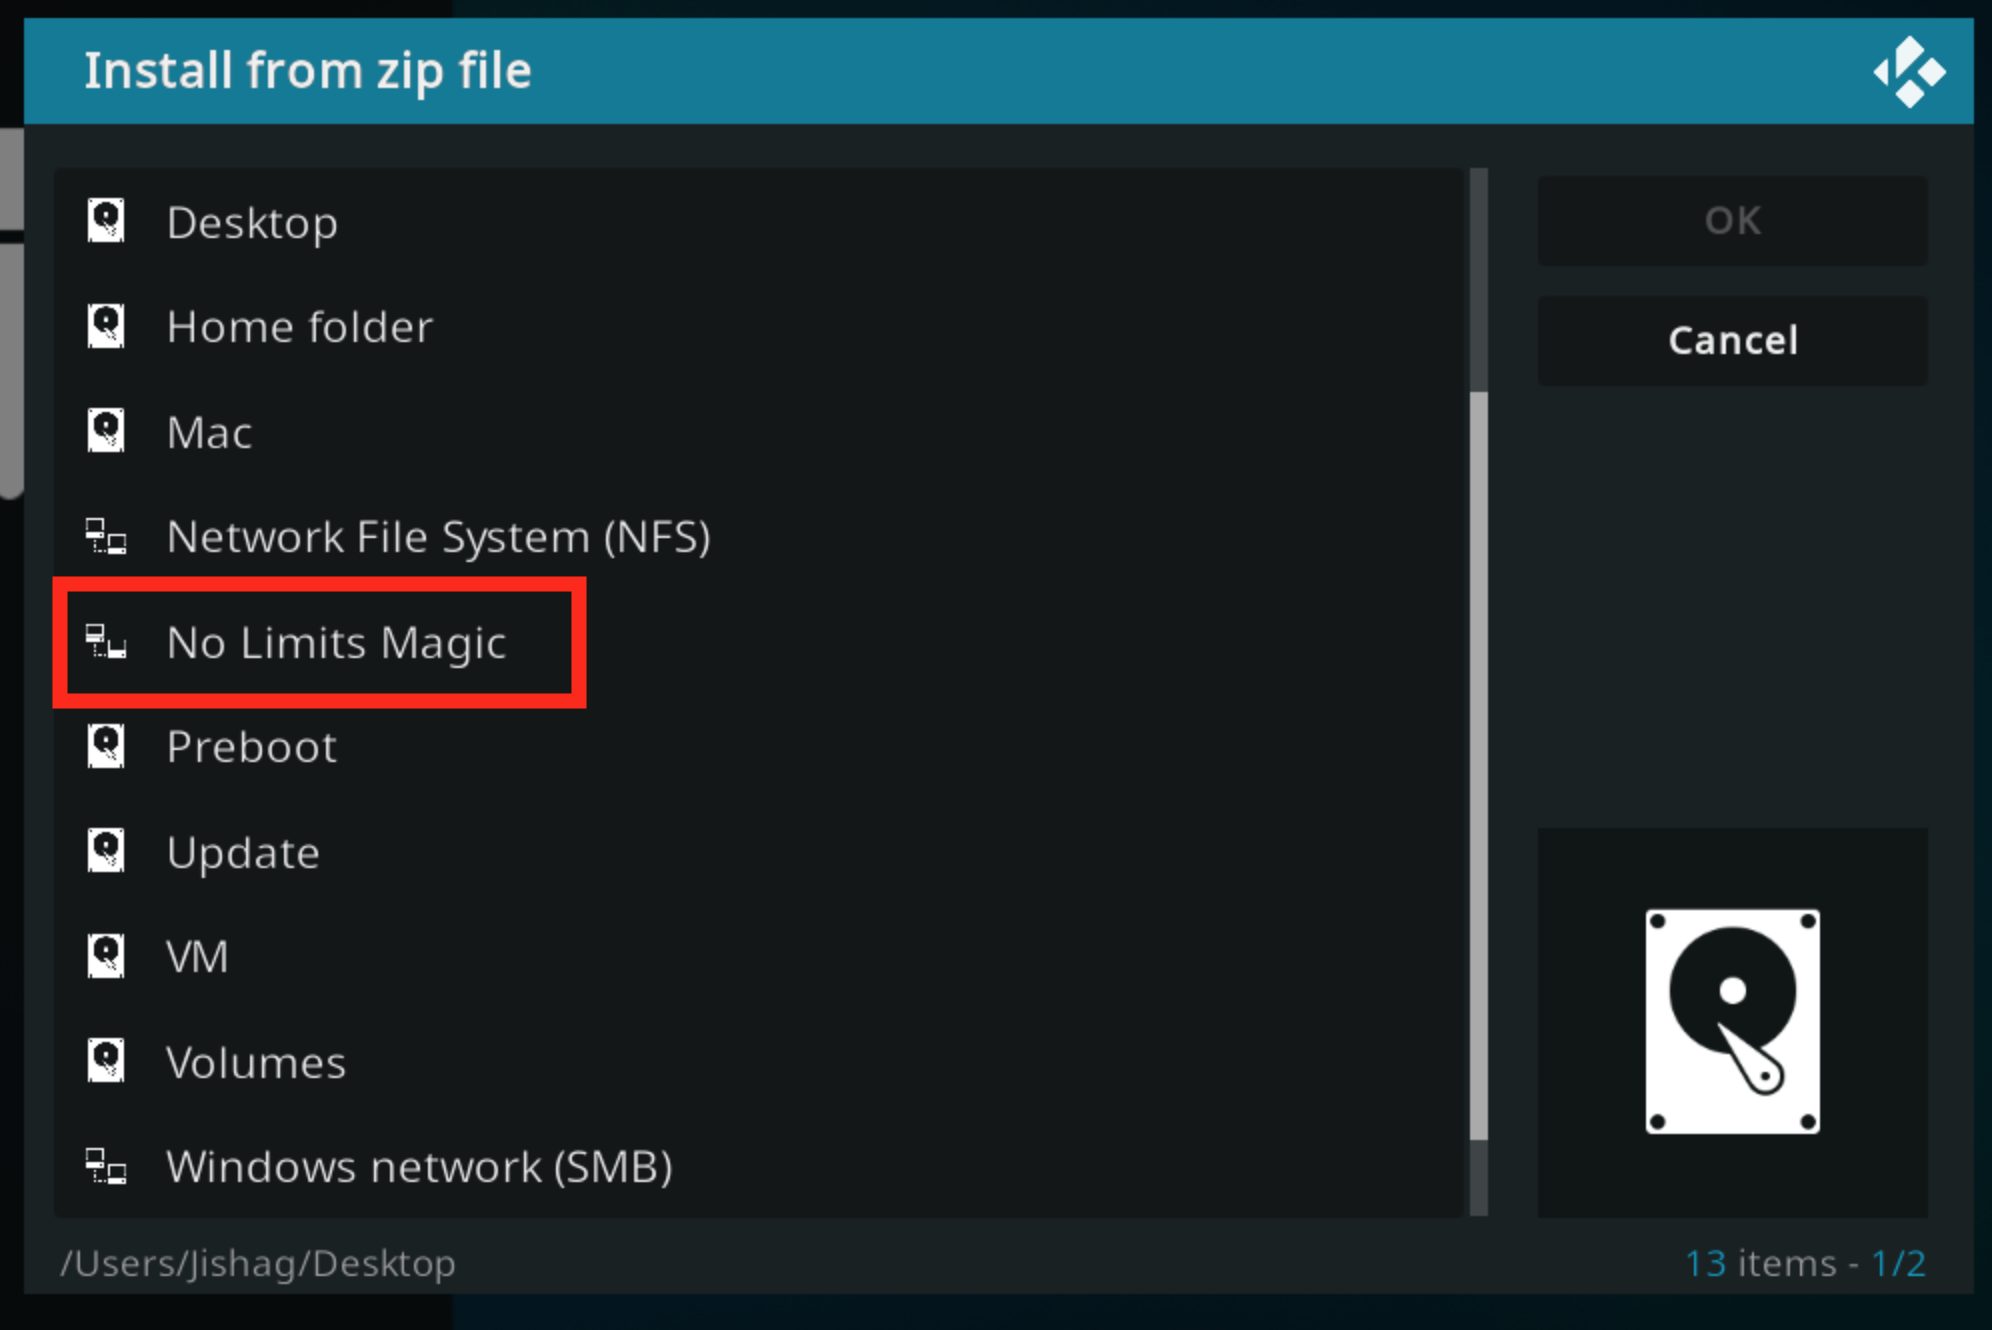

Click on No Limits Magic, and it will automatically install.
The download should start automatically, meaning that the No Limits Magic build is almost ready to use!


And then you will have No Limits Magic installed on Kodi!
Kodi 18 and Kodi 19 from a user perspective are very similar. However, there have been significant changes on the back-end – the biggest one being that the Kodi team changed the version of Python they used to put the media player together. This means that builds for Kodi 18 won’t work with Kodi 19 and vice versa.
The process to install the build is mostly the same, thankfully.


Click on the cog to open up the Settings menu.
From here, we need the File Manager.


Click on File Manager and then open the Add file source menu.
In the Add file source, type in this URL – http://cmanbuilds.com/repo/


This link gives you access to the cMaN’s wizard, which includes the Alienware build.
Give this repo a name, as we will need to find it from a potentially long list of repos.
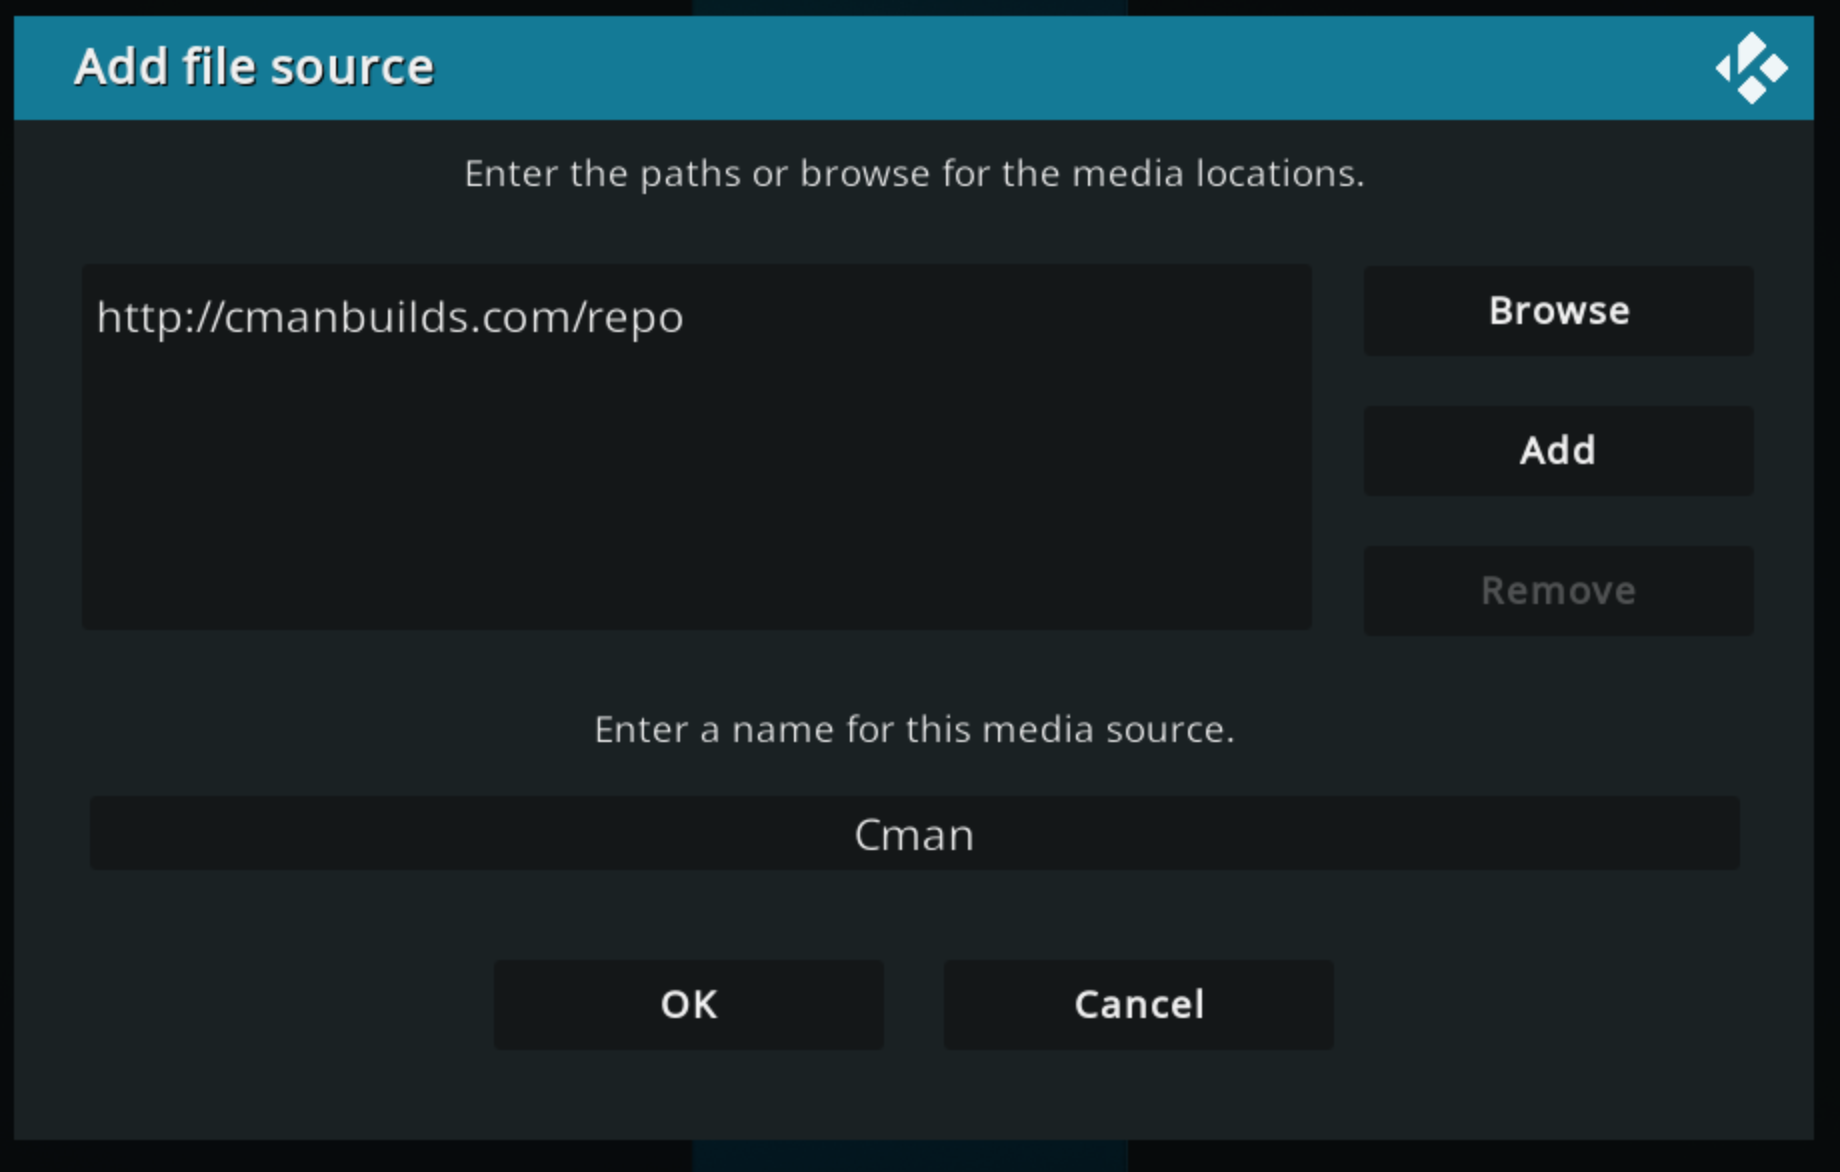

Now head back to the home screen and find Add-ons. From there, click the icon in the top left-hand corner – this is the Package Installer.
![]()
![]()
![]()
Click on this icon to install the Alienware build.
Because the cMaN repository is stored as a ZIP file, we need to install it from the ZIP.


Click on install from the ZIP file and find the Cman file.
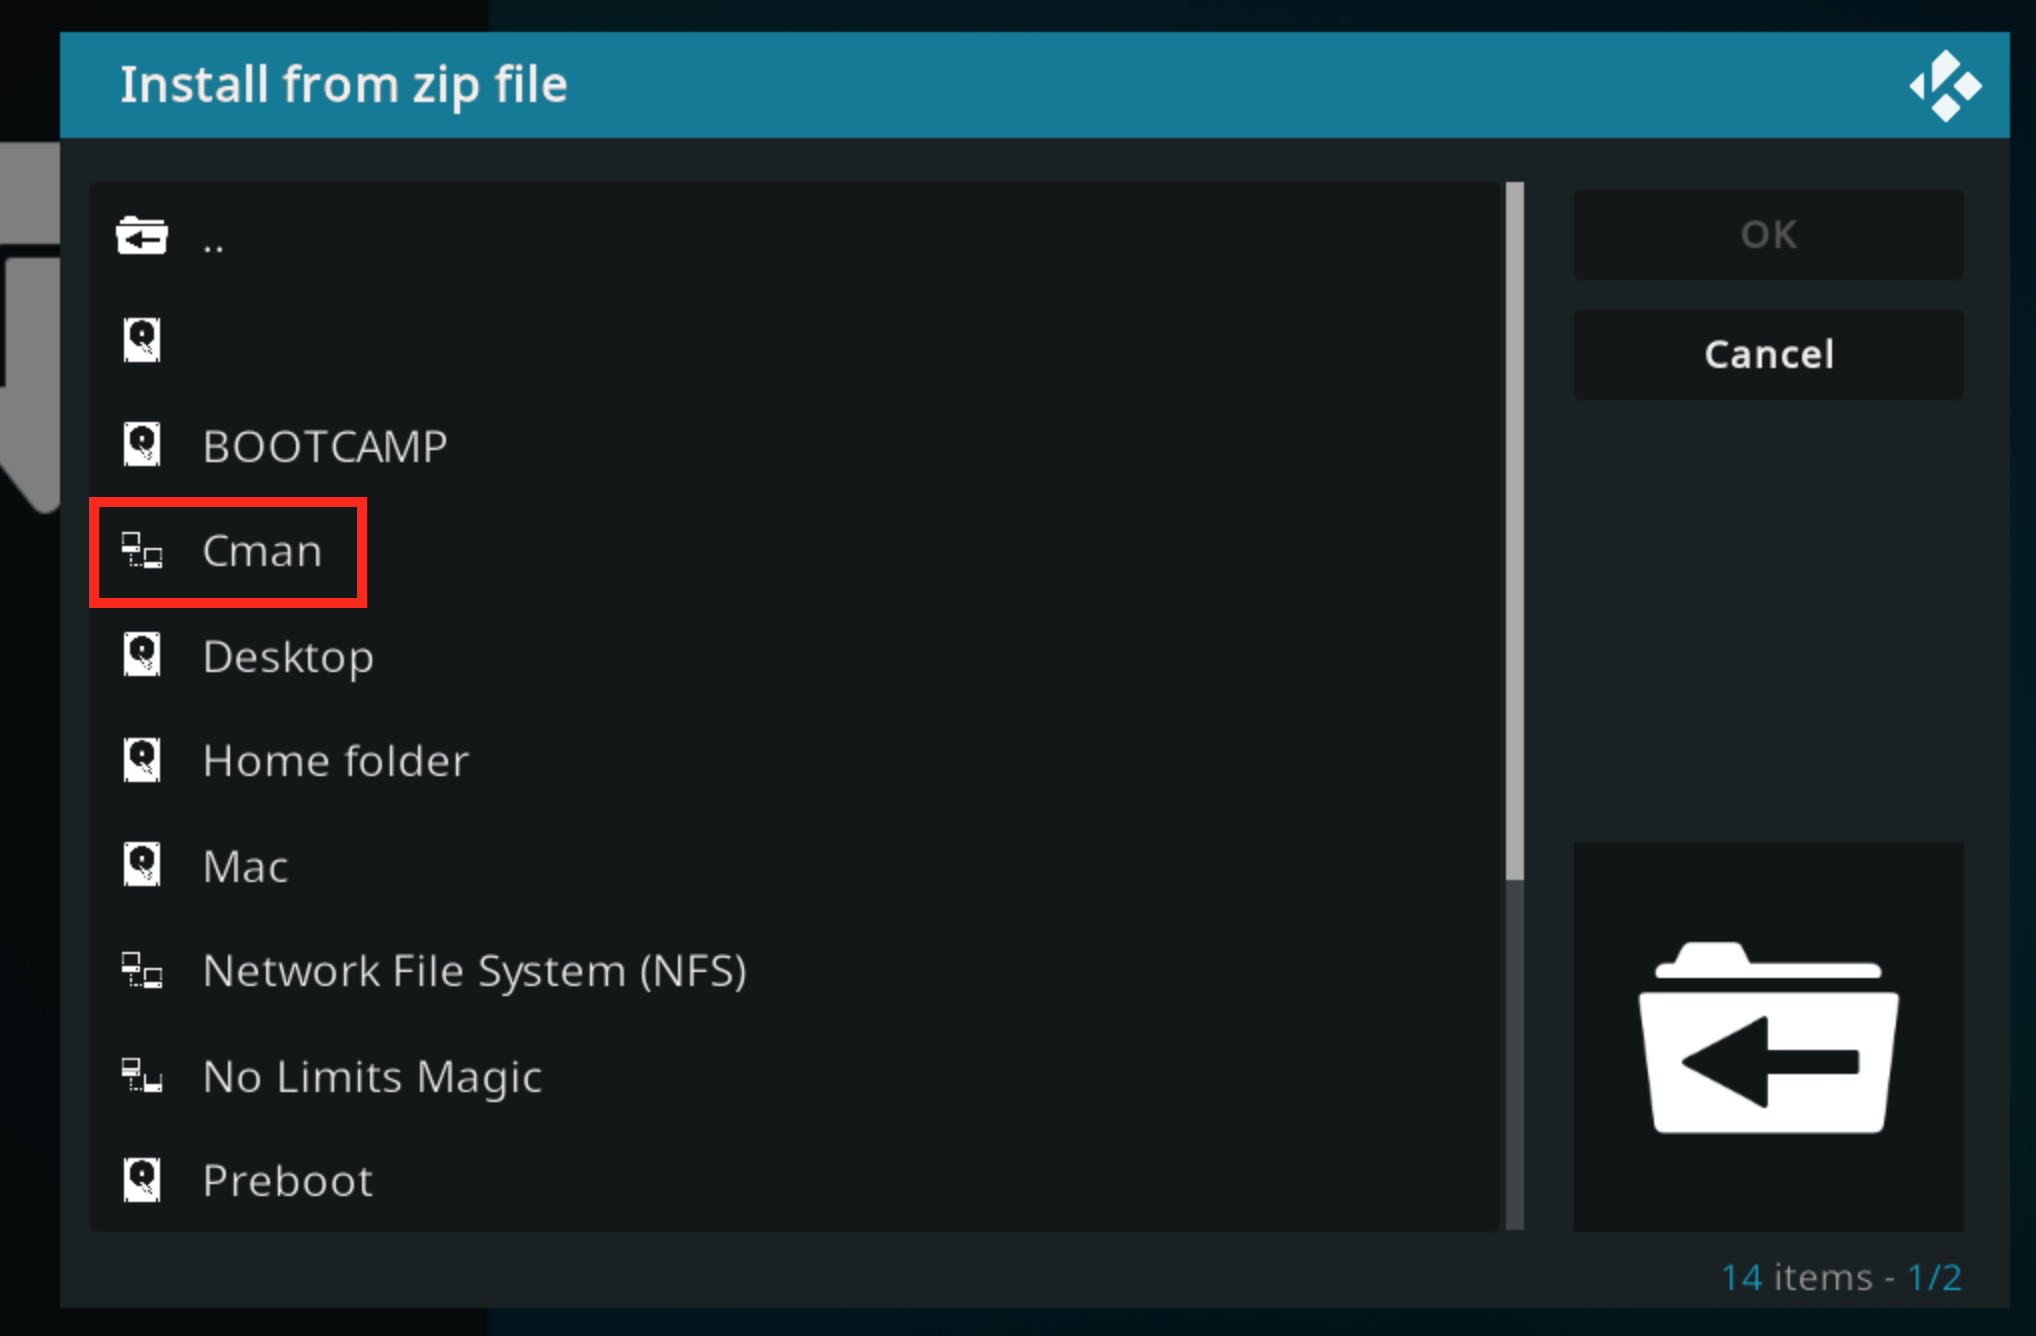

Click on Cman, and it will automatically install.
This download will start automatically, meaning that you can open cMaN’s Wizard Repository, find Alienware (or your other Kodi 19.2 build of choice), and download it. Sorted!
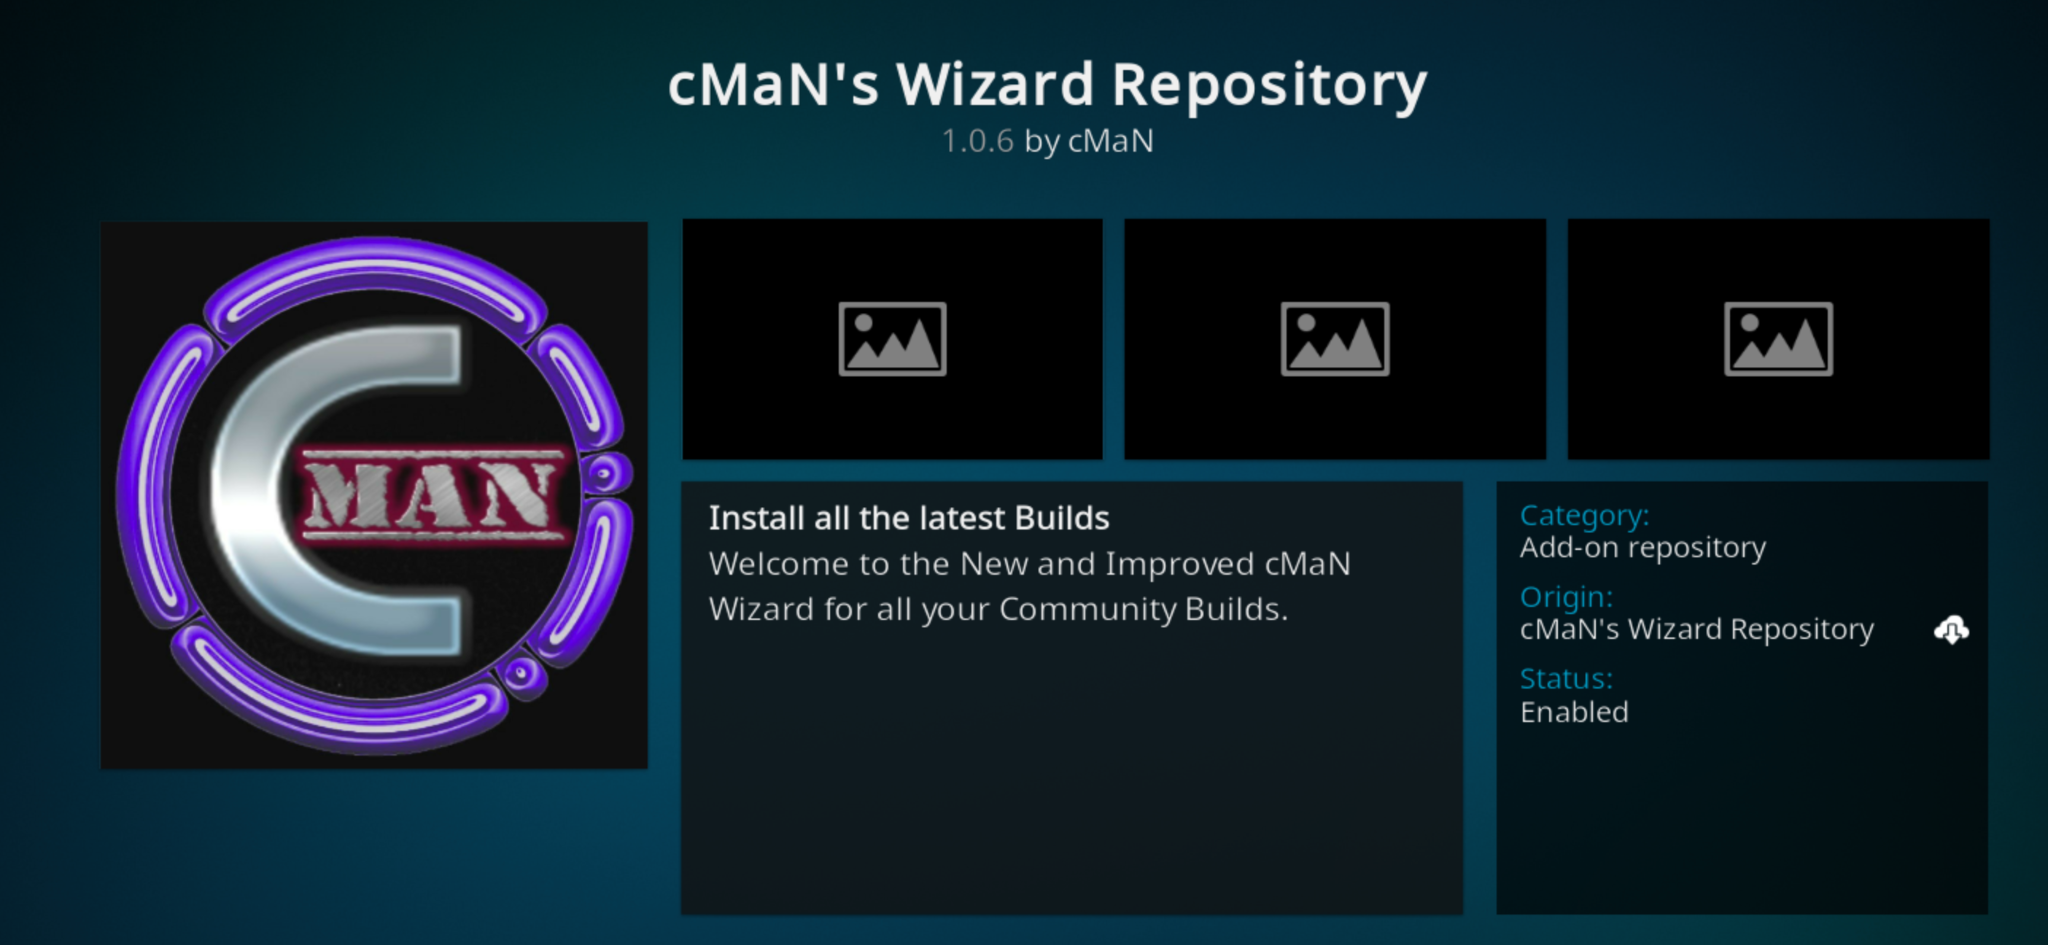

Find your favorite build and download it.
If you have addons that you want to add to your favorite Kodi build, you can manage them through the Kodi home screen. Before you try to add any addons to your build, remember that you need to install your chosen addons to Kodi. Otherwise, there’ll be nothing to install!
Navigate to the Add-ons menu.
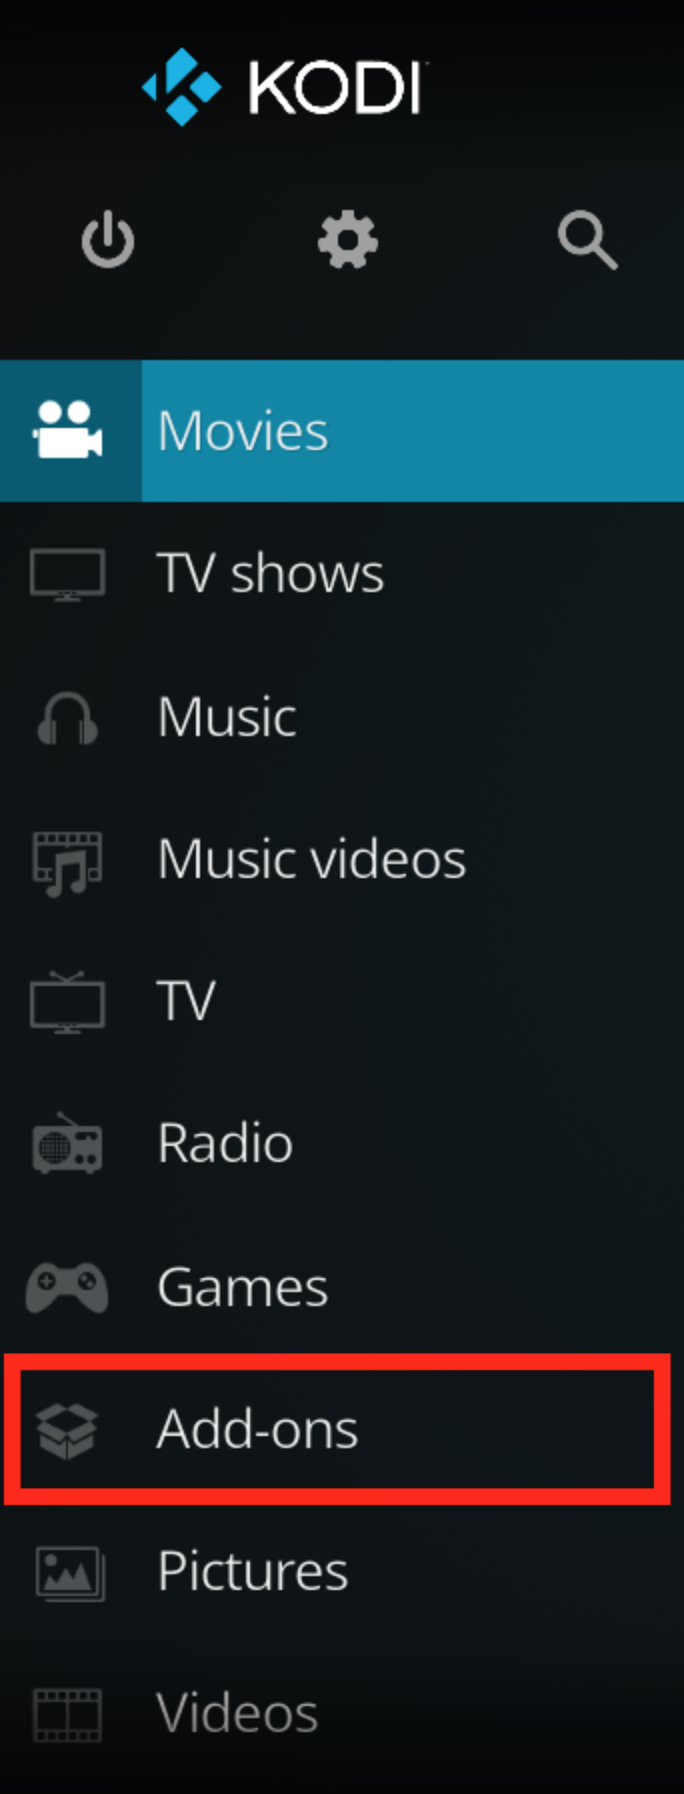

Click on Add-ons.
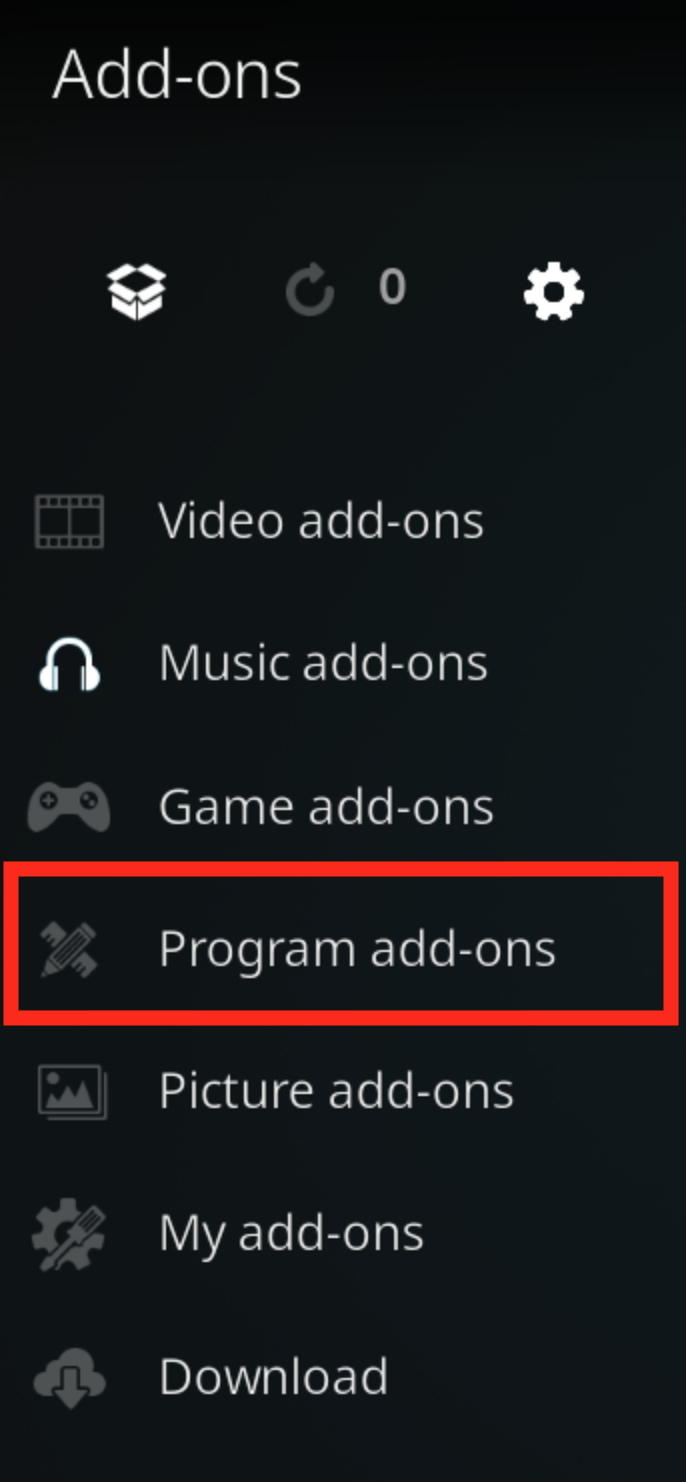

From here, click on Program add-ons.
In Program add-ons, select your chosen build (for example, No Limits Magic), and the installation wizard will open. Then you can add your favorite addons through the Programs folder.
Note: Not every build allows third-party addons, so check that before installing a build that doesn’t include your favorite addons.
Although Kodi is legal, accessing copyrighted content without authorization is illegal (and punishable by law in some countries). That’s why you need to hide your tracks and find a VPN provider that you can trust.
As you can probably guess, we suggest that you use ExpressVPN. As the premium option on the market, it comes with a host of features:
To see why our industry experts consider ExpressVPN to be the best VPN to stay safe while streaming, read our ExpressVPN Review.
Kodi is an open-source media player that can be used to access movies, TV shows, and live sports straight from your devices. Supported by Android, Windows, macOS, and iOS, Kodi allows users to use a wide range of third-party add-ons and watch movies and other content straight from their living rooms.
Kodi has a steep learning curve. When used correctly, Kodi can integrate or replace a wide range of the most popular apps and streaming services. The Kodi app is free and constantly being improved by a team of dedicated software developers.
Because Kodi is only a media player, it is 100% legal. It’s possible to simply use Kodi to access and watch local media on your devices. That’s why it is freely available on the Google Play Store and other app stores.
The complication comes when you start to use Kodi addons. Some of them allow users to access movies, TV shows, and live sports that are copyright-protected. Accessing copyrighted content that you don’t have the right to access is punishable by law in many countries, so be careful if you plan to do so.
In a nutshell, the Kodi media center is not illegal, but the addons you install might give you access to illegal content.
The success of installing Kodi on your smart TV largely depends on which kind you have.
New Kodi addons are being developed every day to help you access movies, TV shows, music, and other content from the comfort of your living room. Keeping up to date on emerging addons can be a challenge, but here are some of the most respected ones right now:
Top 5 Kodi addons:
You don’t need to use a Kodi build, but it will make life easier. A Kodi build is a collection of Kodi addons and a skin wrapped up in a nice little package, so it’s easier for the newbie user to install and edit a build than start from scratch.
If you only want 2 or 3 specific Kodi addons, there’s no need for a full build. Install your favorite ones and stream content shows right away. But if you’re not sure what you want, start with a popular build like No Limits Magic or Alienware.
Kodi is more than just a media player. It is your gateway to finding the movies, TV shows, and live TV that you love without subscribing to multiple content platforms. Everything is available in one place and is extremely easy to use.
When you understand how to install Kodi, find addons, and install or create your own builds. You are sure to turn Kodi from a plain media player into a powerful tool for accessing all the content you want whenever you want.
So what’s stopping you? Install Kodi today.