In this VPNcheck guide, you’ll get to know everything you need to install the Nemesis AIO addon on Kodi. We’ve included high-quality images to help you understand each step. Also included is a list of the best VPNs for Kodi.
Bear in mind that this Kodi addon requires you to generate a web PIN every few hours, without which it stops working. We’ve included steps using which you can use the PIN to generate and authorize Nemesis AIO.
Not sure all the effort is worth it for a single addon? Nemesis AIO will prove you wrong with its excellent features. It offers an exciting collection of shows and movies, as well as gaming videos, anime, webcams, and more.
The installation process could be broadly divided into two steps.
These include:
It’s crucial that you apply both these steps in a sequence – you cannot jump to step number 2 without doing what is required in step number 1. If you choose to ignore this suggestion, the installation might not go as planned.
Before you get the Nemesis Kodi addon, you need to make a few tweaks to the media player’s settings. These tweaks are required because Nemesis isn’t available on the official Kodi repository. You have to download it from a 3rd-party source.
Follow these steps to tweak Kodi’s settings for Nemesis installation:
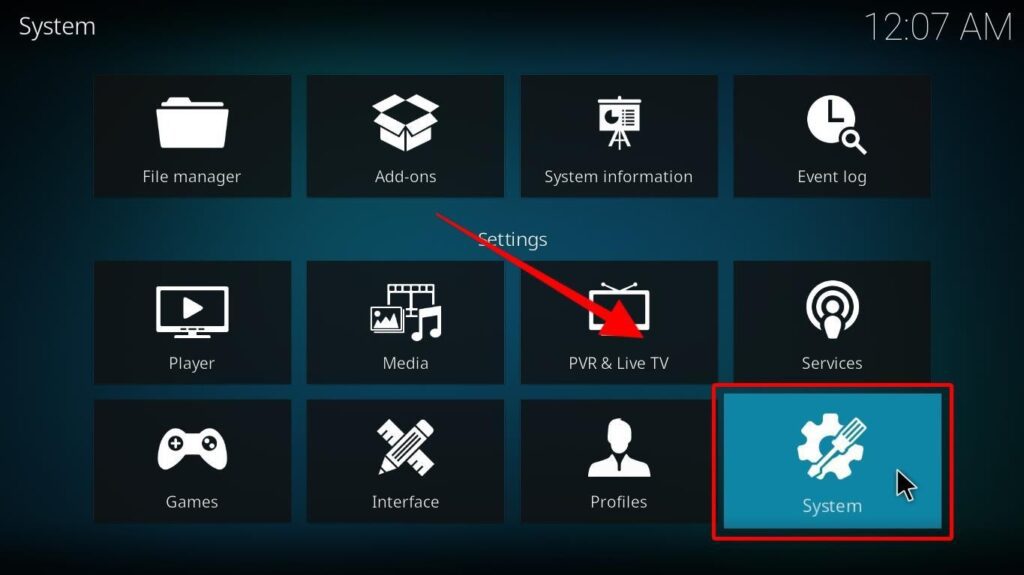
Step 1: Launch the Kodi app and go to Settings. 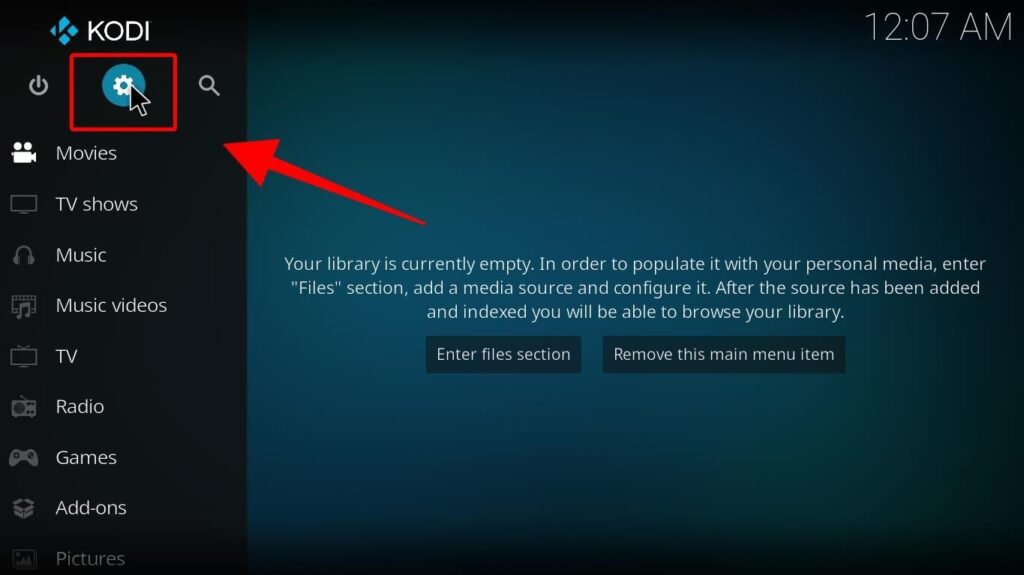 Step 2: Right-click on the System option.
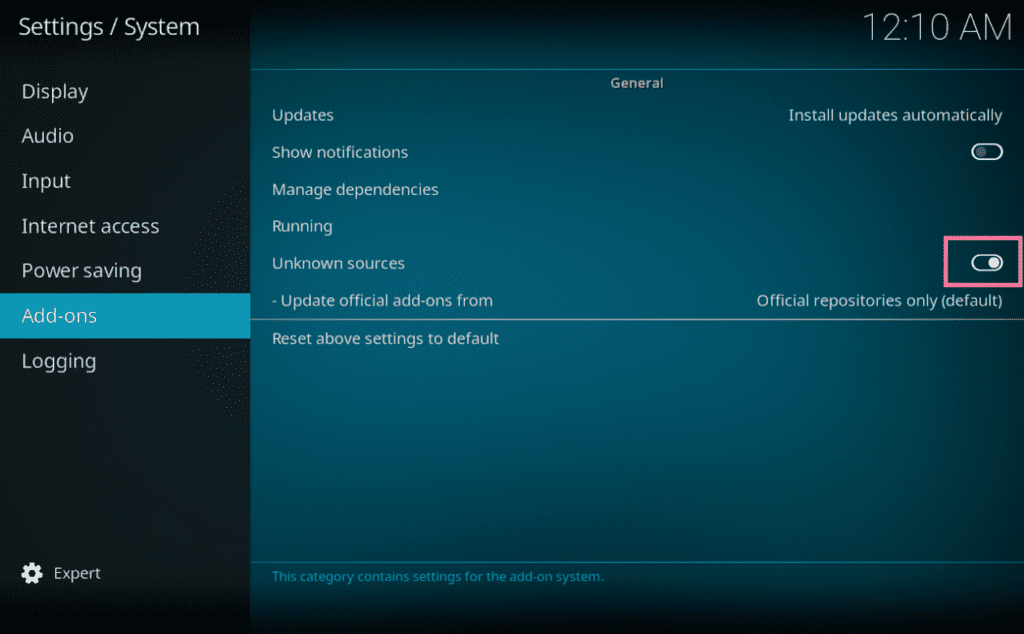
Step 3: Click on the Add-ons option. A list of options will appear. Enable Unknown sources (as shown in the screenshot).
Step 4: When you do this, a disclaimer will appear on the screen.
To proceed, click Yes.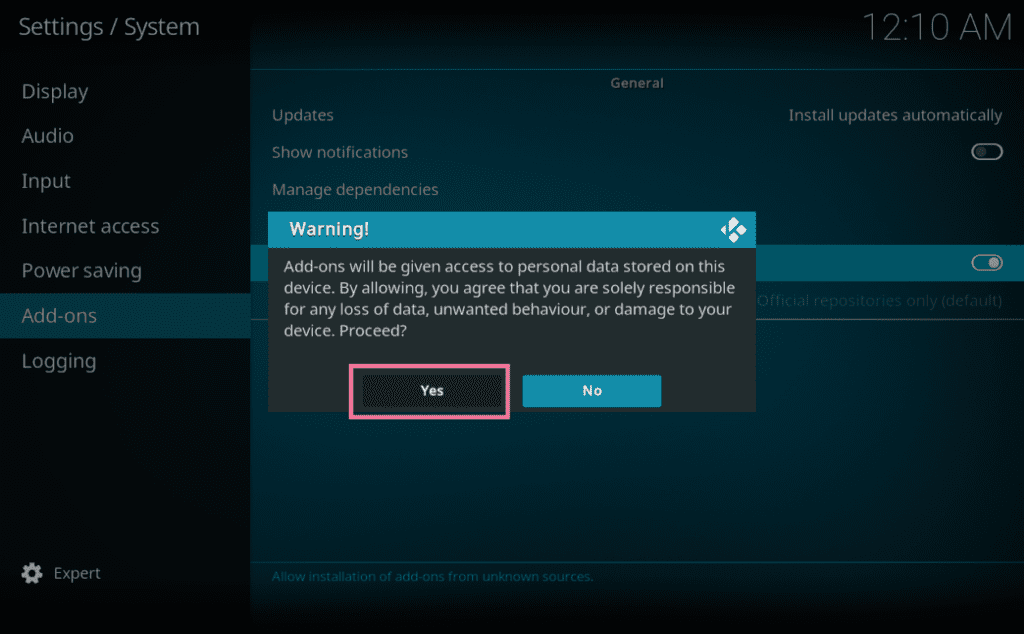
Kodi can now download apps like Nemesis AIO.
To protect your media player against unreliable apps, turn off the Unknown sources option after installing Nemesis AIO Kodi addon.
Follow these steps to install Nemesis addon on Kodi:
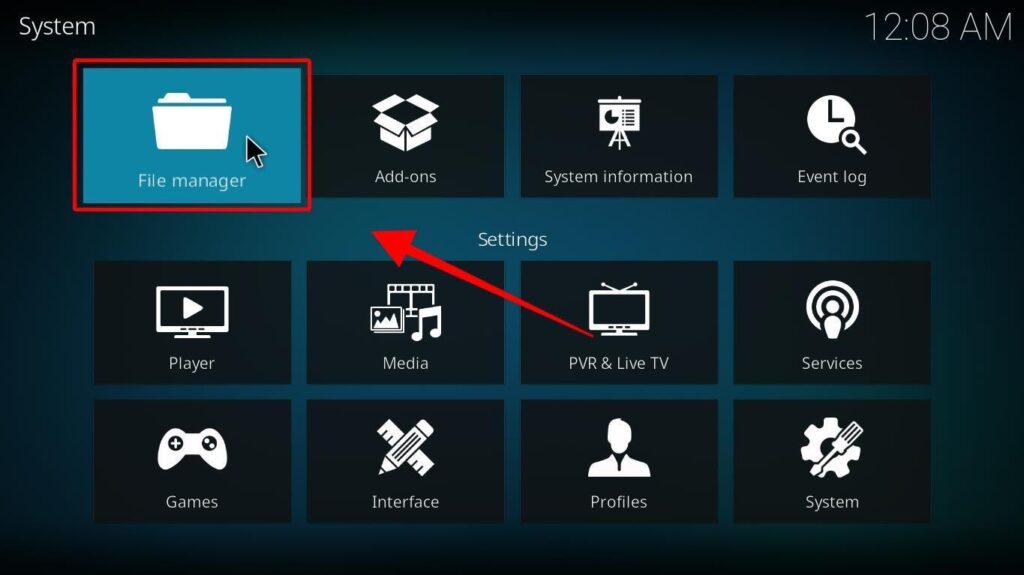
Step 1: Go to Kodi homepage and click on Settings. Step 2: Click on File Manager option.

Step 3: Select the Add Source option.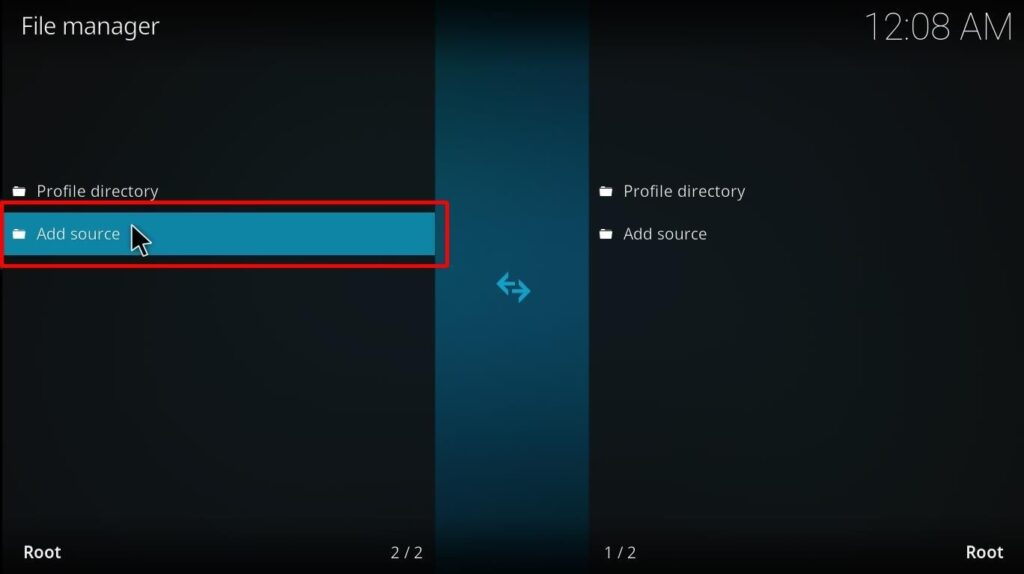

Step 5: A pop-up window will appear with a URL box.
Type this URL: https://streamarmy.co.uk/repo
Click Ok.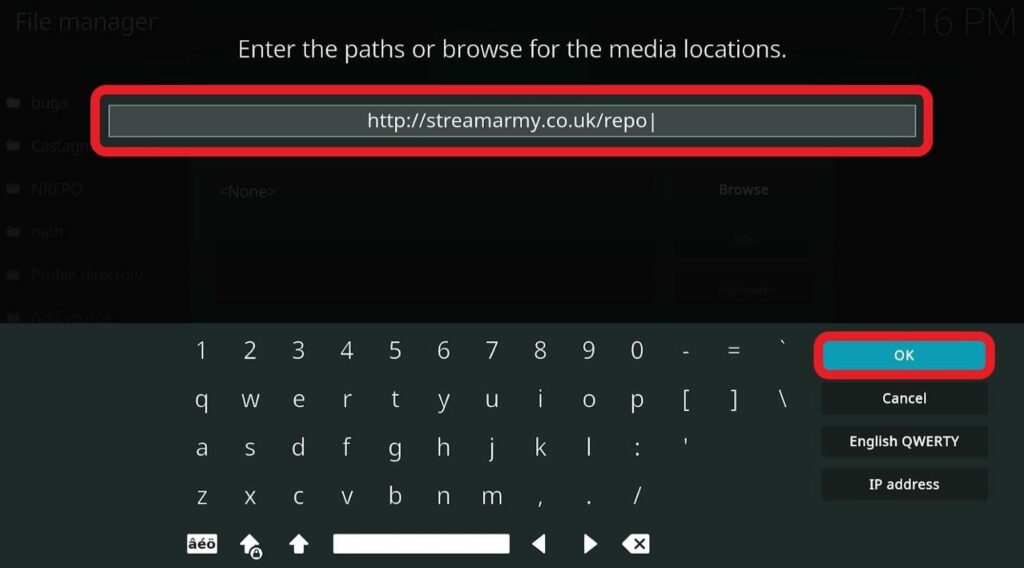

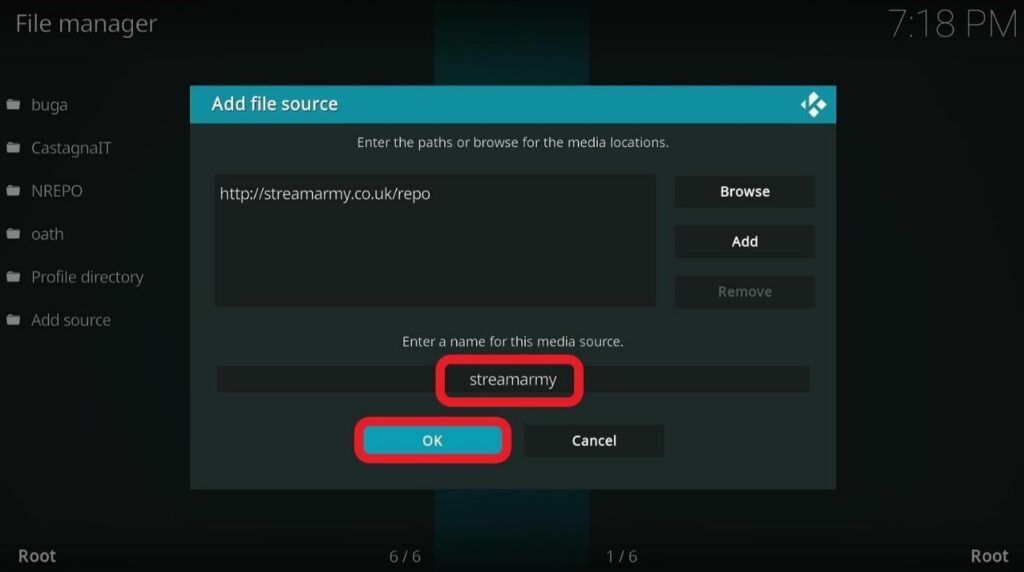
Next, enter any name you want as the file’s source name. We have named the source streamarmy.
Click Ok.

Step 7: Return to Kodi’s homepage.
Step 8: Select Settings again.


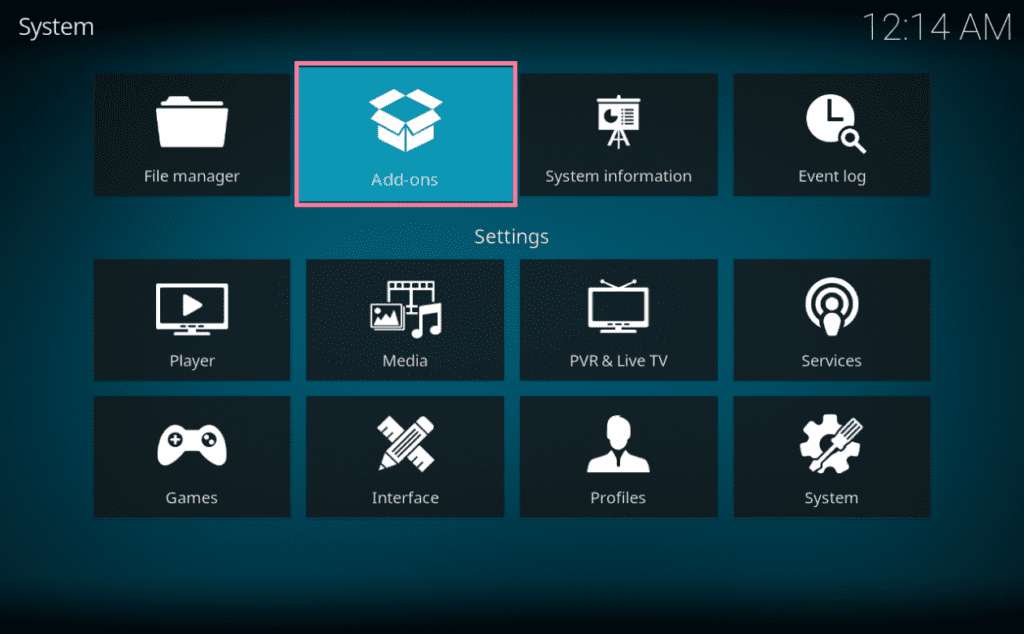

Step 10: Select Install from zip file option (please see screenshot).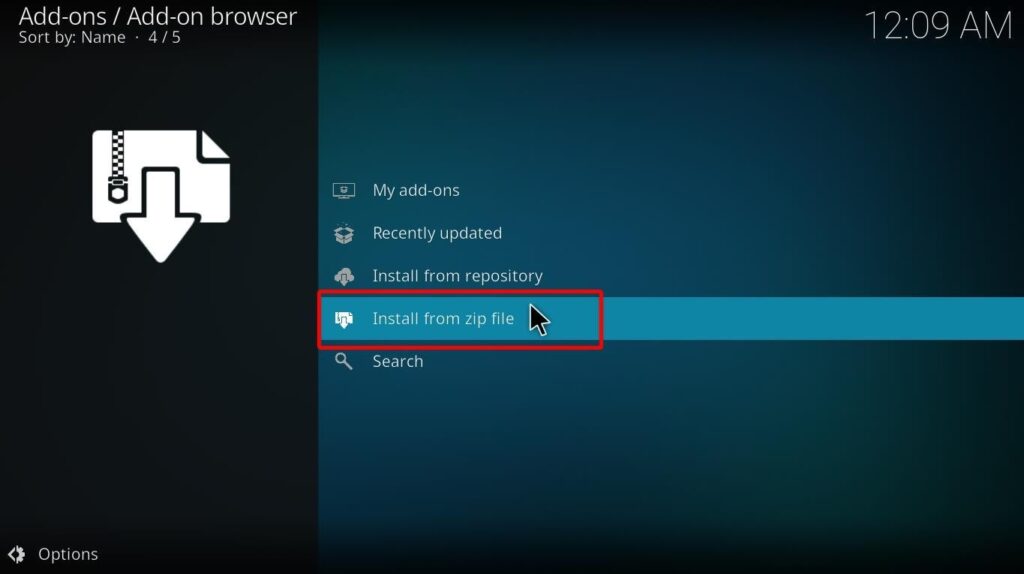

Step 11: A small window will pop up, showcasing a list of options.
Select ‘streamarmy’.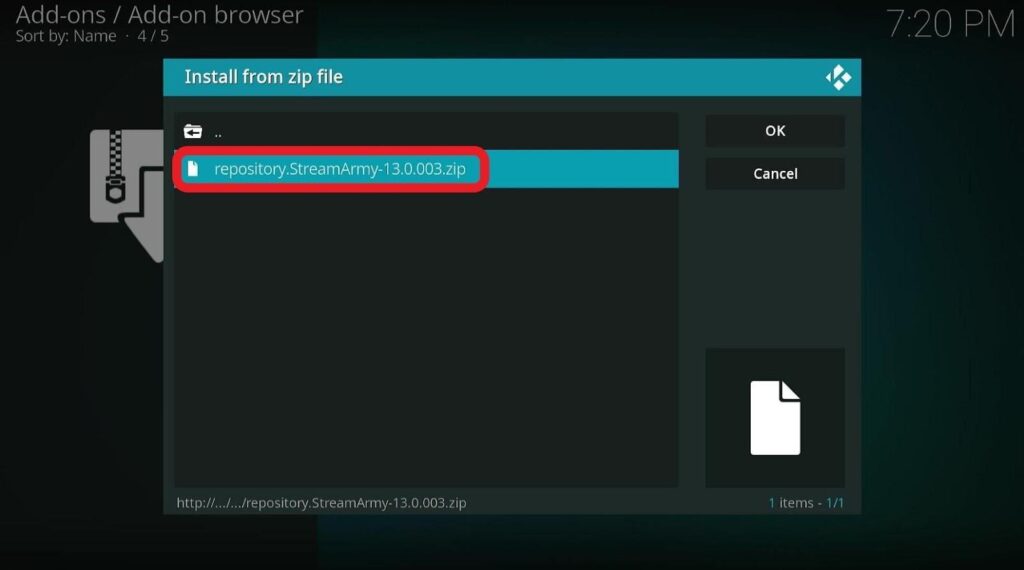

In case you had named the source file differently, select that option.
Step 12: Click on the file named: repository.StreamArmy-x.x.zio.
Press the OK button.
Step 13: After a few minutes have passed, you will see a pop-up telling you that your repository is installed.
Now it’s time to install the Nemesis AIO Kodi add-on from this repository.
Step 14: Select the Install from repository option on your Kodi’s add-ons page.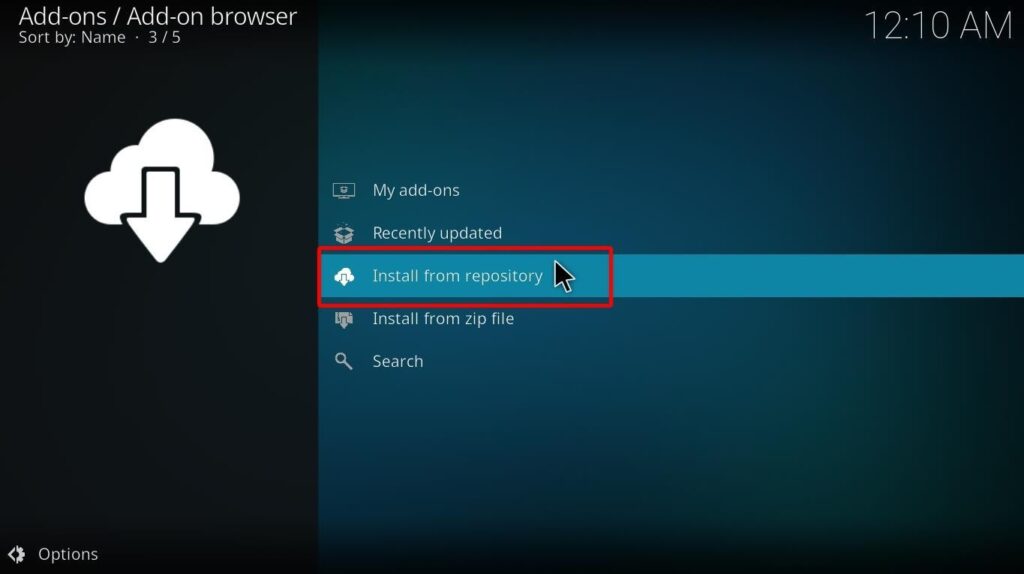

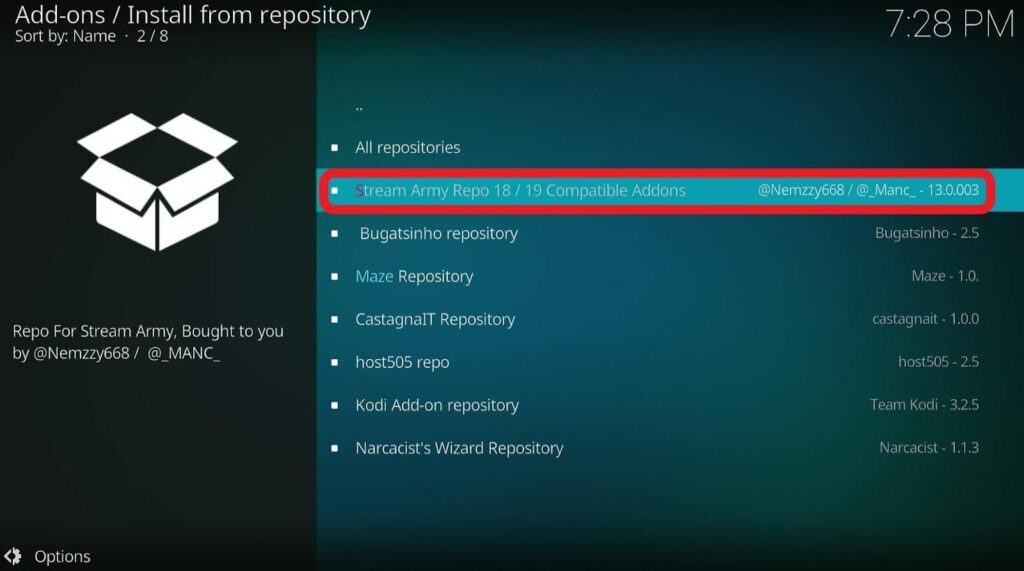

Step 16: You’ll see multiple add-ons’ options in this tab.
Select Video add-ons.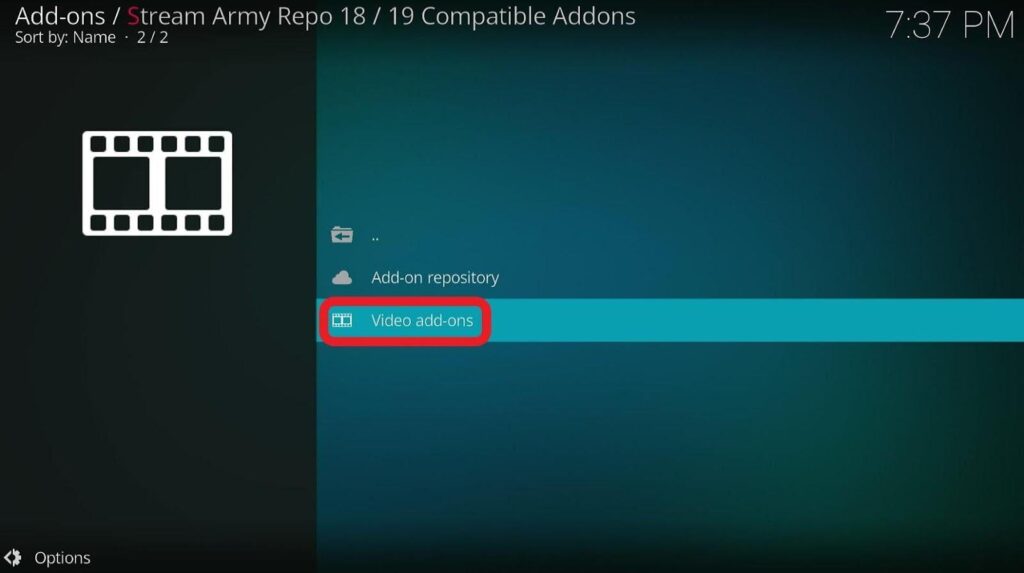

Step 17: Scroll down to the NemesisAio Addon option.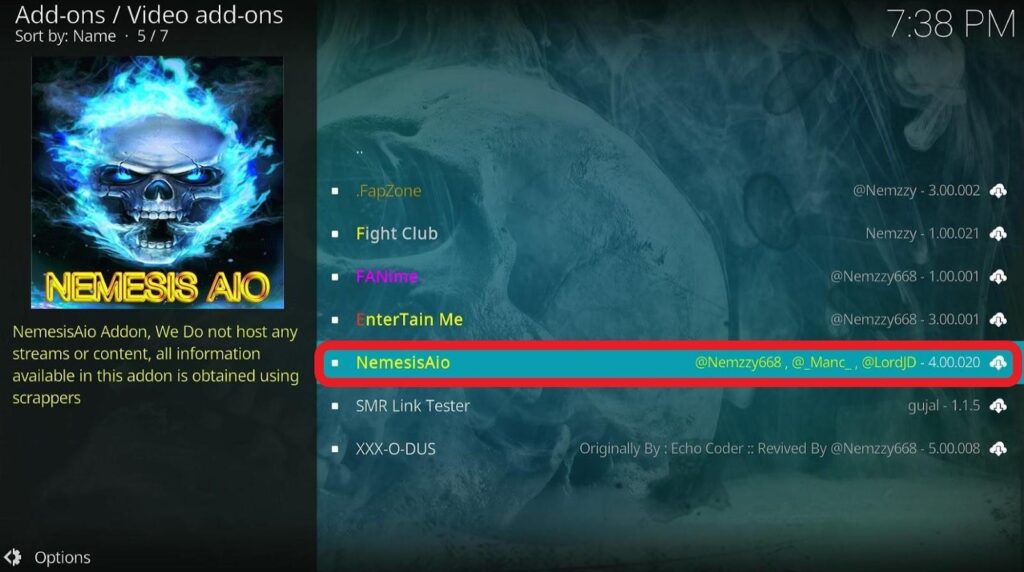

Step 18: Select the NemesisAIO option and click on Install icon.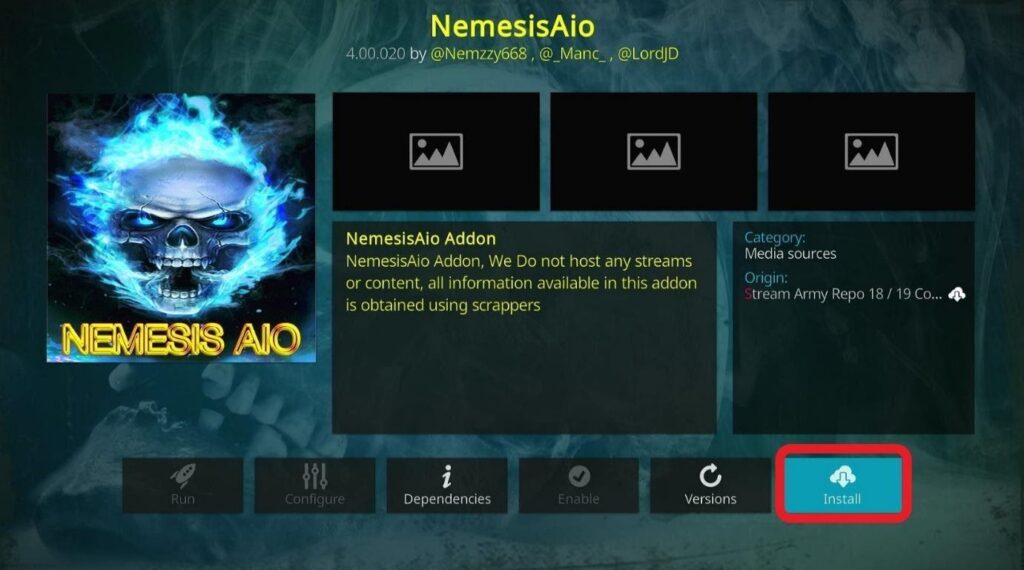

Step 19: A pop-up window will appear seeking your permission to install additional add-ons.
Select Ok.
When the installation is finished, a confirmation pop-up will appear stating that the Nemesis Add-on has been installed.
Now that you’ve successfully installed the Nemesis AIO Kodi add-on, let’s get you acquainted with how it works.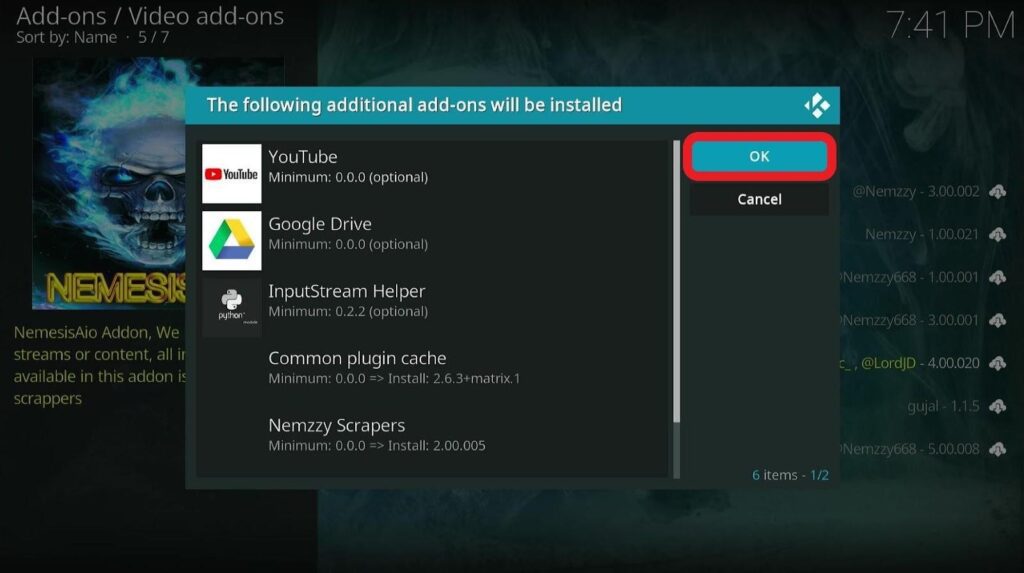

Nemesis AIO requires you to generate a web PIN every few hours, without which it stops working. Here’s how you can generate a PIN:
Step 1: Select Add-ons from the Kodi homepage.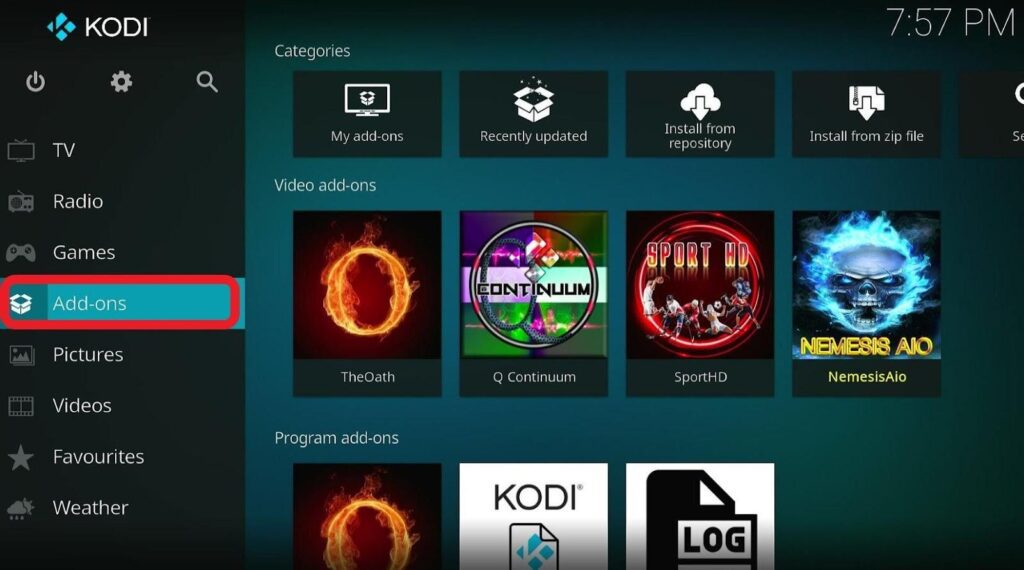

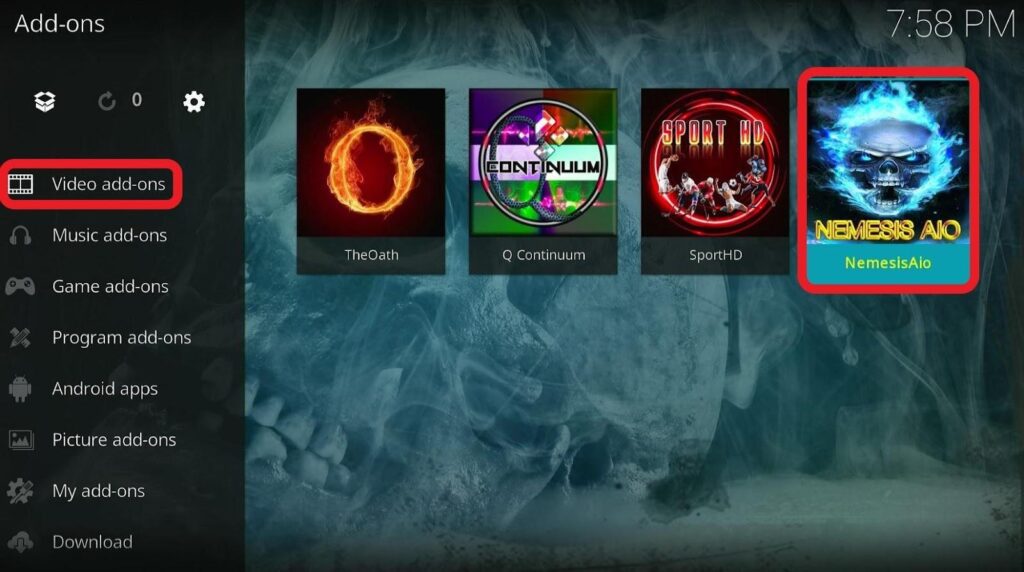
From the resulting options, click on the Nemesis AIO icon to launch it.

Step 3: A pop-up will appear when you’re launching the add-on for the first time. The same pop-up will come up every few hours, reminding you to generate an Access Token (web PIN).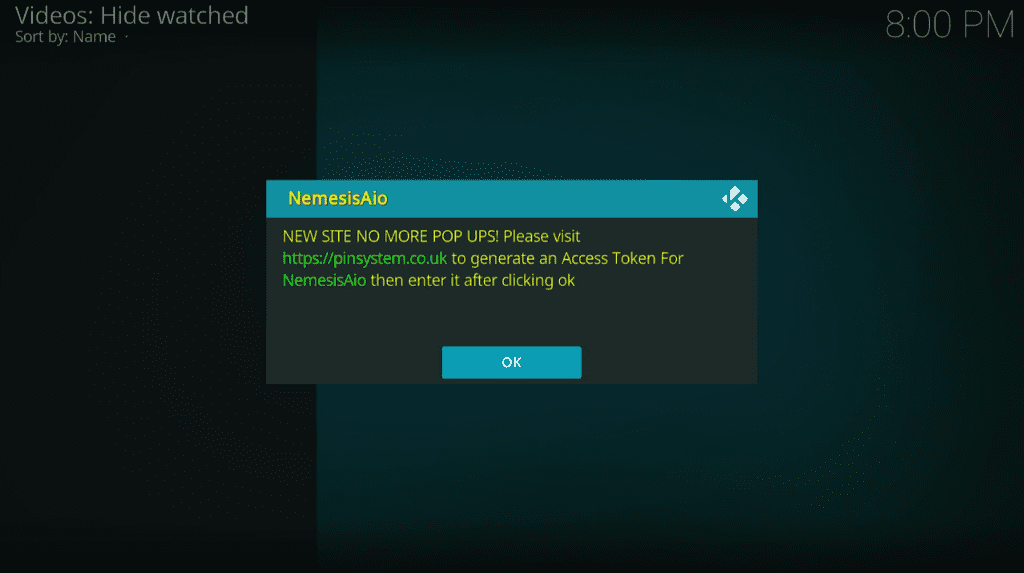


Step 4: From a browser on your mobile phone or computer, go to: https://pinsystem.co.uk
Select the Generate PIN button. It will be at the bottom of the page.

Step 5: Select the Click To View Pin option.
Note down the PIN you see.

Step 6: Return to Kodi and select OK on the popup.


Step 7: Enter the PIN you noted in the previous step.
Click OK.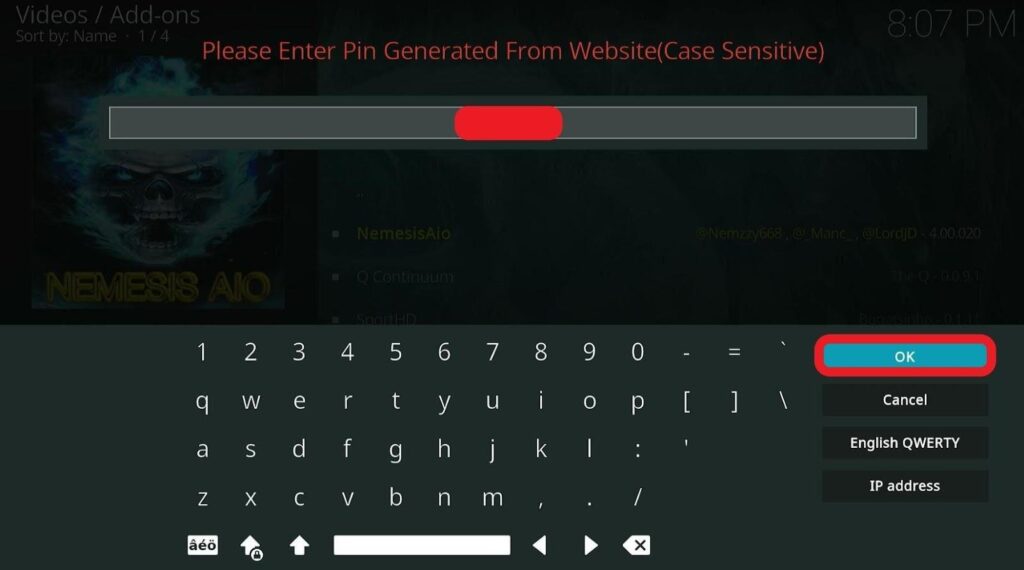

Kodi add-ons or builds fail to offer a safe streaming experience. Whatever you stream, view or browse can be monitored by your government. If you’re caught watching copyrighted content, you might be at a risk of a fine, jail time, or both.
That’s why it’s recommended to use a reliable Kodi VPN while streaming your favorite shows and movies. A VPN masks your real IP address, shielding your online activity from tracking, speed-throttling, and geo-blocking.
Here are some of the best VPNs available for Kodi:
Despite keeping you safe on the internet, ExpressVPN won’t take up much space on your Firestick. This enables it to consume less processing power, allowing your Amazon Fire TV Stick’s speed to stay unaffected.


This VPN is highly secure, with no evidence of DNS breaches, DNS hijacking or VPN data leaks. It also uses a multi-hop server to provide an extra layer of defense to its users and offers ‘Split Tunneling’ as well.


Its ‘Split Tunneling’ feature comes in handy for users who don’t want specific applications or URLs to travel via the VPN. We can also vouch for this VPN’s amazing upload and download speeds.
This VPN has a large number of servers operating out of 91 counters. And it also provides a seamless user experience across a wide range of devices, including Android, iOS, PC, gaming consoles, smart TVs, and routers.
Follow these steps to install ExpressVPN on Firestick:
Step 1: Sign up for one of ExpressVPN’s subscription plans. There are three of them, including monthly, bi-annual, and annual. All subscription plans come with a 30-day return warranty.
Step 2: Open your Firestick’s search bar. Select the ExpressVPN icon from the search results.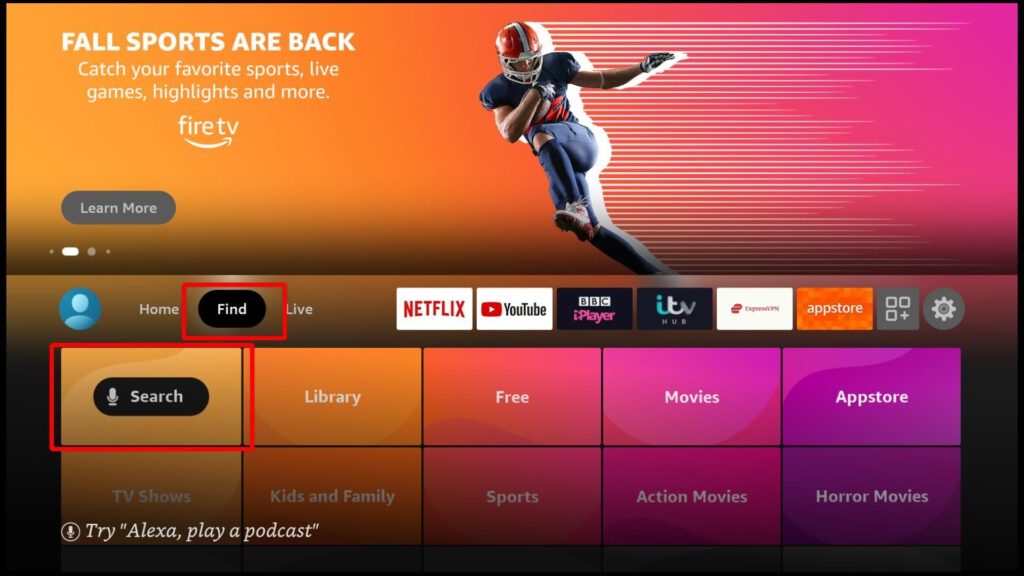

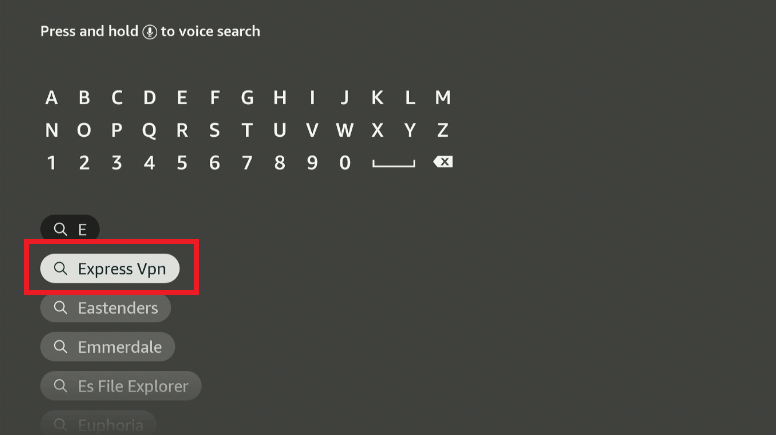

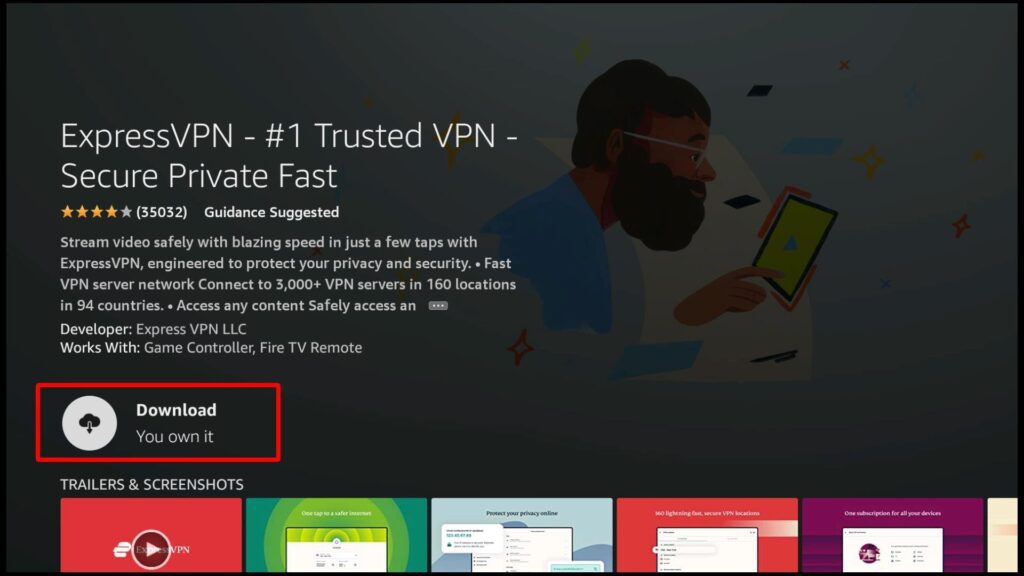
Step 4: Download the ExpressVPN app.

Step 5: Once the download is complete, sign in to ExpressVPN by entering your login details (email and password) 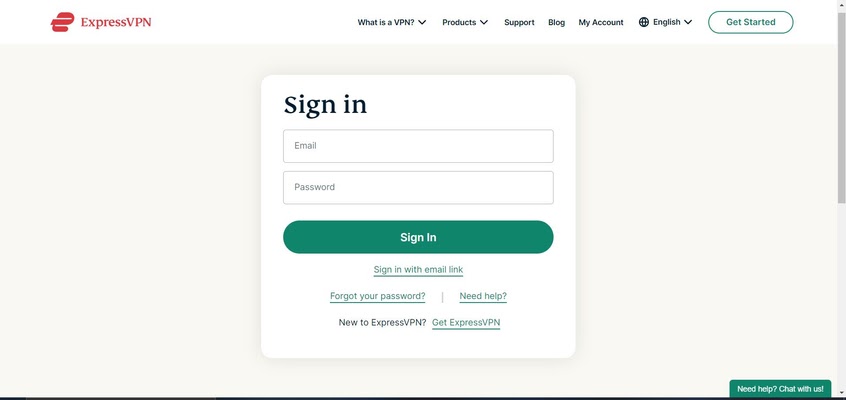


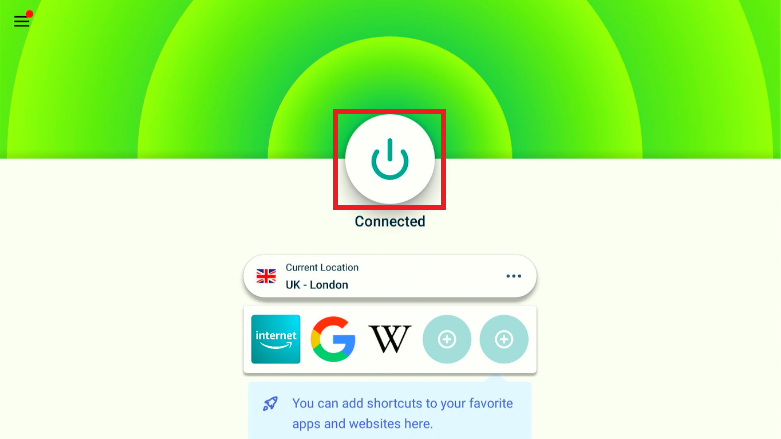

The Nemesis AIO Kodi addon has what it takes to keep you glued to your seat for hours. It offers hundreds of movies, TV shows, as well as other forms of entertainment such as documentaries, webcams, gaming videos, and more.
Each category also has at least one set of subcategories. This means you will never run out of content to explore. And the arrangement of the categories/subcategories is so neat that it’s a cinch to navigate through them.
If you want to authorize Real Debrid with Nemesis AIO addon, select Settings >> Maintenance on the homepage.
Decided this addon is not for you? Try some of the best Kodi addons right now (that we actually use!).
Nemesis AIO is a powerful Kodi addon for streaming documentaries, TV series, movies, anime and other media. It also comes with a live sports segment and offers dedicated sections for kids’ enjoyment as well. All of this makes it worth a shot.