There’s no denying that Netflix is among the most popular streaming services currently available. Now, imagine being able to take Netflix’s functionality up a notch. With Netflix integrated into Kodi, you can enjoy added features such as hi-res playbacks, library integration, and much more.
However, accessing Netflix on Kodi is easier said than done. The streaming platform has no addon available on Kodi’s official repository. To use Netflix on Kodi, you’d have to install an unofficial addon from a third-party source. This works for Amazon Fire TV Stick, Firestick 4K, Firestick Lite, Fire TV Cube, Android Devices, and PCs. The only prerequisite is to have Kodi installed on your device.
If you already have already installed Kodi, here’s how you can do it on Kodi 19 Matrix and Kodi 18 Leia:
Follow these steps to install the Kodi Netflix addon:
Since the Netflix addon isn’t available on the official Kodi repository, you’ll have to source it from a third-party repository. This requires downloading a source that contains the repository.
We have selected a source named Fusion TV for this guide. It contains a repository named CastagnaIT, which hosts the unofficial Netflix addon for Kodi.
Feeling overwhelmed with all this technical stuff? Forget what you’ve read until now and follow the instructions given below:
Step 1: Launch the Kodi media player on your Firestick.

Step 2: On Kodi’s home menu, look for the Settings icon. It will be at the top-left corner (as shown in the screenshot).
Click on the Settings icon.
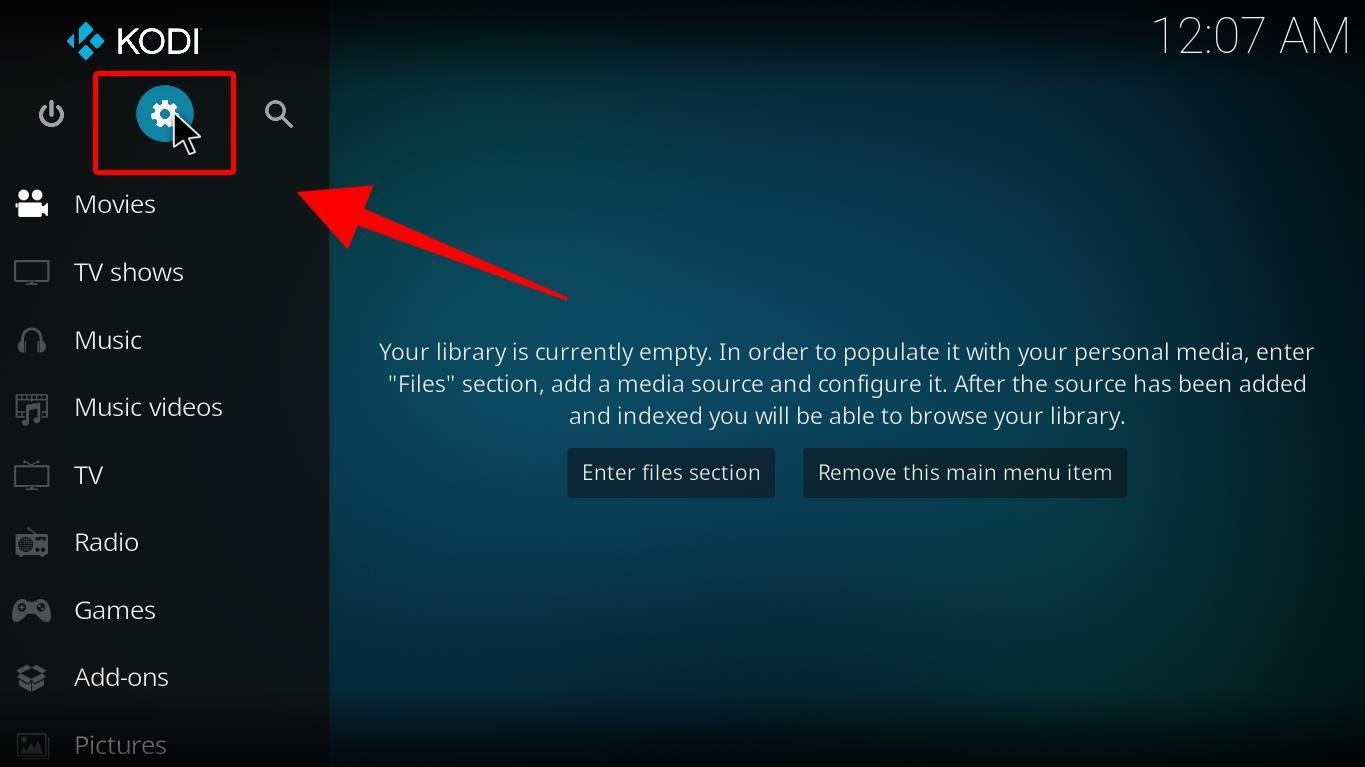
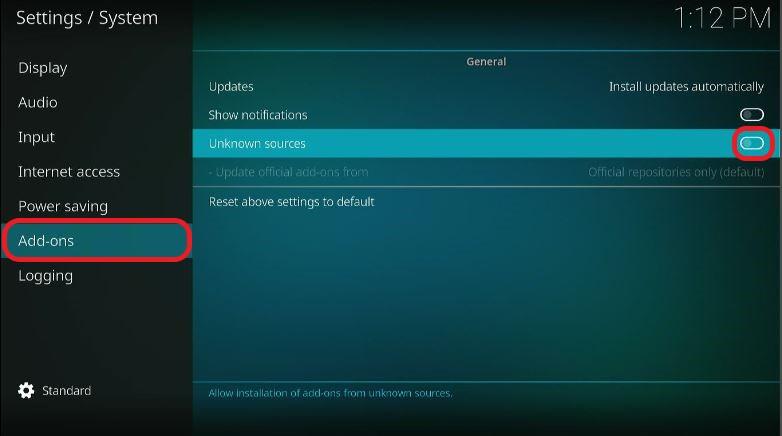
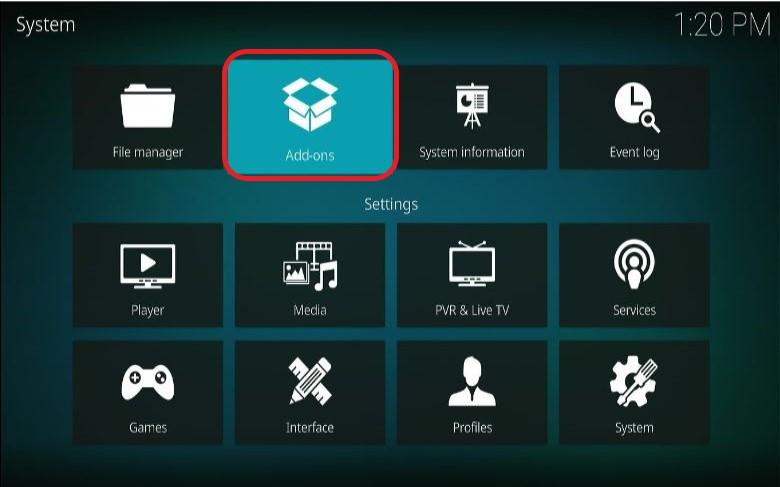
Step 3: Select the System option.
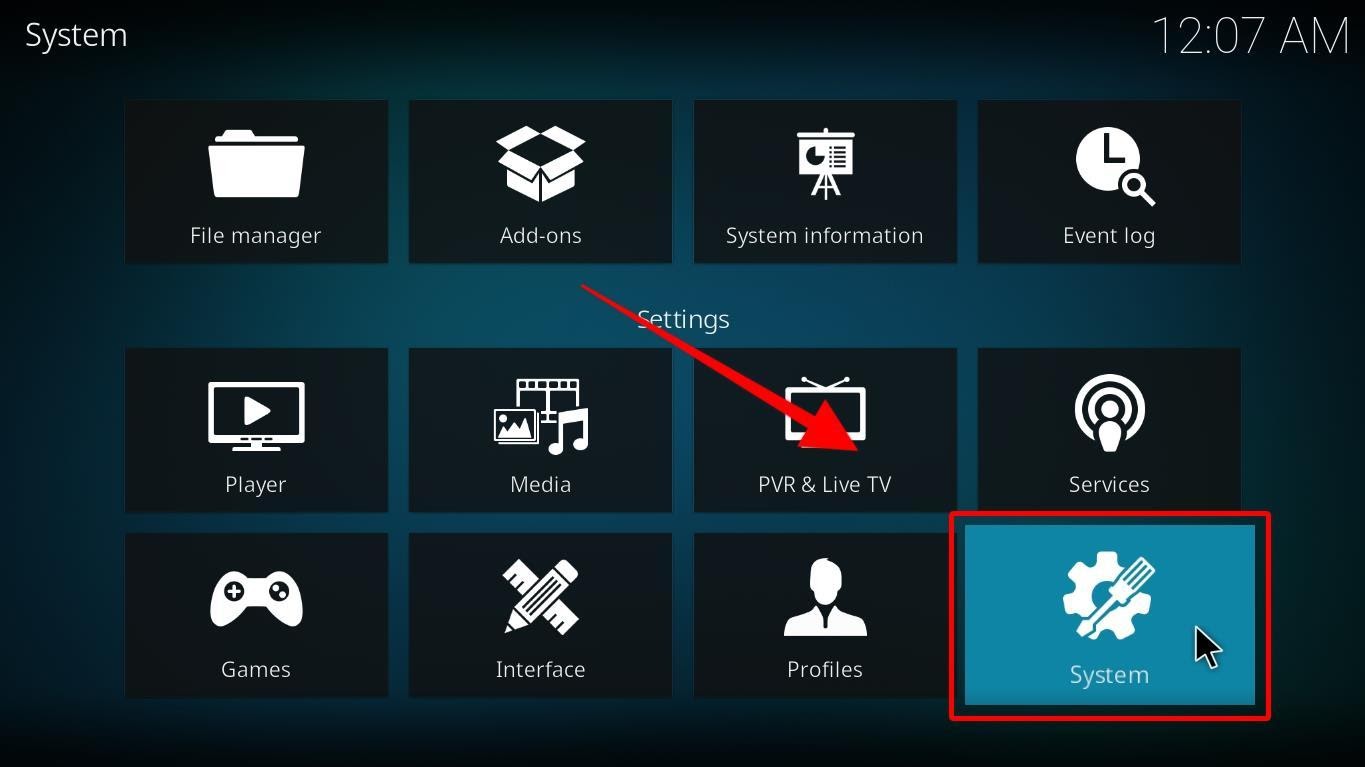
Step 4: Click on the addons tab.
Afterward, from the right-side menu, toggle Unknown Sources on.
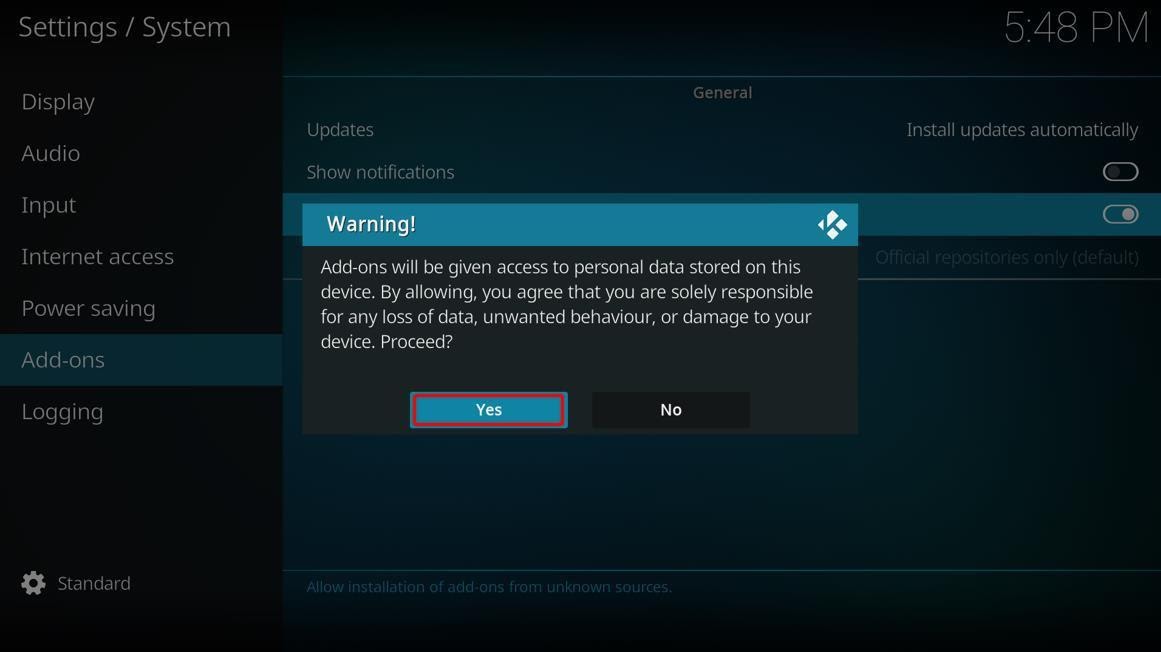
Step 5: A warning prompt will appear; select Yes.
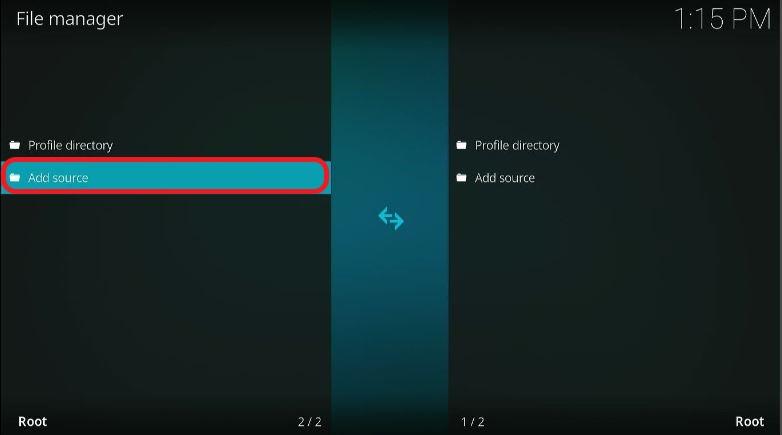
Step 6: Head back to Kodi’s settings and click on File Manager.

Step 7: Select Add source.
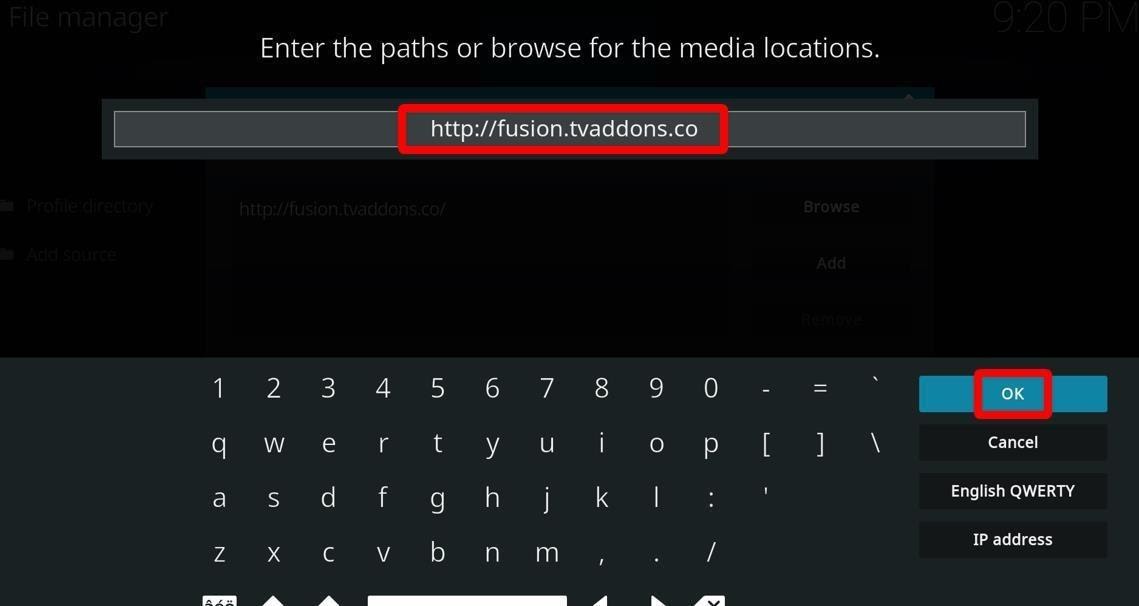
Step 8: A smaller window will open; click on <None>.
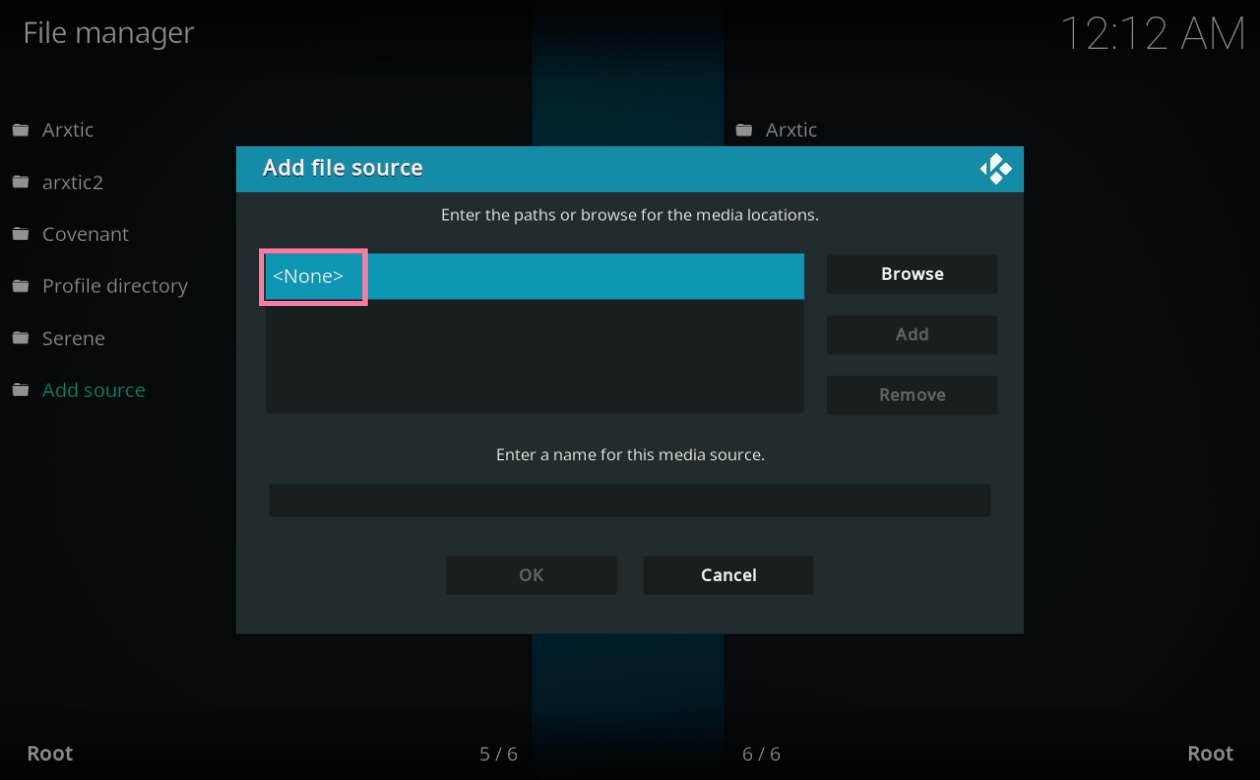
Another window will open.
In the URL bar, type this URL: http://fusion.tvaddons.co
Select OK to continue.
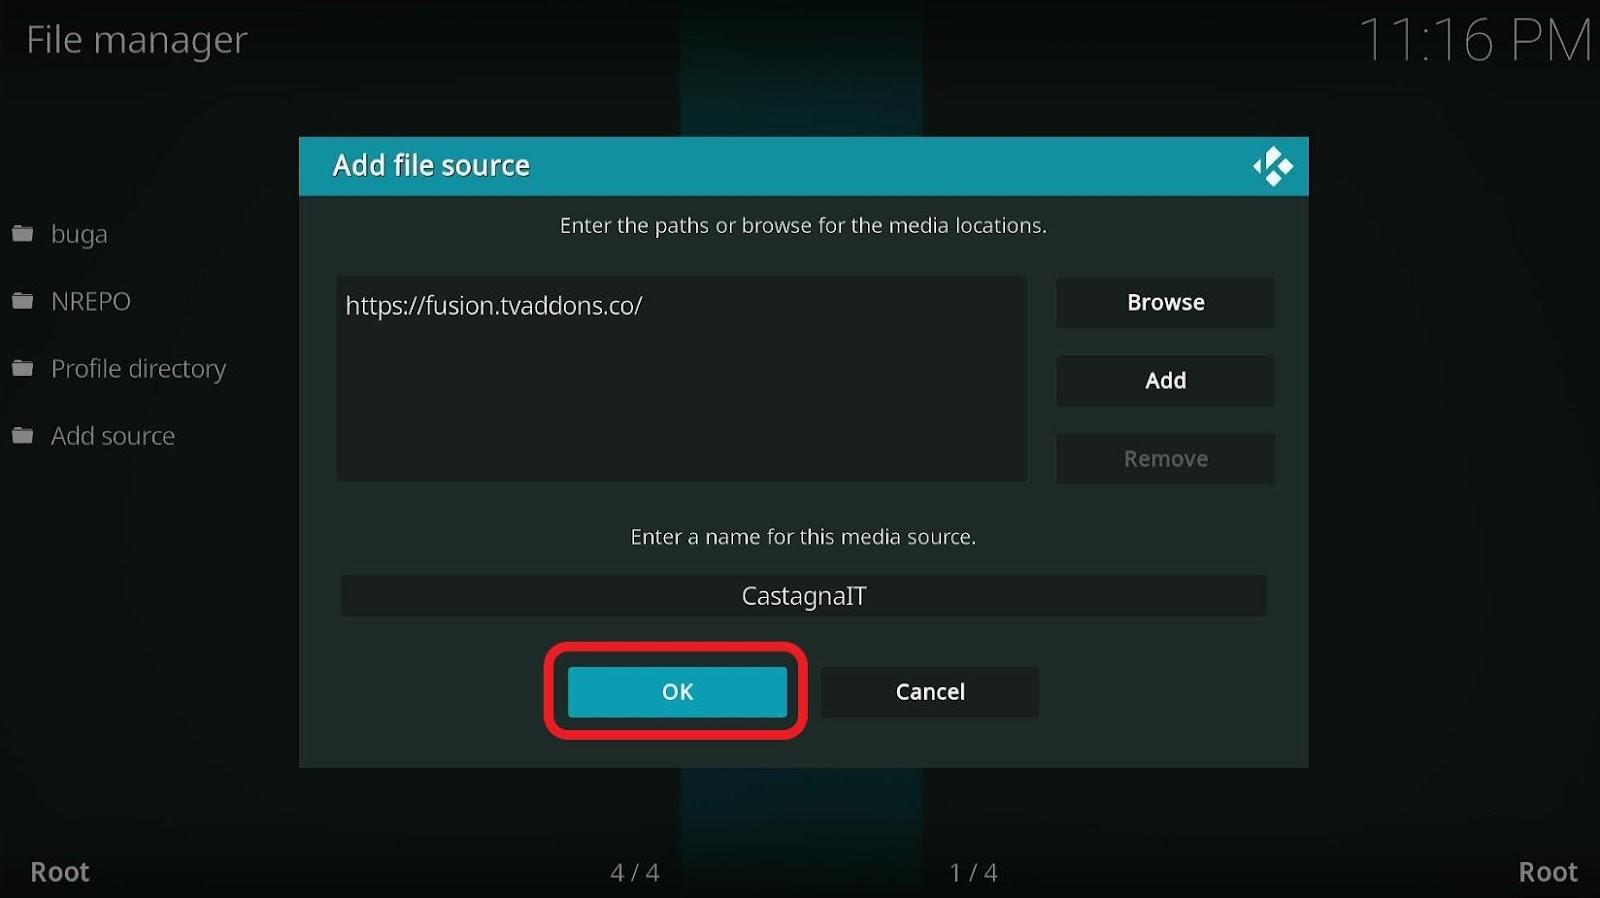
Step 9: Add a name you selected for the source in: ‘Enter a name for this media source’.
Any name would work. We are naming the source CastagnalT.
Click on OK to continue.

Now that you’ve successfully added the source, move on to the next part.
In this part, you’re going to install the CastagnaIT Repository from the source you just added in the section above.
This repository contains the Netflix addon, so installing it on Kodi is an indispensable prerequisite.
Follow these instructions to install the CastagnaIT Repository on Kodi:
Step 1: From the Settings, select addons.
Step 2: Click on Install from zip file.
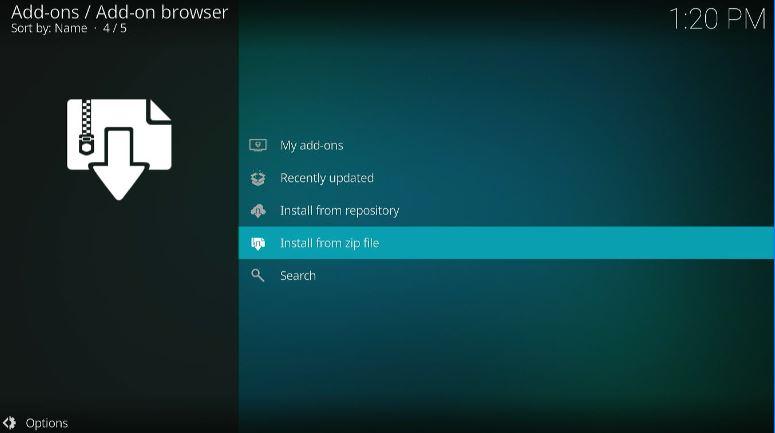
Step 3: A small window will pop up, showcasing a list of options.
Search for the name you gave the source earlier and click on it.
In our case, it is CastagnaIT.

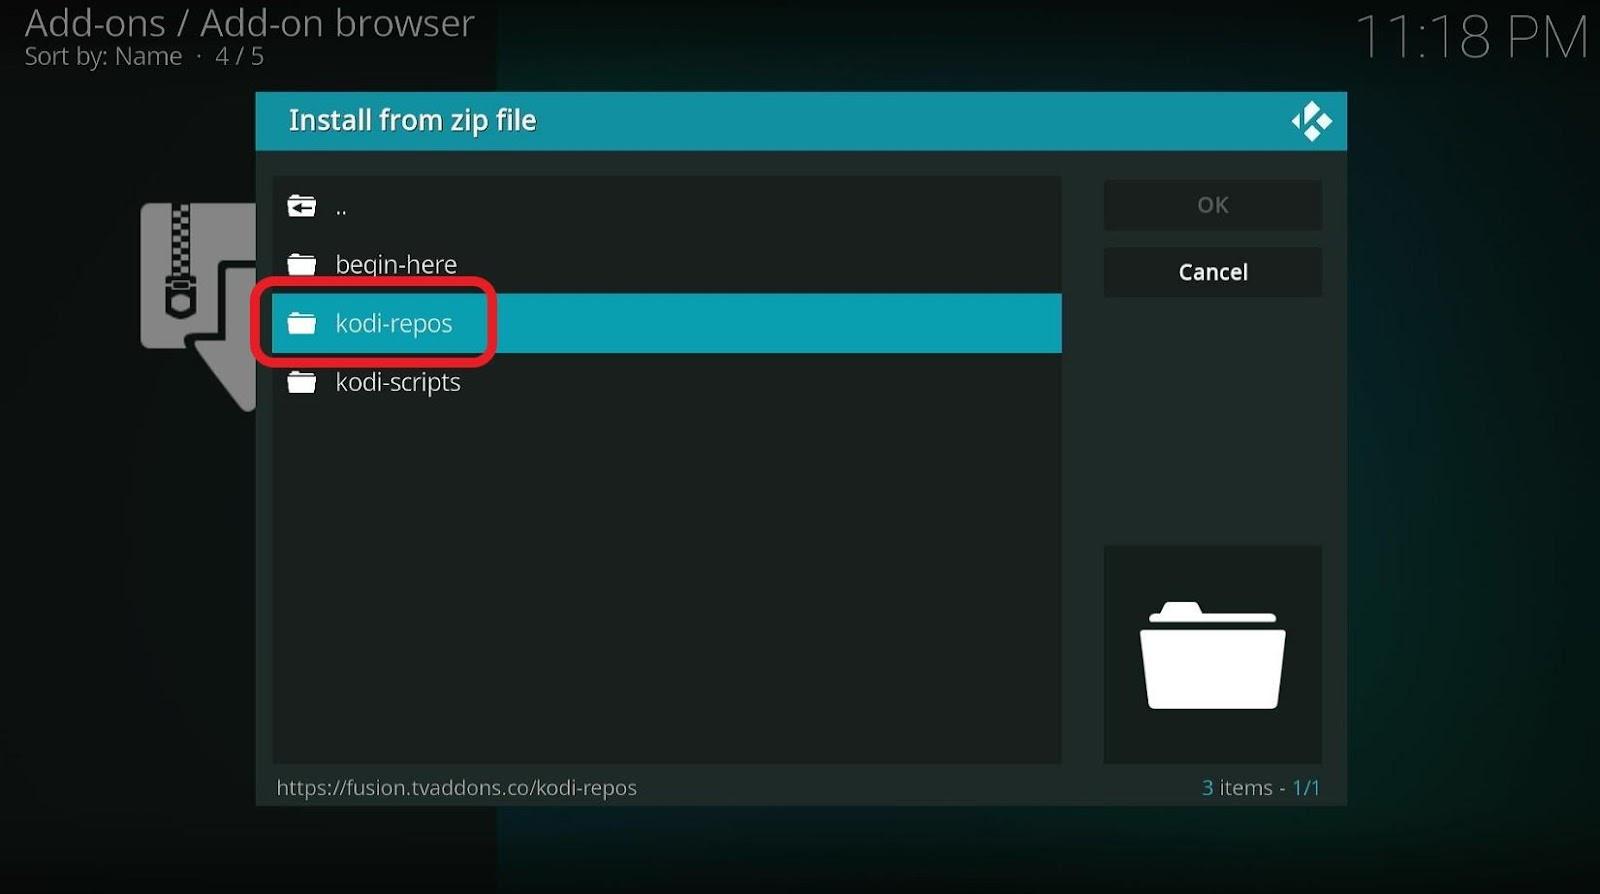
Step 4: Select ‘Kodi-repos.’
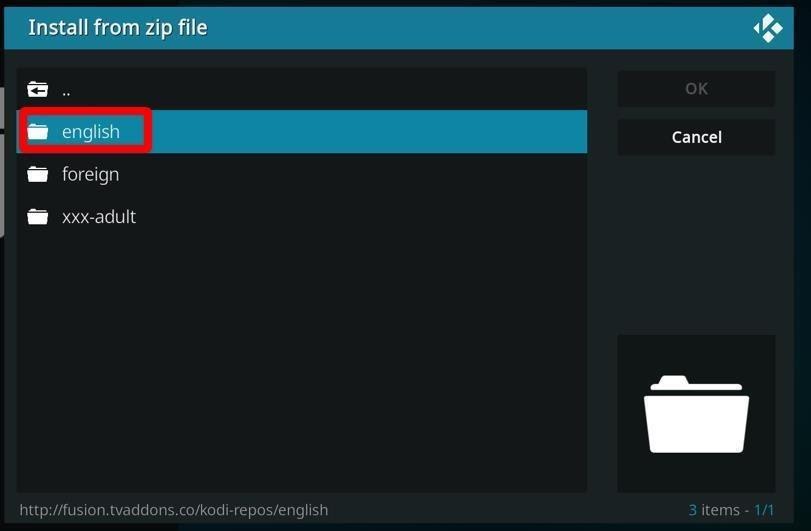
Step 5: Choose English.
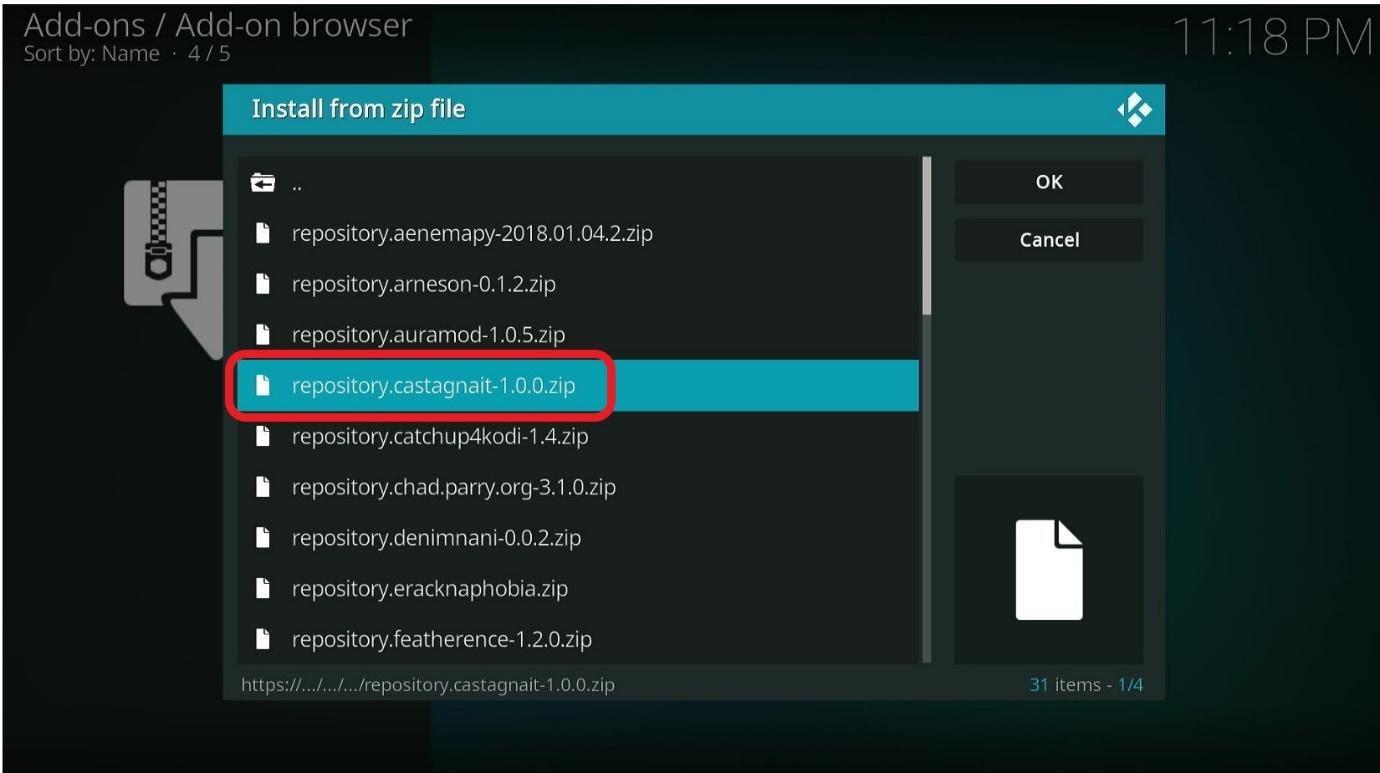
You’ll see a list. Scroll to find ‘repository.castagnait-1.0.0.zip‘.
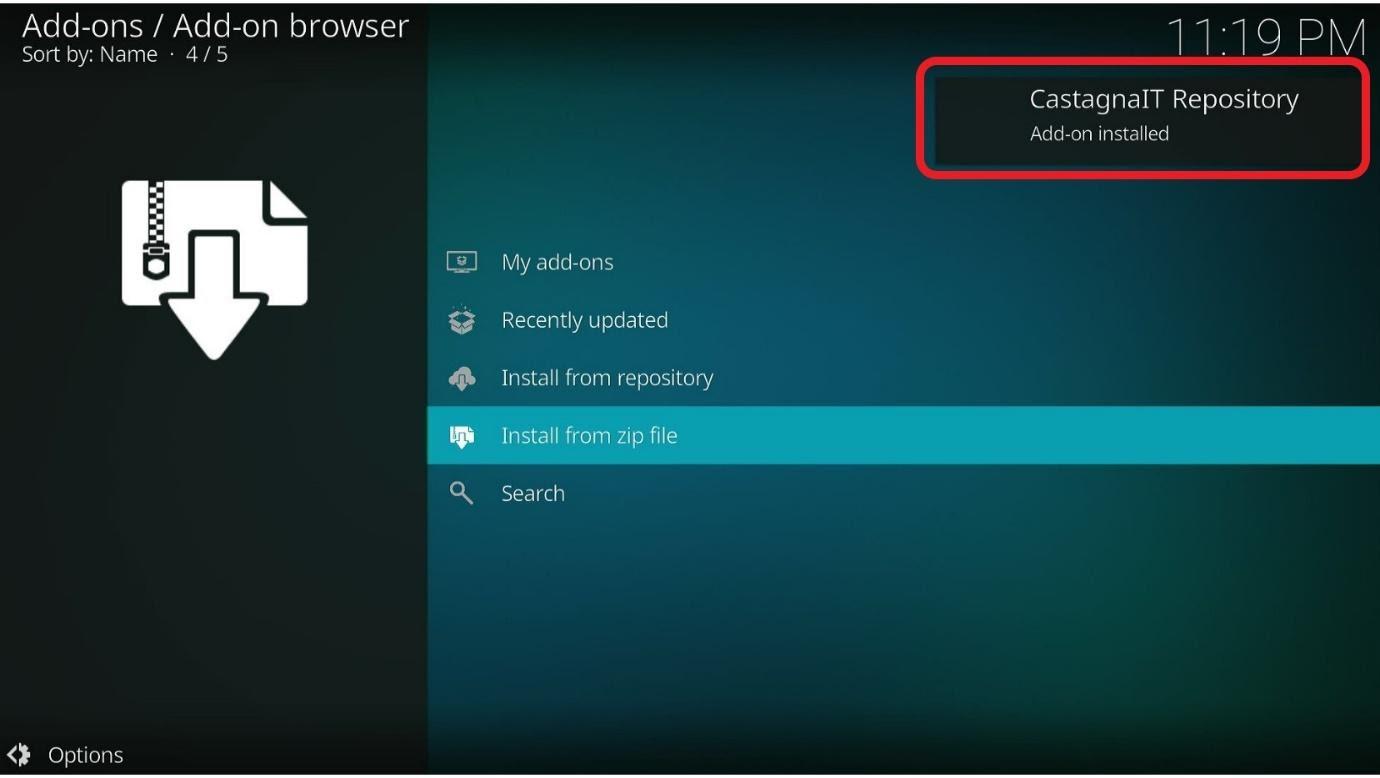
An installation confirmation notification ‘TV addons Co repo installed’ will appear on the top right corner – wait for it to appear before moving ahead.
Now that you’ve installed the CastagnaIT repository on your device, it’s time to install the Netflix addon.
Step 1: Once the installation is complete, you’ll automatically be redirected to the addons screen. Here’s how it will look like (see screenshot).
In case you aren’t automatically redirected, go to the home menu and navigate to Settings>addon.
Step 2: Click on Install from repository.

Step 3: Choose CastagnaIT Repository.

Step 4: If you’ve previously installed addons, you’ll see all of them on this screen. Otherwise, there will be solo Video add-ons addon.
Click on it.
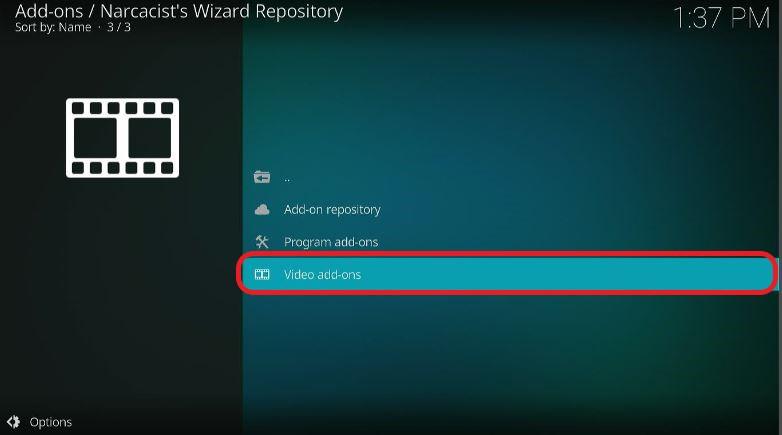
Step 5: Scroll down to the Netflix option.
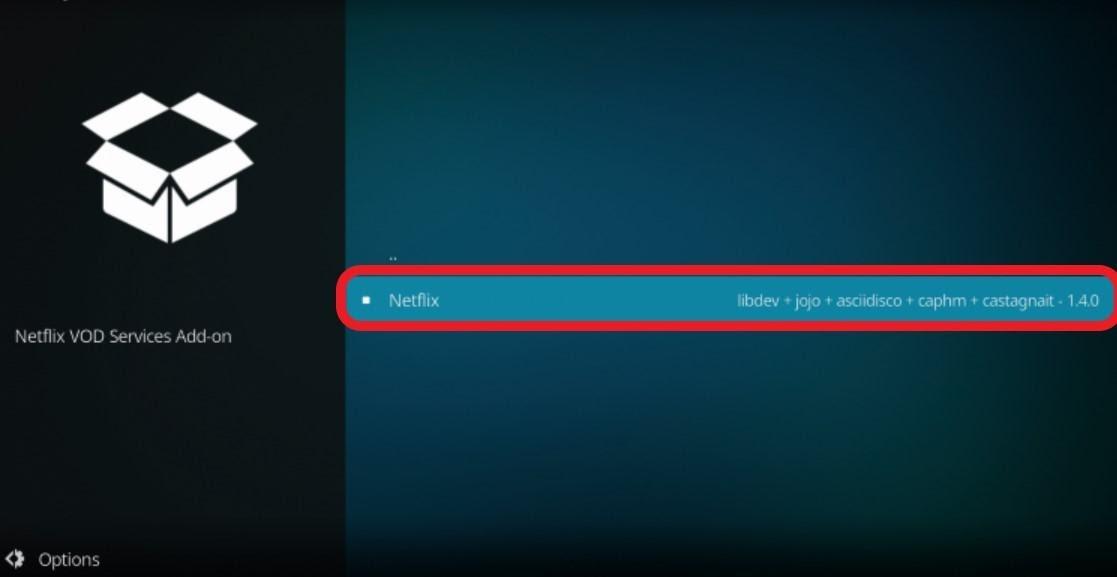
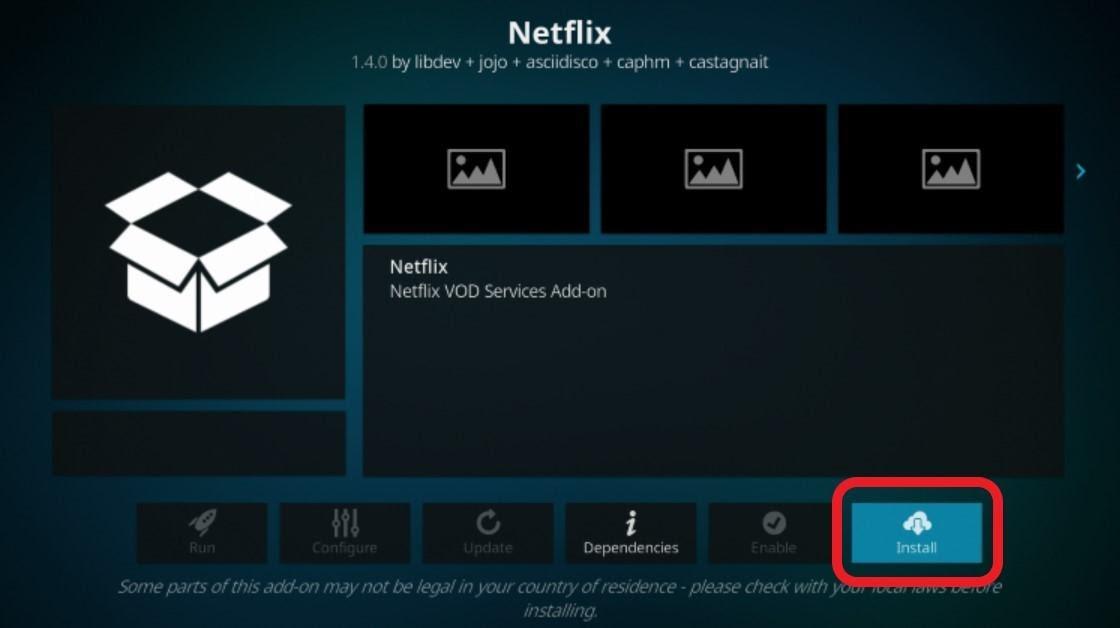
Select the Netflix option and click on Install.
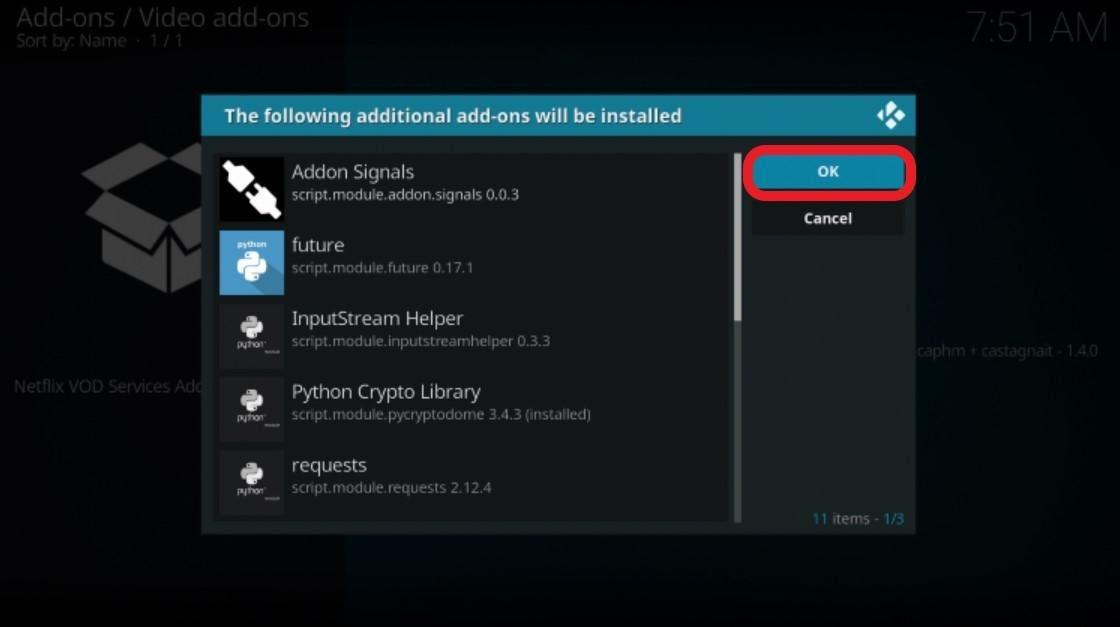
Step 6: After clicking on Install, you’ll see different versions of the Netflix addon.
Select the one on top of the list. It’s the latest version.
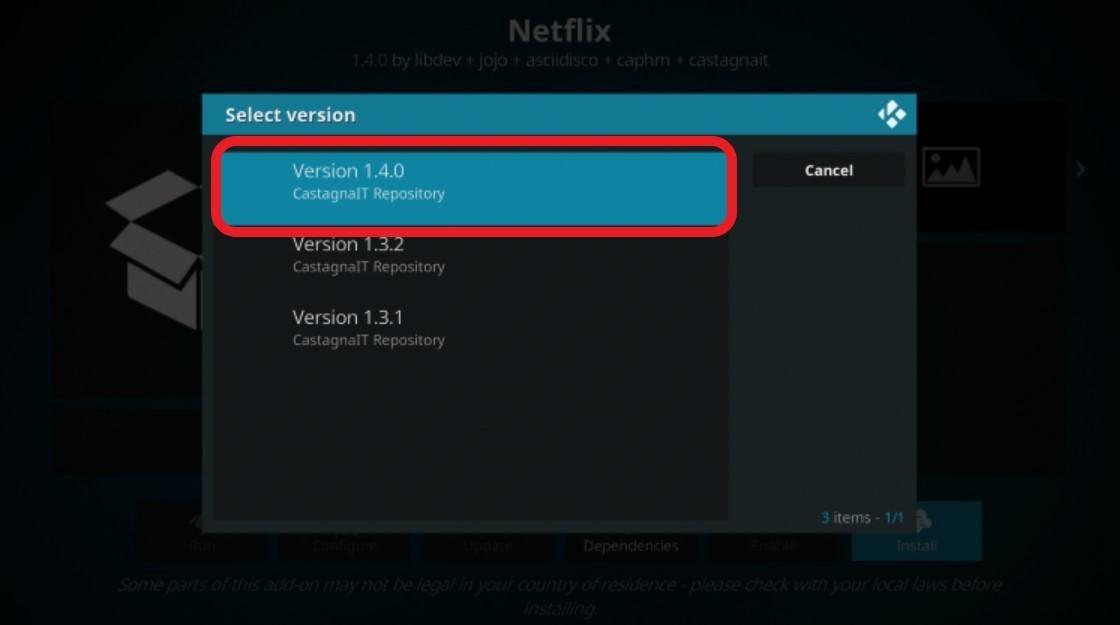
Select OK to begin the installation process.
After the process is complete, you will get a notification saying Netflix addon installed.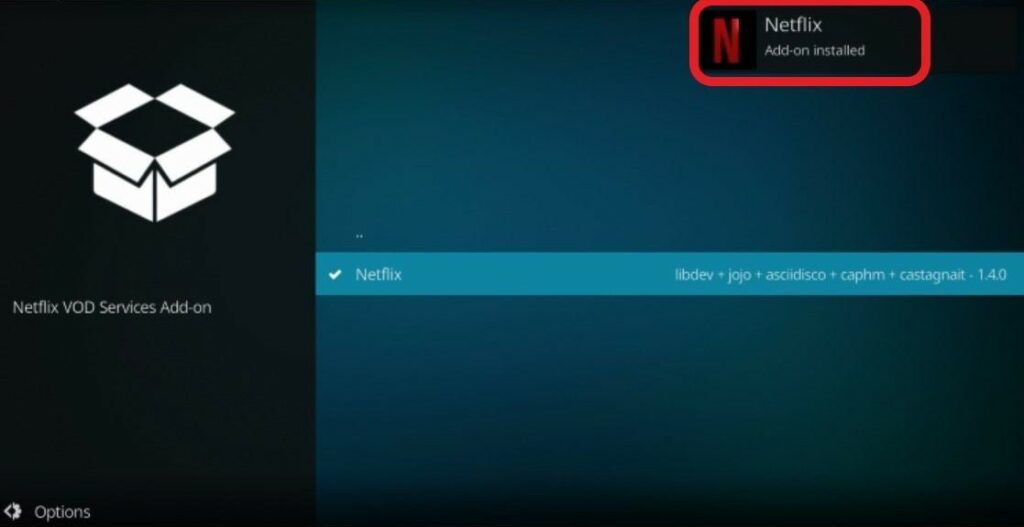
After the pop-up has appeared, go to the homepage and select the addons option.
You should be able to see the Netflix addon you just installed in the Video addons tab.
Although sourced from a third-party repository, the Netflix Kodi addon is quite similar to the actual Netflix app in terms of functionality.
Once you launch the addon, you’ll need to set up an account first. Here’s how you can do it:
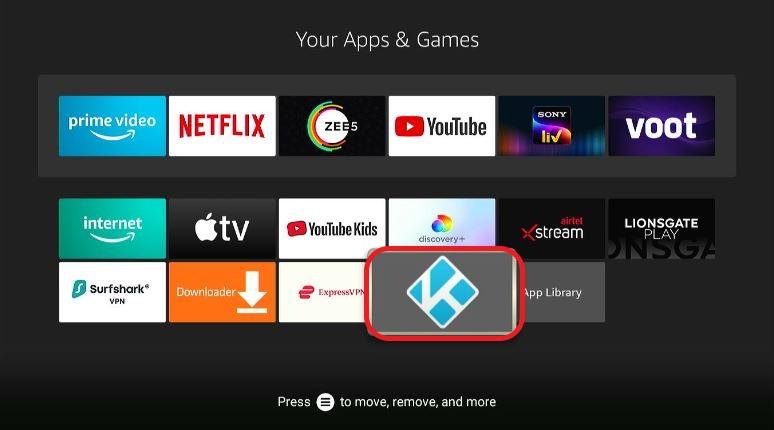
Step 1: On Kodi’s homepage, select addons.
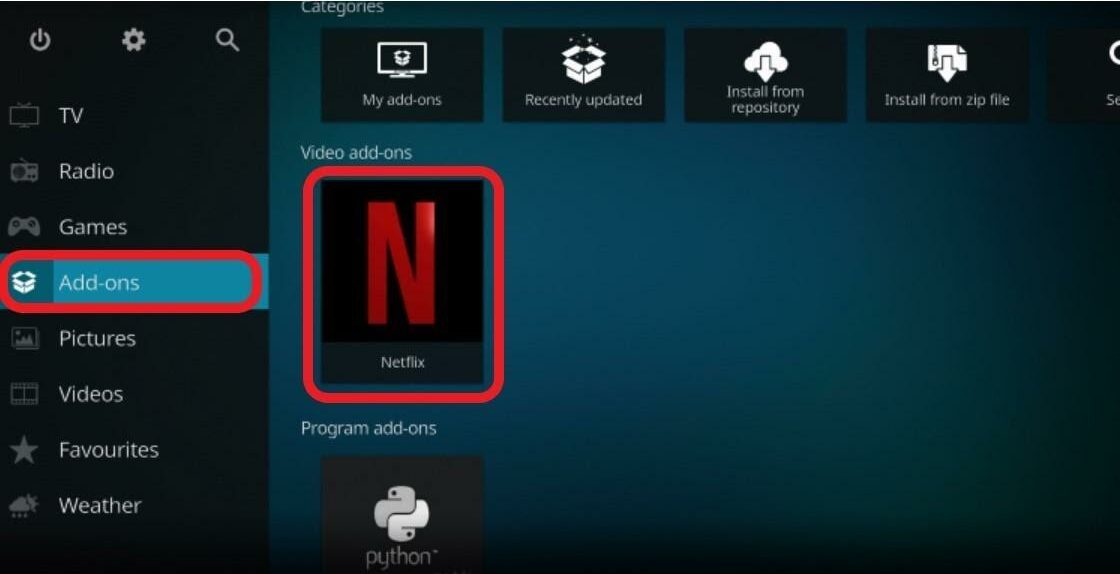
Step 2: Select the Netflix icon. As shown in the screenshot, it will be under the Video addons category
![]()
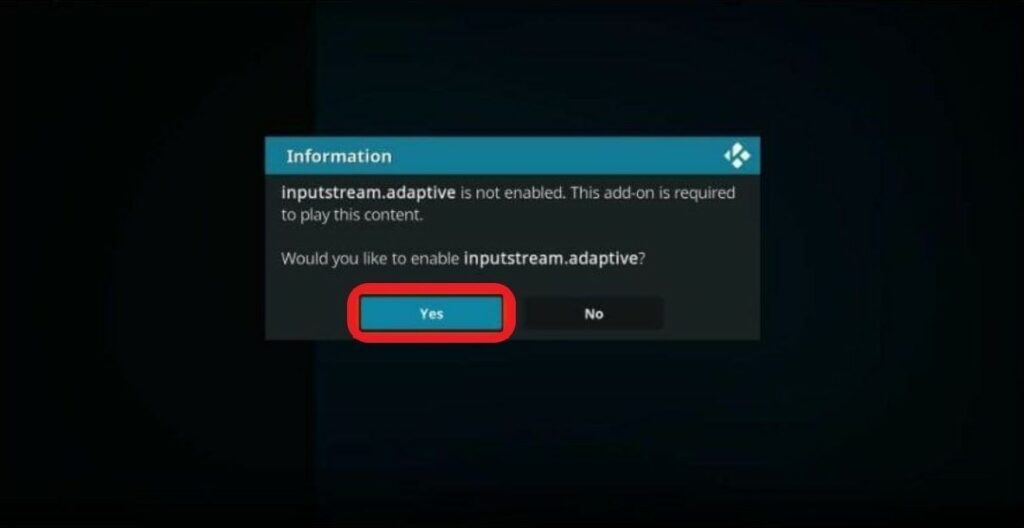
Step 3: A pop-up will appear when launching the Netflix addon for the first time. It will ask you to enable the inputstream.adaptive addon.
Click Yes.
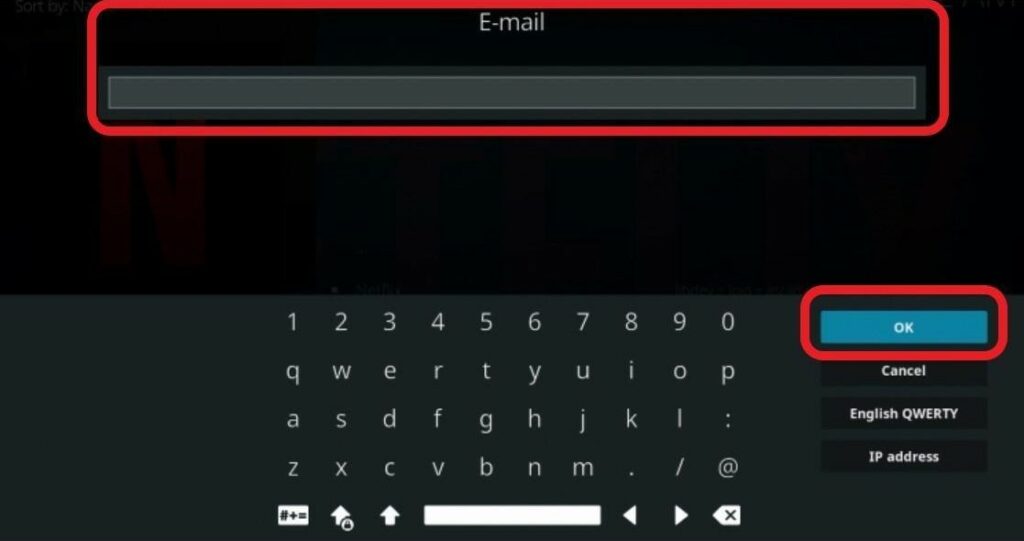
Step 4: Select the email/password option.
Step 5: Sign in to your Netflix account by entering your login credentials (email and password).
Select the OK button afterward
Congratulations! You’ve successfully installed and logged into the Netflix addon from your Kodi media player.
Keep in mind that the Netflix addon’s interface won’t look exactly the same as that of the official app.
For instance, it will contain a folder named Top 10. Selecting it will show you the top ten titles currently trending in your region.
You’ll see other folders on the addon’s homescreen, such as My List, New Releases, Trending Now, among others.
You can also search for your favorite content on the Netflix addon.
Scroll down through the folders and select the Search folder at the bottom. Type the name of the title you want to stream.
Important Note: We recommend that you choose a good Netflix VPN before you start streaming your favorite content with this addon.
addons, especially those sourced from unofficial third-party developers, have trackers that send information regarding your online activity to the developer, putting your privacy at risk.
When you watch content online, your streaming history is visible to ISP and government agencies. They might engage in surveillance to keep track of your online activities.
Using a VPN is, therefore, necessary if you care about your privacy.
The unofficial Netflix Kodi addon, maintained by CastagnaIT, is simple to use. It is incredibly responsive and lets you search for your favorite titles, just like you’d do on the official Netflix app.

You need to load content from reCAPTCHA to submit the form. Please note that doing so will share data with third-party providers.
More InformationYou are currently viewing a placeholder content from Turnstile. To access the actual content, click the button below. Please note that doing so will share data with third-party providers.
More InformationYou are currently viewing a placeholder content from Facebook. To access the actual content, click the button below. Please note that doing so will share data with third-party providers.
More InformationYou need to load content from reCAPTCHA to submit the form. Please note that doing so will share data with third-party providers.
More InformationYou are currently viewing a placeholder content from reCAPTCHA. To access the actual content, click the button below. Please note that doing so will share data with third-party providers.
More InformationYou are currently viewing a placeholder content from Instagram. To access the actual content, click the button below. Please note that doing so will share data with third-party providers.
More InformationYou are currently viewing a placeholder content from X. To access the actual content, click the button below. Please note that doing so will share data with third-party providers.
More Information