The Phoenix Rises Kodi Addon is an all-in-one app that is available through the Falcon repository that allows you to watch TV shows and movies with numerous streaming options. Since the Phoenix Rises addon isn’t in the official repository of Kodi addons, we need to install it through an external provider. The Phoenix addon is available within the Team Falcon repository as a video addon. While the Phoenix repository also contains other addons, in this post we’ll tell you how to install the Phoenix Rises Kodi addon on Amazon Fire TV Stick.
Before installing any Kodi addon, you must make sure that Kodi is configured to allow installation. This step is especially necessary when you want to install an addon that isn’t present in the official repository of Kodi. To allow installation through unknown sources on Kodi, follow these steps:
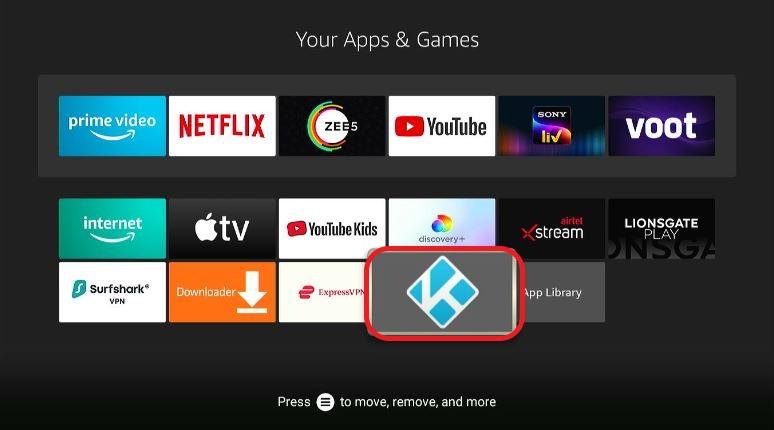
Step 1: Launch Kodi on Firestick.
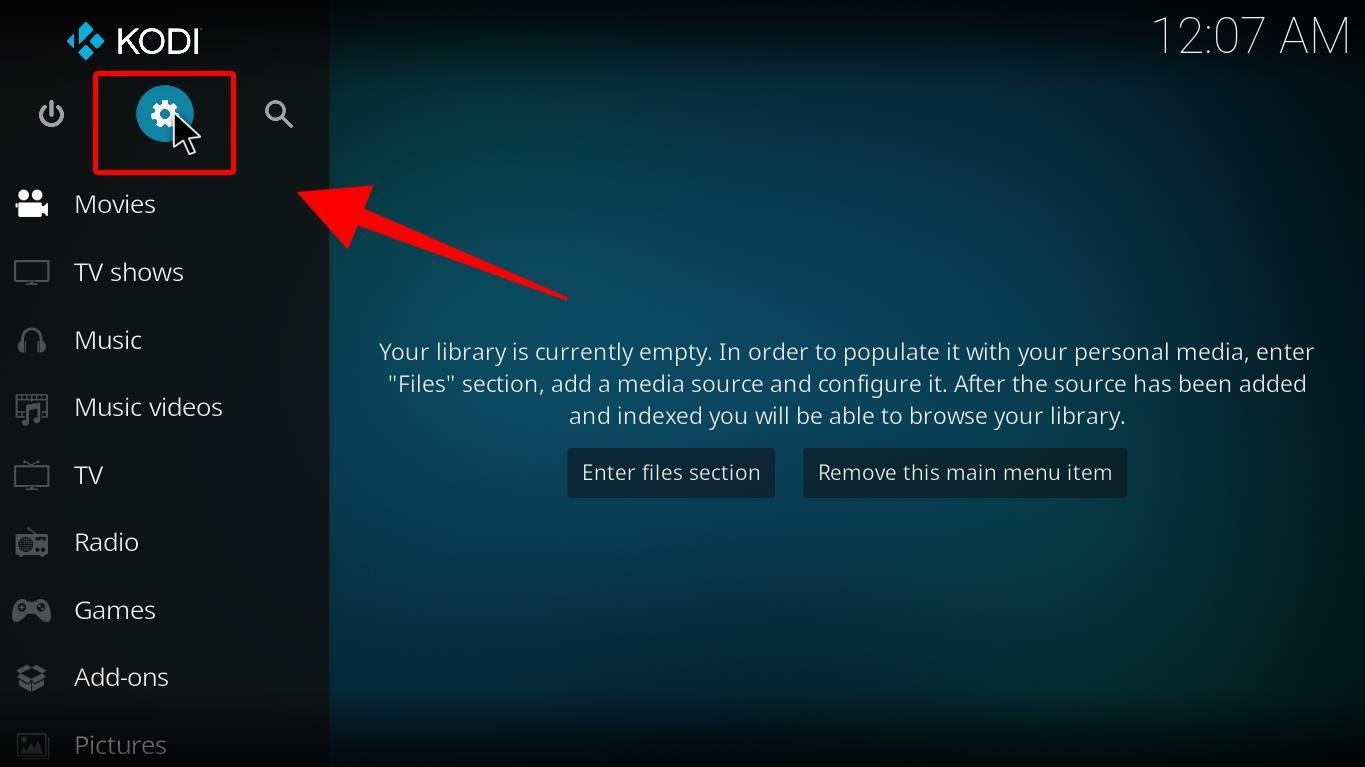
When you are on the home screen, navigate to the Settings icon present on the left side of the screen.
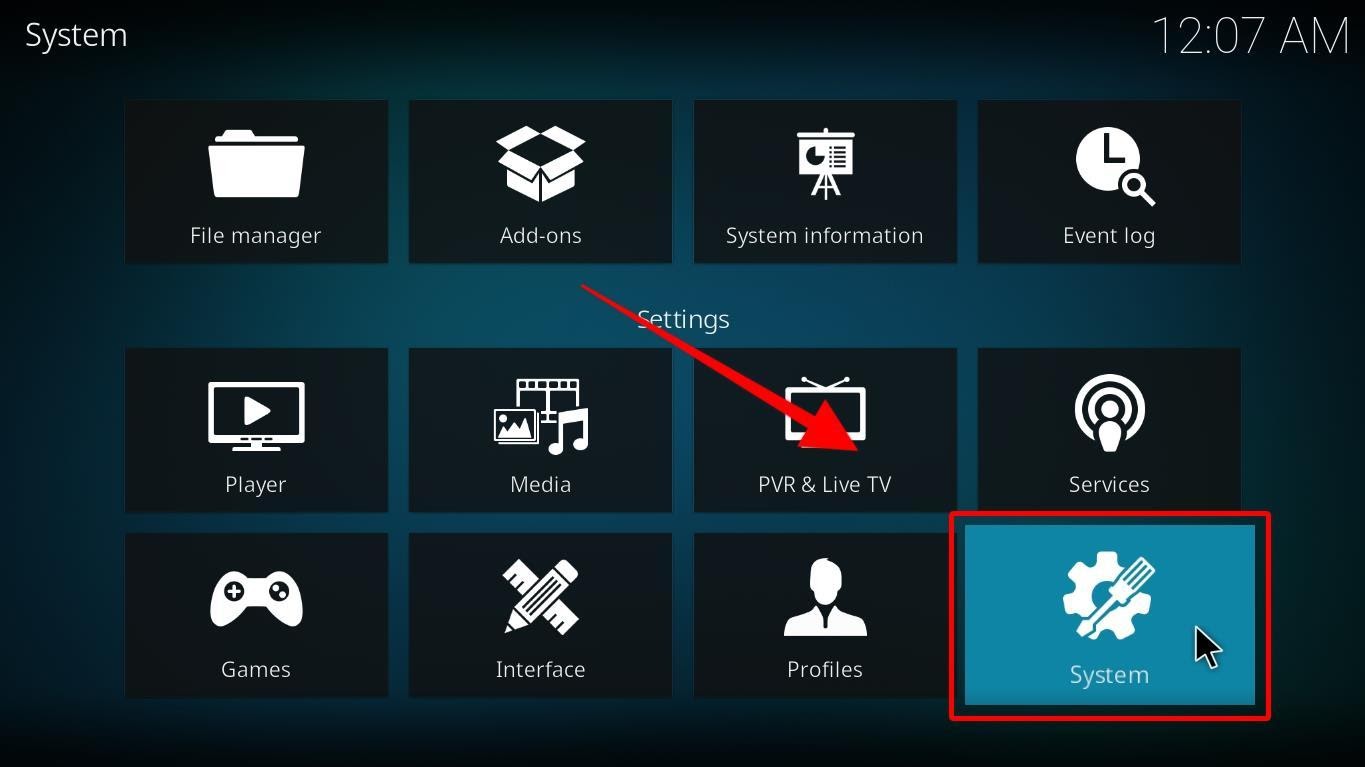
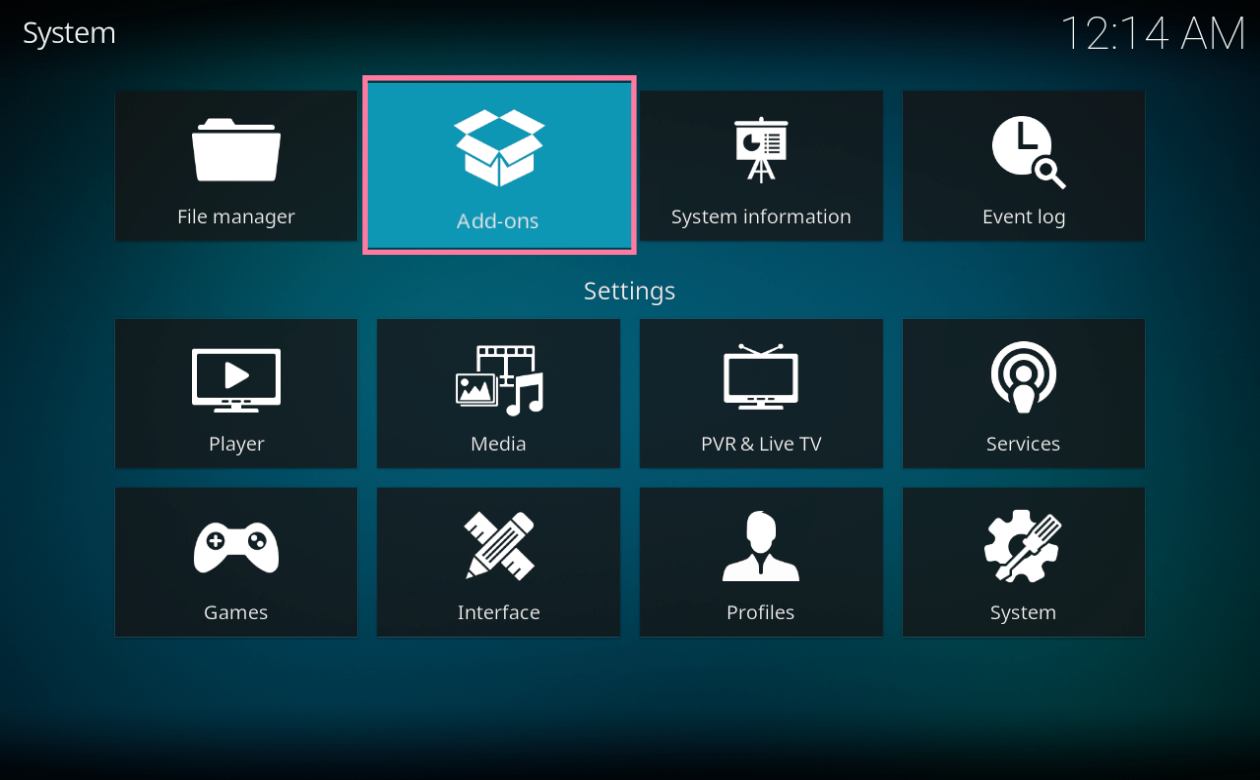
Step 2: Go to ‘System’ on this screen.
Step 3: In the system section, click on ‘Add-ons’ on the left menu
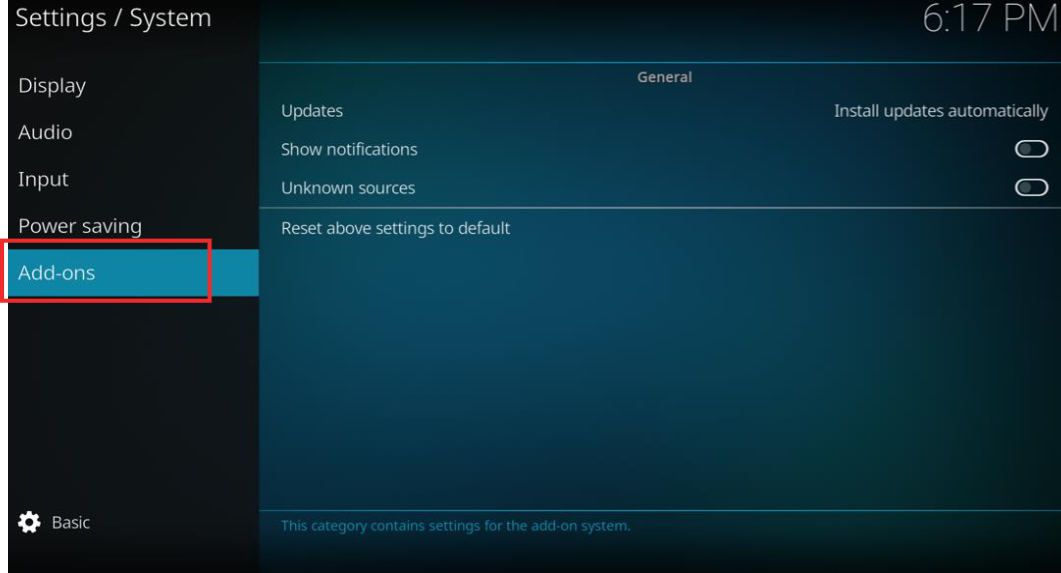
Step 4: On the right side, you’ll see some options. Navigate to ‘Unknown sources’
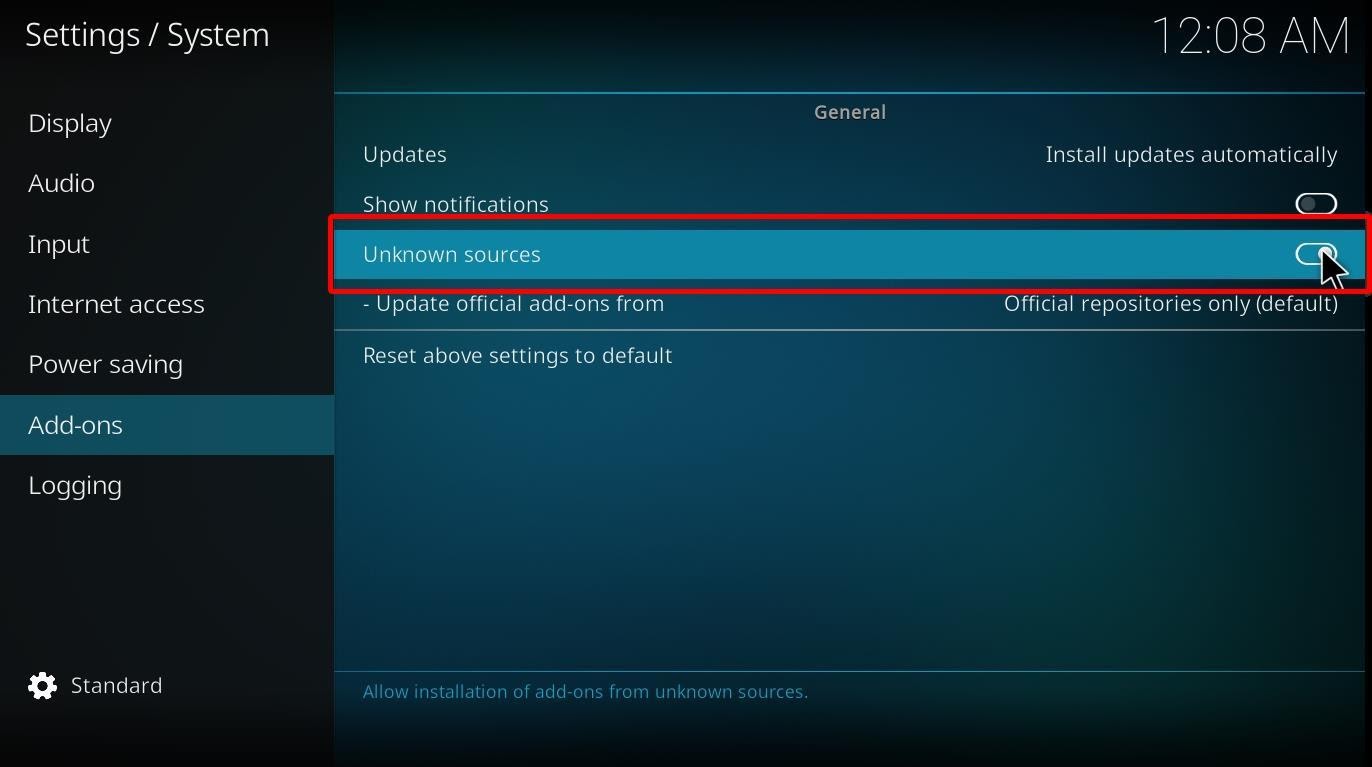
Step 5: If the ‘unknown sources’ option is disabled, click on it to turn it on
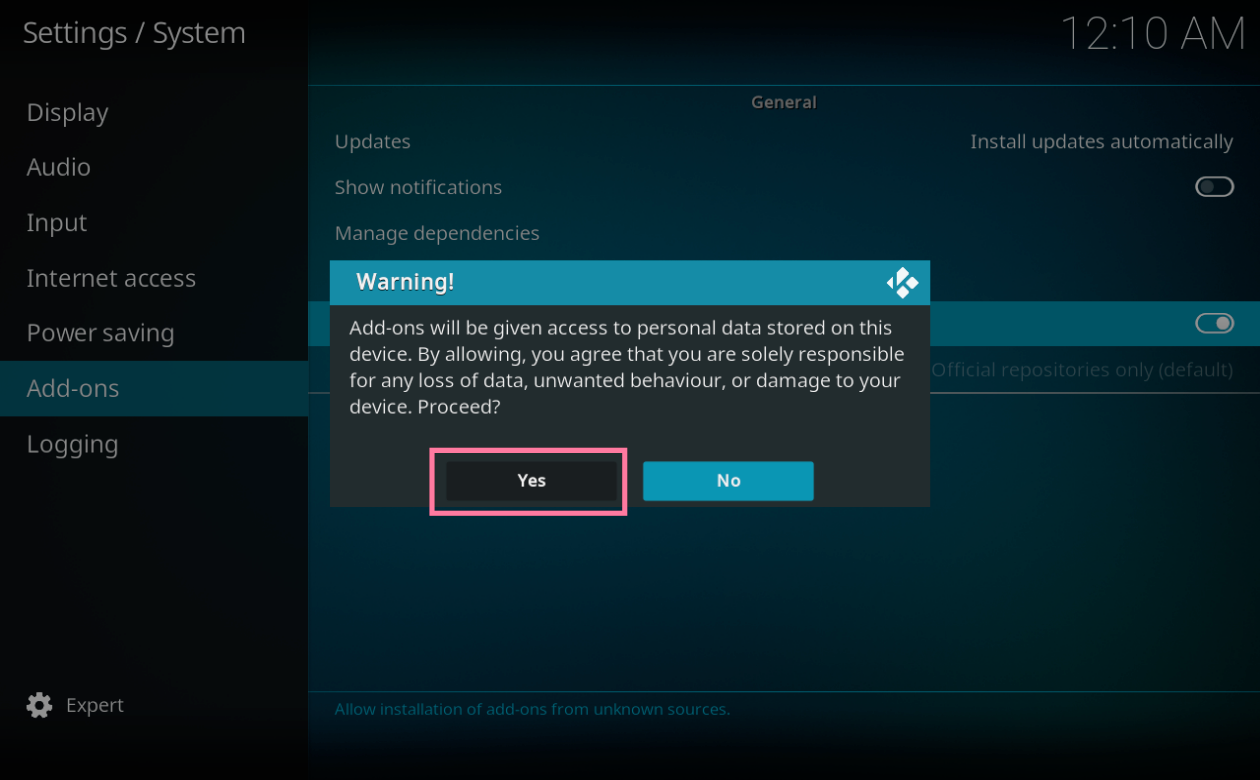
Step 6: You’ll get a warning message. Click on Yes to continue.
Your Kodi app is now configured and ready to install addons from unknown sources.
Update: The Phoenix Rises Kodi Addon is no longer available. We therefore recommend you try one of the latest and best Kodi addons for your version of Kodi.
Now that you’ve allowed Kodi to install from unknown sources, you can start the installation process for the Phoenix Rises Addon. If you know how to install any Kodi addon on Firestick, then you’ll easily install the Phoenix Rises addon too. The process is easy; you first have to add the source link, then install the repository, and then locate the addon from the repository section and install it. Following are the steps to get the Phoenix Rises on Kodi:
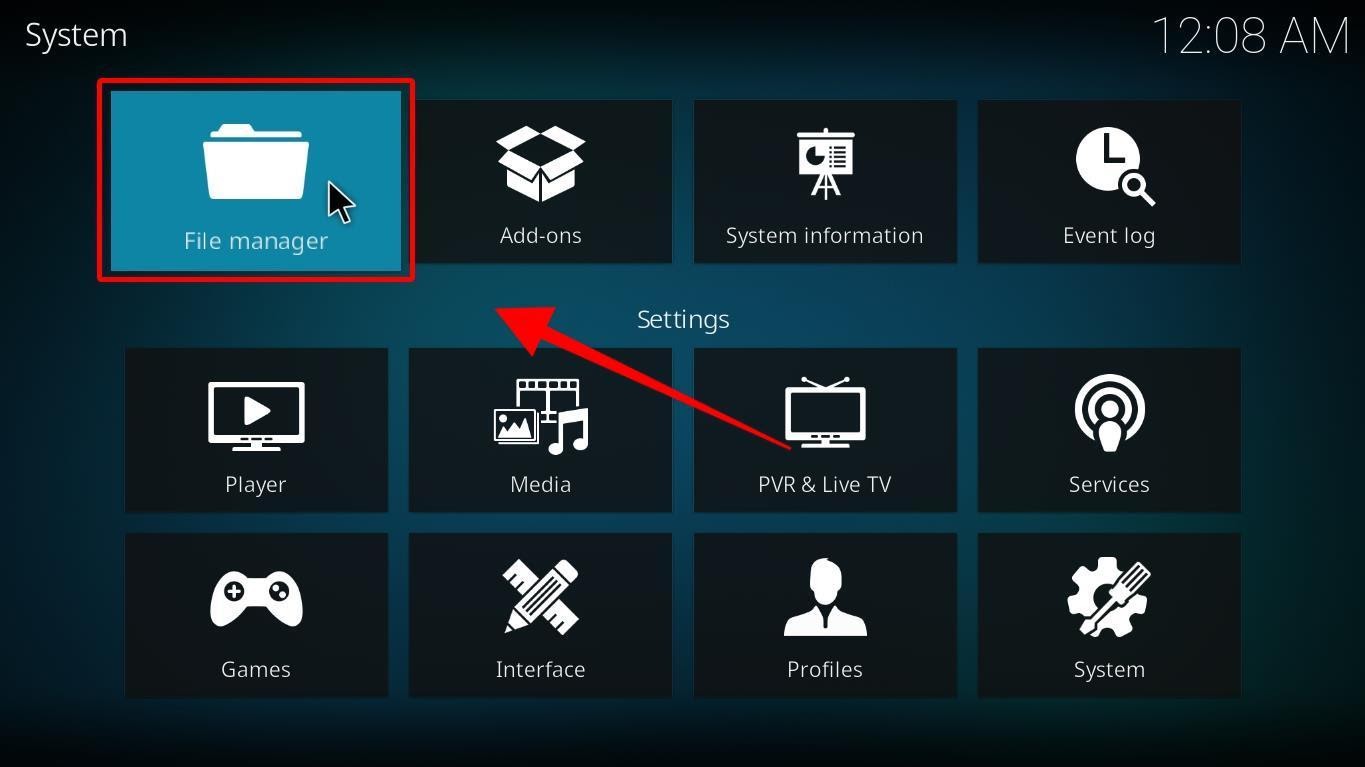
Step 1: Go to Kodi Settings on the app’s home screen.
Step 2: Click on ‘File Manager’.
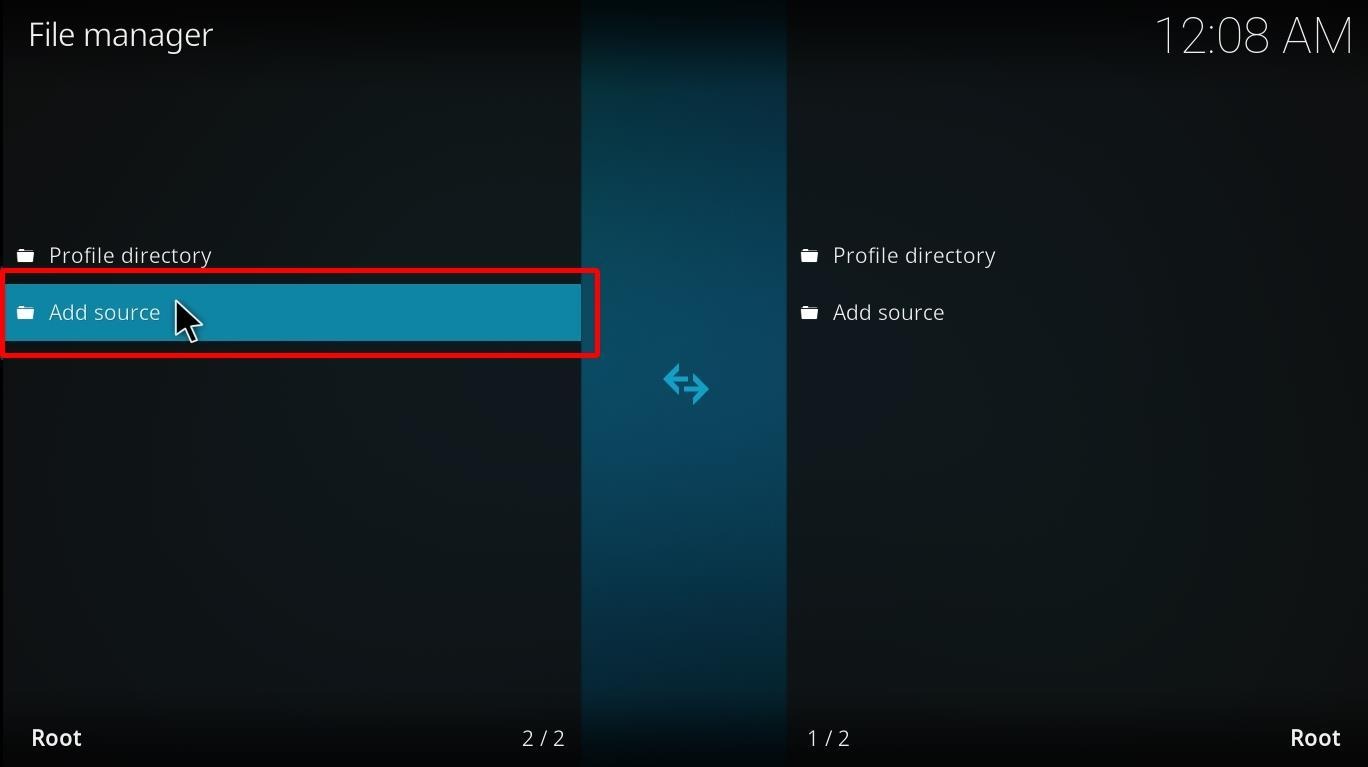
Step 3: Next, you’ll see some options on the left and right of the screen. Both sides have the same options, and thus you’re free to click on any.
Step 4: Click on ‘Add source’
Step 5: A prompt will appear where you have to enter the repository’s address. Click on ‘None’ to enter the address.
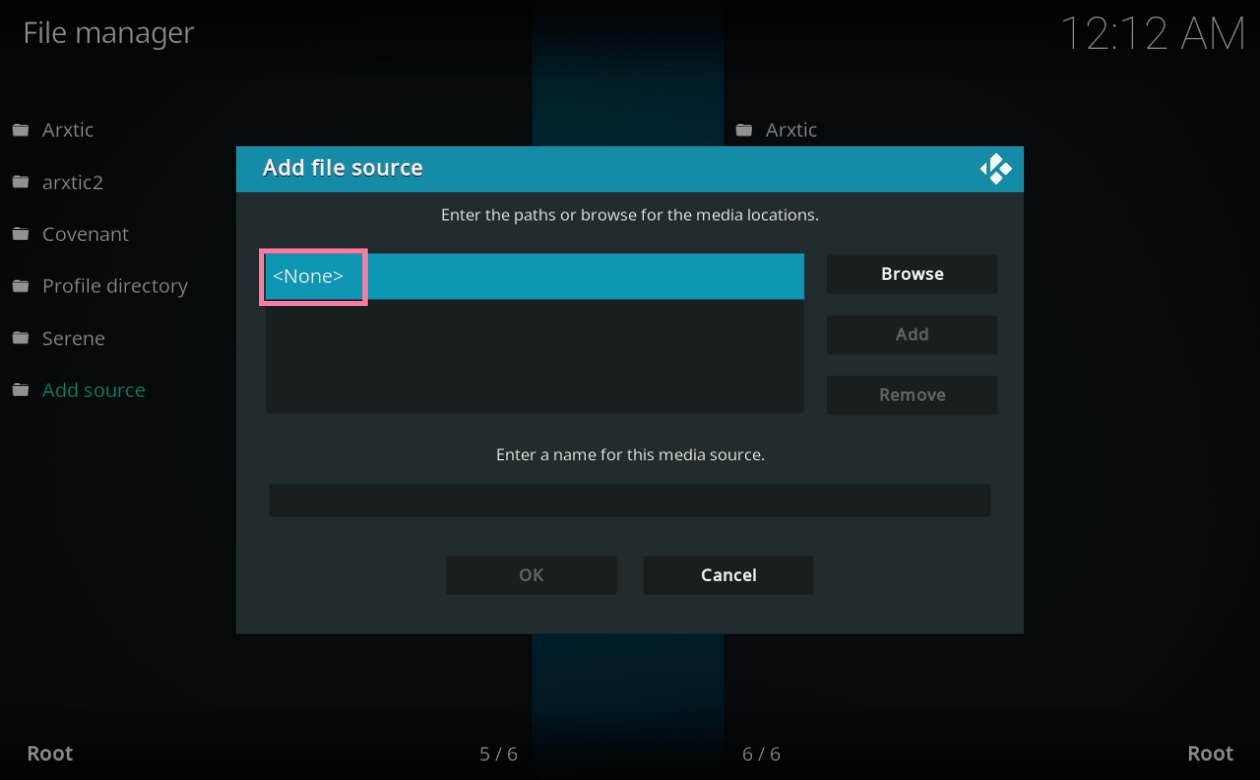
Step 6: You get an onscreen keypad when clicking on ‘None’. Type this URL in the address bar:
http://teamfalcon.exposed/repository
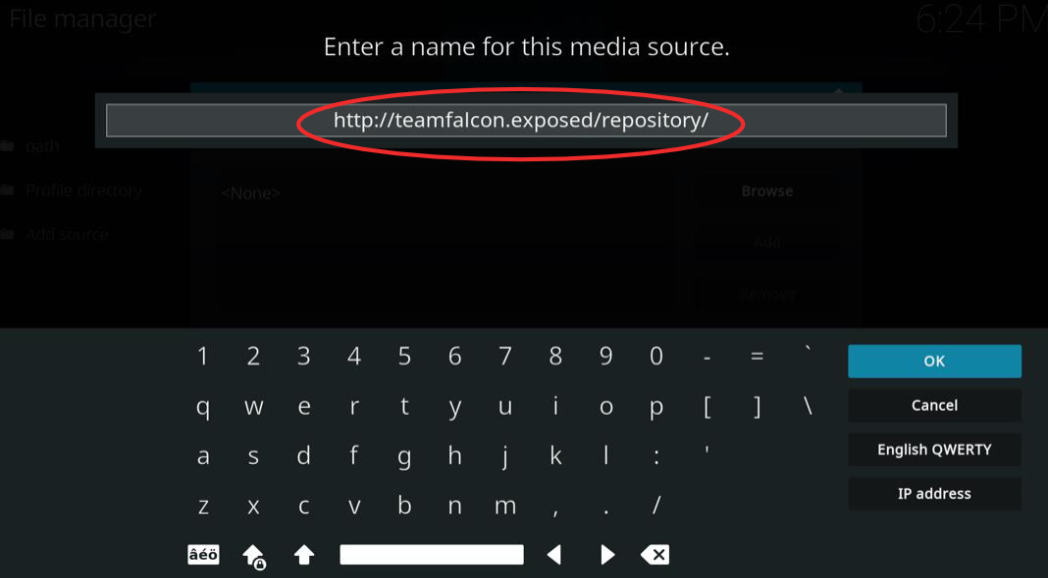
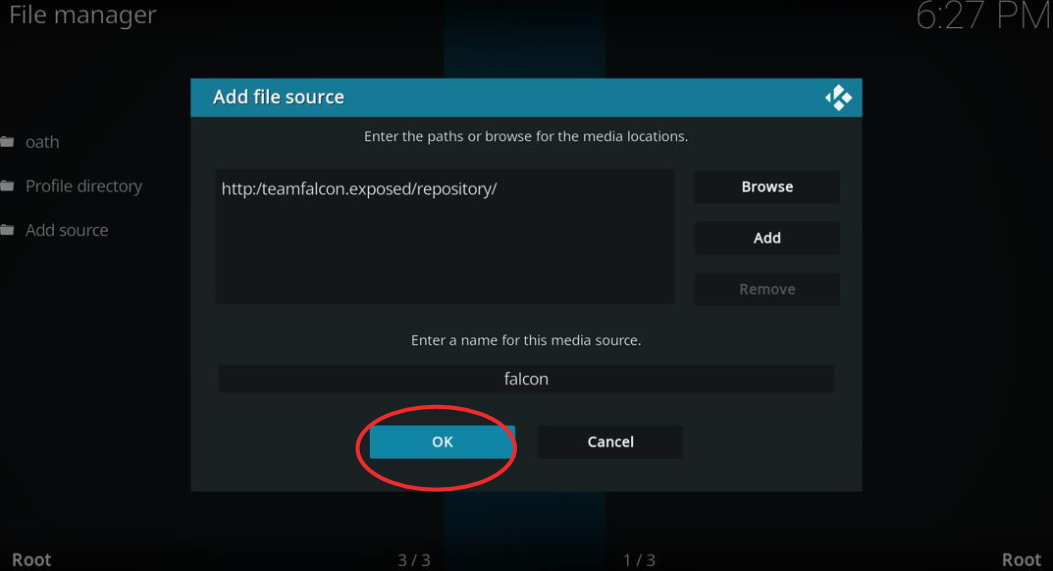
Step 7: Click on OK.
Step 8: Click on ‘Enter a name for media source’. Here you can enter any name of your choice. We are naming it ‘falcon’.
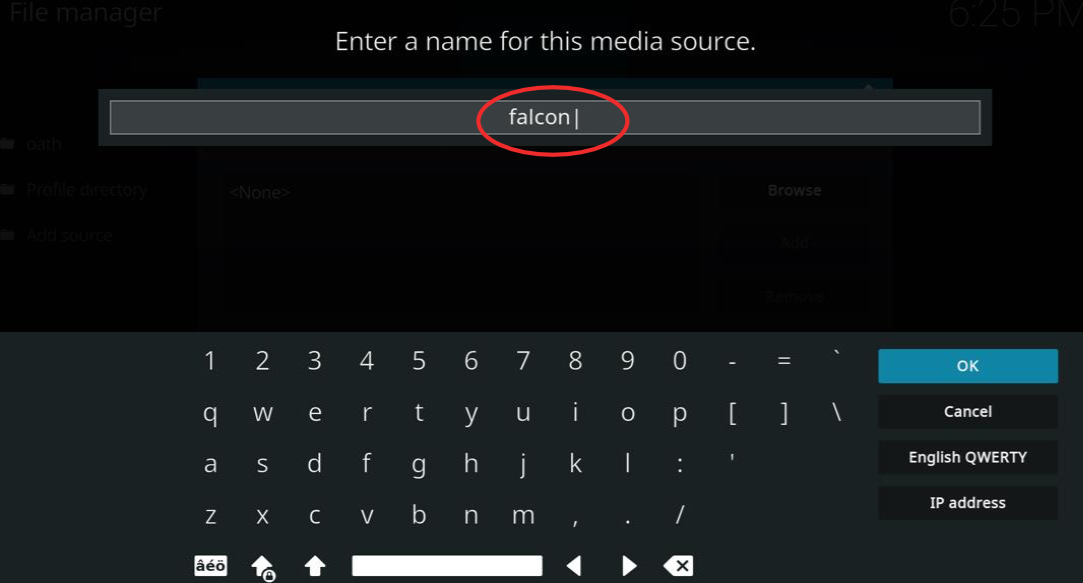
Step 9: Click on ‘OK’ and go back to the Settings menu of the Kodi app.
Step 10: Click on ‘Add-ons’ in the settings category.
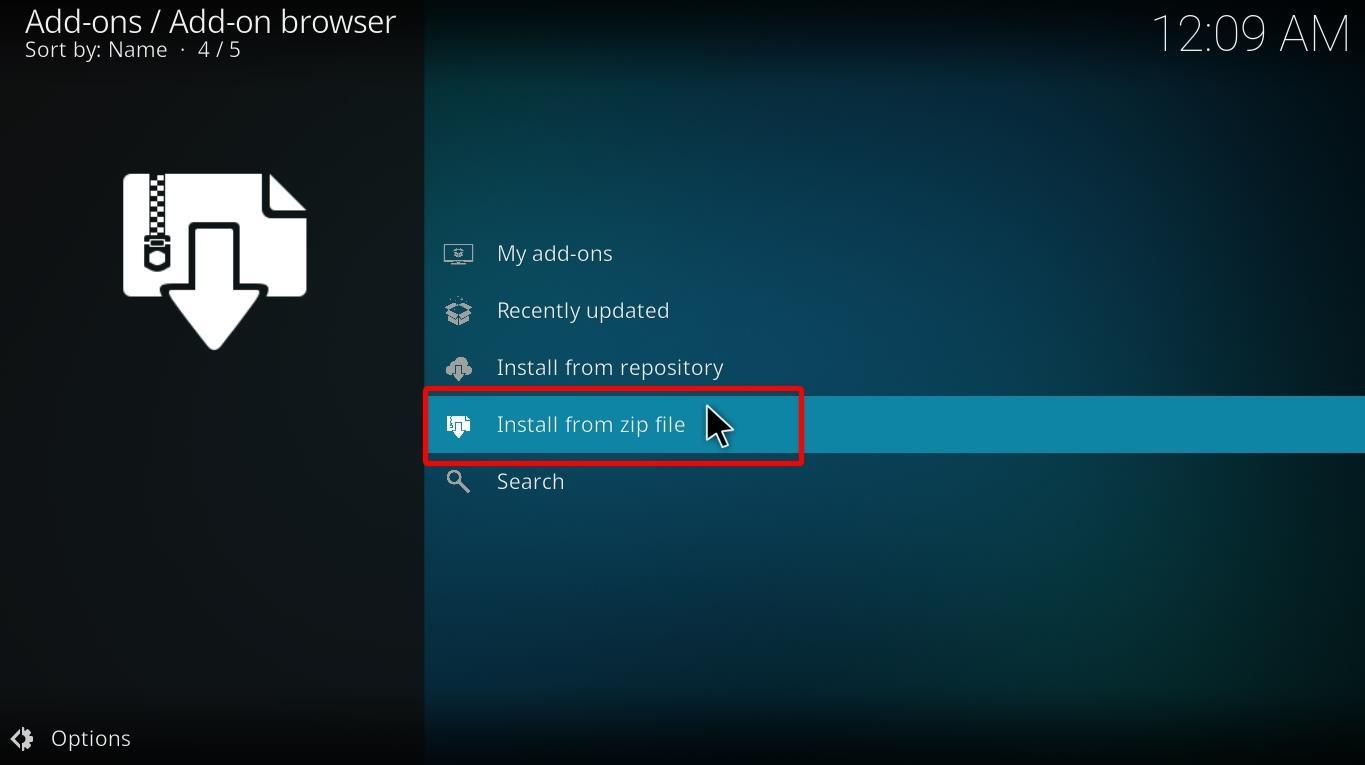
Step 11: Click on the ‘Install from zip file’ option on the right of the screen.
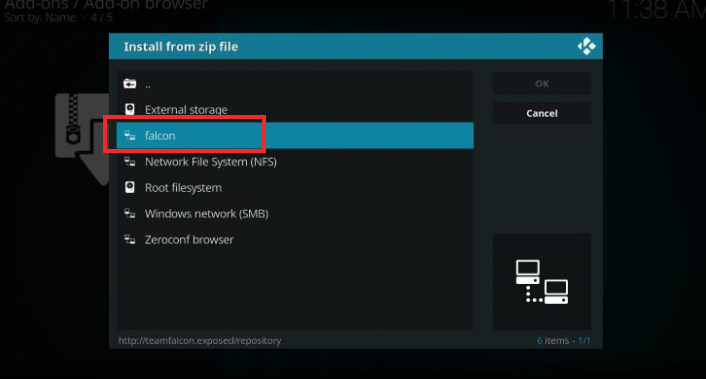
Step 12: You’ll see a window with a list of files to choose from. Click on ‘falcon’ or the name you added as a media source.
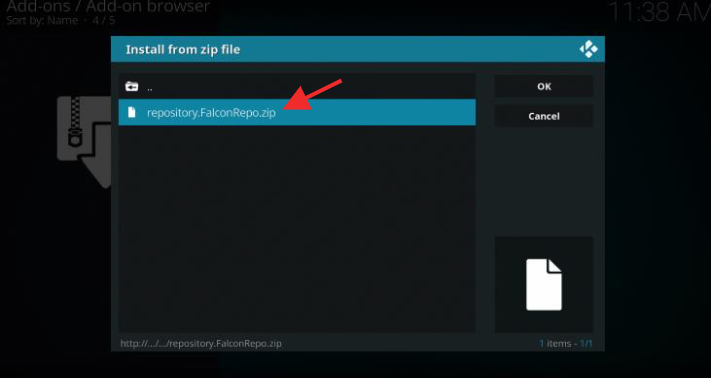
Step 13: You will be directed to the zip file: repository.FalconRepo.zip. Go ahead and click on it.
Step 14: The repository’s installation will start, and it will take a few seconds to install it completely. You’ll get a notification ‘Falcon Repo add-on installed’ on the top right corner.

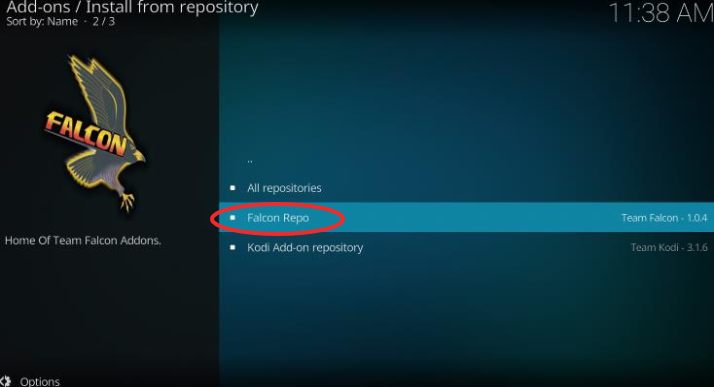
Step 15: Go back to the ‘Add-on’ browser and click on ‘Install from repository’.

Step 16: Click on ‘Falcon Repo’.
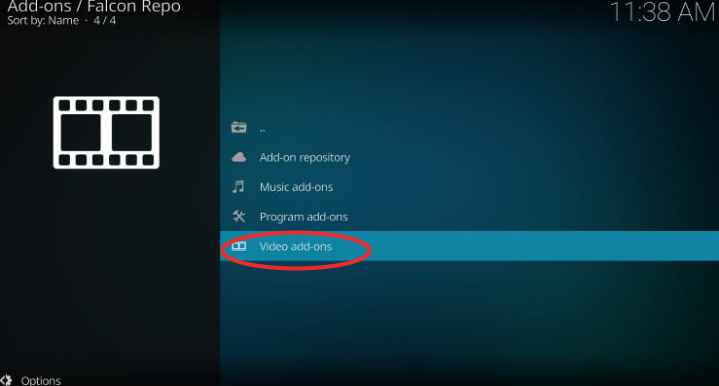
Step 17: Go to video add-ons on this menu.
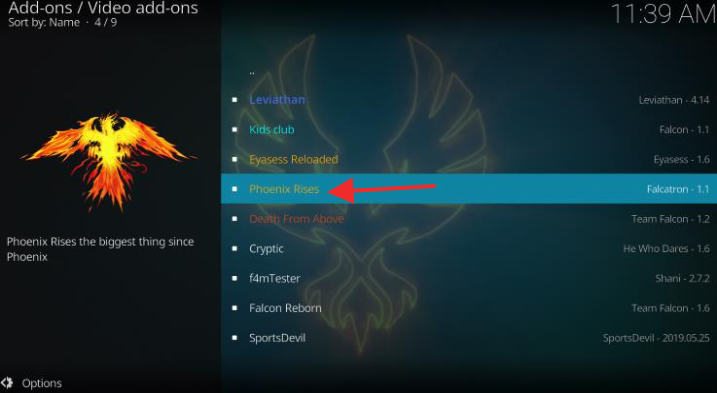
Step 18: Click on ‘Phoenix Rises’ from the addons list.
Step 19: A window will open. Click on ‘Install’.
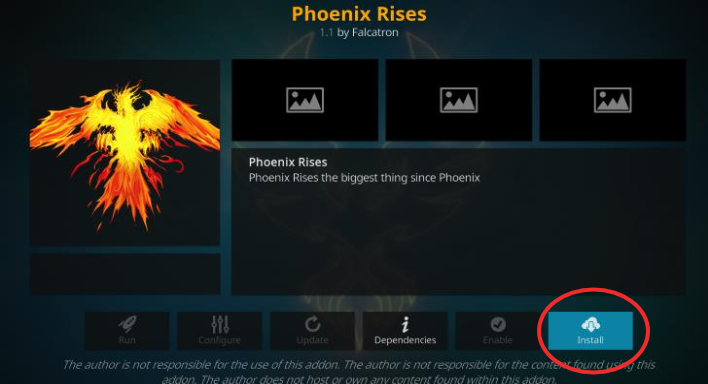
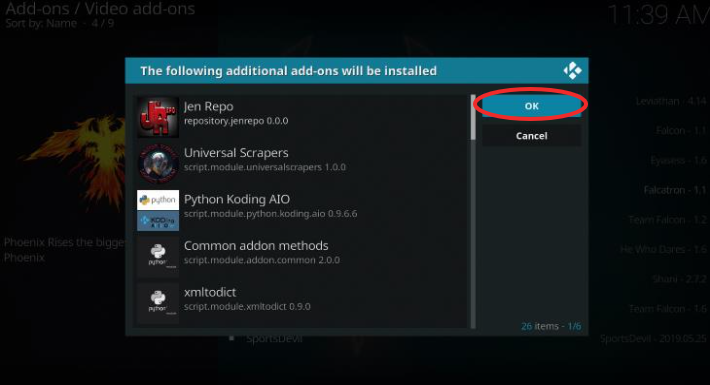
Step 20: You’ll get a list of repositories that will be installed with the Phoenix Rises addon. Click on ‘Ok’ to continue.
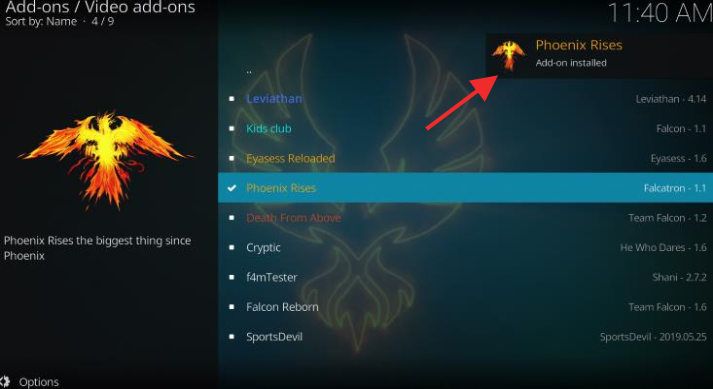
Step 21: The Phoenix Rises will start downloading and installing. You will be able to follow the progress on the right, next to its name.
Step 22: The installation of the Phoenix Rises Kodi addon is complete.
After the installation process is completed, you can easily access it and start using it. You can access the Phoenix Rises addon through the home screen of the Kodi app. Navigate to the ‘Add-ons’ option on the Kodi app and then click on Video add-ons:
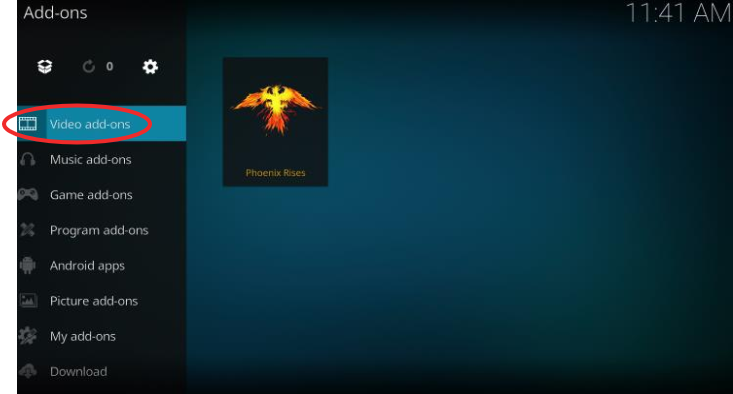
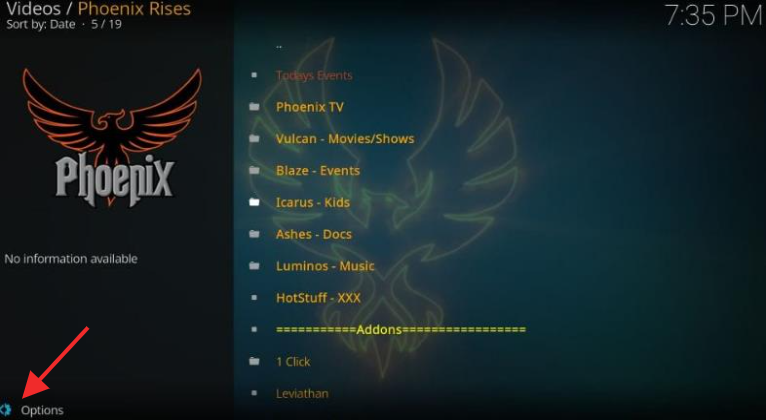
You can also find the Phoenix Rises addon when you highlight the Add-on option on the left side of the screen. When you open the Phoenix Rises addon, you will be directed to the main screen that looks like this:
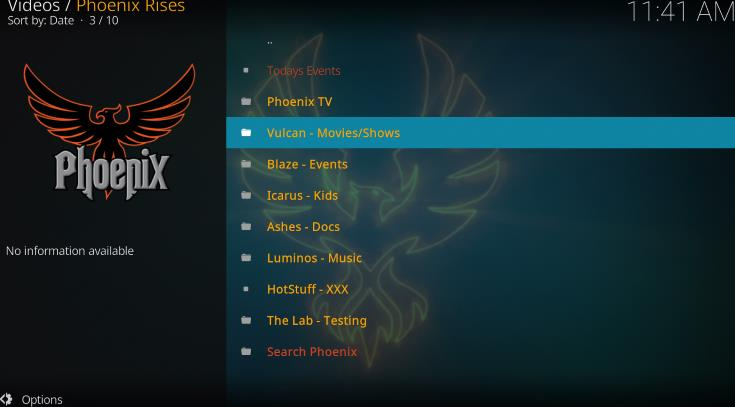
There are numerous other addons you can access through this repository. Apart from that, you can go through the extensive collection of top TV shows and movies. The Phoenix Rises Kodi addon has an easy-to-use interface that allows you to navigate smoothly and stream your favorite content. Following are the categories of this addon:
Metadata processing can slow down the processes, which can cause a delay in the operations. This can be very frustrating, especially when streaming your favorite content from an app. Also, it gets very annoying if it appears any time you click an option within the addon. Fortunately, we’ll share with you a method to disable the metadata from the ‘Add-on’ Settings. Just go to the ‘Phoenix Rises’ Kodi addon and click on the options on the bottom left corner:
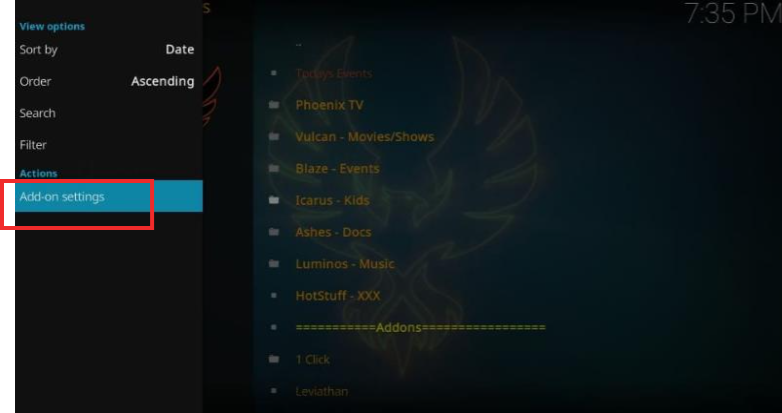
A menu bar will appear. Click on the ‘Add-on Settings’:
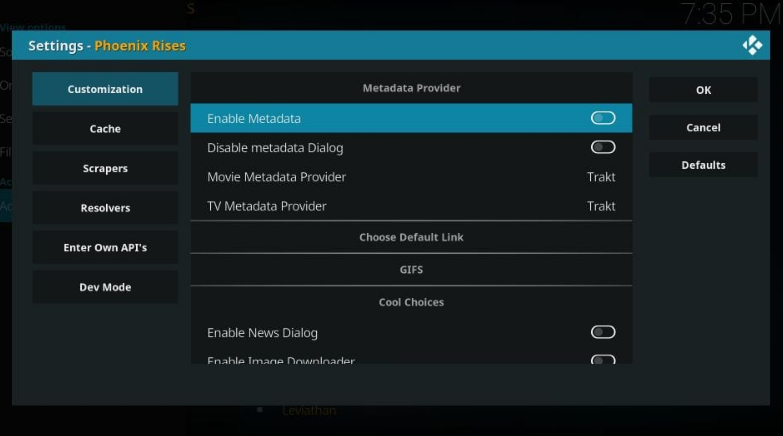
On the ‘Settings’ Window, click on the ‘Customization’ tab on the left. Navigate to the option ‘Enable Metadata’ and disable it. Then Click on OK.
For the best results, you must set up Real-Debrid on Kodi, which will offer a buffer-free experience. Real Debrid is a downloading service that allows you to access premium links and is an excellent option to consider. To start using it, you first need to subscribe. Following are the steps to register for an account:
Follow these steps after you’ve purchased Real Debrid:
Step 1: Go to the main screen of Phoenix Rises Kodi Addon. Click on Options at the bottom left.
Step 2: A menu bar will appear on the left. Click on ‘Add-on Settings’.
Step 3: The settings window will open. Click on Resolvers from there. Go to ‘Resolver Settings’ and click on ‘Open Resolver Settings’.
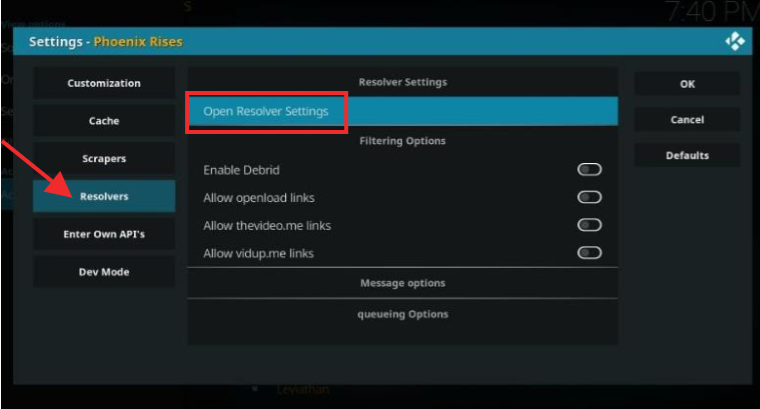
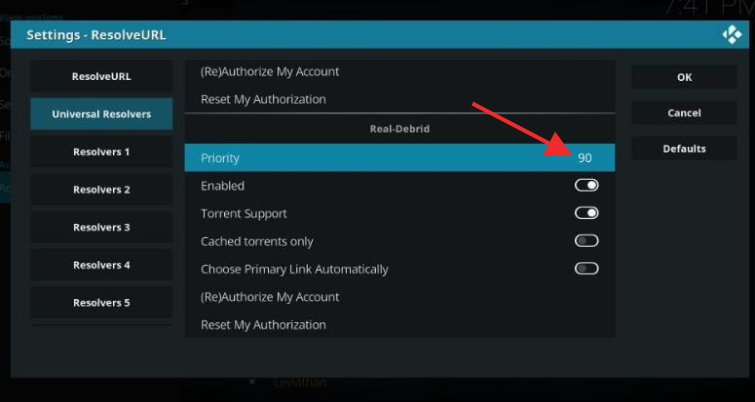
Step 4: On the left menu, click on the ‘Universal Resolvers’. Then navigate to the Real-Debrid option. Change the default priority level (which is 100) to 90.
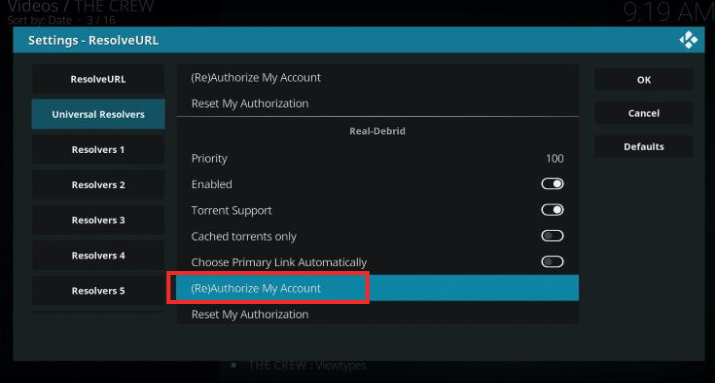
Step 5: Now click on ‘(Re)authorize My account. You’ll get a code on Kodi.
A window will appear and you’ll receive a code. Note down this code:
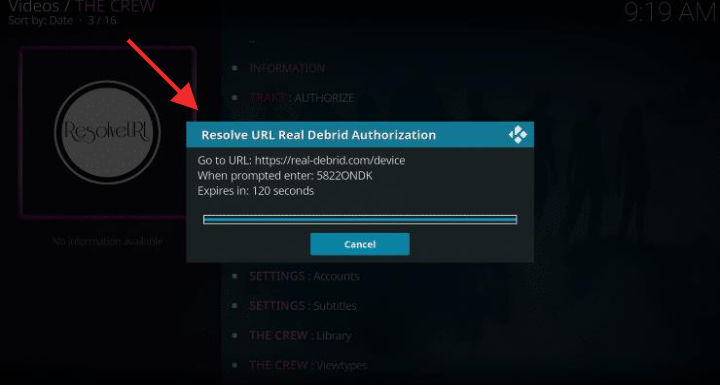
Step 6: Go on your mobile or PC web browser and enter https://real-debrid.com/device.
Step 7: Enter the code you received on the Kodi app.
Step 8: You’ll get an authorization confirmation notification on the screen. After that, you can benefit from the Real-debrid services.
Before you start using the Phoenix Rises Kodi add-on, we recommend using the best VPN for Kodi because whatever content you stream on Kodi can be tracked by the Government or your ISP. So, if you’re streaming any copyrighted content such as movies, TV shows, sports channels, or others, you can get into trouble.
However, a VPN will hide your identity if using one while streaming through the Phoenix Rises Kodi addon. This way, you can bypass the geological restrictions, and your server will think that you are somewhere where it is legal to stream the content.
We always use ExpressVPN for streaming content. This VPN is secure, fast, and allows you to stream on various devices and apps. If you’re about to stream on your Kodi app, follow these simple steps to turn on the VPN protection on your Firestick:
1. Subscribe to ExpressVPN.
The subscription comes with a 30-day money-back guarantee, too. So, if you aren’t satisfied with the service, you can get a refund.

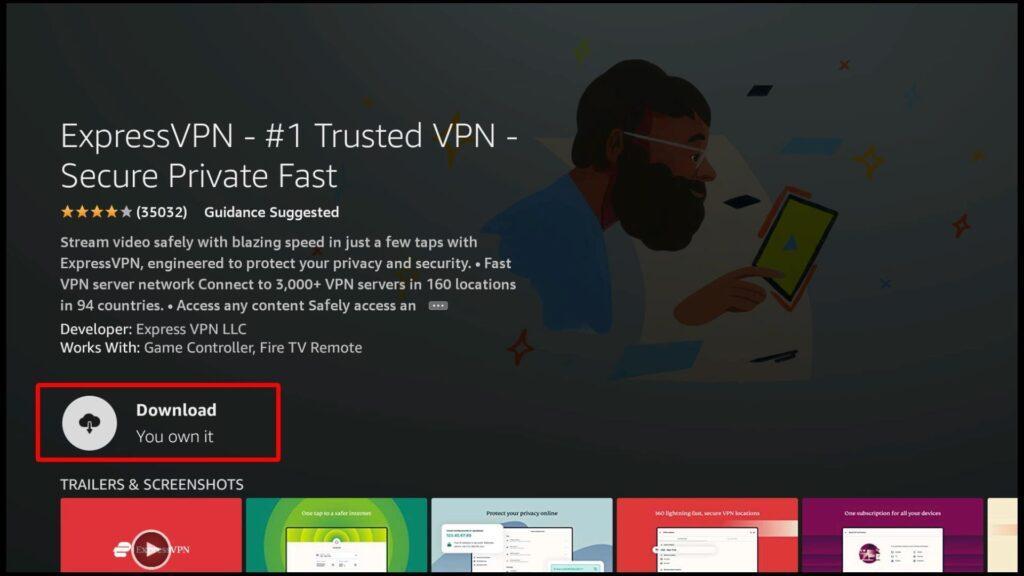
2. Download ExpressVPN using this link.
If you use Firestick, go to the Home Screen and click on ‘Find’. Type ExpressVPN in the search bar and then click on download.
3. Launch the ExpressVPN app and sign in using the email ID and password you used for your subscription.
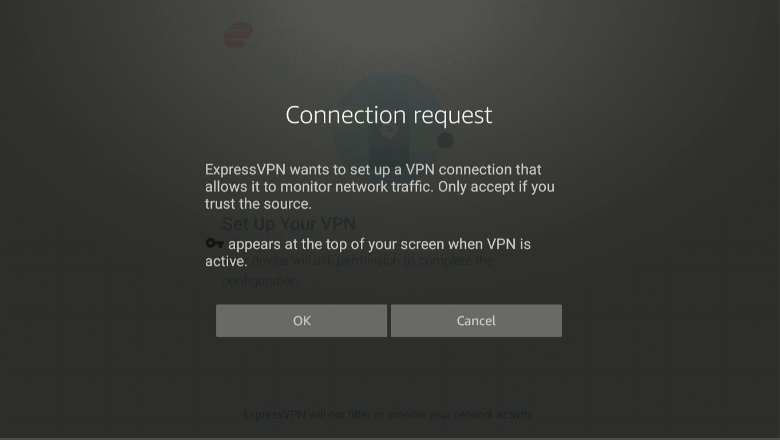
4. After the download is complete, click on the ‘Power icon’ and connect to a VPN server of your choice.
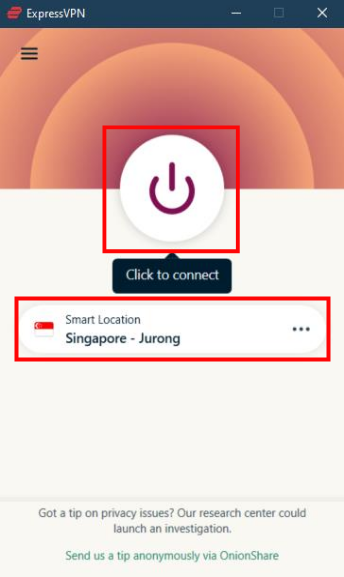
5. Now, ExpressVPN protects your Firestick session from curious eyes.
Phoenix Rises Kodi addon has proven to be an excellent addition to the list of Kodi addons. This Phoenix Rises Kodi addon guide lists all the steps to help you install the addon on your Firestick. Also, ensure that the Phoenix Rises addon always needs the latest version to work properly. If the addon doesn’t work, try uninstalling and then reinstalling using our easy step-by-step guide. Alternatively, there are plenty of other great Kodi addons to try that are even better than The Phoenix Rises.

You need to load content from reCAPTCHA to submit the form. Please note that doing so will share data with third-party providers.
More InformationYou are currently viewing a placeholder content from Turnstile. To access the actual content, click the button below. Please note that doing so will share data with third-party providers.
More InformationYou are currently viewing a placeholder content from Facebook. To access the actual content, click the button below. Please note that doing so will share data with third-party providers.
More InformationYou need to load content from reCAPTCHA to submit the form. Please note that doing so will share data with third-party providers.
More InformationYou are currently viewing a placeholder content from reCAPTCHA. To access the actual content, click the button below. Please note that doing so will share data with third-party providers.
More InformationYou are currently viewing a placeholder content from Instagram. To access the actual content, click the button below. Please note that doing so will share data with third-party providers.
More InformationYou are currently viewing a placeholder content from X. To access the actual content, click the button below. Please note that doing so will share data with third-party providers.
More Information