In this guide, you’ll learn how to download and install the Rising Tides addon on Kodi. The step-by-step instructions given below apply to Amazon Fire TV Stick, Firestick 4K, Firestick Lite, FireTV Cube and all other devices that are compatible with Kodi.
Rising Tides is an exciting Kodi addon that brings a vast range of sports to your device. It has a sizable content library that gets new streams regularly. Apart from playing live sports channels, Rising Tides also gives you the option to play sports highlights.
Scroll to the IPTV section of the Rising Tides addon if you’re looking for streaming options. Sure, some of the streams might be offline, a common problem with almost every live TV addon you can think of. But you’d still be able to find a large number of working streams.
Follow these instructions to get the Rising Tides addon on Kodi:
Kodi takes its security seriously and thus prevents the installation of third-party apps. That poses a problem, given that the Rising Tides addon isn’t available on the official Kodi repository. So we have no choice but to tweak Kodi’s settings to ‘enable unknown sources’.
Here’s how you can enable unknown sources on Kodi:
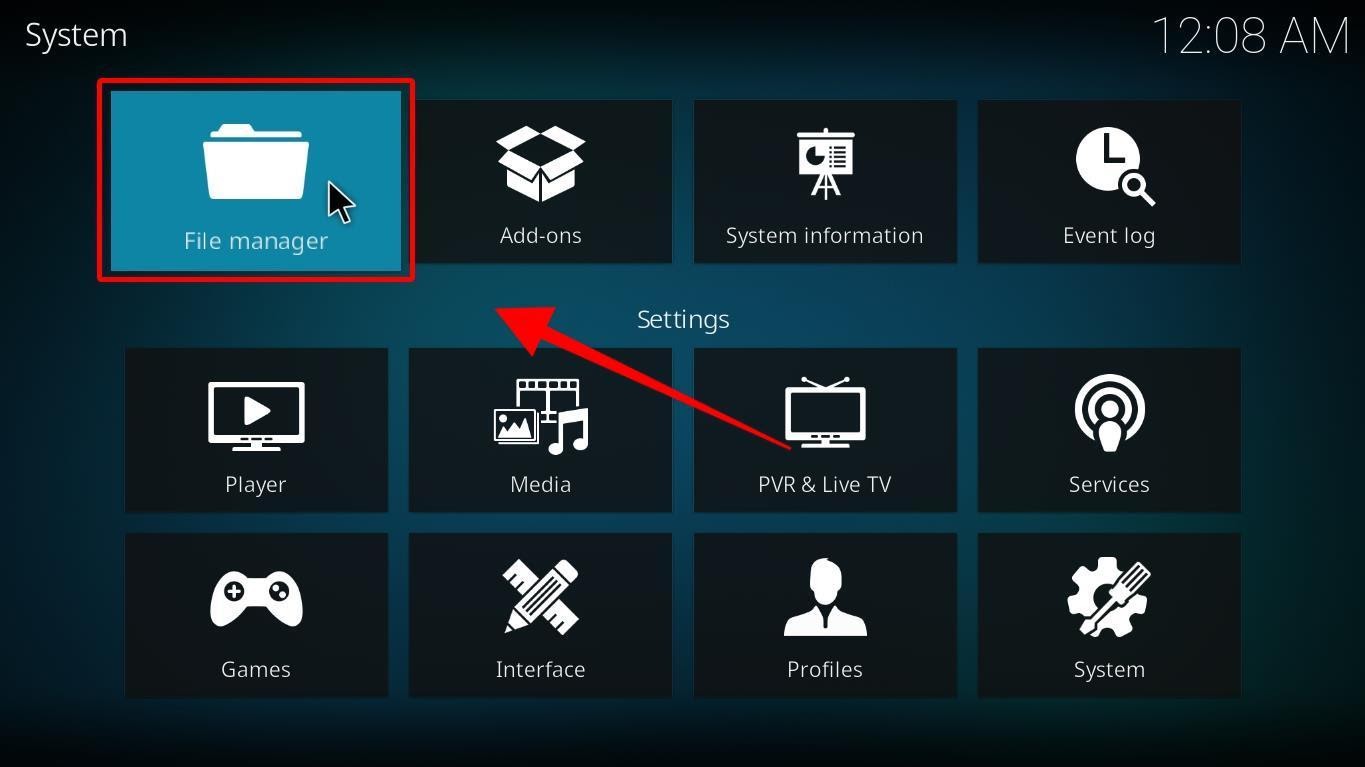
Step 1: Launch the Kodi app and open Settings. 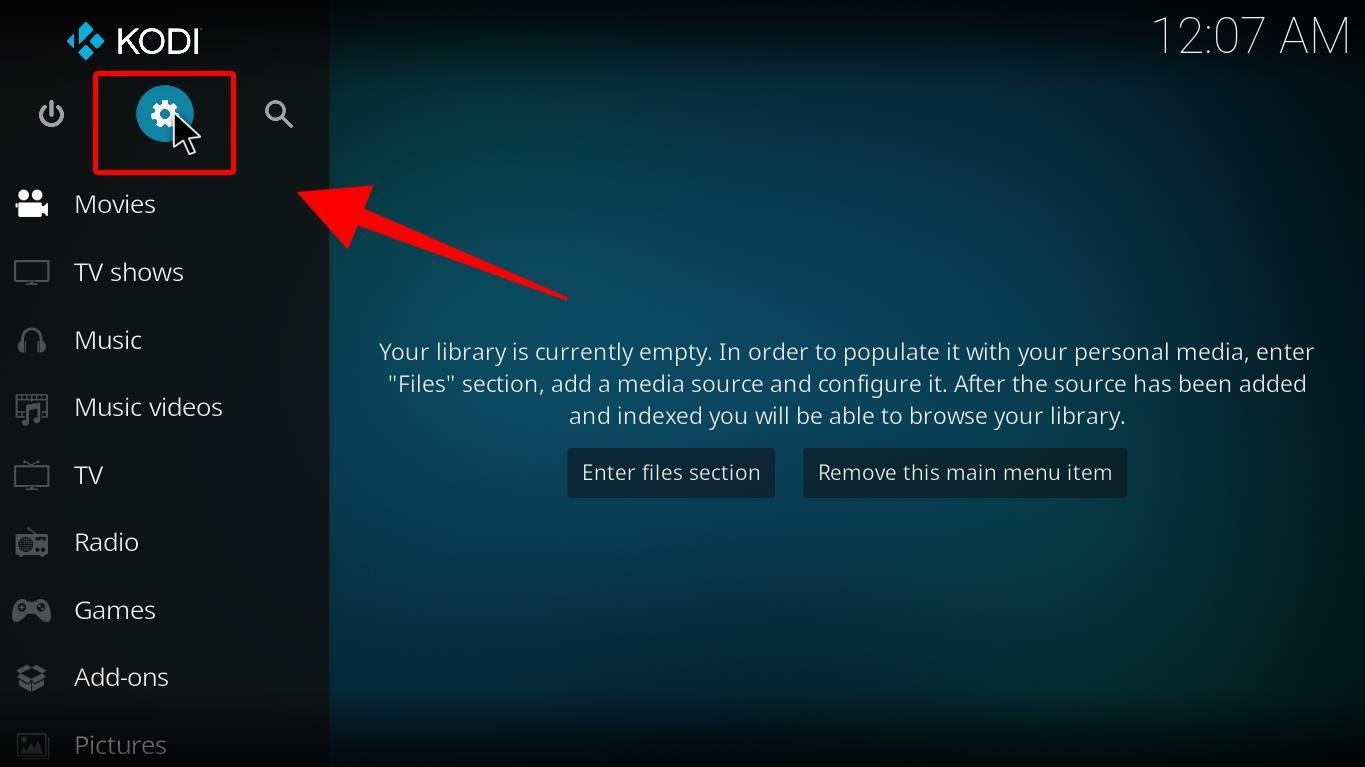
Step 2: Right-click on the System option.
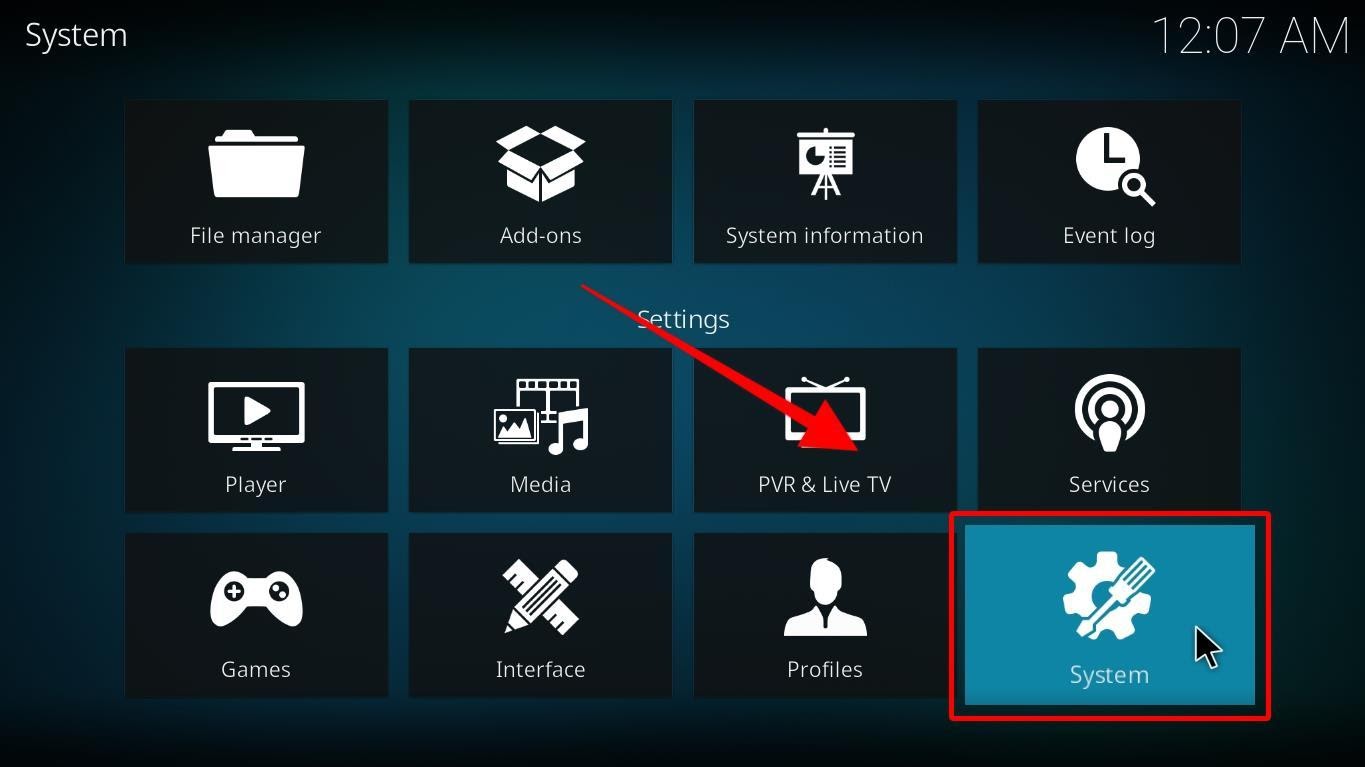
Step 3: Click on the Add-ons option.
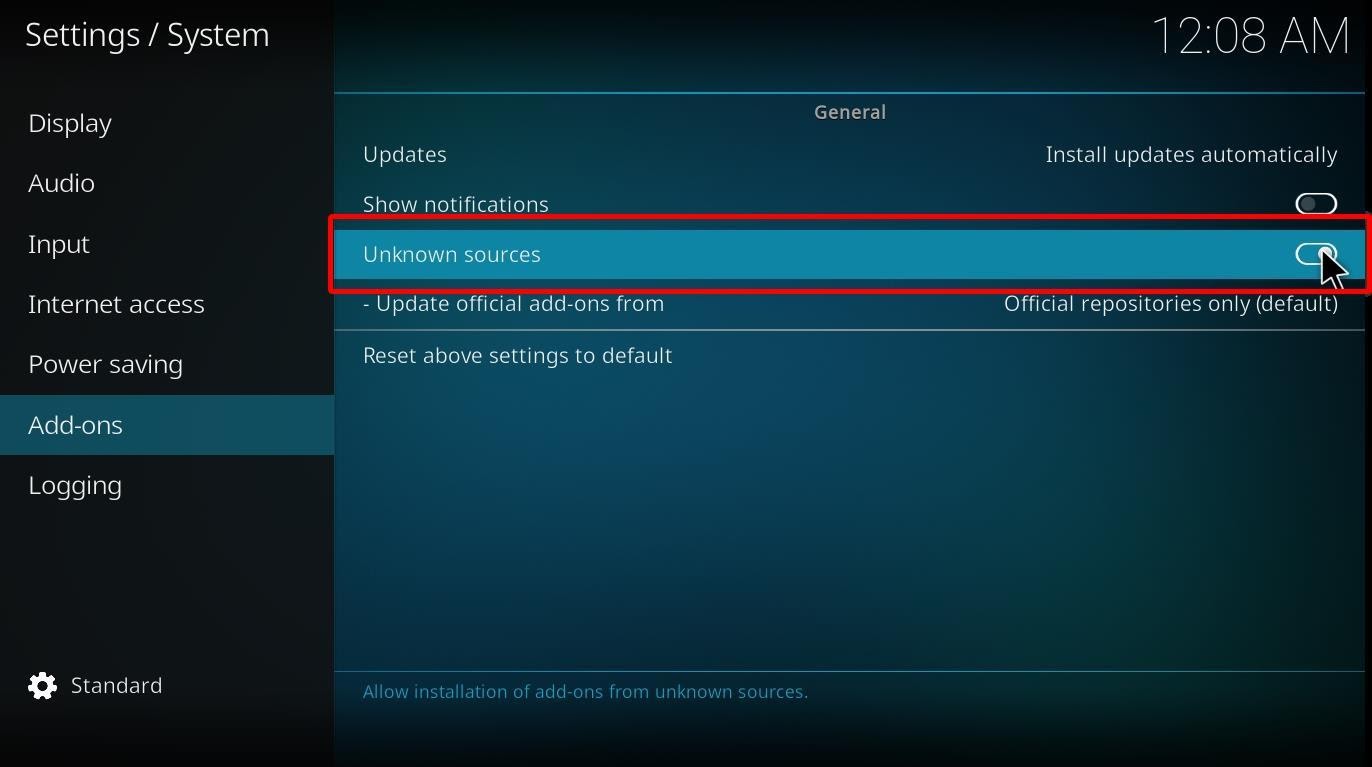
A list of options will appear. Enable Unknown sources (as shown in the screenshot).
Step 4: A warning prompt will appear; select Yes and continue. 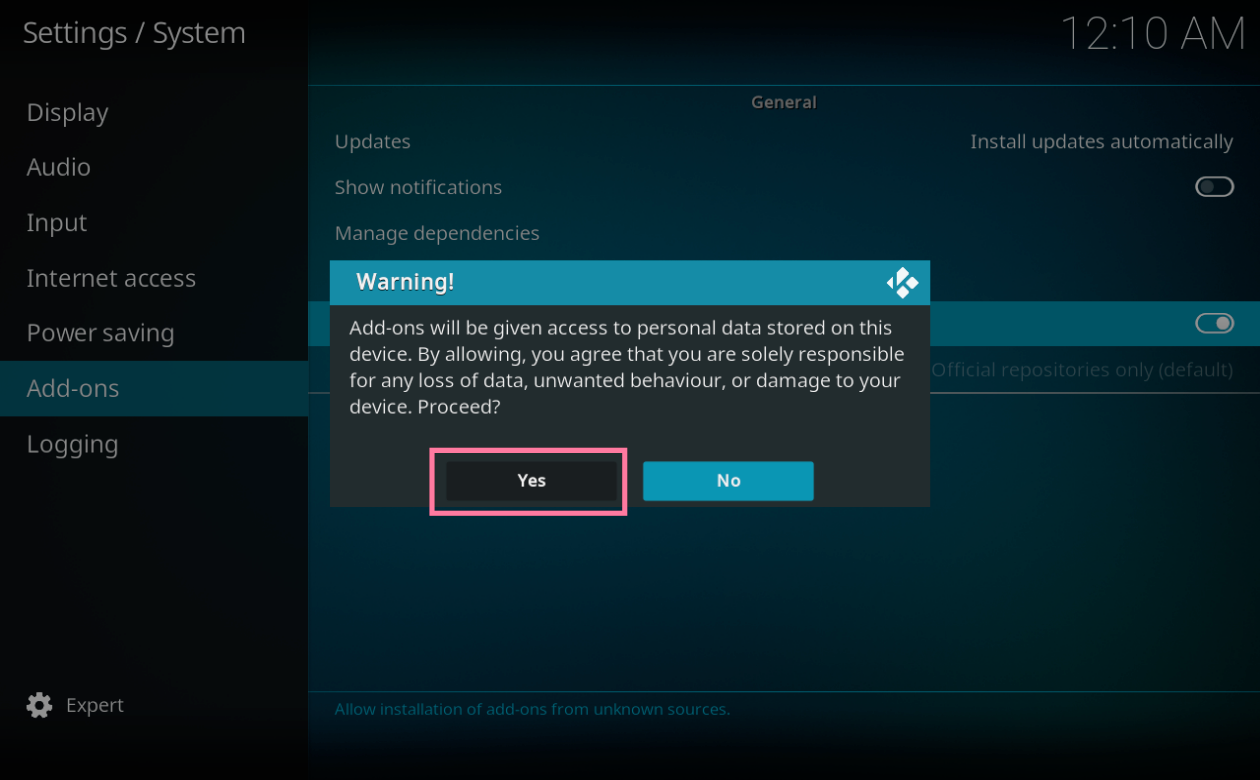
Kodi can now download third-party apps like Rising Tides.
Here’s how you can install the Rising Tides Kodi addon:
Step 1: Add the Rising Tides Repo Source
Step 2: Install the Rising Tides Repo
Step 3: Install the Rising Tides Addon
Let’s discuss all these steps in more detail.
Step 1: Go to the Kodi homepage and click on Settings.
On the following screen, select the File Manager option.
Step 2: Select the Add Source option. 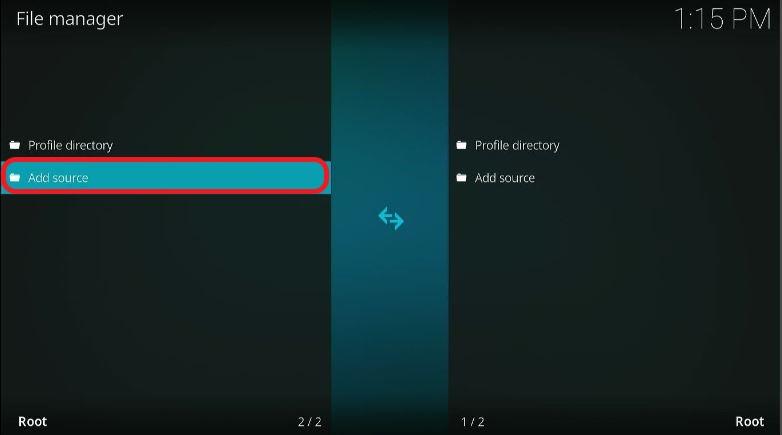
Step 3: A smaller window, ‘Add file source,’ will appear. Click on <None>.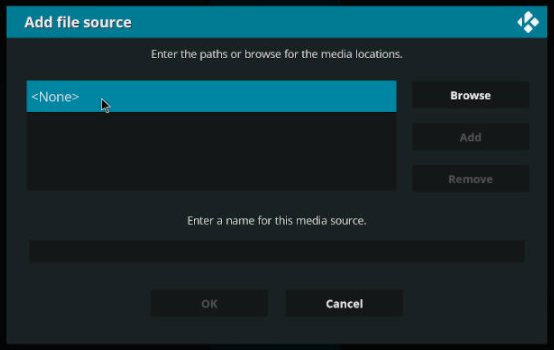
Step 4: A pop-up window will appear with a URL box.
Type this URL (if you’re using Kodi 19 Matrix): http://mullafabz.xyz/Repository/K19
Type this URL (if you’re using Kodi 18 Leia): http://mullafabz.xyz/Repository/
Click OK.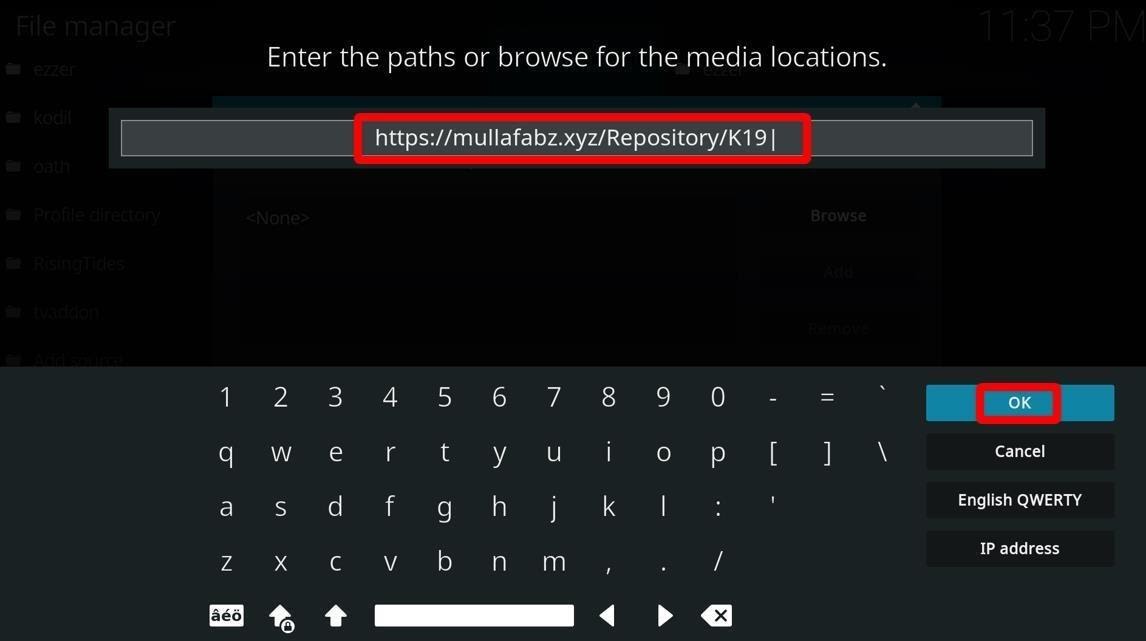
Step 5: Enter the file’s source name. We are naming it RisingTides.
Once you’ve added the name, click on OK to proceed. 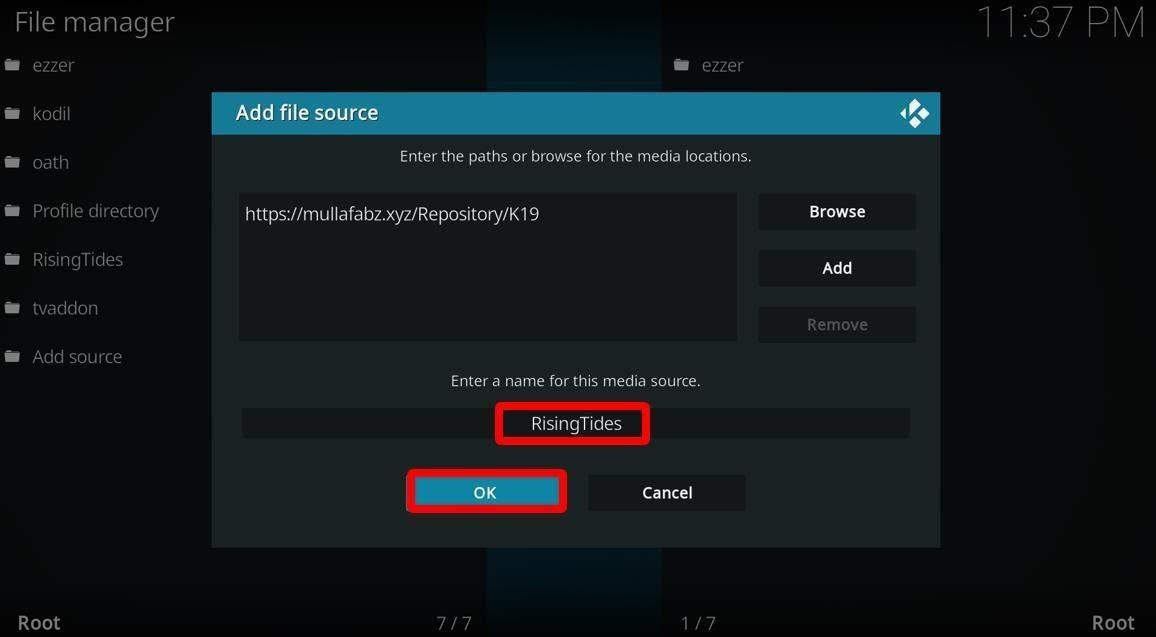
Congratulations! You’ve successfully added the source for the Rising Tides Repo.
Follow these steps to install the Rising Tides repository on your Kodi:
Step 1: Head back to Kodi’s homepage.
Select Settings and open Addons. 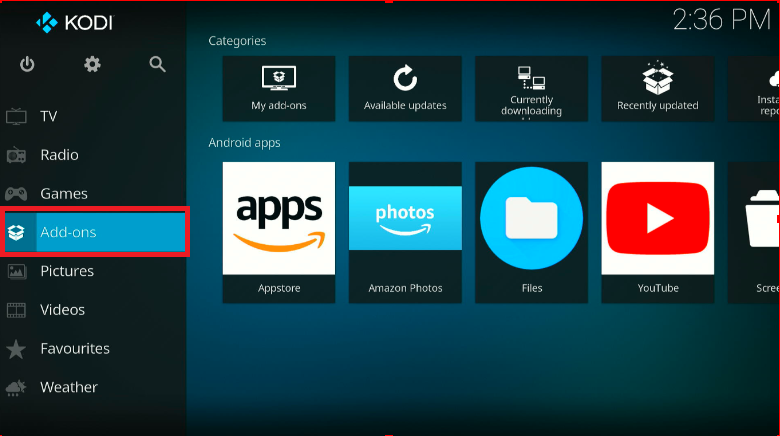
Step 2: You will see a small ‘open-box icon’ on the top left corner.
This is the Package Installer icon; open it.![]()
Step 3: Select Install from zip file option (please see screenshot).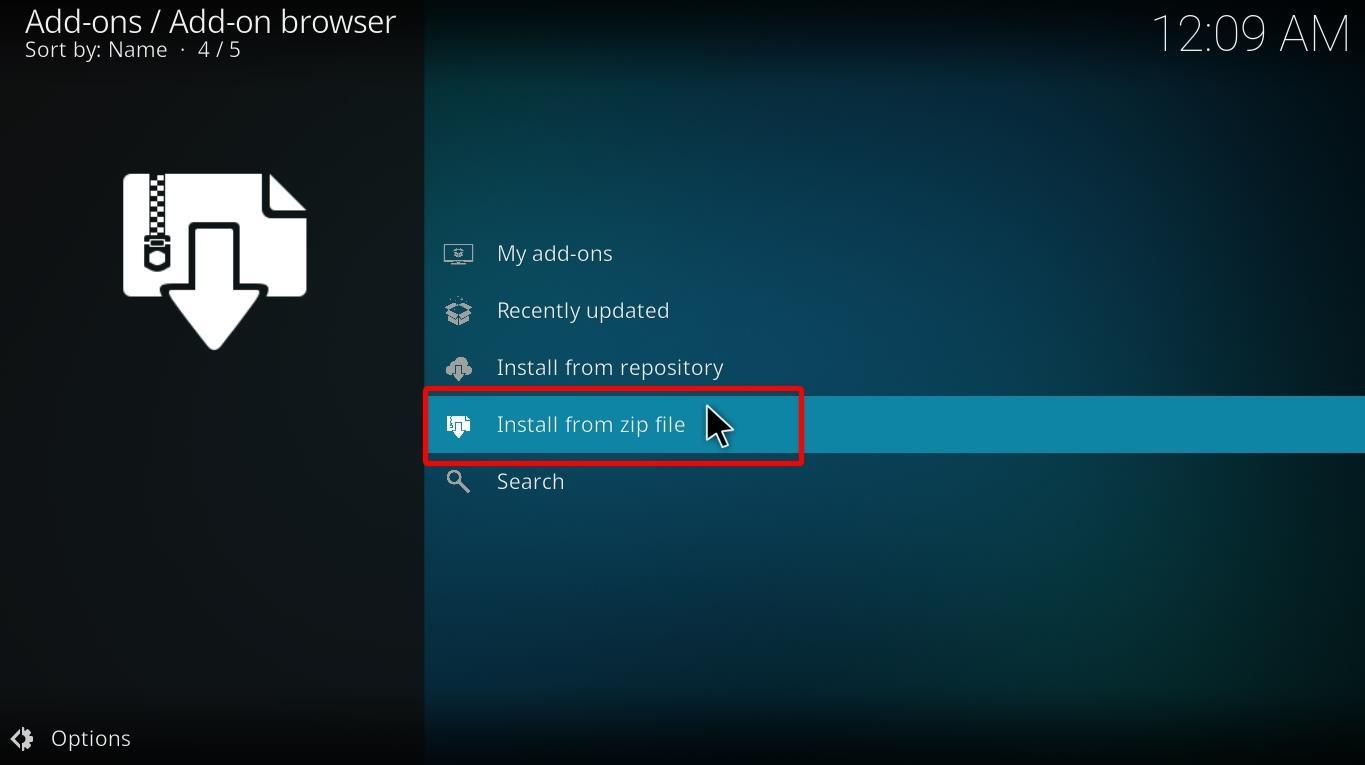
Step 4: A small window will pop up, showcasing a list of options.
Select RisingTides (or whatever name you gave the source file). 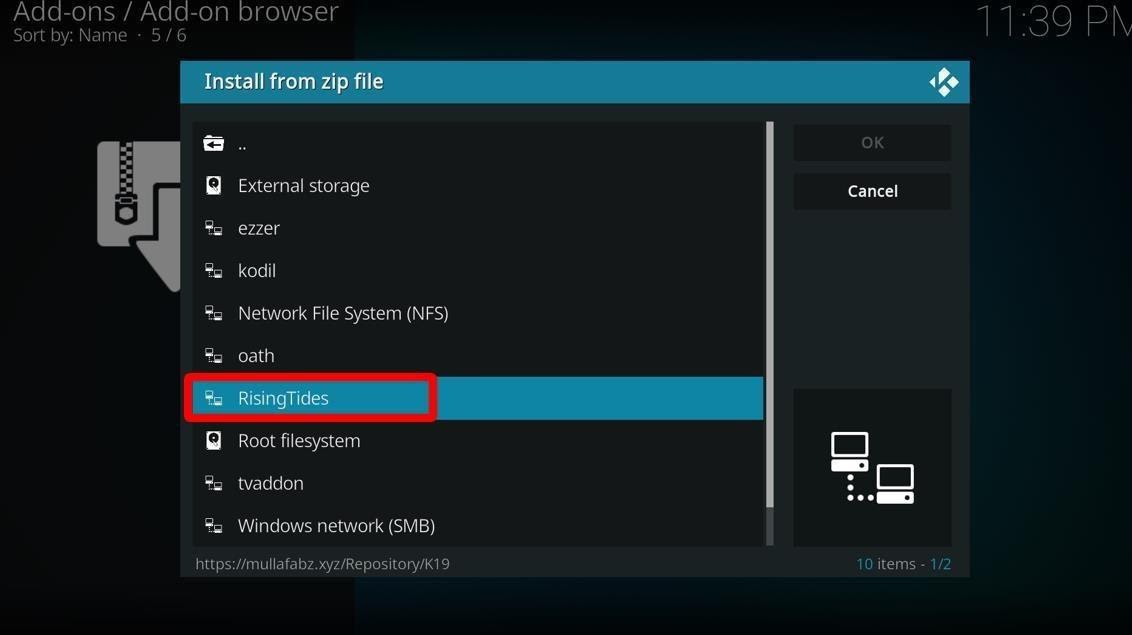
Step 5: Click on the file named: repository.Rising.Tides-x.x.zip
Press the OK button.
Step 6: After a few minutes have passed, you will see a pop-up telling you that your repository is installed.
Now it’s time to install the Rising Tides addon from this repository.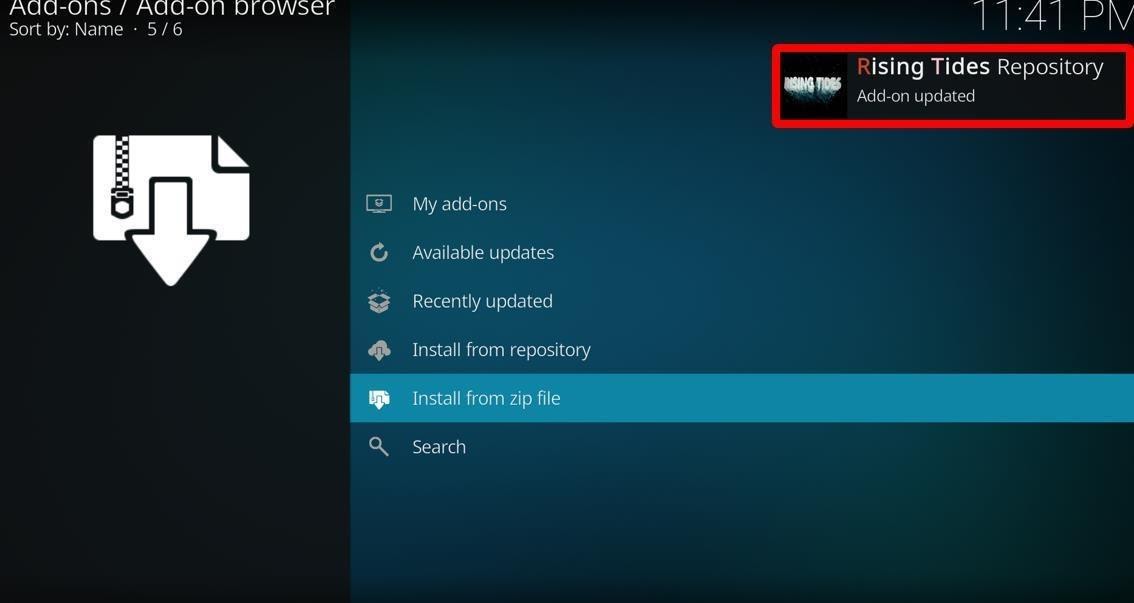
Follow these steps to install the Rising Tides Kodi addon:
Step 1: Click on the Install from repository option on Kodi’s addons page. 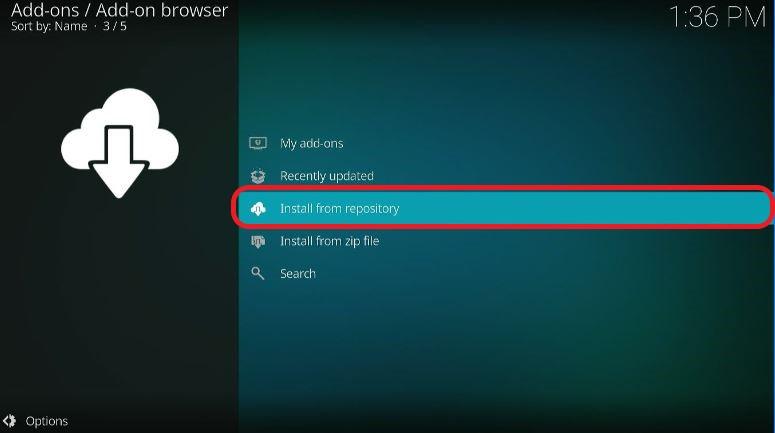
Step 2: A list of available repositories will appear on your screen.
Open Rising Tides Repository (your saved file’s repository).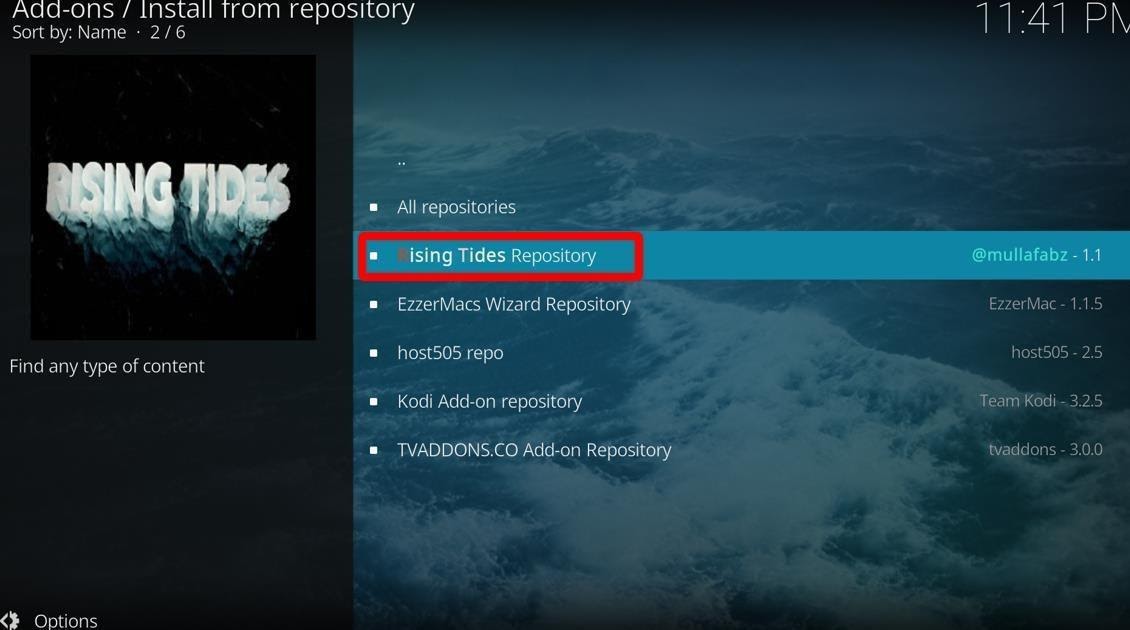
Step 3: You’ll see multiple addons on the following screen.
Select Video Add-ons.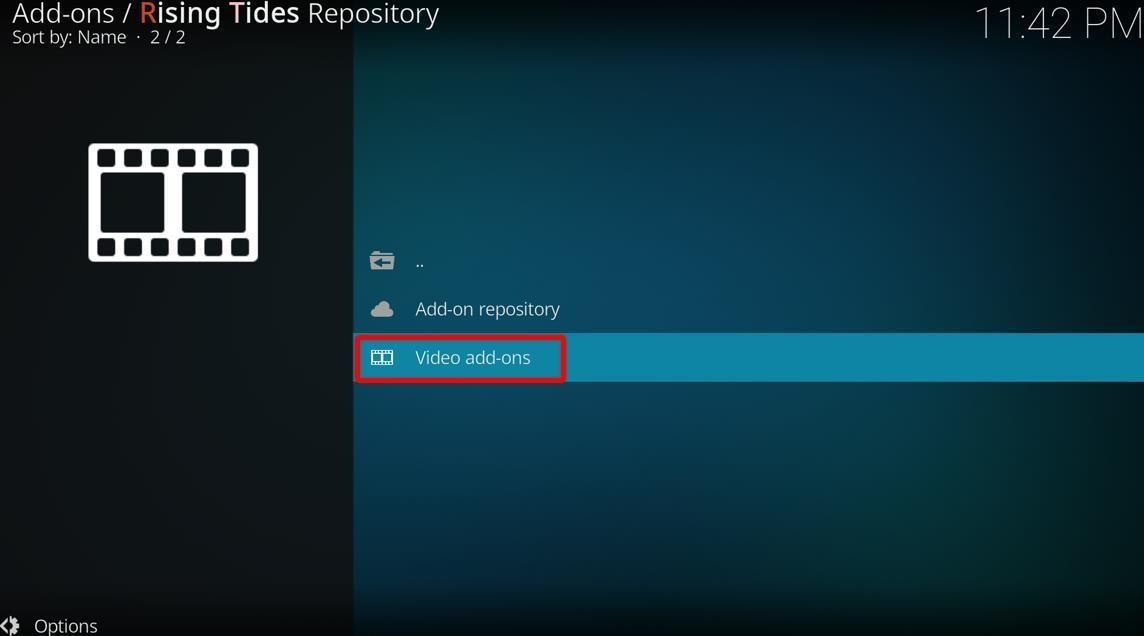
Step 4: Select Rising Tides open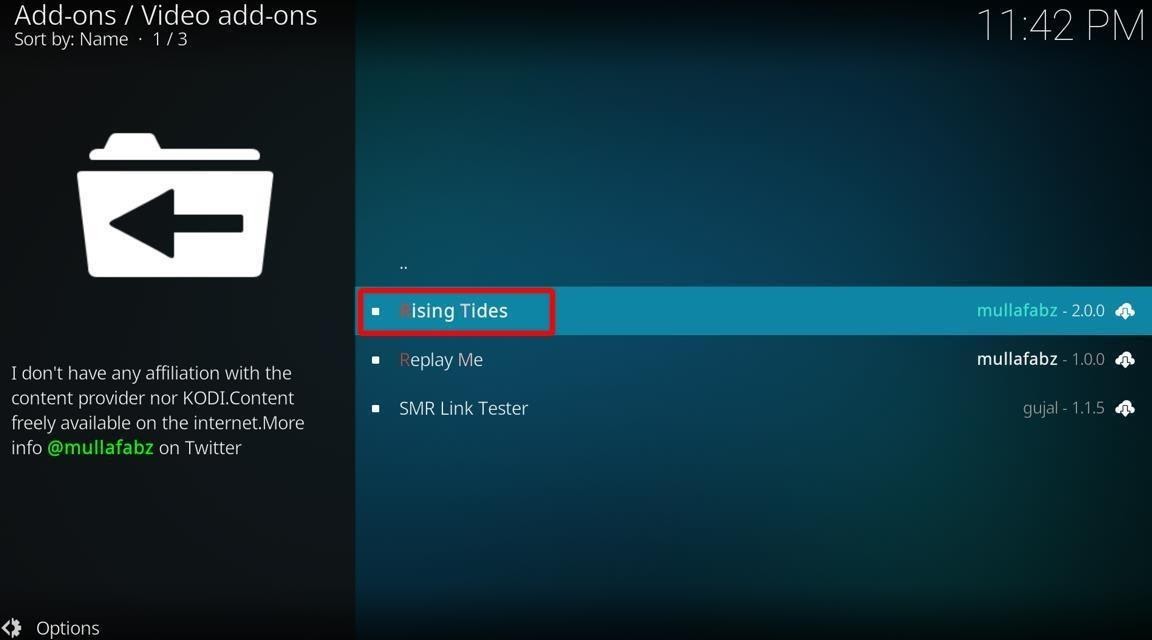
Step 5: An installation screen will appear.
Click on the Install icon.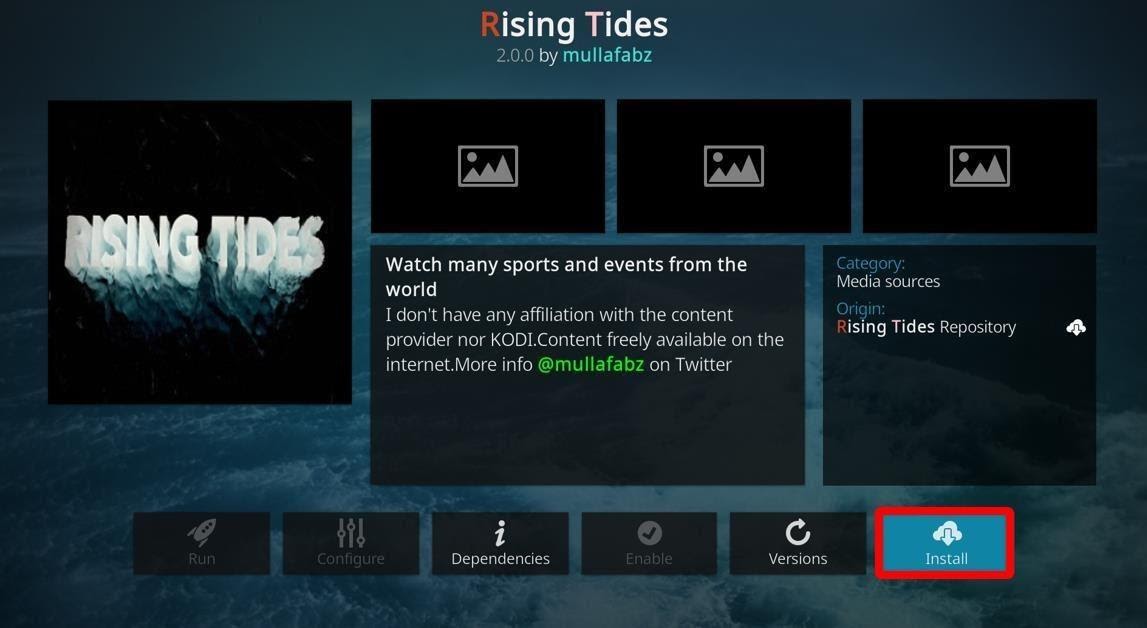
Step 6. A pop-up window will appear seeking your permission to install additional addons.
Select Ok.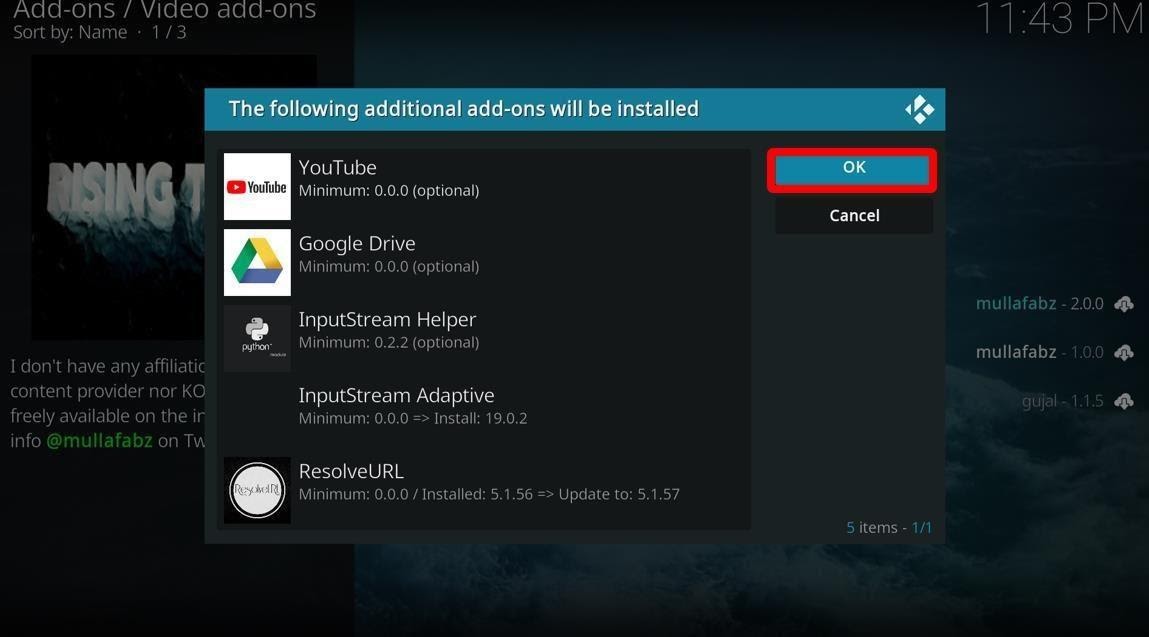
Step 7: Wait for the installation to complete.
When the installation is finished, a confirmation pop-up will appear stating that the Rising Tides addon has been installed. 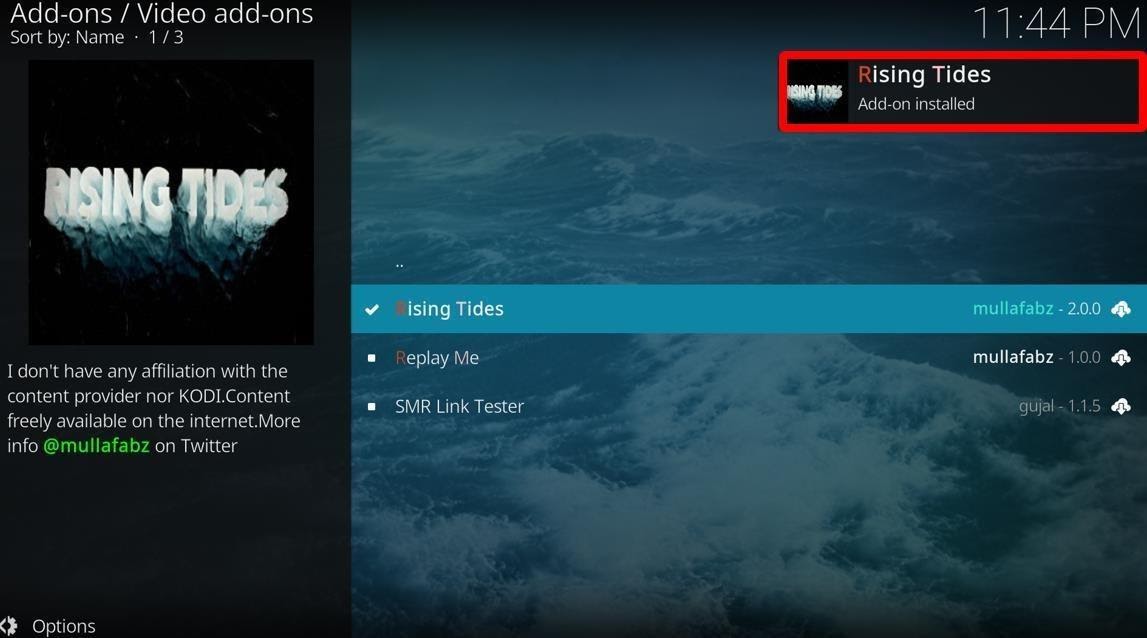
Before you start streaming on Kodi addons, you need to know how vulnerable you are. Kodi doesn’t hide your online activity. Whatever you stream on Kodi addons will be visible to your government, ISP, and they can often keep track of it all. If you’re caught watching copyrighted content, you might be at risk of a fine, jail time, or both.
That’s why it’s recommended to use a reliable VPN (like ExpressVPN) while streaming your favorite movies and shows on Kodi. ExpressVPN is a subscription-based service that hides your online activity from your government and ISP. It masks your real IP address and helps you bypass geoblocking restrictions. ExpressVPN also safeguards you from speed-throttling.
Here’s how you can set up ExpressVPN:
Setting up ExpressVPN on Firestick is pretty simple:
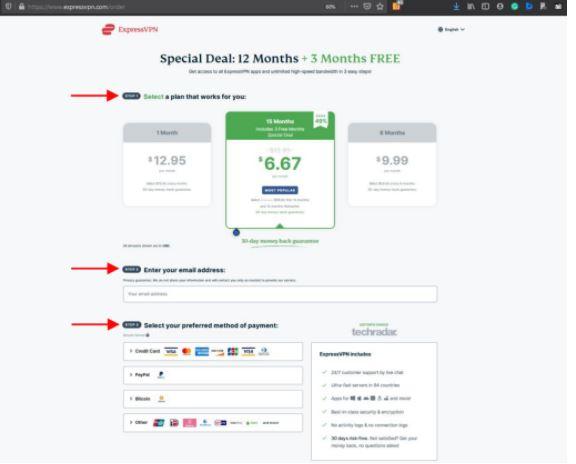
Step 1. Go to the ExpressVPN website.
Follow these steps to make your ExpressVPN account:
 Step 2. Next thing you need to do is download ExpressVPN on your Firestick.
Go to your Firestick’s homepage. Select Find and Search.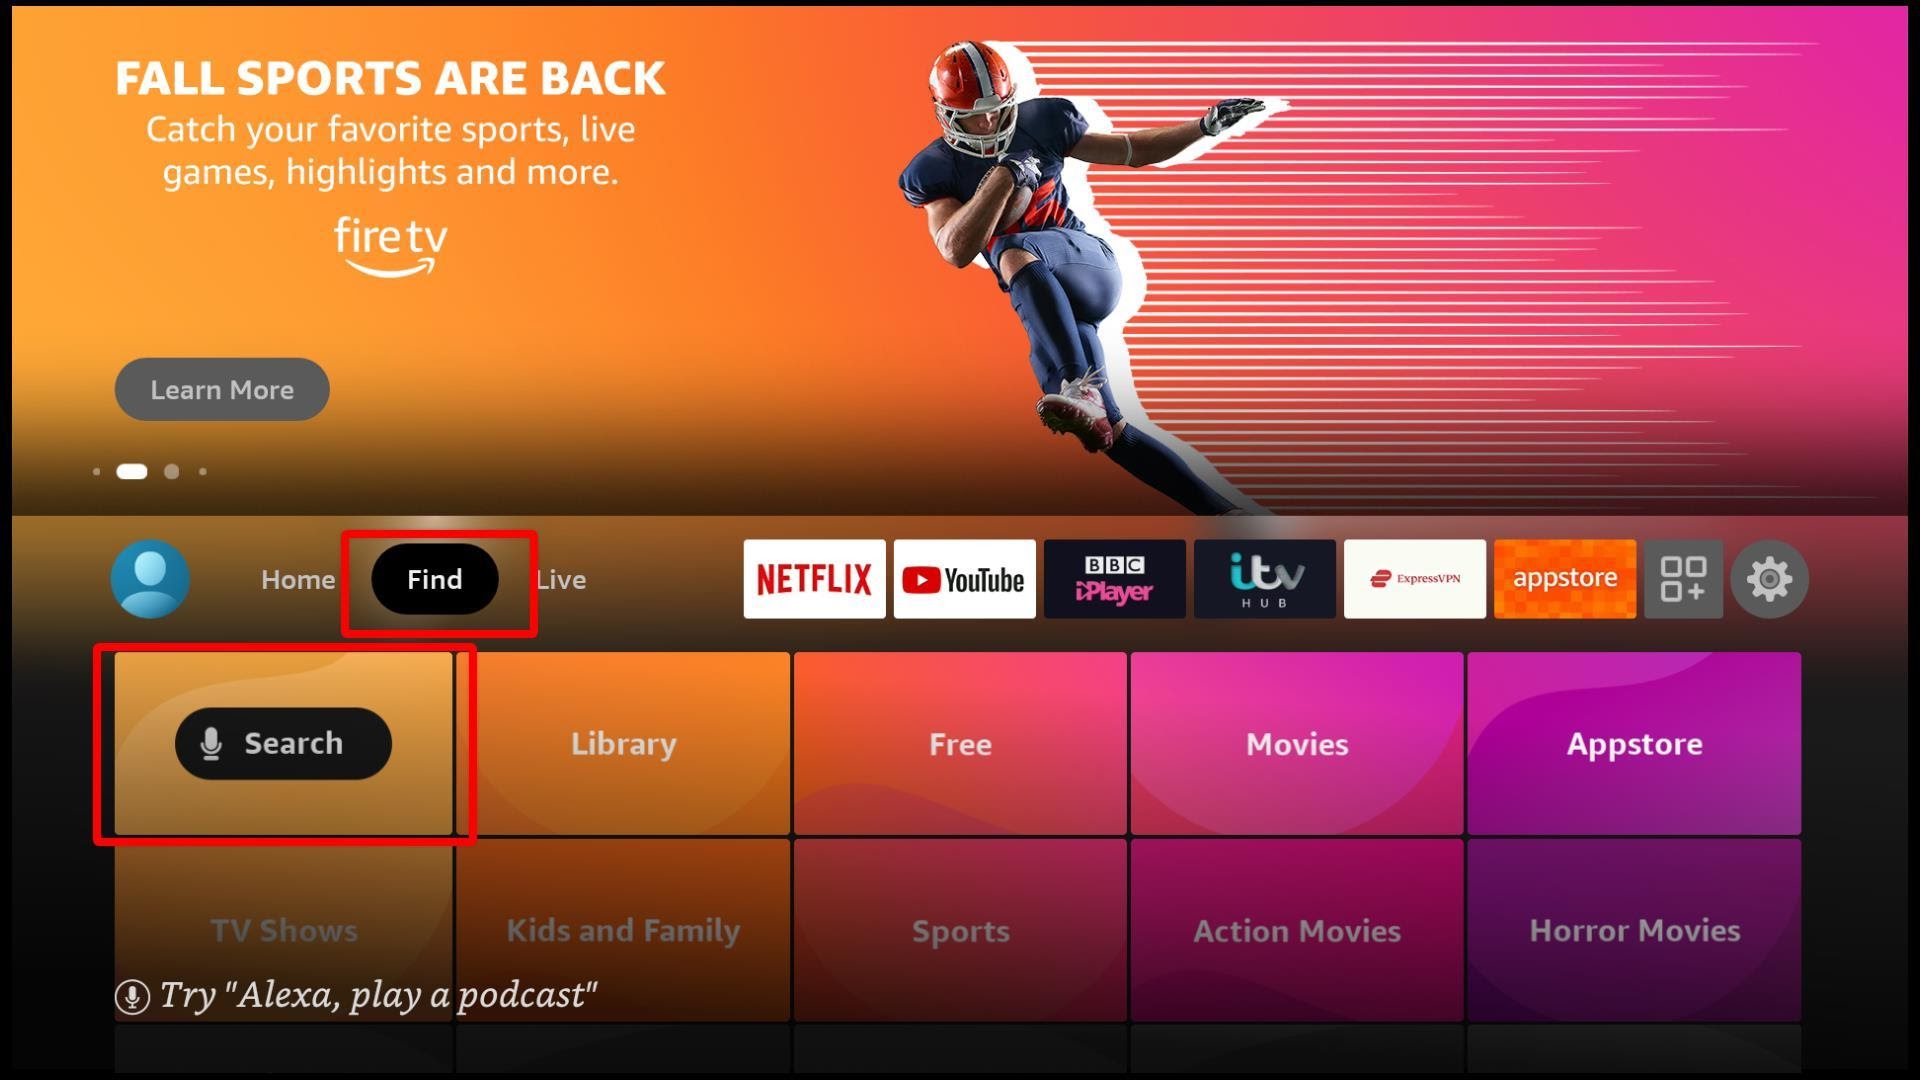
Step 3. Type ExpressVPN and press enter. 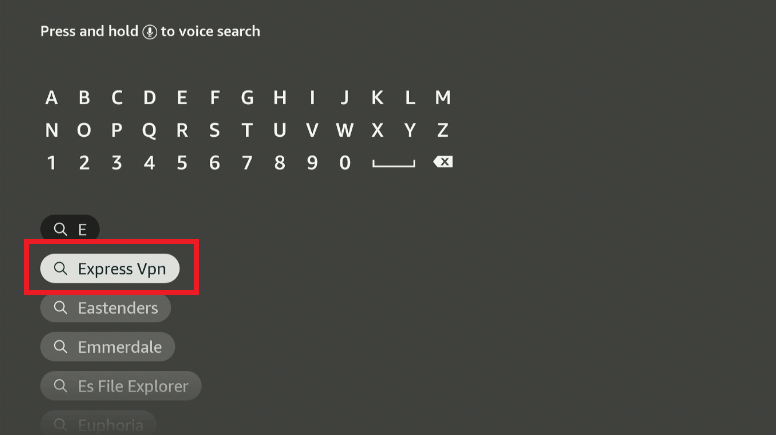
Step 4. Select the ExpressVPN icon from the search results.
Start the download and wait until it’s complete. 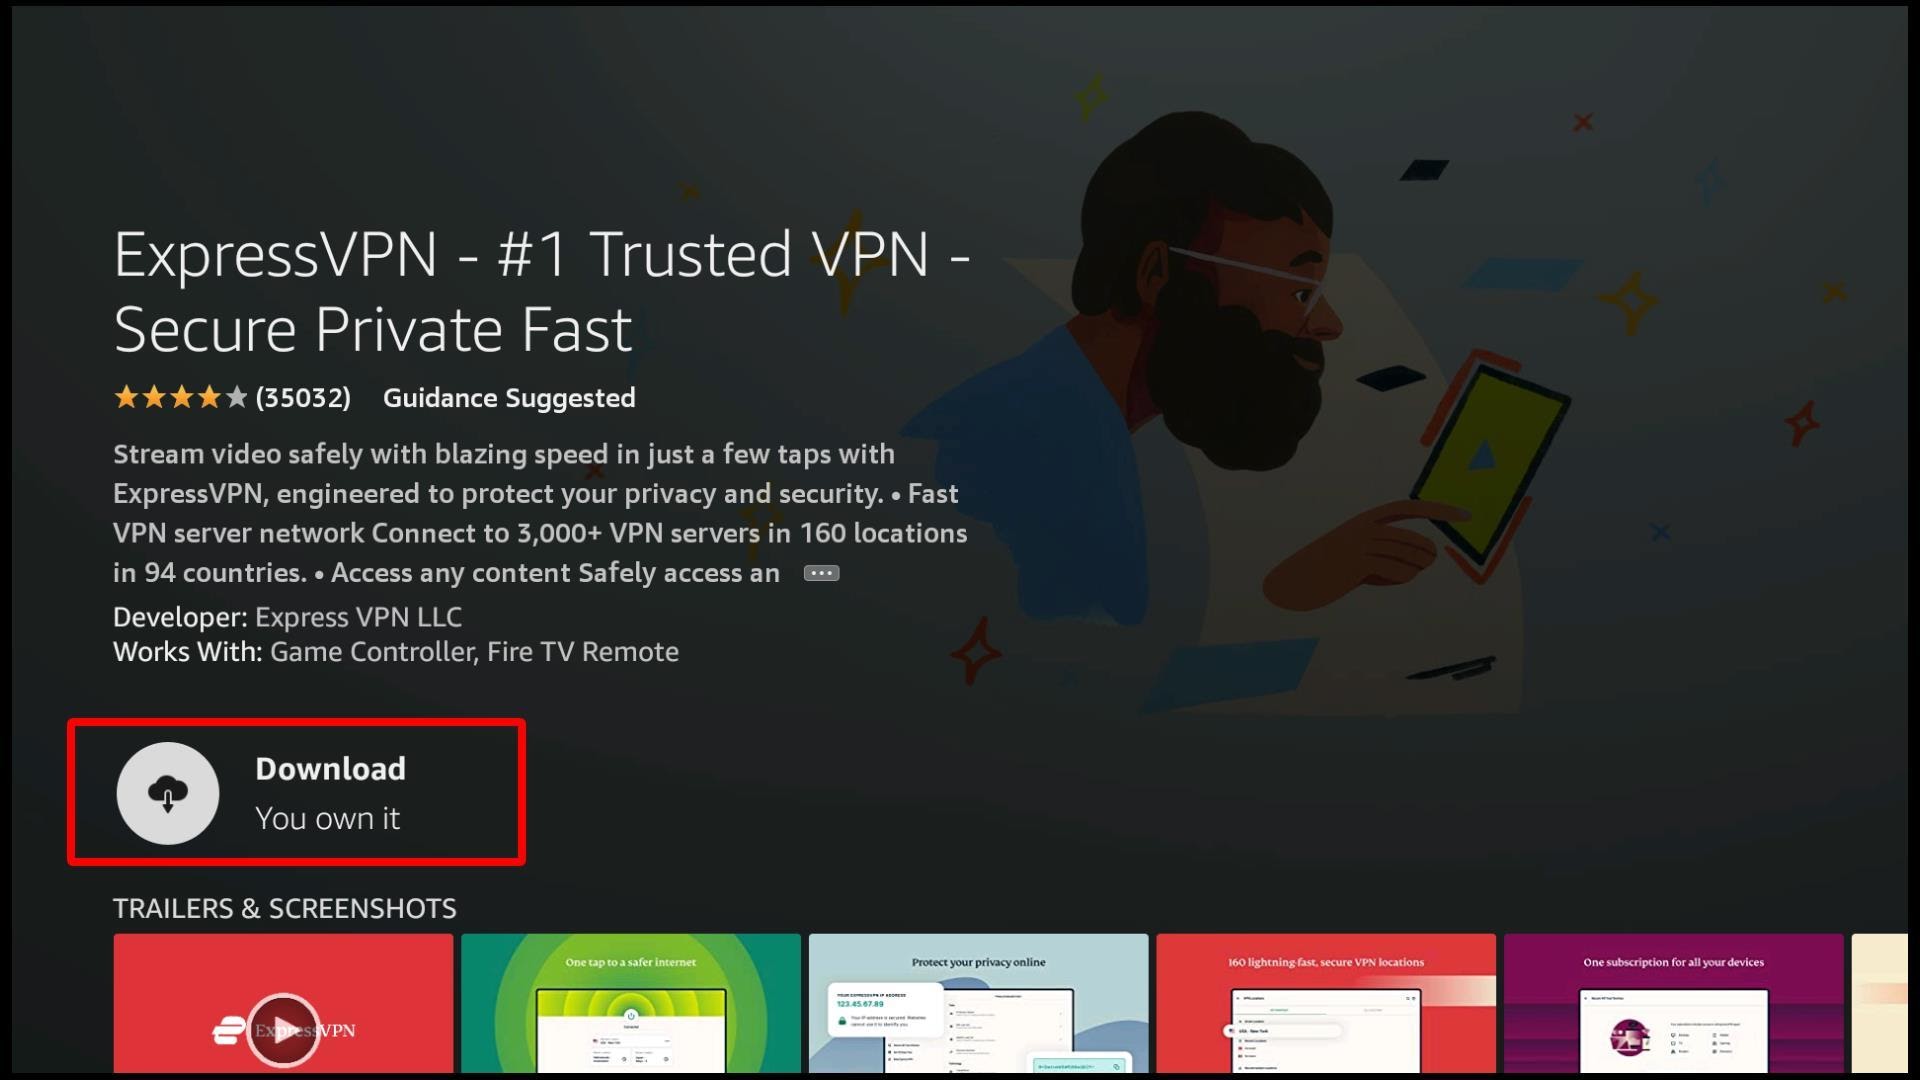
Step 5. Once the download is complete, sign in to ExpressVPN by entering your login details (email and password)
Step 6. The only thing left to do now is to connect to a server location. You will see the connecting symbol on the screen. Click on it and let the VPN automatically connect you to a reliable server location.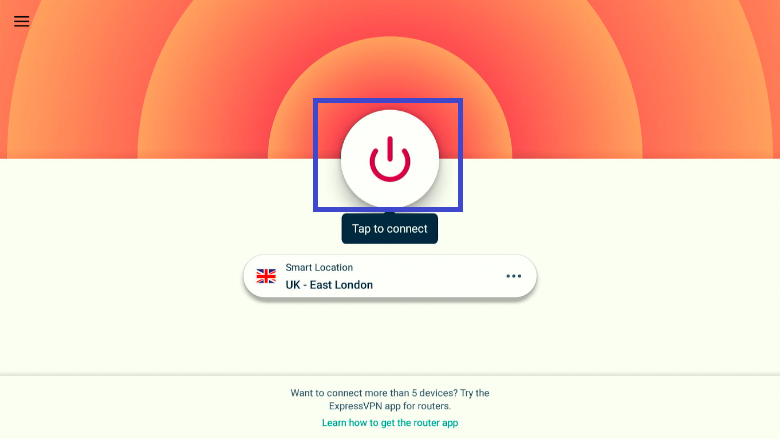
Congratulations! You’ve successfully installed and connected to ExpressVPN.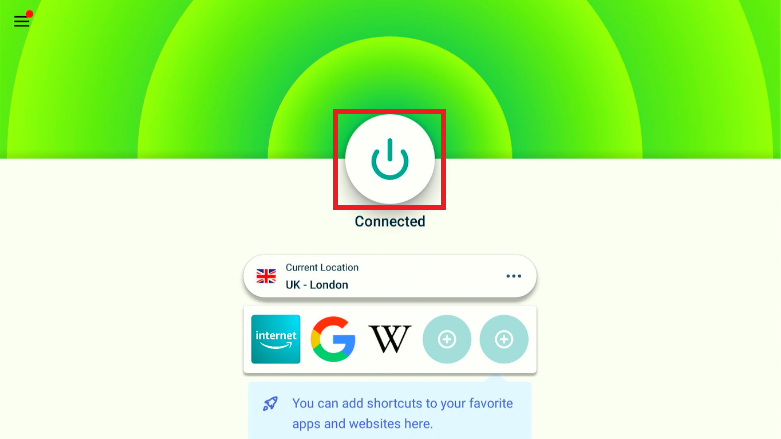
Rising Tides is one of the best sports addons for Kodi. It has sections for live PPV events, football games, and other sports events. And the best thing about Rising Tides is that it works with both Kodi 18 and 19 Matrix (albeit with different URLs). What more can you ask for in a Kodi addon?

You need to load content from reCAPTCHA to submit the form. Please note that doing so will share data with third-party providers.
More InformationYou are currently viewing a placeholder content from Turnstile. To access the actual content, click the button below. Please note that doing so will share data with third-party providers.
More InformationYou are currently viewing a placeholder content from Facebook. To access the actual content, click the button below. Please note that doing so will share data with third-party providers.
More InformationYou need to load content from reCAPTCHA to submit the form. Please note that doing so will share data with third-party providers.
More InformationYou are currently viewing a placeholder content from reCAPTCHA. To access the actual content, click the button below. Please note that doing so will share data with third-party providers.
More InformationYou are currently viewing a placeholder content from Instagram. To access the actual content, click the button below. Please note that doing so will share data with third-party providers.
More InformationYou are currently viewing a placeholder content from X. To access the actual content, click the button below. Please note that doing so will share data with third-party providers.
More Information