This article is your complete guide to learn how to install Slamious Wizard and Slamious Kodi Build on Amazon Fire TV Stick. The installation process is compatible with multiple other devices and operating systems including, Linux, Windows, Android, iOS, and many more.
Slamious Wizard is a Kodi program addon with numerous Kodi builds. The best build on Slamious Wizard is the Slamious Kodi build, as it comes with multiple pre-installed addons that take care of your streaming needs perfectly. From a variety of movies and TV shows to Live TV and sports channels, Kodi addons will cater to your streaming needs like nothing else.
The addon itself is well-designed and organized, where you can access your favorite movie in seconds. Along with its compatibility with multiple devices, Slamious comes with over 40 Kodi addons and still takes only 246 MB!
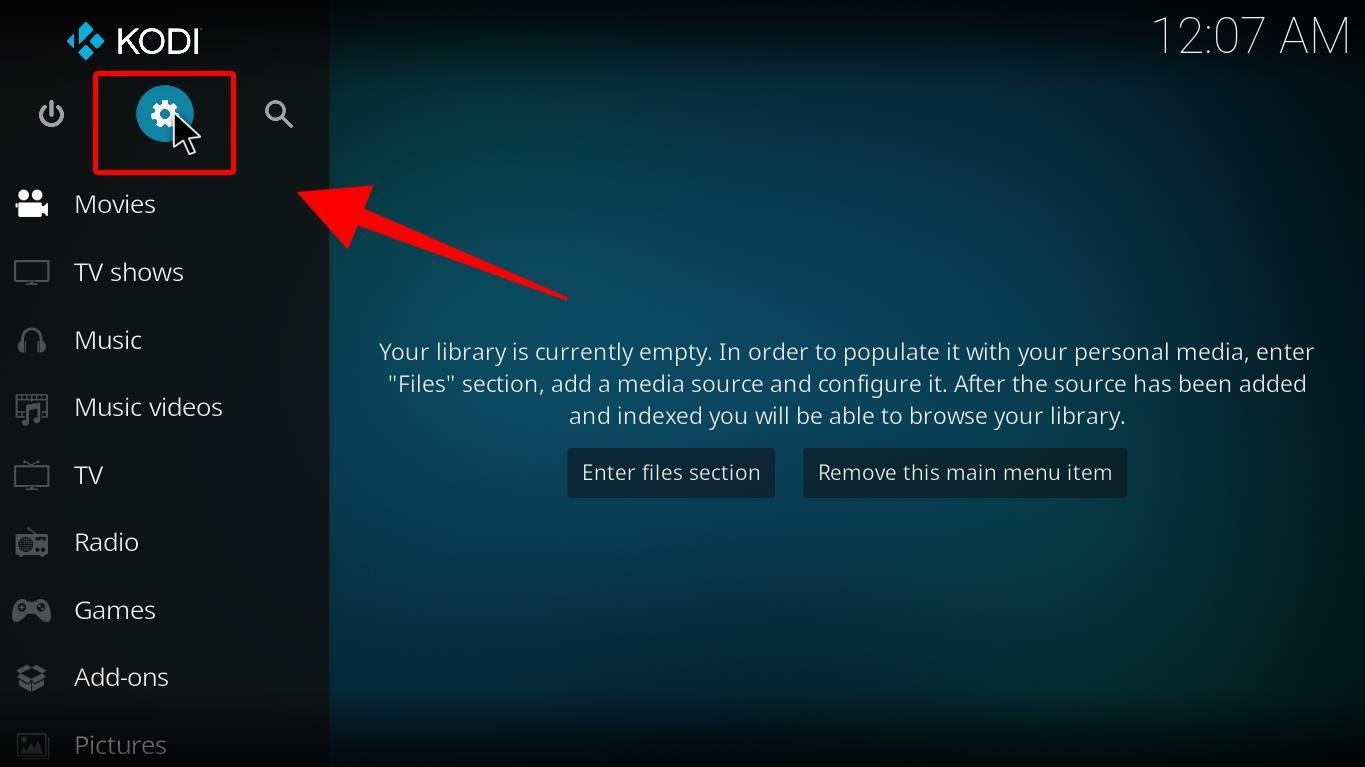
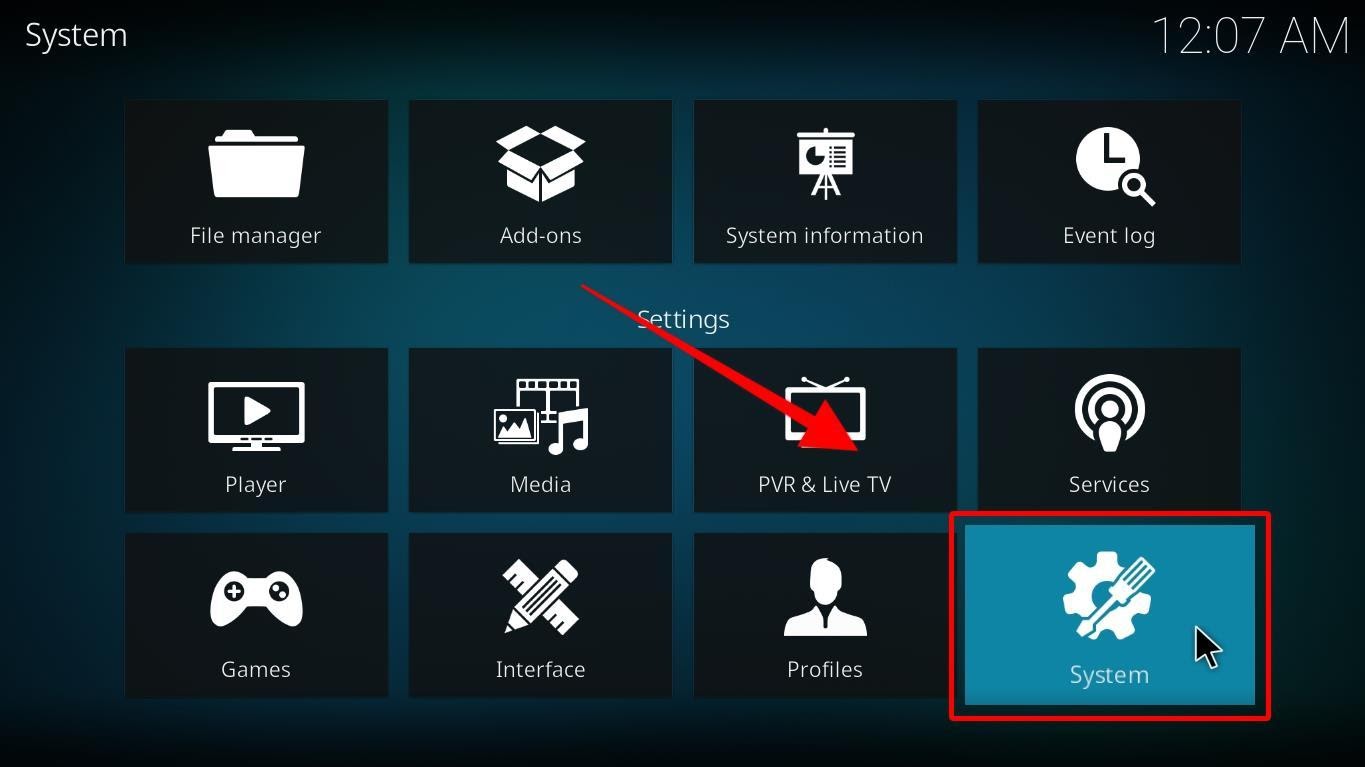
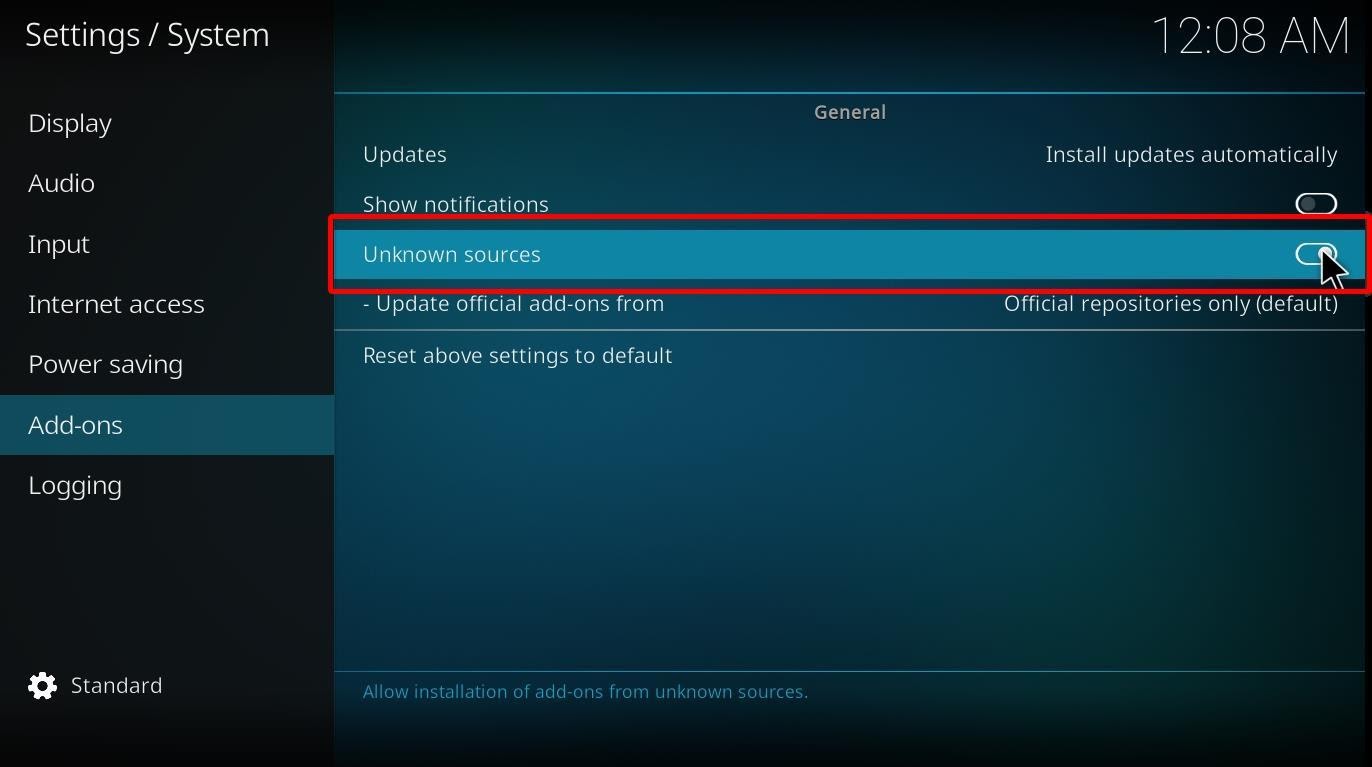
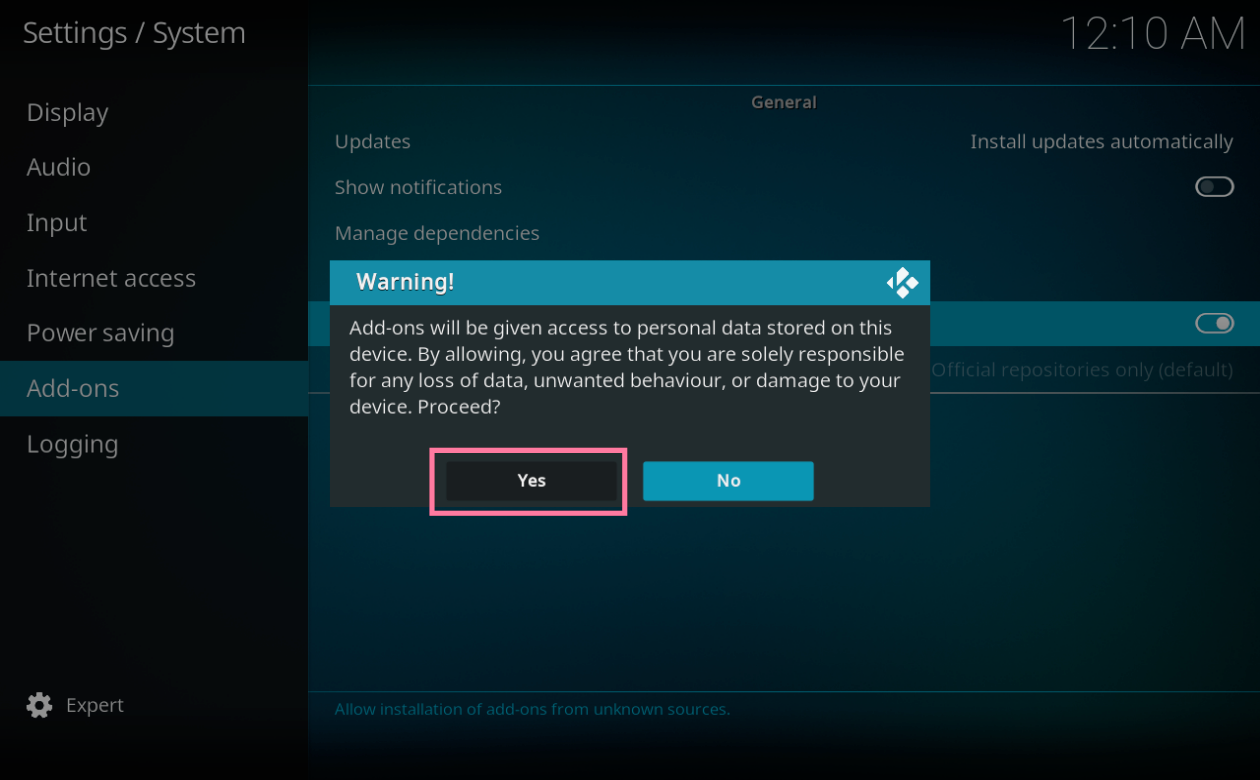
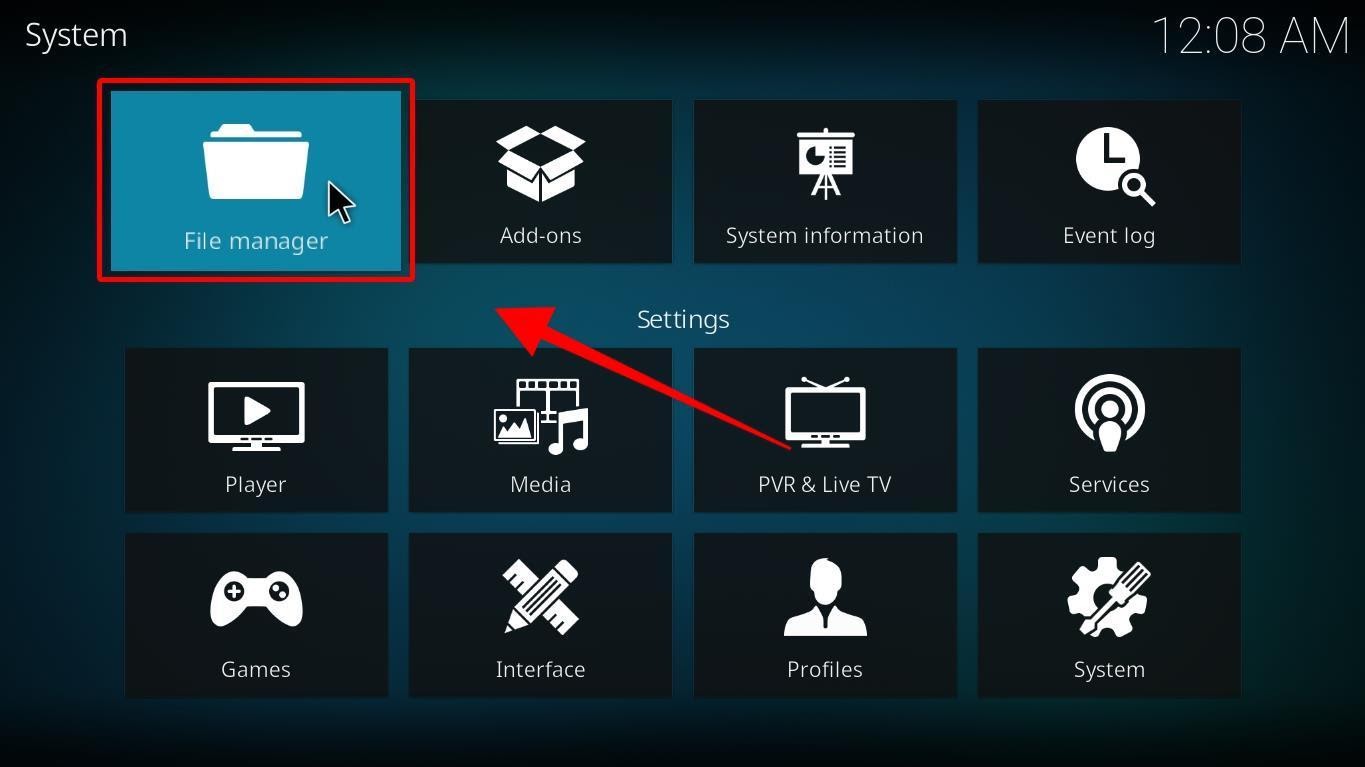
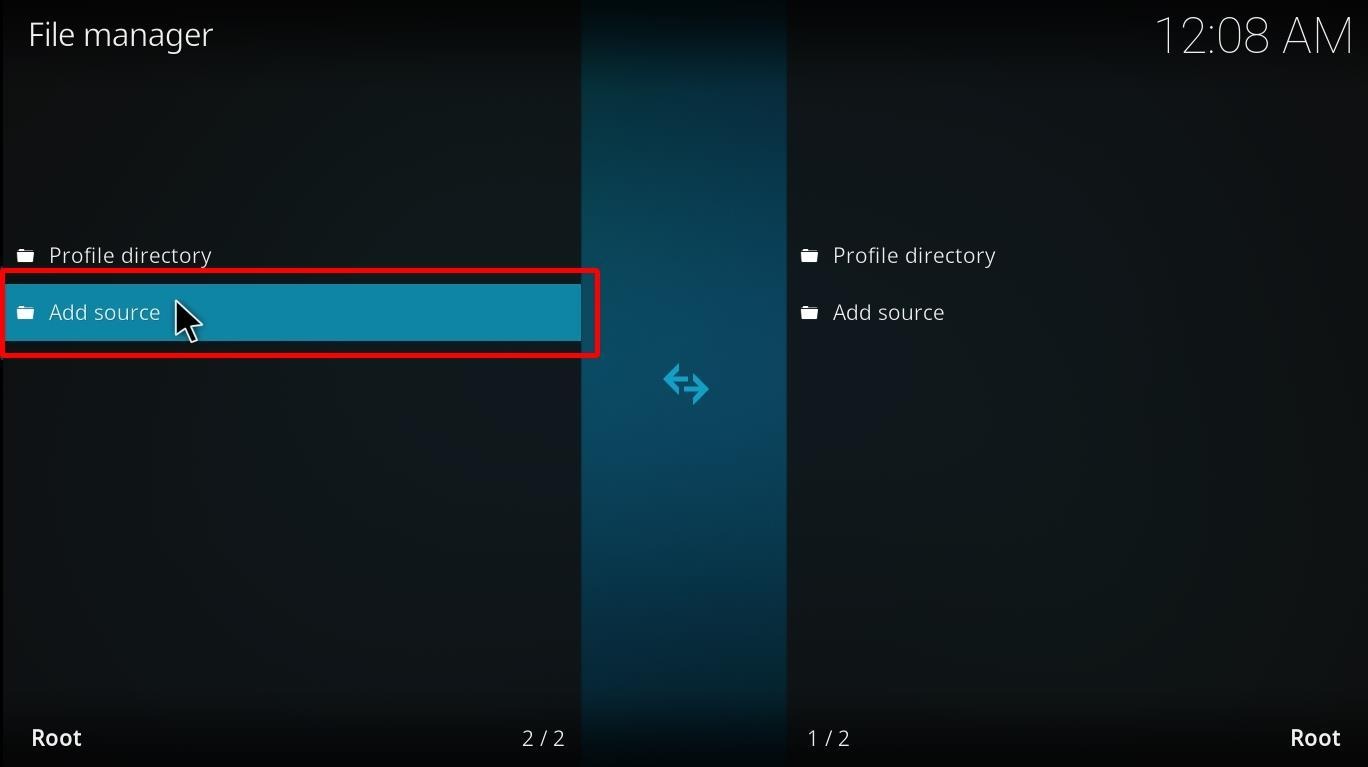
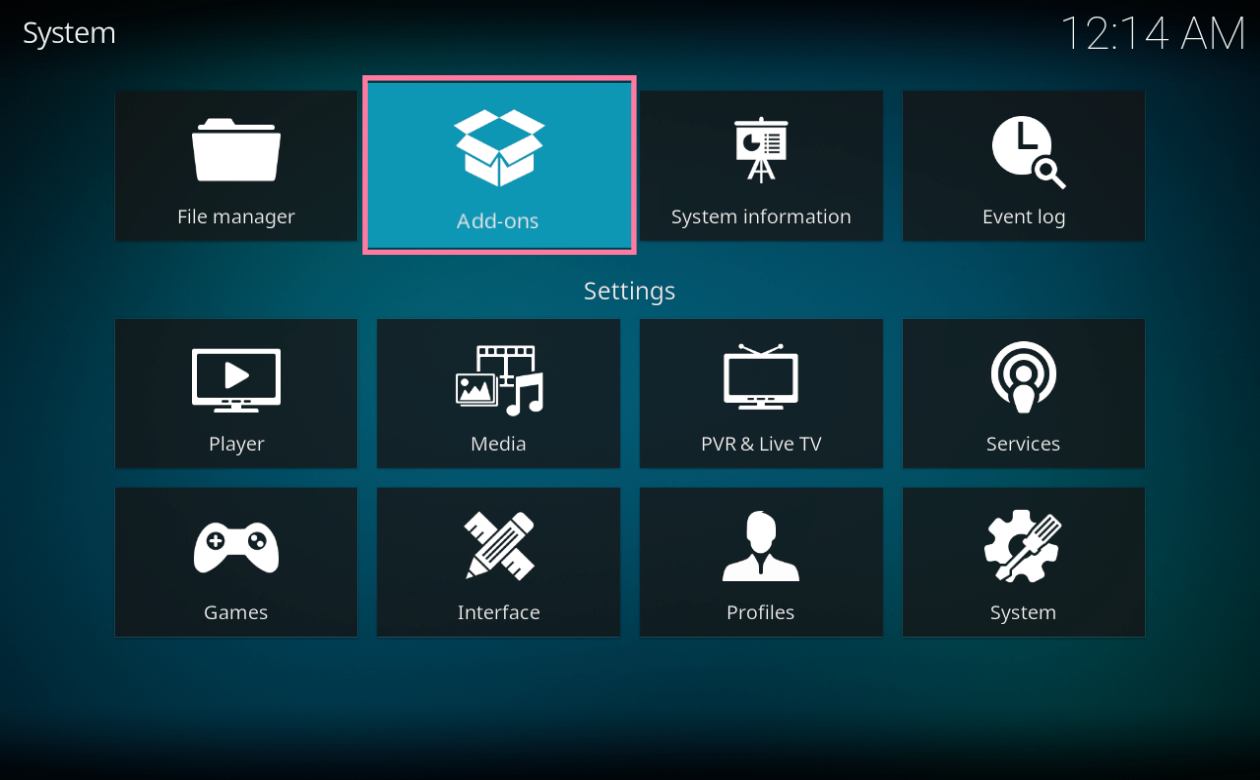
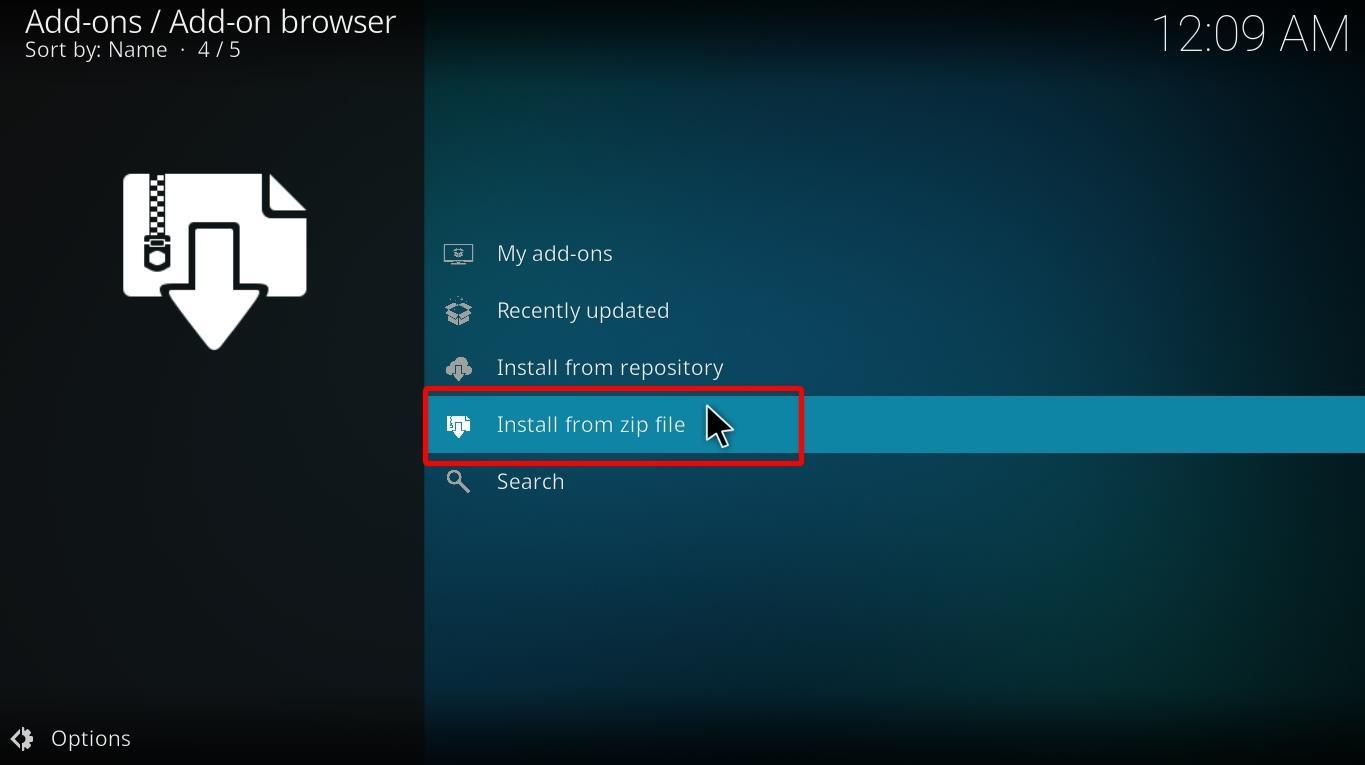
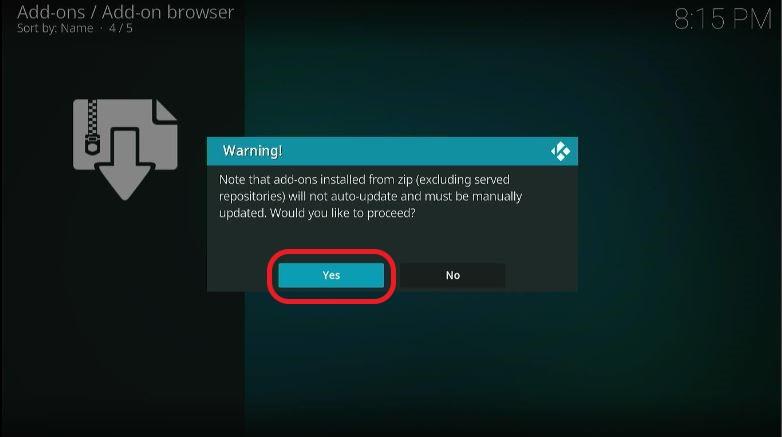
Let’s delve into how you can get the Slamious Kodi build on Kodi (and on Firestick, or whichever device you prefer).
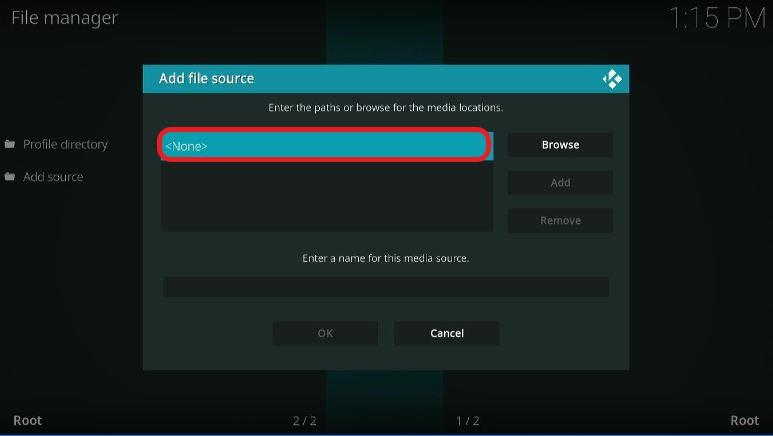
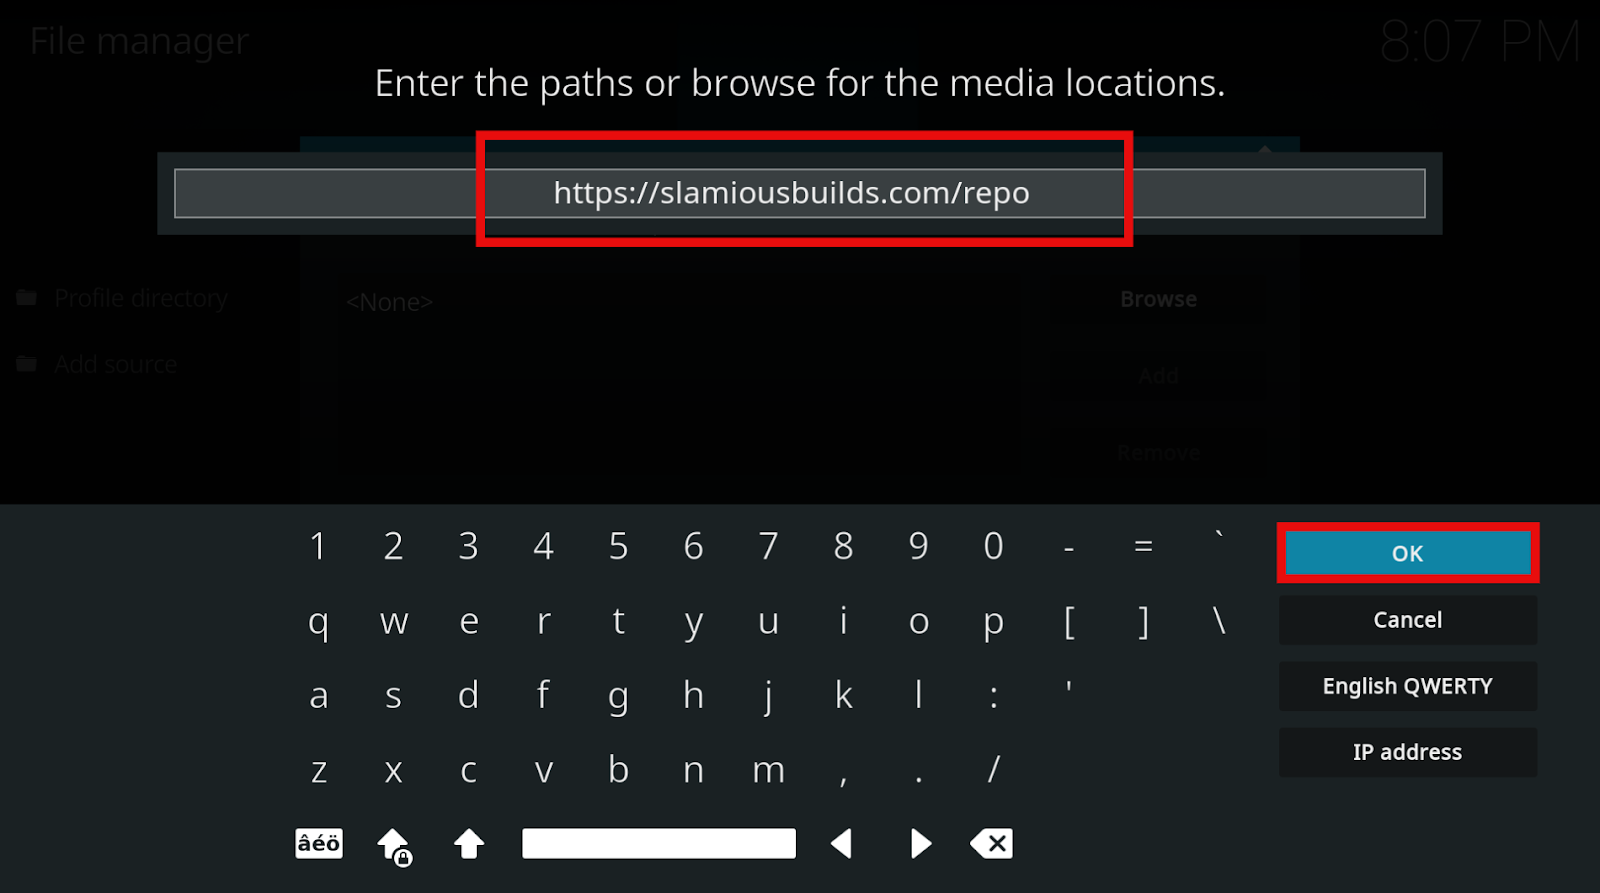
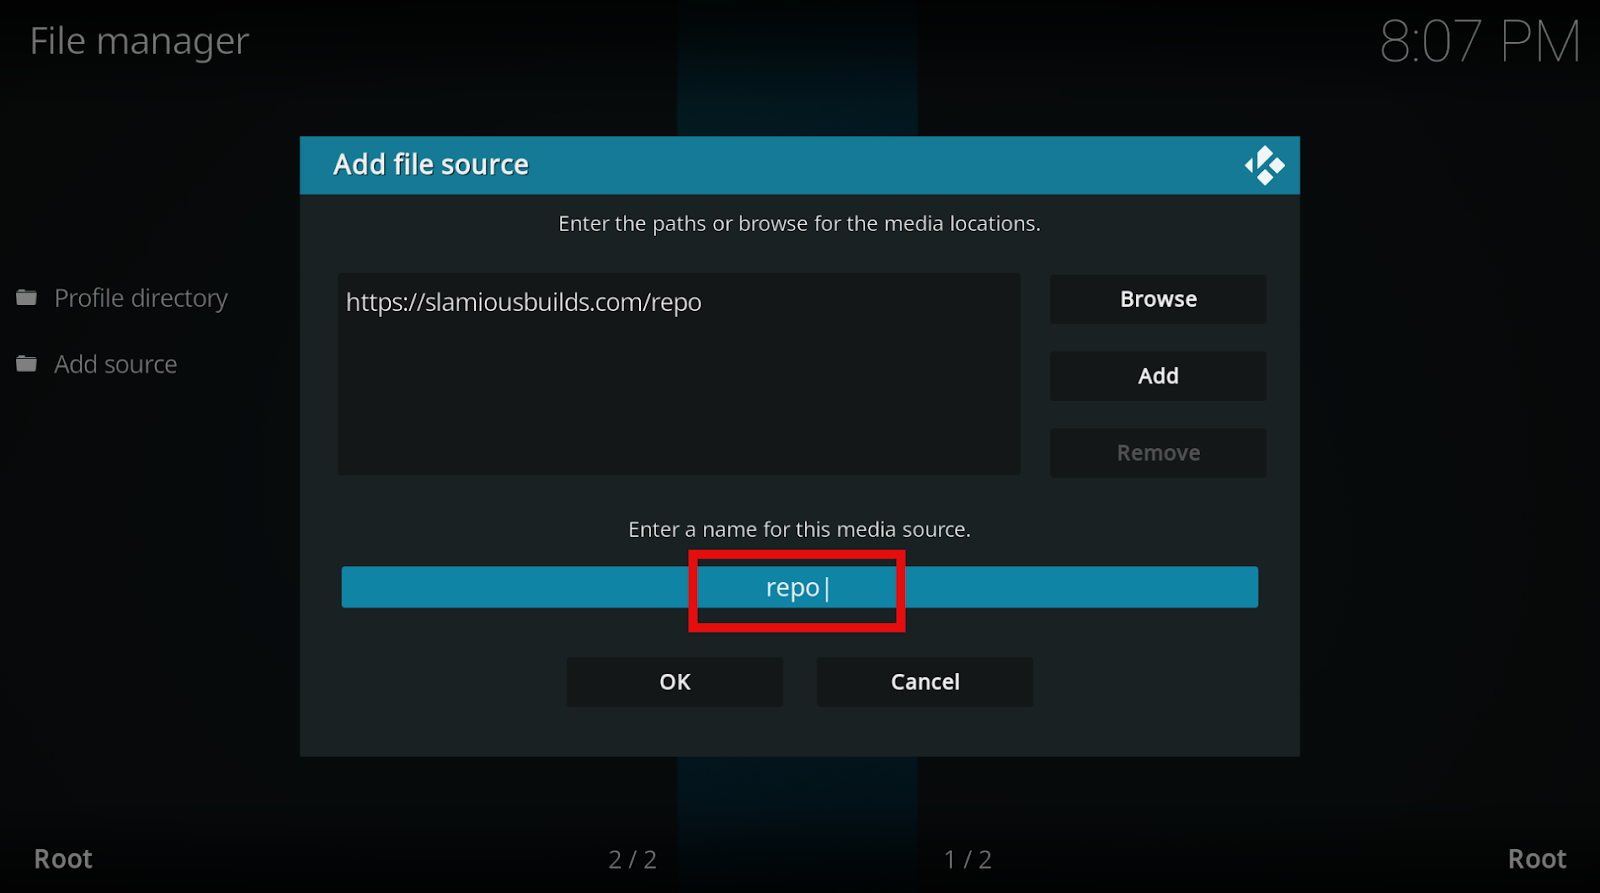
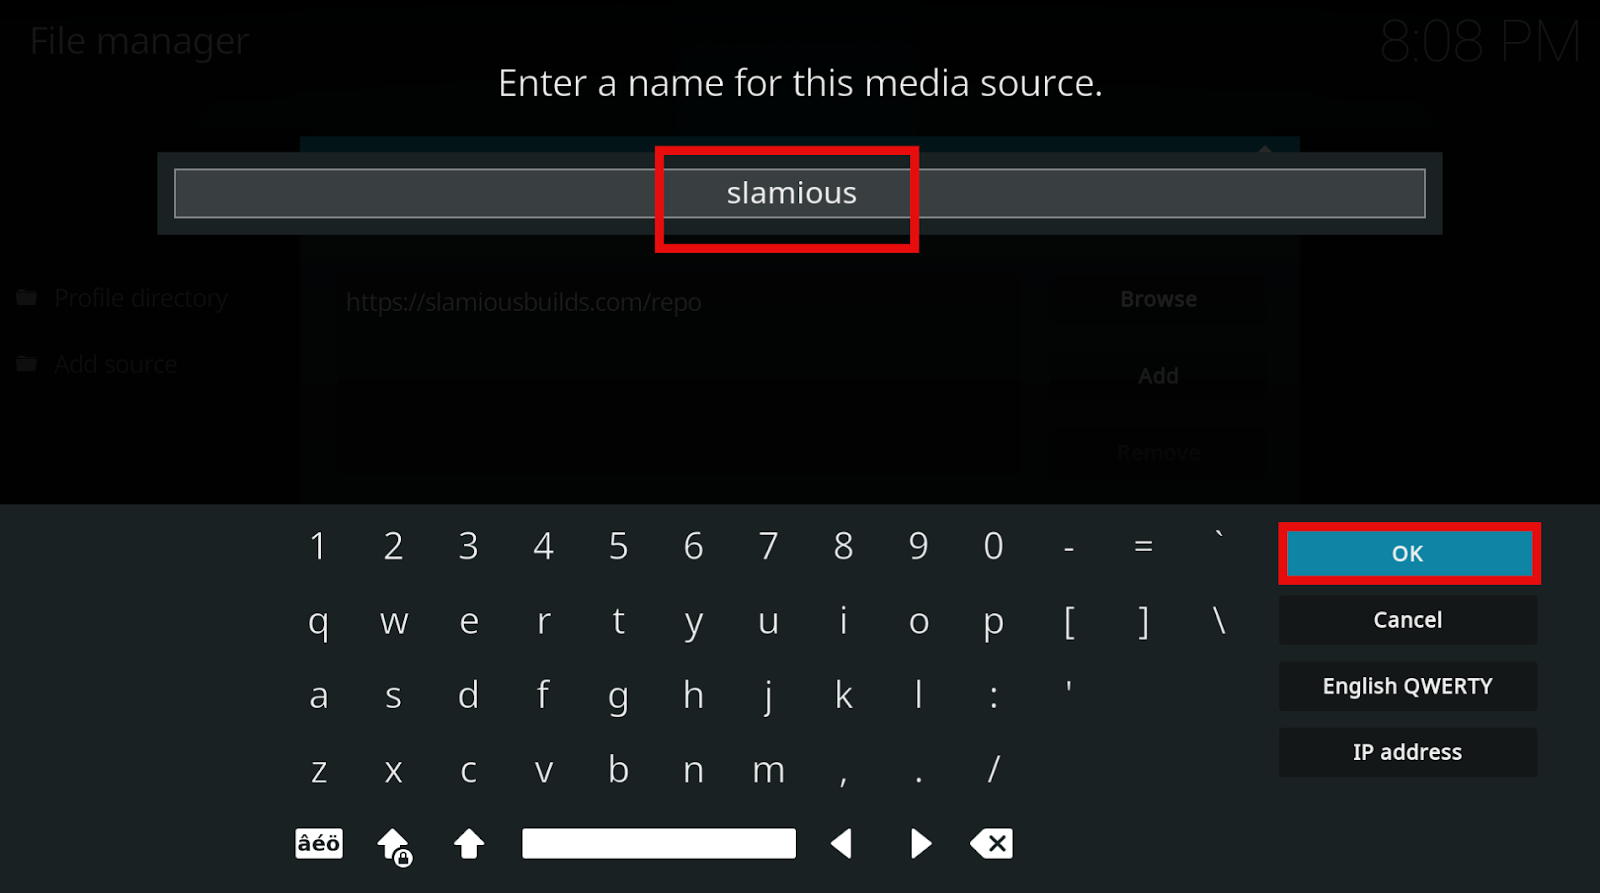
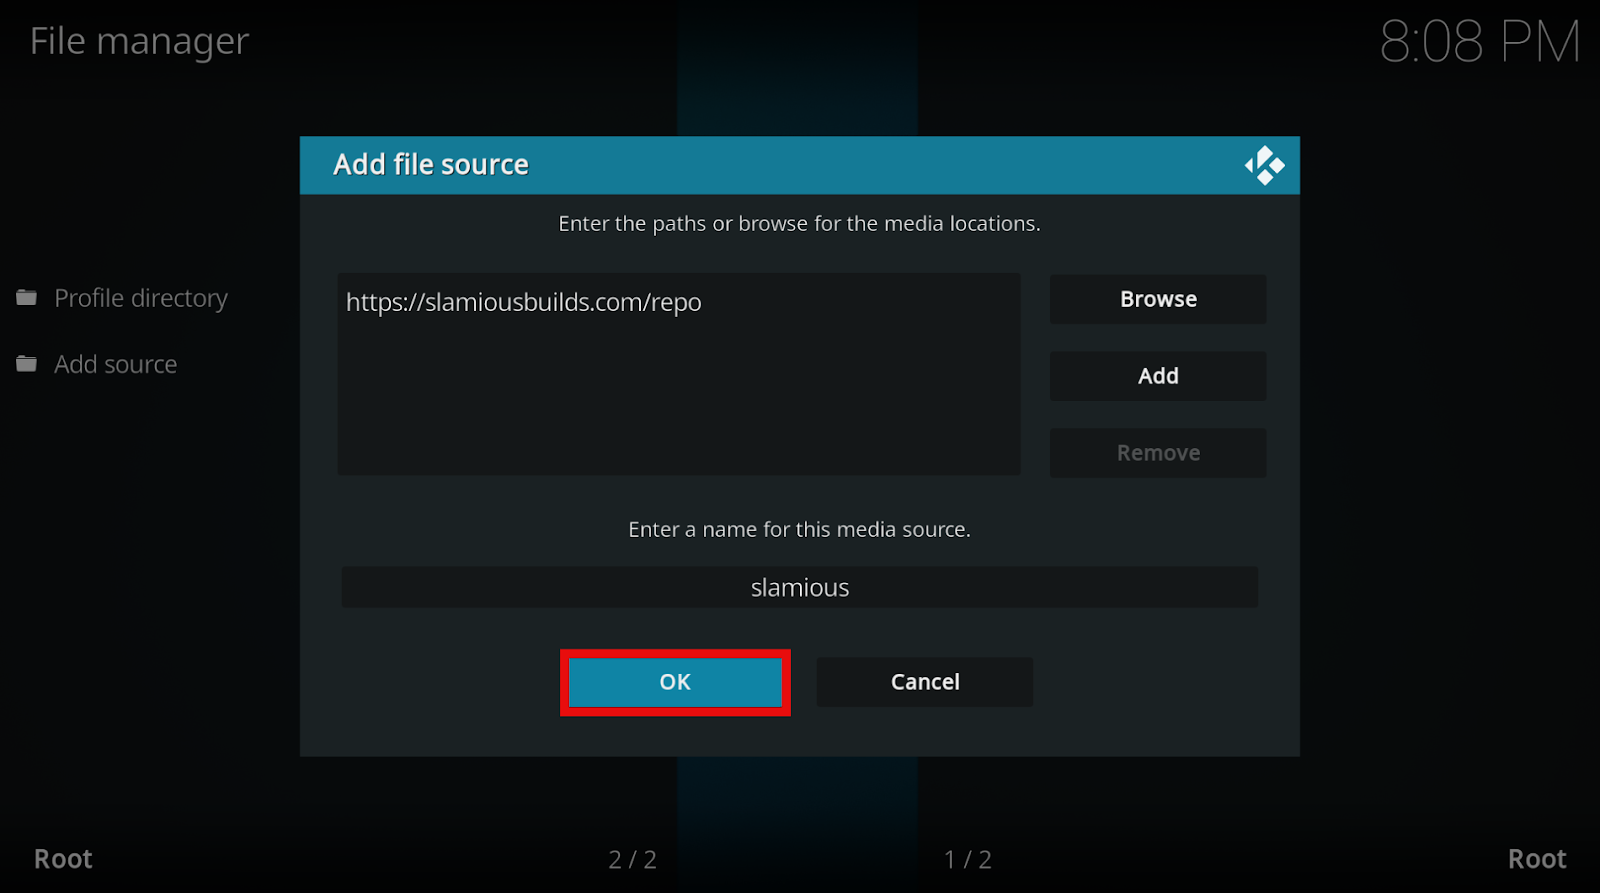
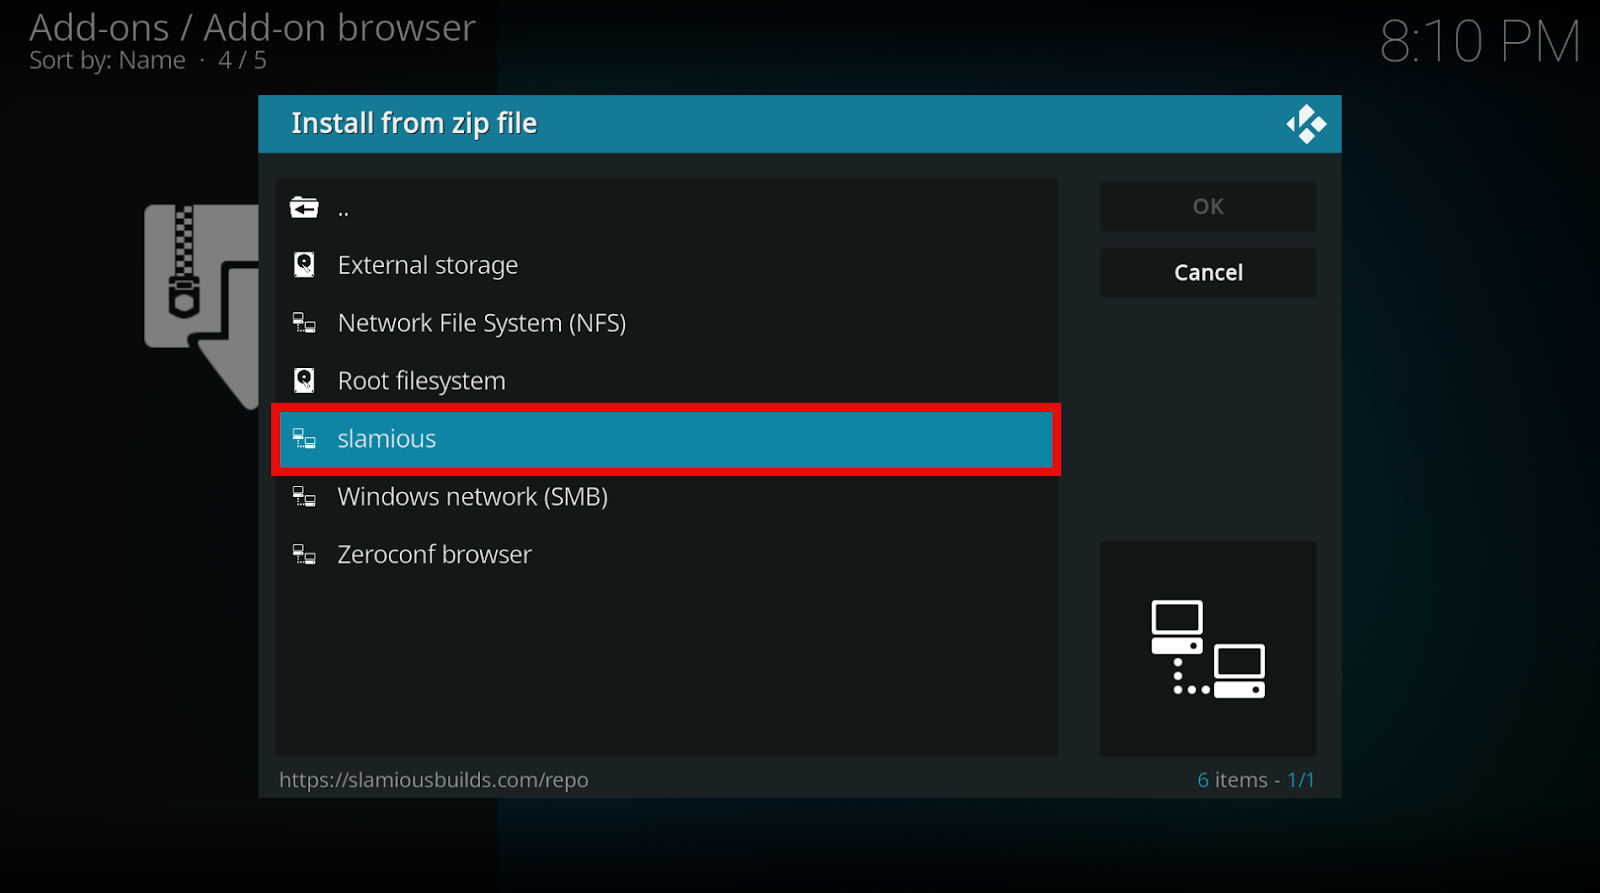
By following the steps above, you have effectively added the source link. Now you are ready to move on to the next part, which is installing Slamious Wizard!
The whole process can take up to 2- 3 minutes depending on your internet connectivity.
This is how you install Slamious build on Kodi from the Slamious wizard. After the download is complete, the window will force close. When this happens, it means that Kodi is now installed. Open the application to finally enjoy your Slamious 19 build!
We would like to warn you before you start streaming with Kodi builds and addons. Without the use of the best Kodi VPN, everything that you stream through Kodi will be visible to the ISP and government.
This means that viewing copyrighted TV shows and movies can also land you into legal trouble. Your personal data can also be misused by numerous hackers out there!
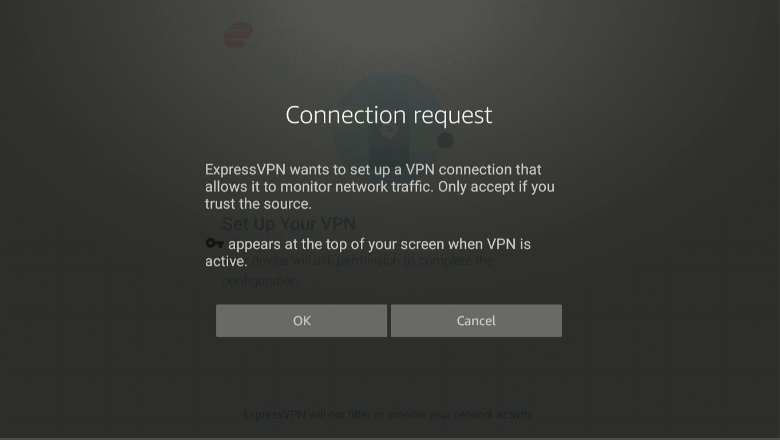
To stay out of such troubles, we have the best option for you: Installing a good VPN. A Virtual Private Network is an encrypted connection that hides your true IP address to secure you from privacy breaches and legal troubles by changing your location.
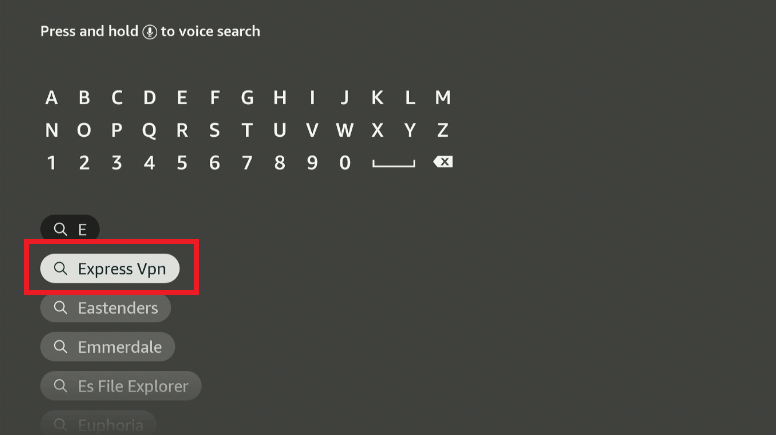
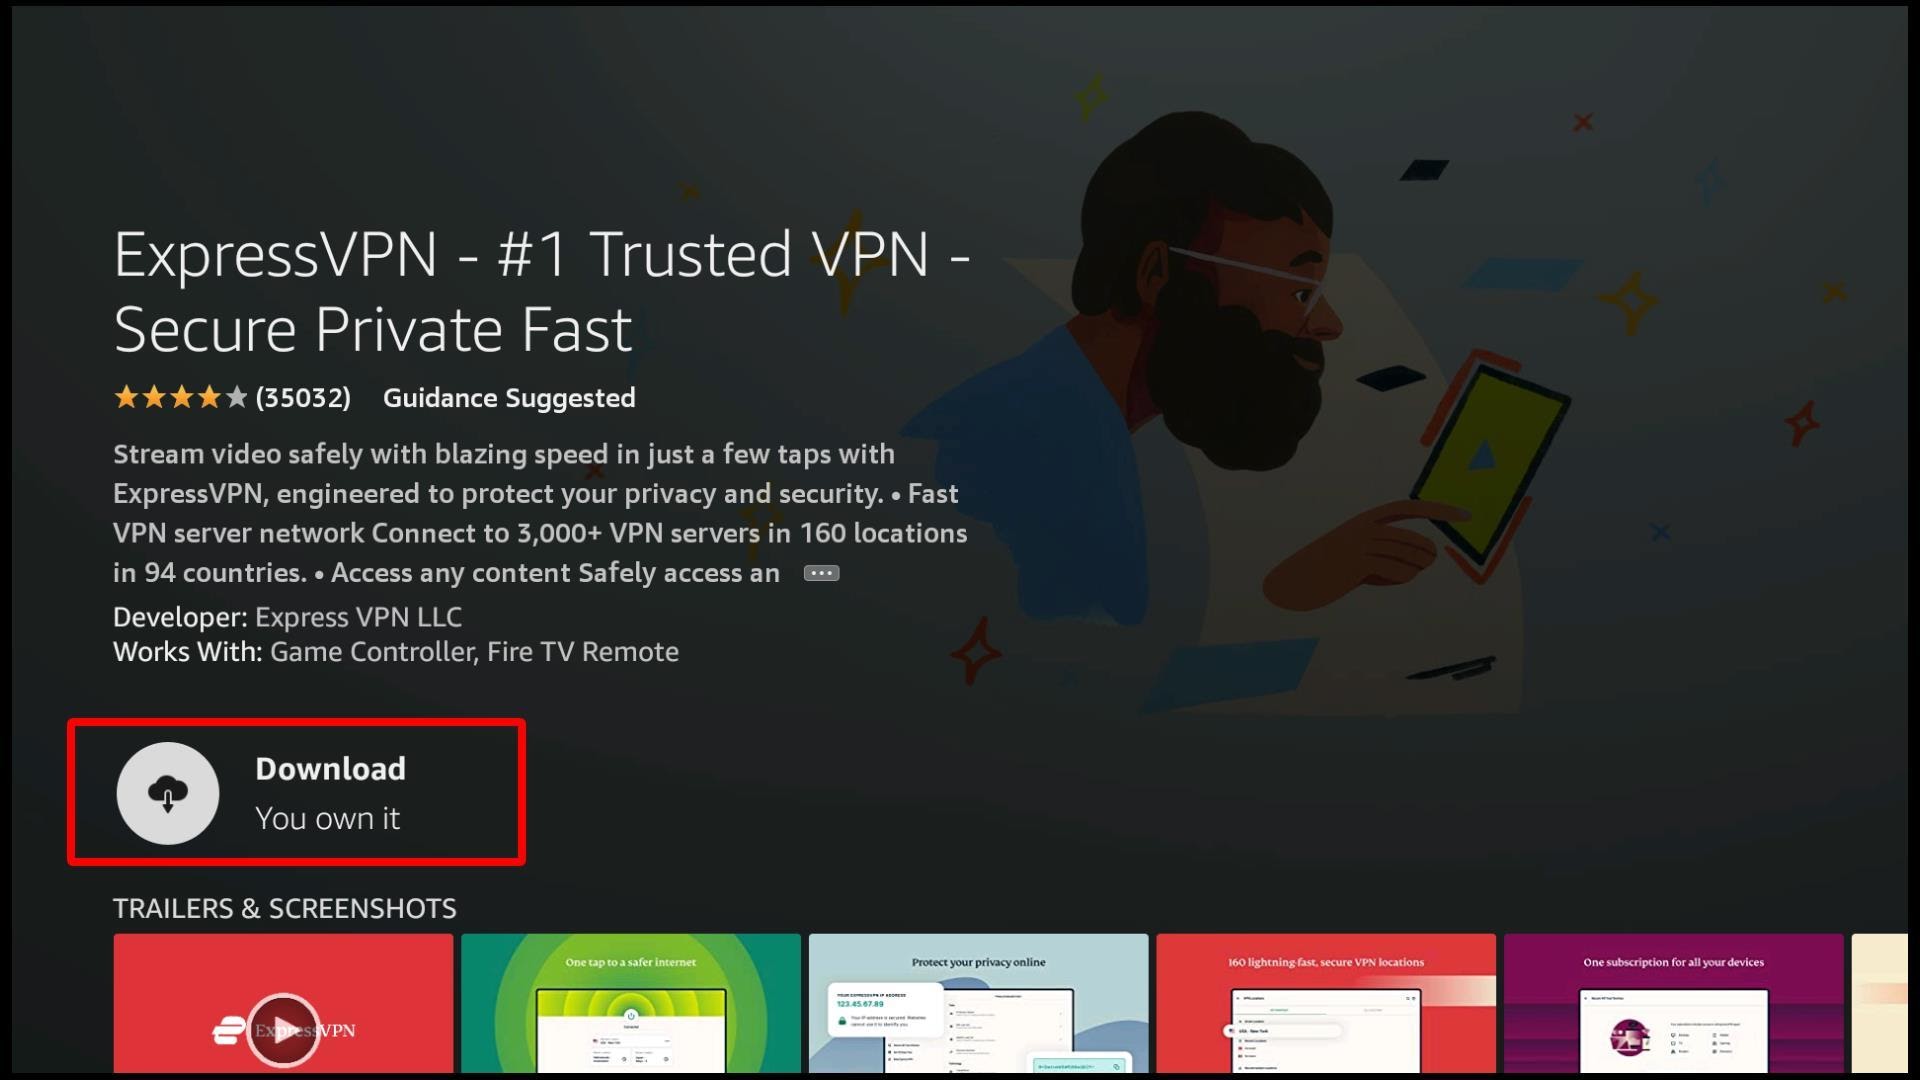
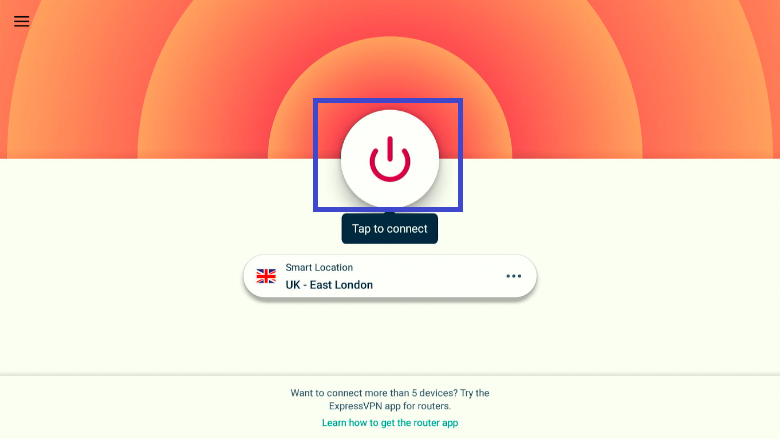
It can get very confusing to try different VPNs and wonder if they do what they’re actually supposed to (and whether they do it well). We personally recommend ExpressVPN, as it’s economical, easy to use, compatible with multiple devices, and keeps your data safe.
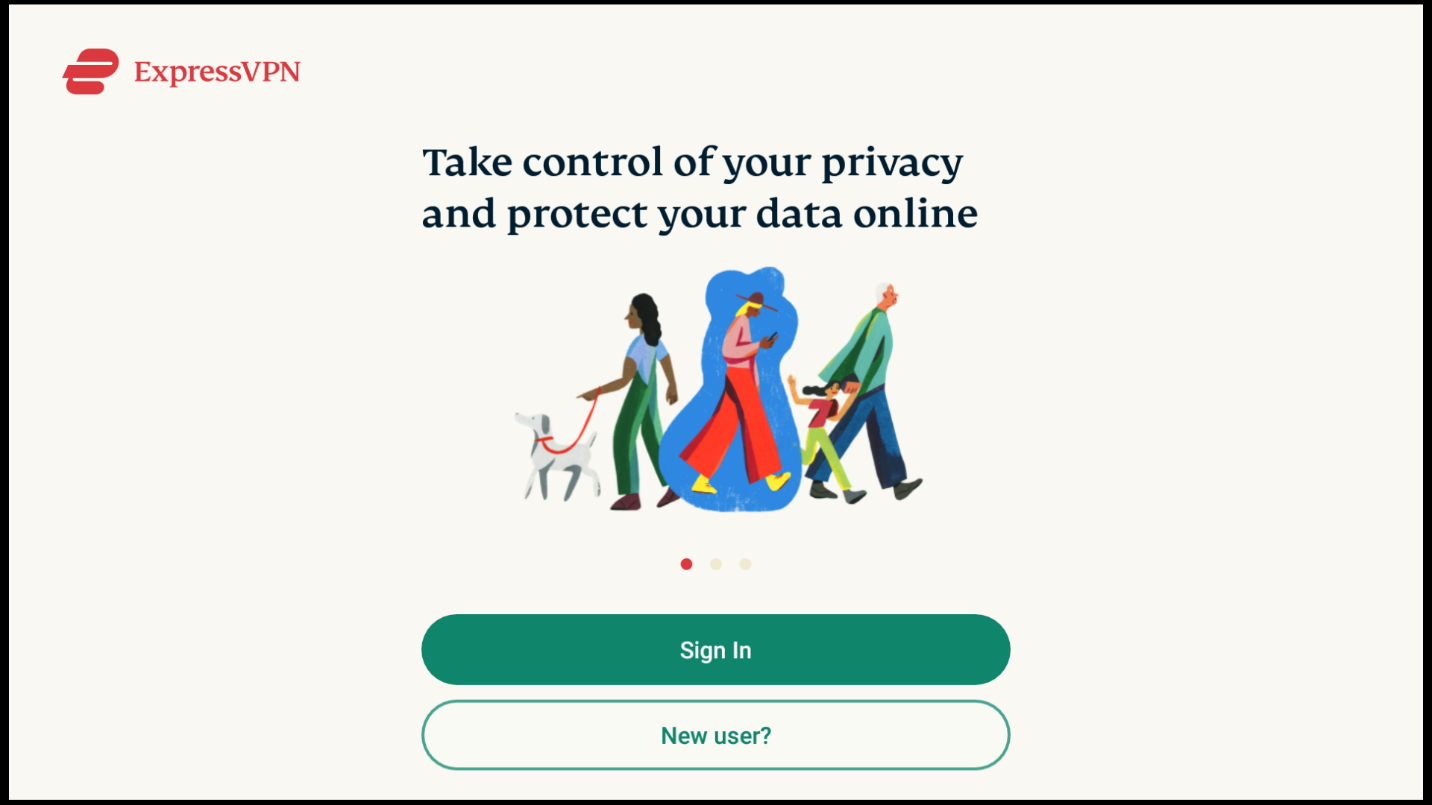
So, before you start streaming on Kodi, here is a guide to installing ExpressVPN on your Firestick.
If you are opening the application for the first time, then it might take 2-3 minutes to update its addons and settings. Please be patient if you do not find a particular addon, as it must be in the process of updating.
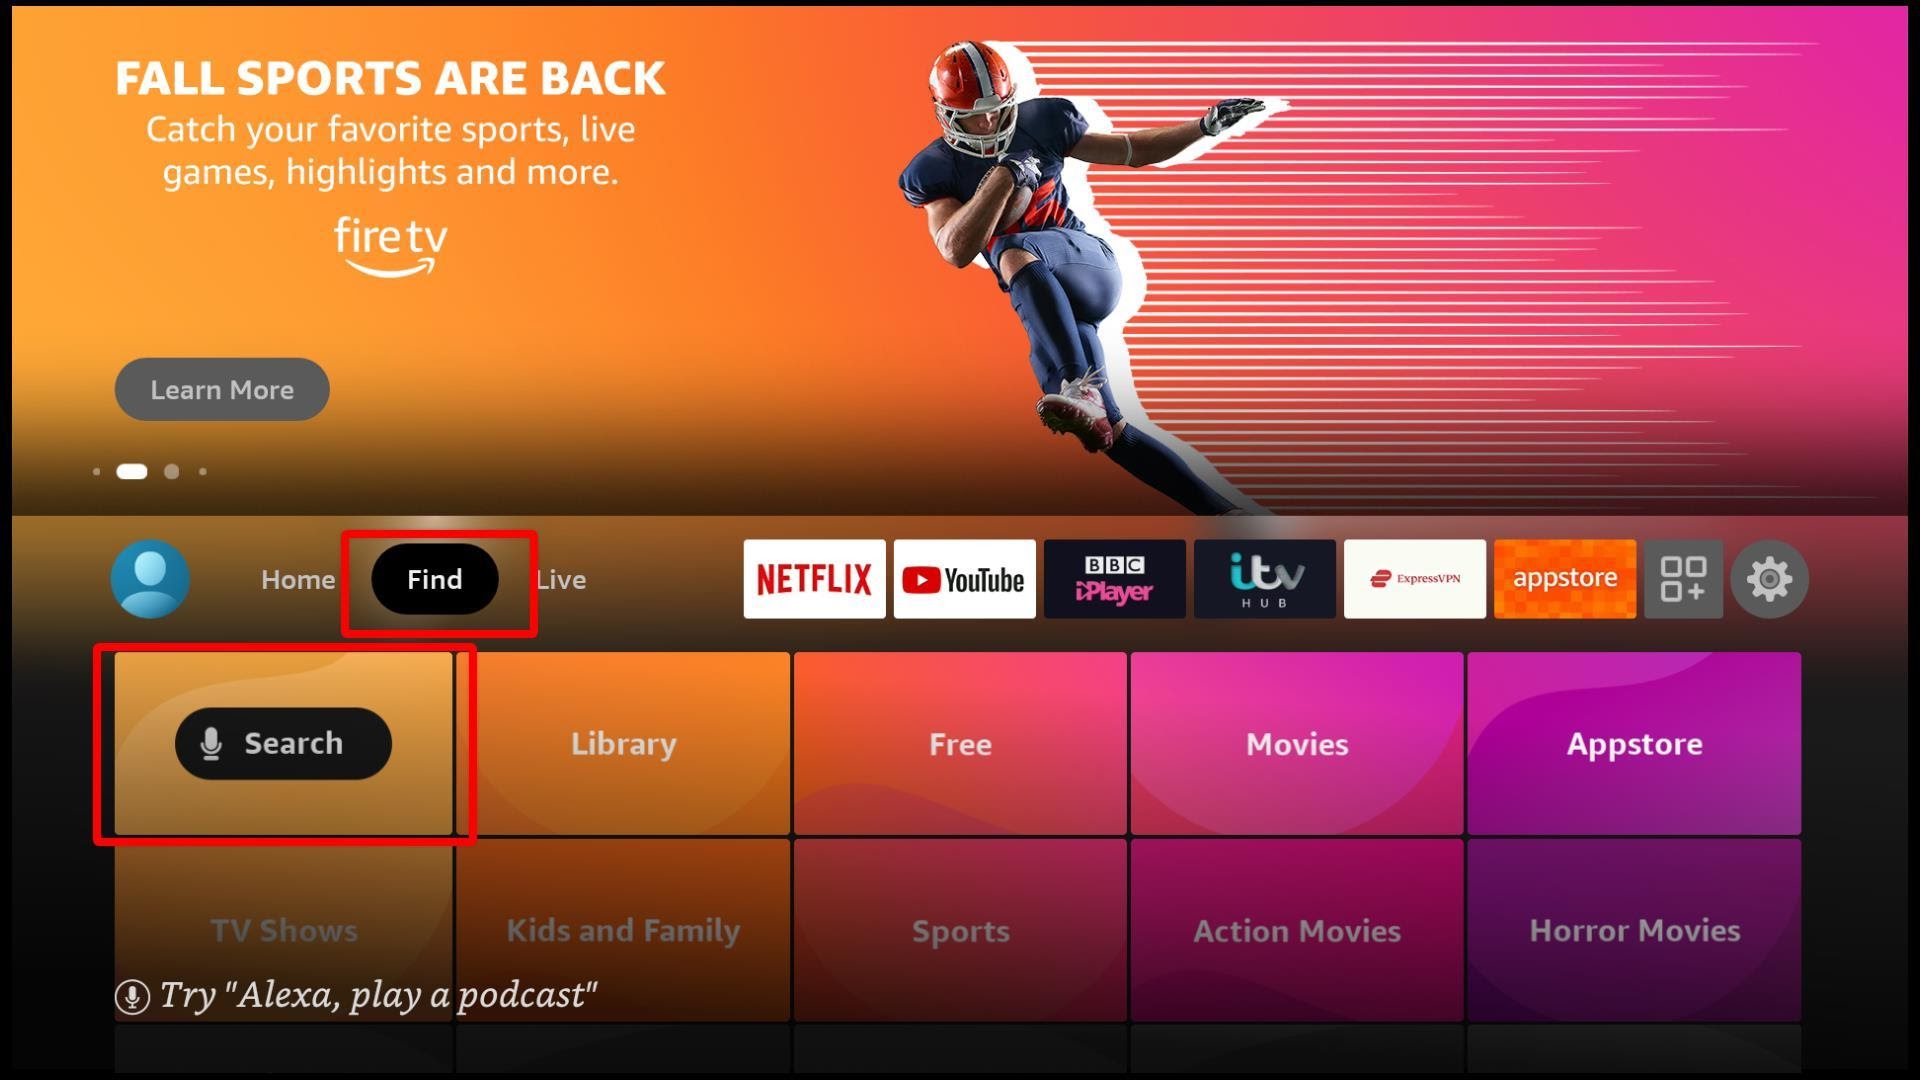
The following options will appear on your home screen that can allow you to begin your streaming activities instantly:
You can view all these categories on the main menu bar on your home screen. After clicking on your desired category, a sub-menu will appear containing additional relevant options, like video addons and new releases.
If you want to view all the pre-installed addons that come with Salmious Kodi build, you can select the addon and then Video addons from the main menu present on your home screen.
Some of the popular video addons pre-installed with Slamious Kodi Build are:
Slamious wizard itself hosts multiple builds, but we have done the hard work of figuring out the best build of all. Slamious is certainly the most compatible and entertaining build. It is a brilliant streaming platform with an easy-to-use interface and its downloading process is relatively hassle-free, and it works well on low ram devices too.

You need to load content from reCAPTCHA to submit the form. Please note that doing so will share data with third-party providers.
More InformationYou are currently viewing a placeholder content from Turnstile. To access the actual content, click the button below. Please note that doing so will share data with third-party providers.
More InformationYou are currently viewing a placeholder content from Facebook. To access the actual content, click the button below. Please note that doing so will share data with third-party providers.
More InformationYou need to load content from reCAPTCHA to submit the form. Please note that doing so will share data with third-party providers.
More InformationYou are currently viewing a placeholder content from reCAPTCHA. To access the actual content, click the button below. Please note that doing so will share data with third-party providers.
More InformationYou are currently viewing a placeholder content from Instagram. To access the actual content, click the button below. Please note that doing so will share data with third-party providers.
More InformationYou are currently viewing a placeholder content from X. To access the actual content, click the button below. Please note that doing so will share data with third-party providers.
More Information