Without addons and builds, Kodi is simple and can be tedious. Video addons add so much for streaming content to Kodi, and Kodi builds let you personalize and renovate your Kodi interface. Kodi might not have been as popular if it weren’t for the free addons and builds readily available. These addons are your portal to stream content for free. You can find movies, TV shows, sports, cable TV, anime, and so much more for free.
Kodi has different addons for different content. You might want to stream a movie or a TV show, but you can’t find it on the addon you have installed. Perhaps you want to watch sports, so you will need another addon. It can be confusing to know which is which if the number of addons installed on your devices increases. Fortunately, there are builds that solve such a problem by decluttering and organizing your addons.
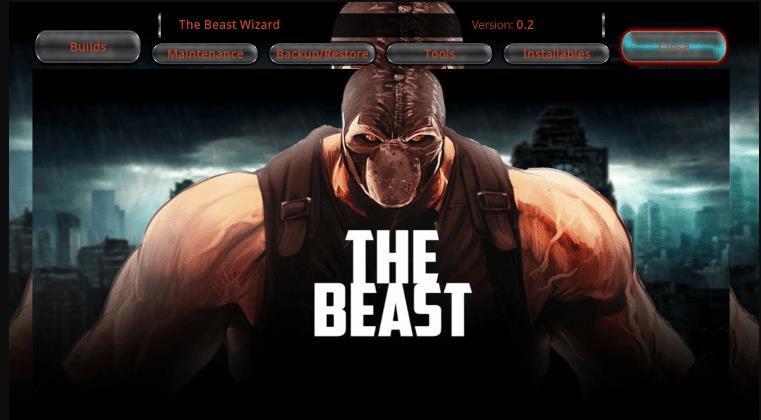
The Beast is one of the best Kodi builds out there. It is so in-demand, that it is already built-in with some of the popular addons. Installing it saves you from the troubles of searching and installing multiple addons. The Beast Build not only gives your Kodi a new look but also helps you declutter your addons. It helps you pick the best addons for you, install them, and organize them as you like.
The Beast Kodi Build can be used across different platforms, such as Amazon Firestick, Smart TVs, PC, Mac, smartphones, etc. You can use it on both remote-controlled and touch devices easily. Today, we are going to talk about installing it on Kodi in Amazon Fire TV Stick 4K. The same procedure can be followed to install it on other Kodi-supported devices.
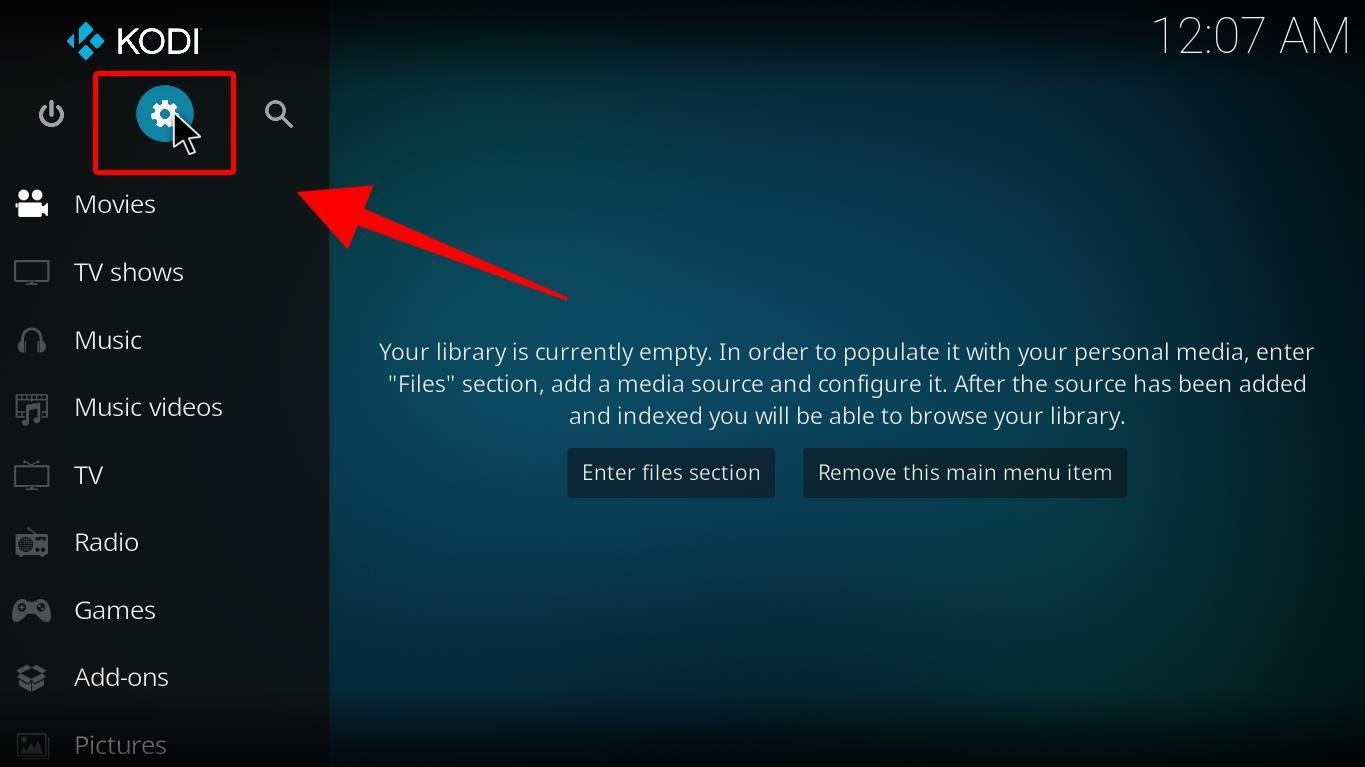
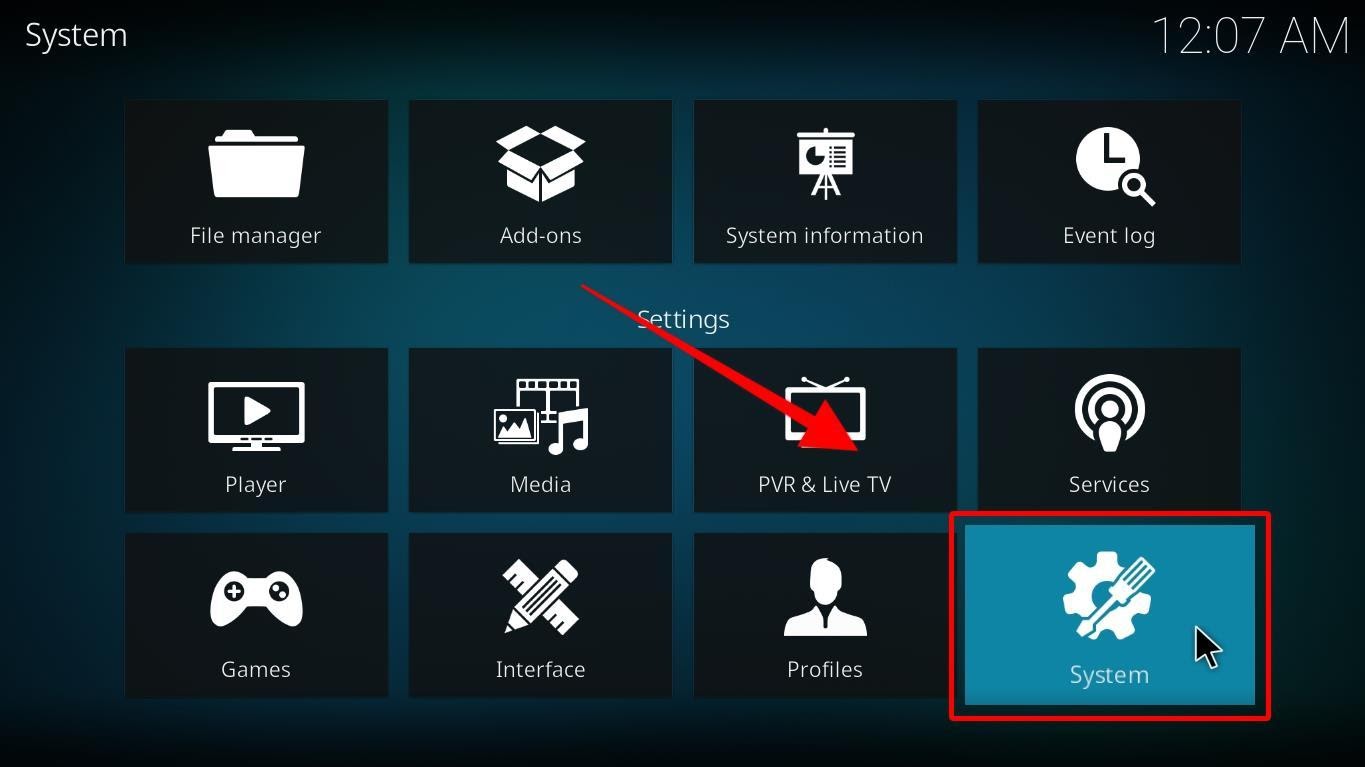
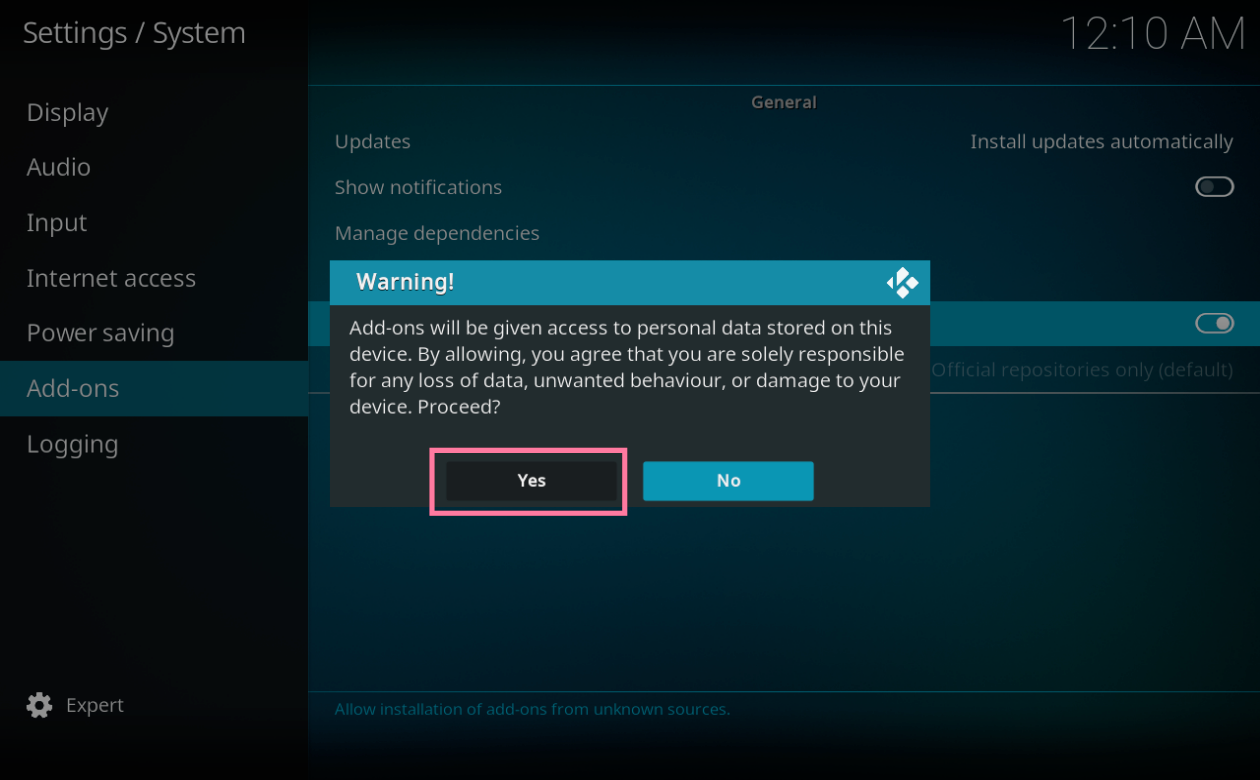
The Beast Build was created by a third-party developer. That’s why we need to enable Unknown Sources from the settings menu to install it.
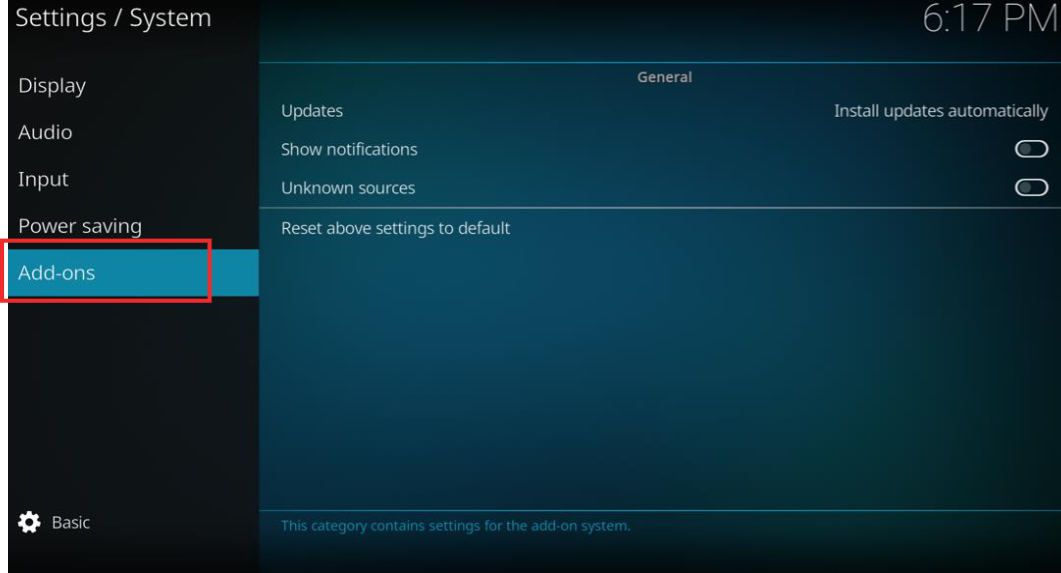
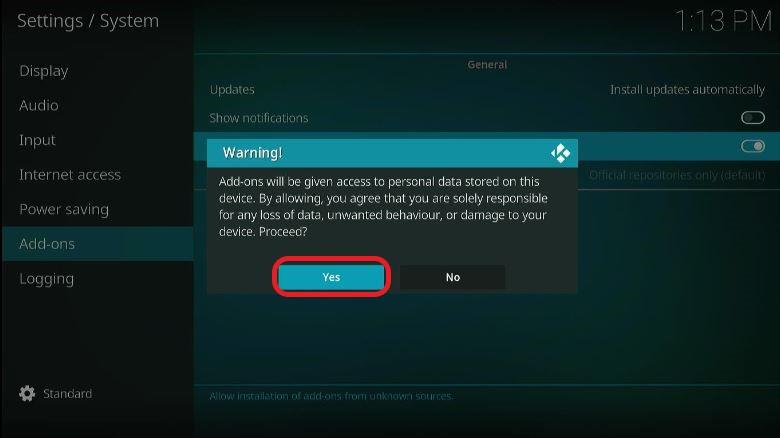
You’ve now successfully allowed Unknown sources, and now you can start installing The Beast Build on Kodi. Even though it is by a third party, it is perfectly safe. The installation process consists of three parts.
The whole process might look daunting, but we assure you, it is as easy as 1, 2, 3!
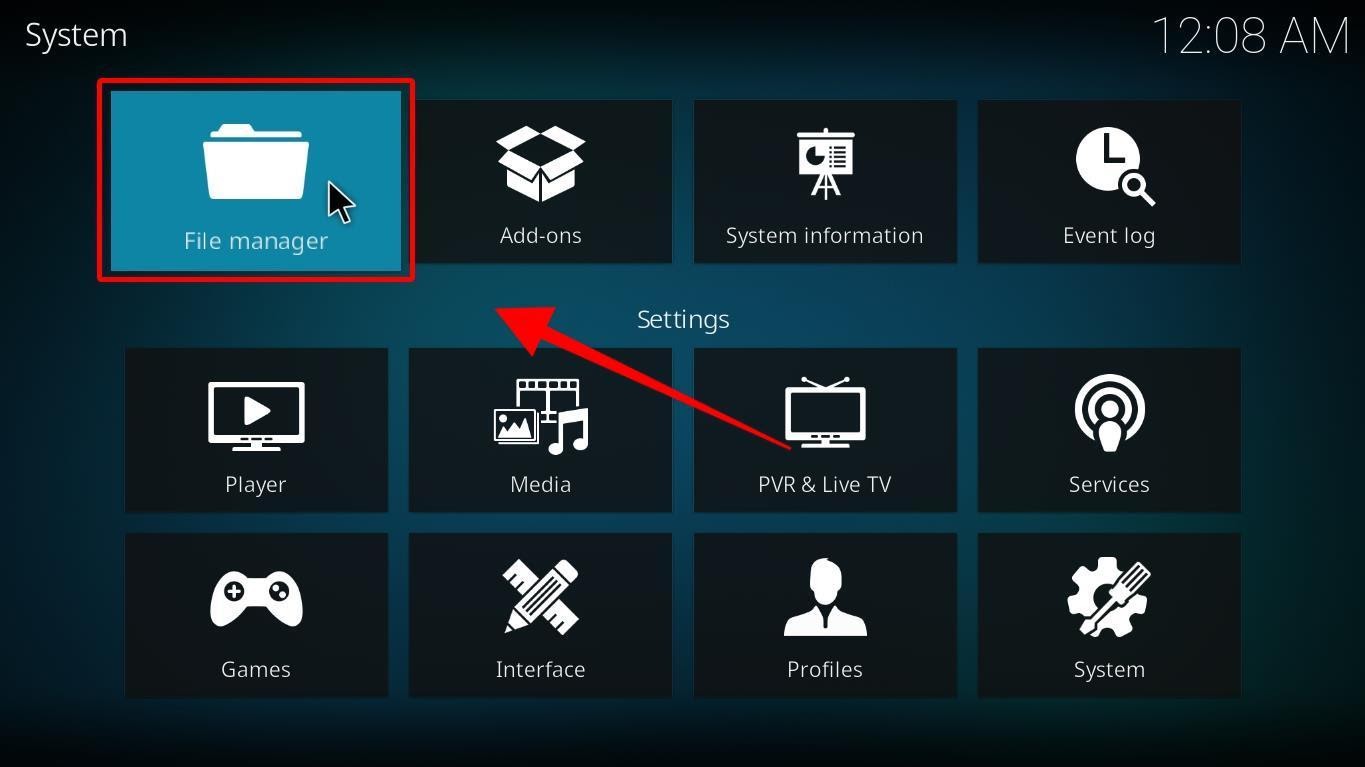
Let’s add a source for Beast Repo.
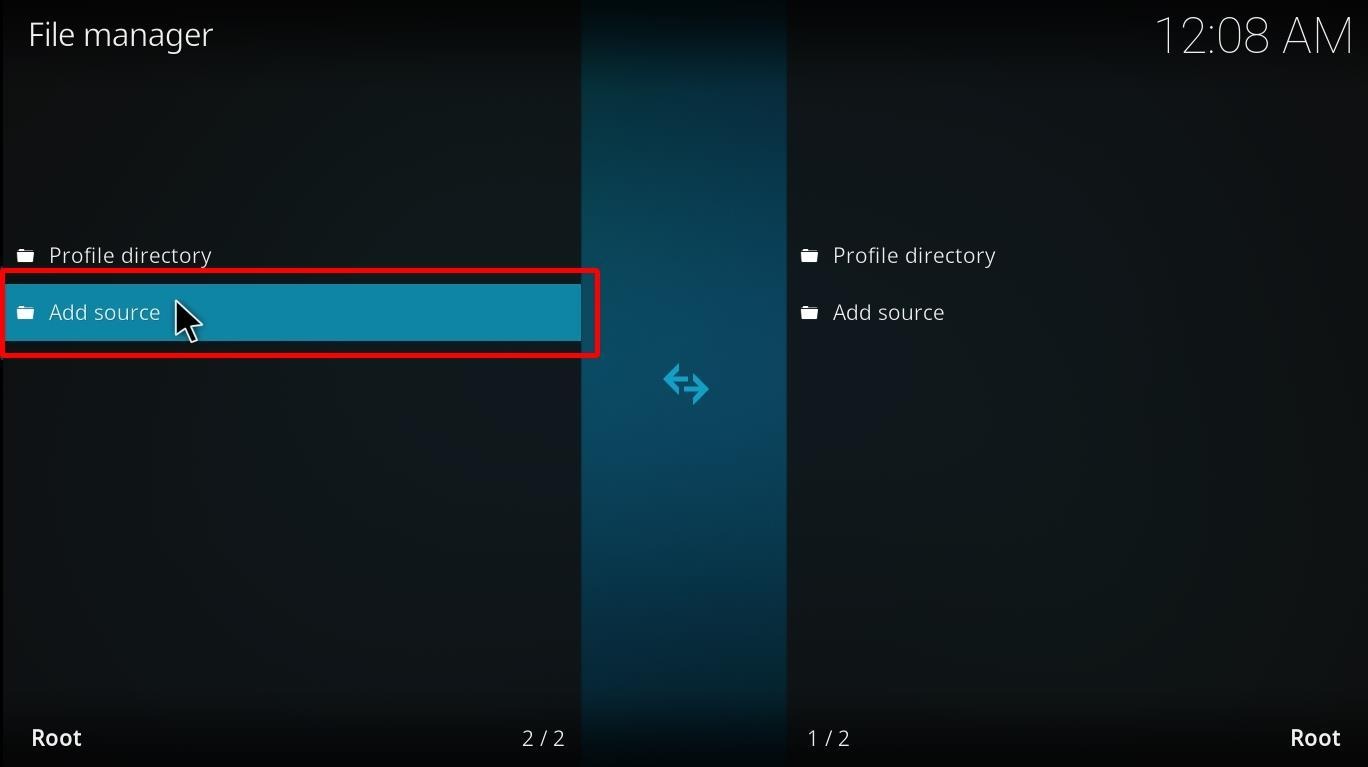
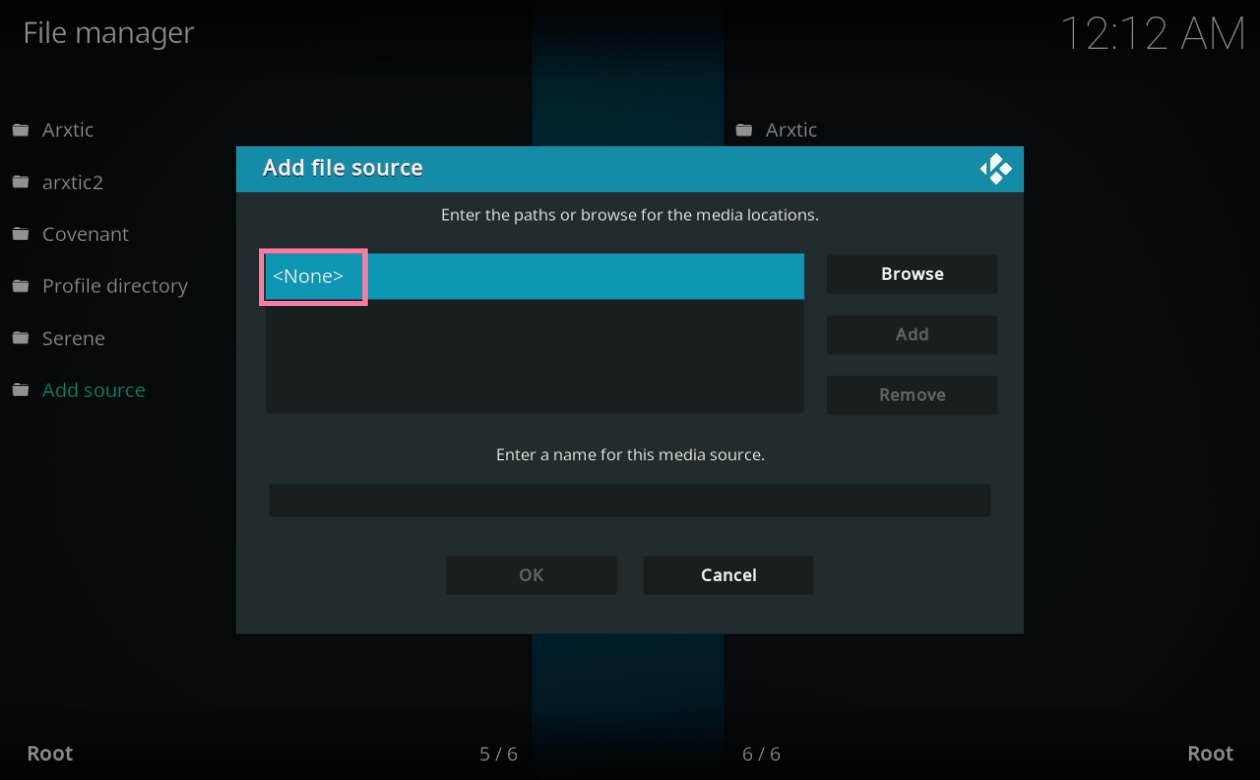
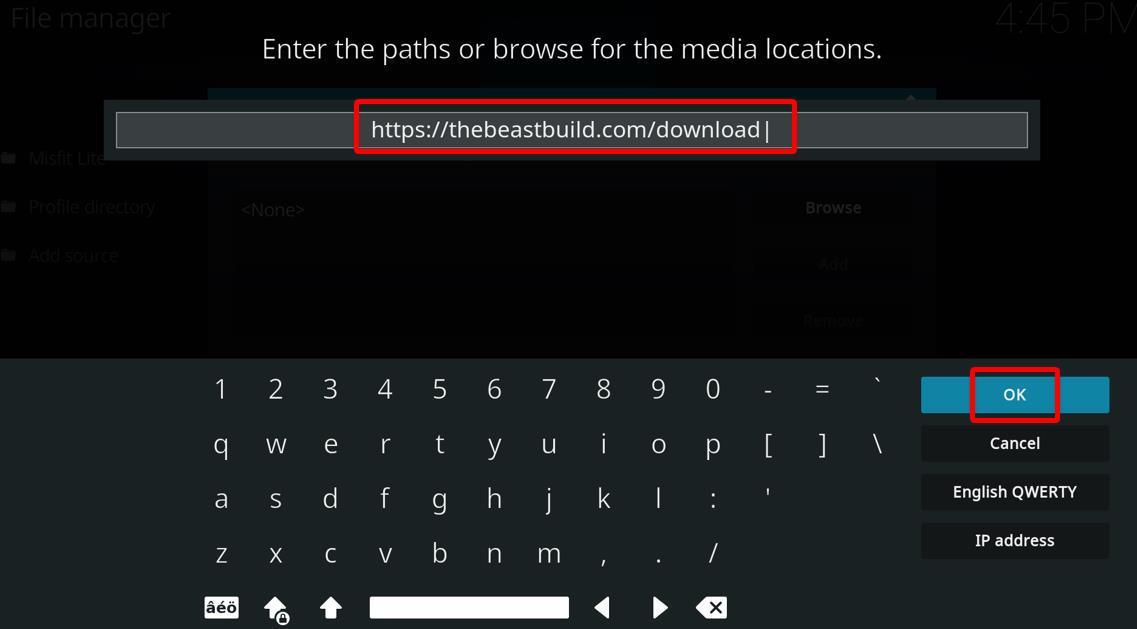
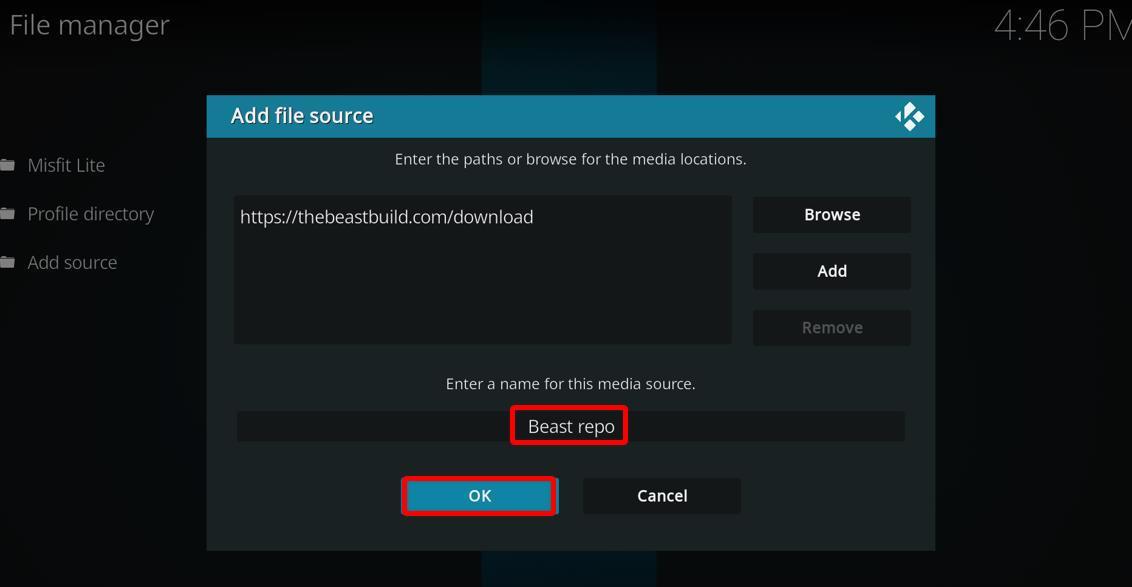
You’ve now added the source for installing Beast Repo.
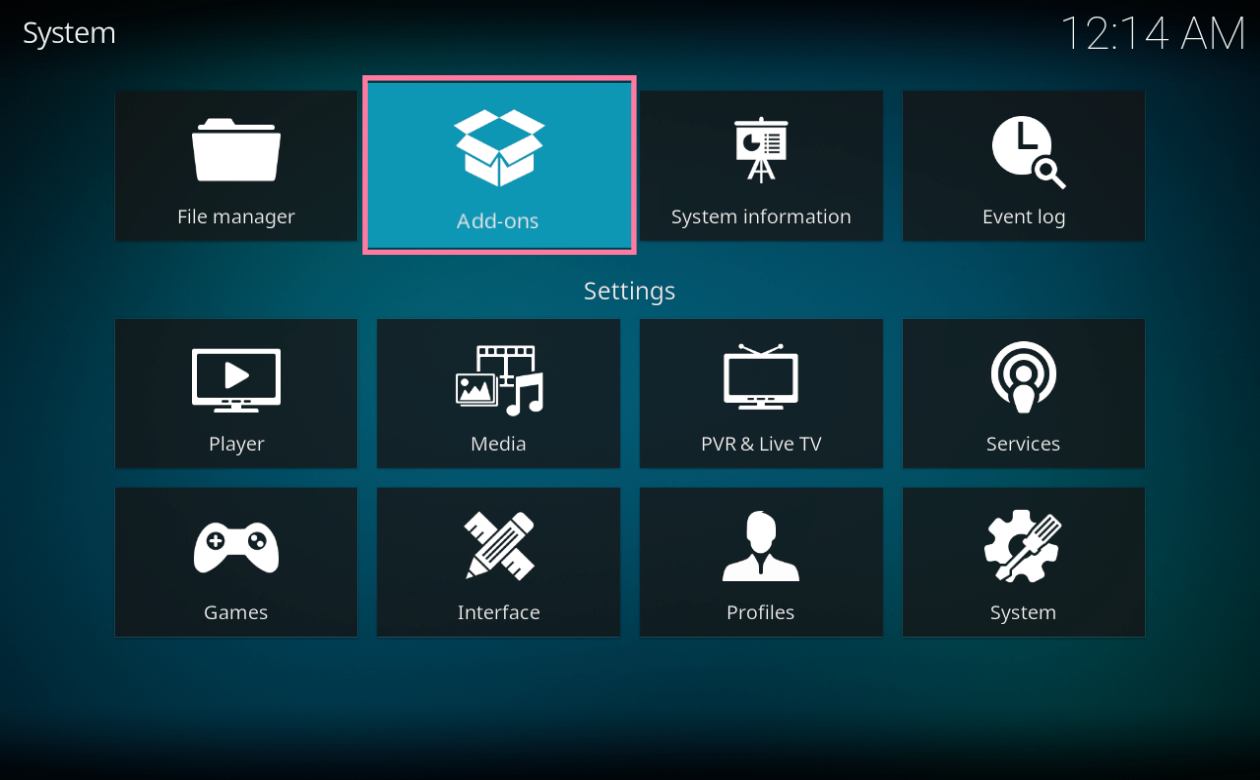
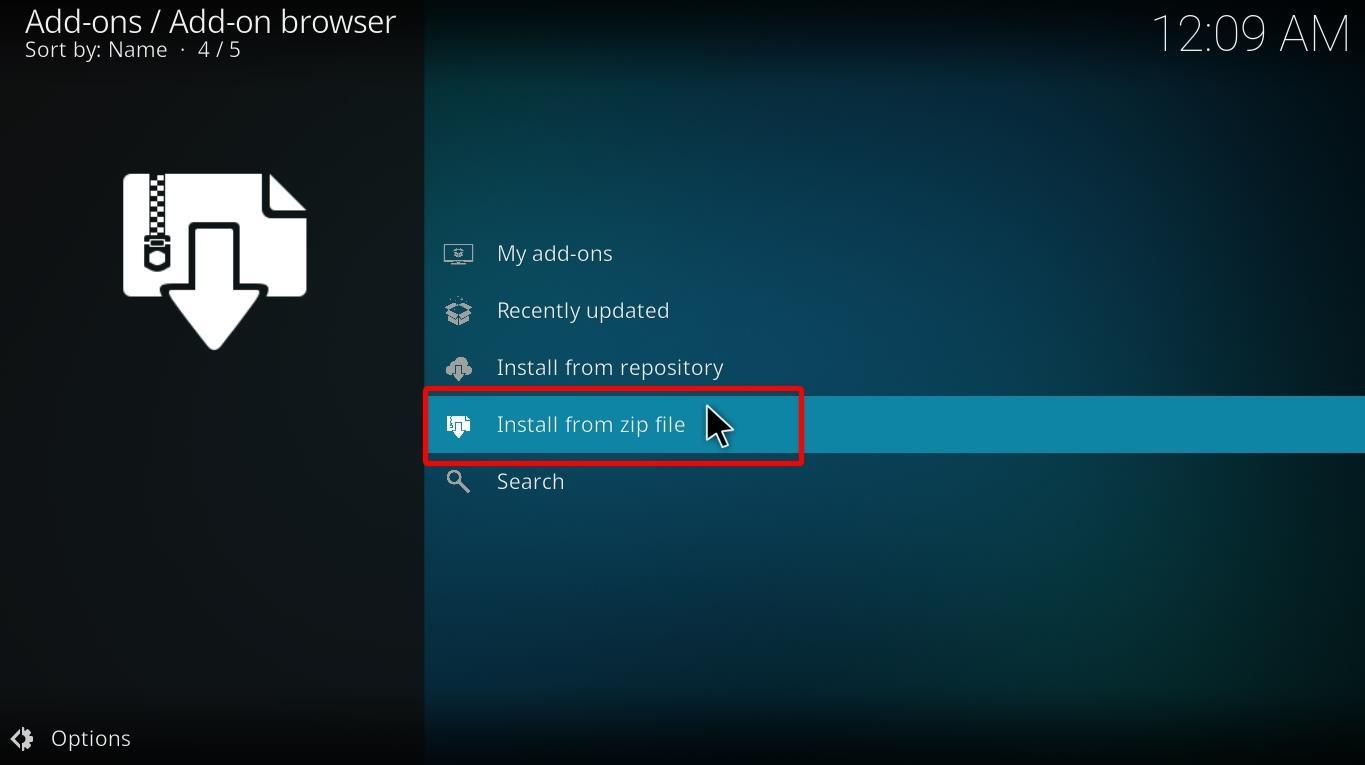
We can easily install the Beast repo from the source we have added.
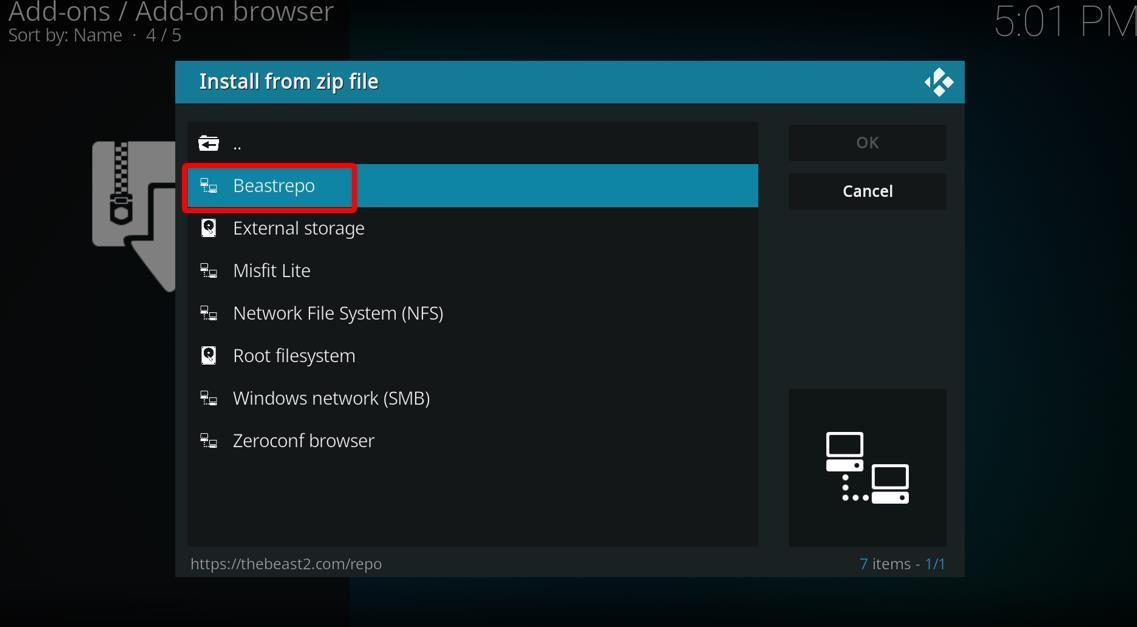
At this point, you’ve successfully installed Beast Repo to your Kodi. Now, we move on to installing The Beast Build on your Kodi.
The final part is installing The Beast Build from Beast Repo. Here’s how you do it:

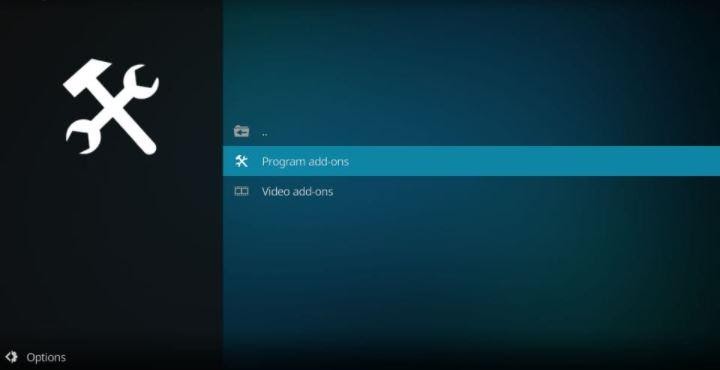

You’ve successfully installed The Beast Build on your Kodi.
Adding a Build to Kodi is an excellent way of personalizing your Kodi how you want. Most of the Builds also come with an inbuilt feature that lets you download different addons, and some builds come with pre-installed addons as well. Whether you are new to using Kodi or have been using it for a while, it will not take long to understand and get used to Kodi Builds.
Kodi Builds and addons let you stream content for free. There are different types of addons available that enable you to stream different types of content. Kodi works like a media player. A media player doesn’t have video content; instead, it plays what you feed or open in it. Kodi addons are the real game-changer. They find you the best links for streaming the content you want to watch. Once you open these links, you can start streaming. You can find video content like movies, TV shows, sports, music videos, and even live TV.
We have explored and gathered the best Kodi addons for you. You can read about these addons and a brief introduction of them in our article: Best Kodi Addons. We only recommend the addons that we have tried and tested and would use them personally.
Before you start exploring and streaming on Kodi addons, we want to warn you that even though Kodi addons are legal, the content you stream through them may be copyrighted. Streaming any copyrighted content via any means without a license is considered copyright infringement. You might face legal troubles when consuming such content.
Regardless of where you are, your internet activities will always be tracked. Everything can be seen by your internet service provider (ISP), your government, and even some malicious third parties.
Your ISP usually keeps track of your Google searches, the websites you visit, the content you watch, the shops you visit, and many more. They can even sell your data to advertising companies. These can be harmless, as they only buy this data to show you ads that will interest you. But at times, it can be bought by companies that are involved in malicious activities.
Your government can also keep track of your activities. You can also get in trouble if you start streaming copyrighted content illegally. If your country has laws against illegal streaming of copyrighted content, you can be taken to court and face punishment for streaming.
In this digital age, you must ensure the protection of your online privacy. You must protect it just as you protect your identity, social security number, and bank accounts.
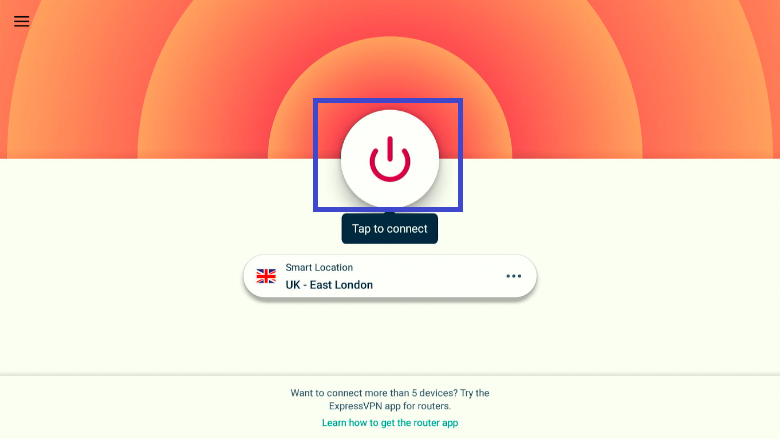
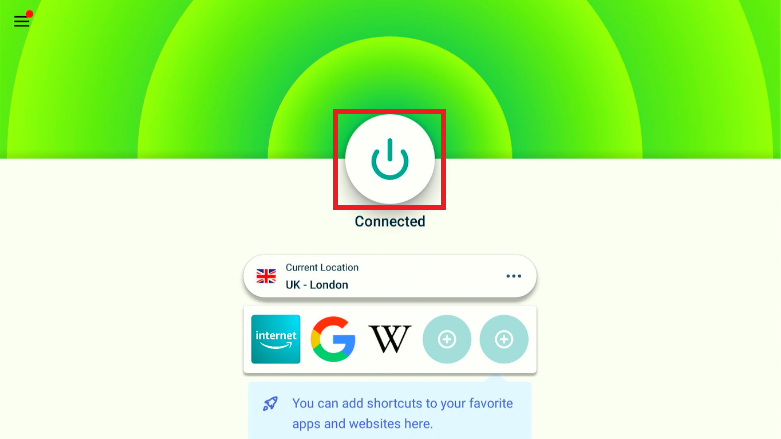
The quickest solution is to purchase a VPN subscription. A VPN is a service that encrypts your data. You can browse the internet, make searches, or even stream content while running it, and it will keep your online activity encrypted. Meaning no matter who wants to keep an eye on your activities, they won’t be able to read your data.
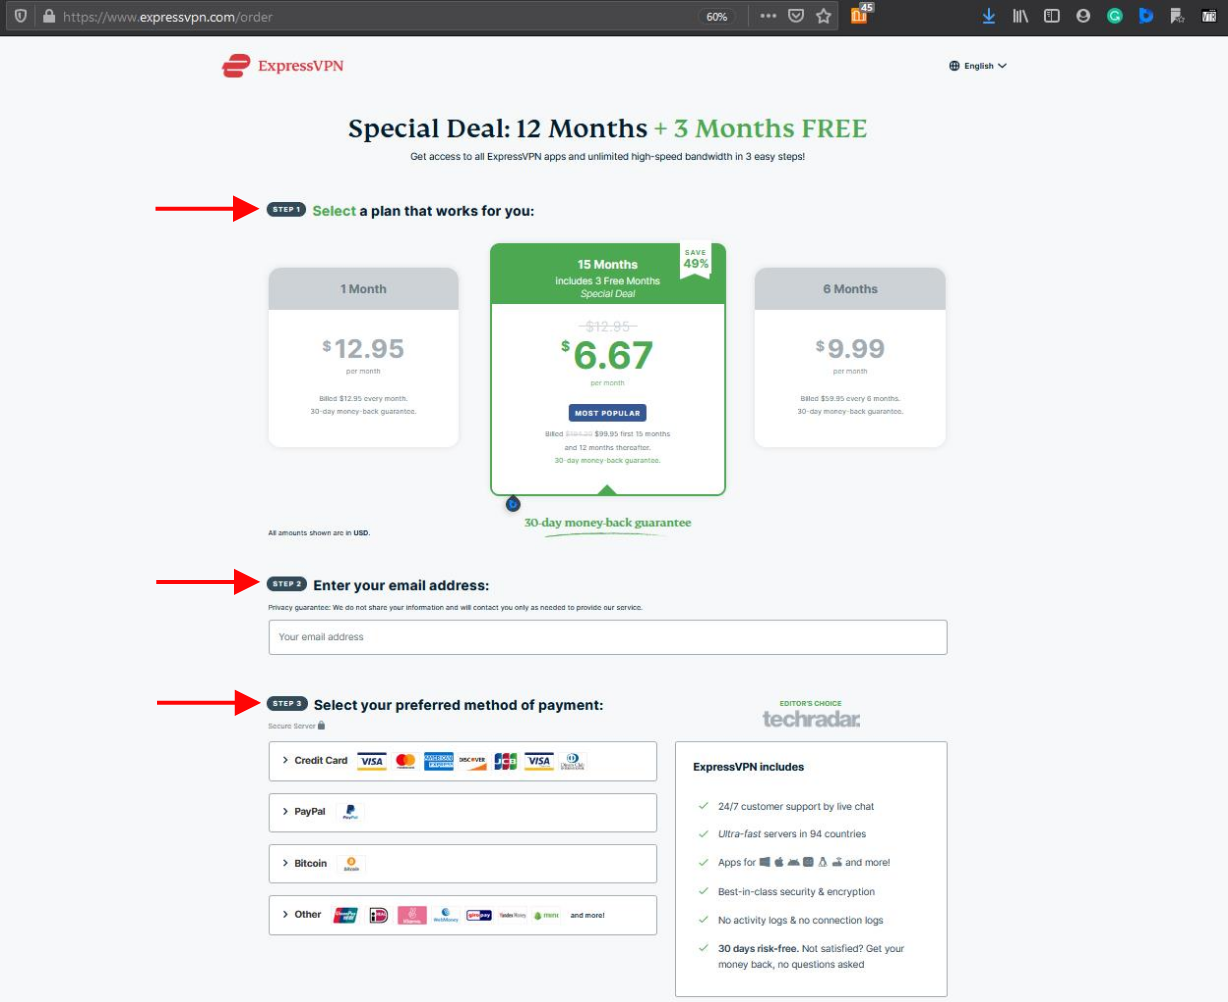
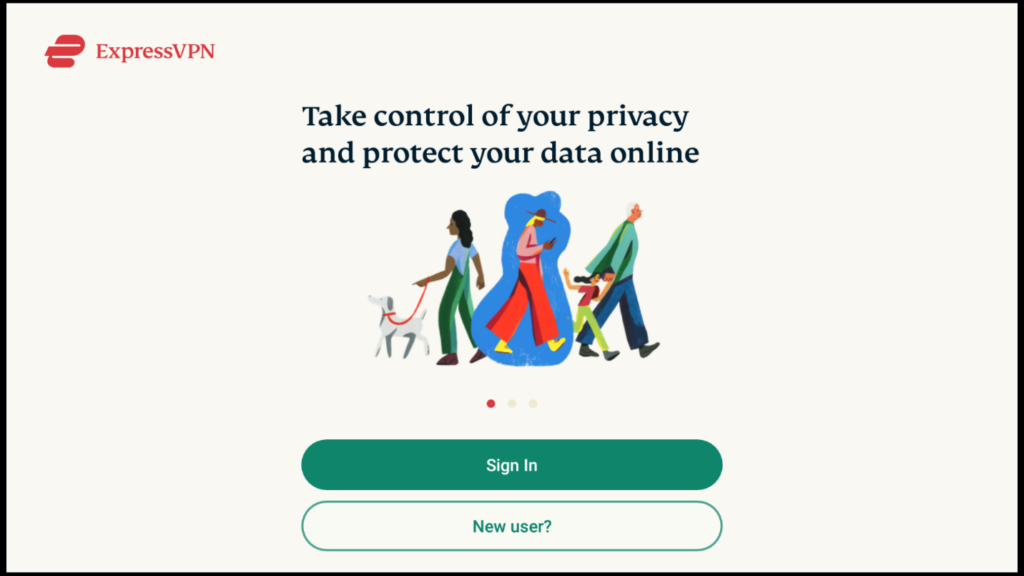
Our most preferred VPN service is ExpressVPN. It is easy to set up and use and gives you a secure and private internet connection. ExpressVPN is trusted by millions, including us. If you are new to using VPNs and want to try it out but are unsure about buying a subscription, ExpressVPN offers a 30-days money-back guarantee. If you are not satisfied with its service, you can reclaim the fee you paid.
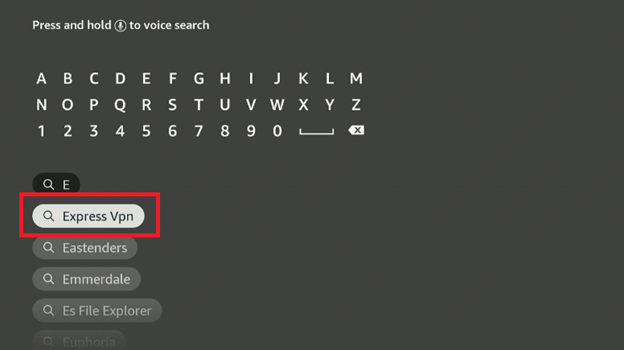
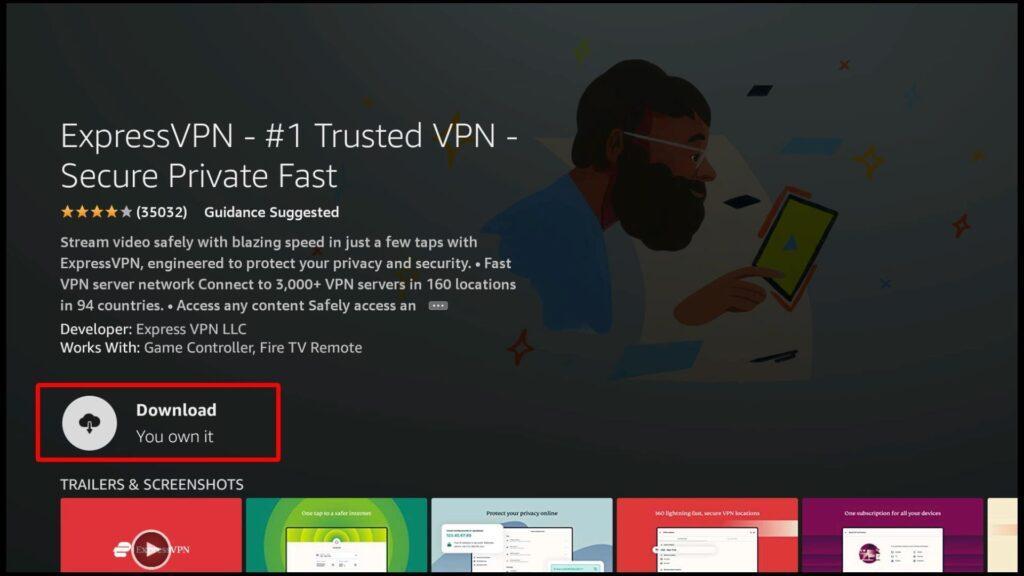
Your ExpressVPN account can be used across multiple devices. You can log in on your Firestick, mobile devices, PC, or laptops. It will work on your smart TV too.
The Beast Build transforms your Kodi and brings you an enormous library of the most wanted addons. With this build, you won’t have to install individual repos. On top of this, you’ll likely find the addon you want in the library.
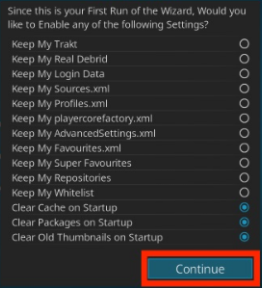
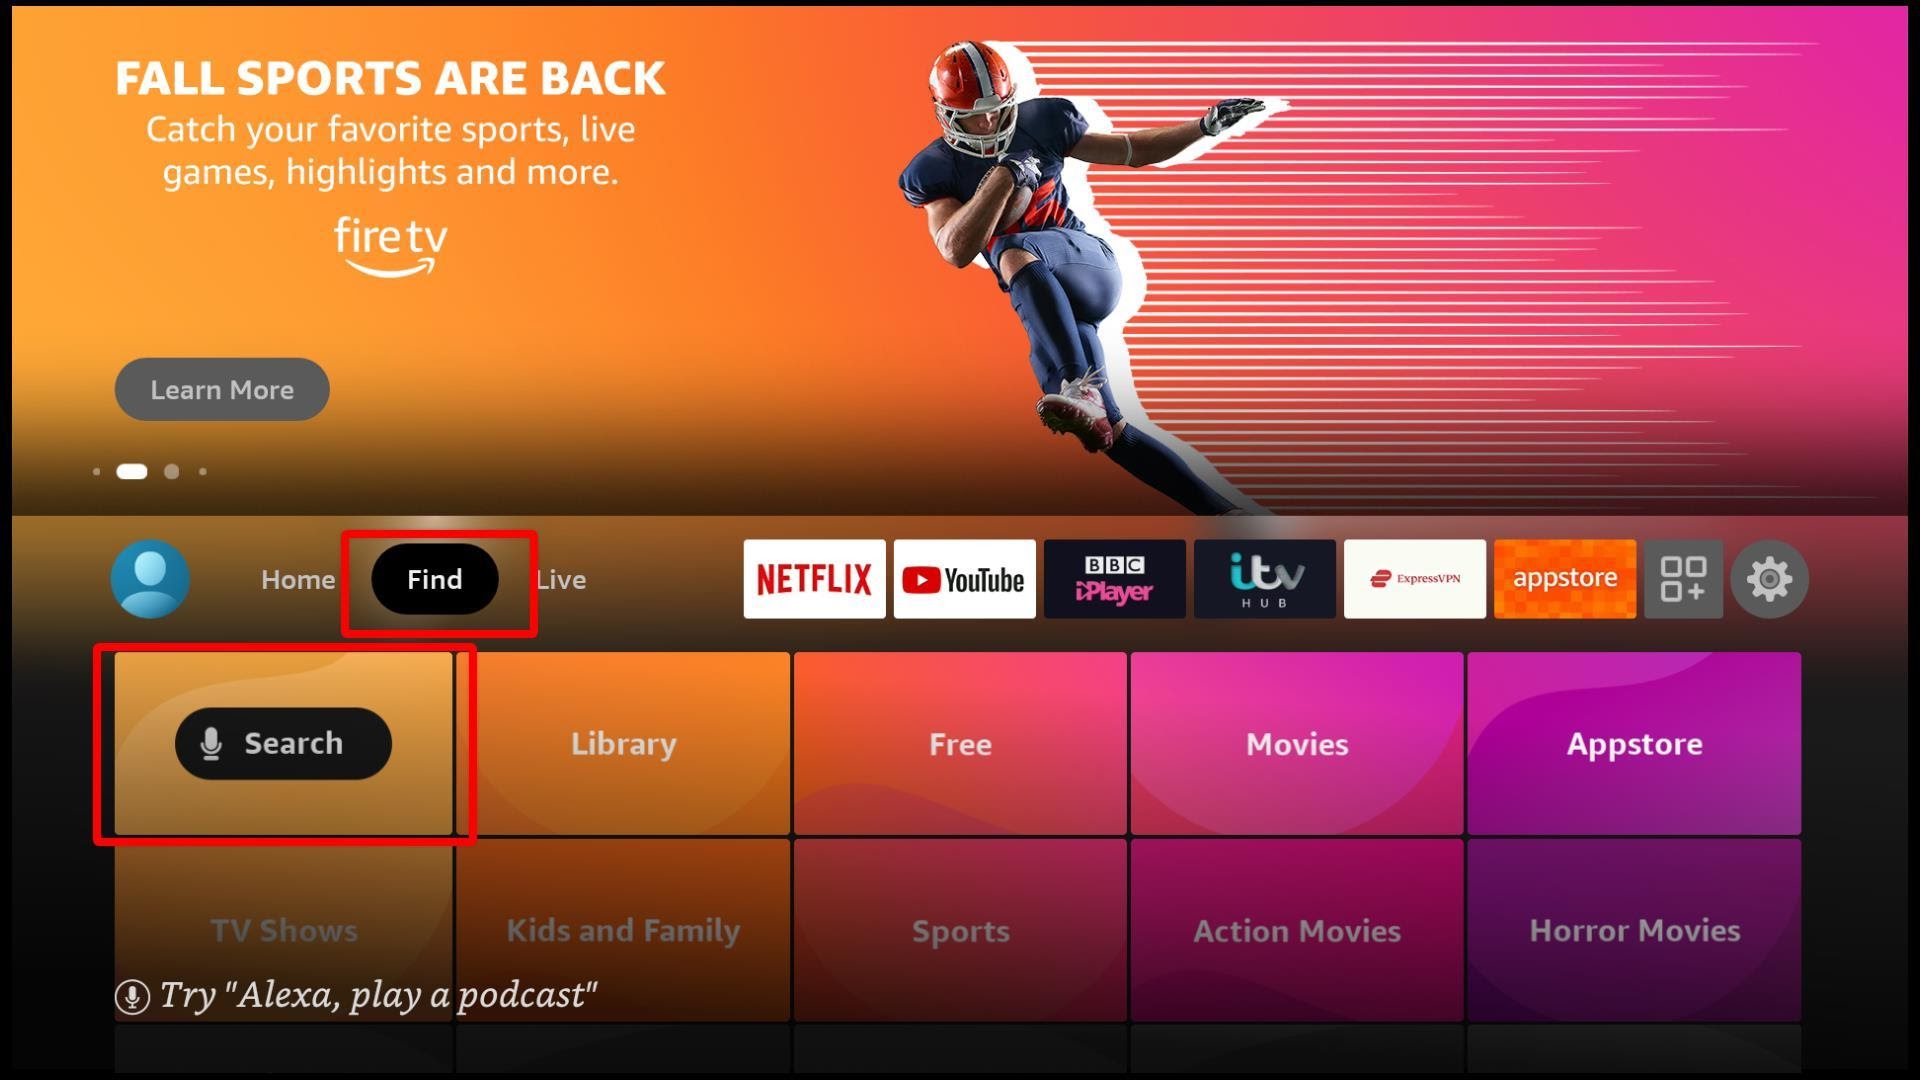
Unlike the other choices, The Beast Build does have an extra step for setting it up. It requires you to sign up for the build and acquire a token via a web browser. You will need to access your laptop’s or mobile web browser. It’s an easy procedure that hardly takes a minute or two. With the perks the build has, the extra step is worth the effort.
It is a stable build and can become your favorite Kodi build in no time. If you don’t like it, you can just as easily reset your Kodi to its default/factory settings. But we guarantee you that you’ll love it.

You need to load content from reCAPTCHA to submit the form. Please note that doing so will share data with third-party providers.
More InformationYou are currently viewing a placeholder content from Turnstile. To access the actual content, click the button below. Please note that doing so will share data with third-party providers.
More InformationYou are currently viewing a placeholder content from Facebook. To access the actual content, click the button below. Please note that doing so will share data with third-party providers.
More InformationYou need to load content from reCAPTCHA to submit the form. Please note that doing so will share data with third-party providers.
More InformationYou are currently viewing a placeholder content from reCAPTCHA. To access the actual content, click the button below. Please note that doing so will share data with third-party providers.
More InformationYou are currently viewing a placeholder content from Instagram. To access the actual content, click the button below. Please note that doing so will share data with third-party providers.
More InformationYou are currently viewing a placeholder content from X. To access the actual content, click the button below. Please note that doing so will share data with third-party providers.
More Information