In this article, we give step-by-step instructions on how to install TVOne Live TV Kodi addon on Firestick. The instructions written in this guide can also work while installing the addon on Fire TV cube, Android, Mac, Windows, iOS, and all devices that support Kodi.
If you love streaming content from different countries, the TVOne111 addon is something you should try. It is a popular IPTV addon that allows you to watch content from many different countries, including the UK, the USA, Pakistan, Portugal, Turkey, India, and more.
With hundreds of channels, the TVOne addon has emerged as one of the go-to free IPTV addons. As a user, you can choose to stream from several content categories such as sports, news, kids, and music. The addon has a straightforward design that lets you watch live TV without navigating much.
Now, let’s get to the detailed guide on how to install TVOne Kodi Addon for Live TV.
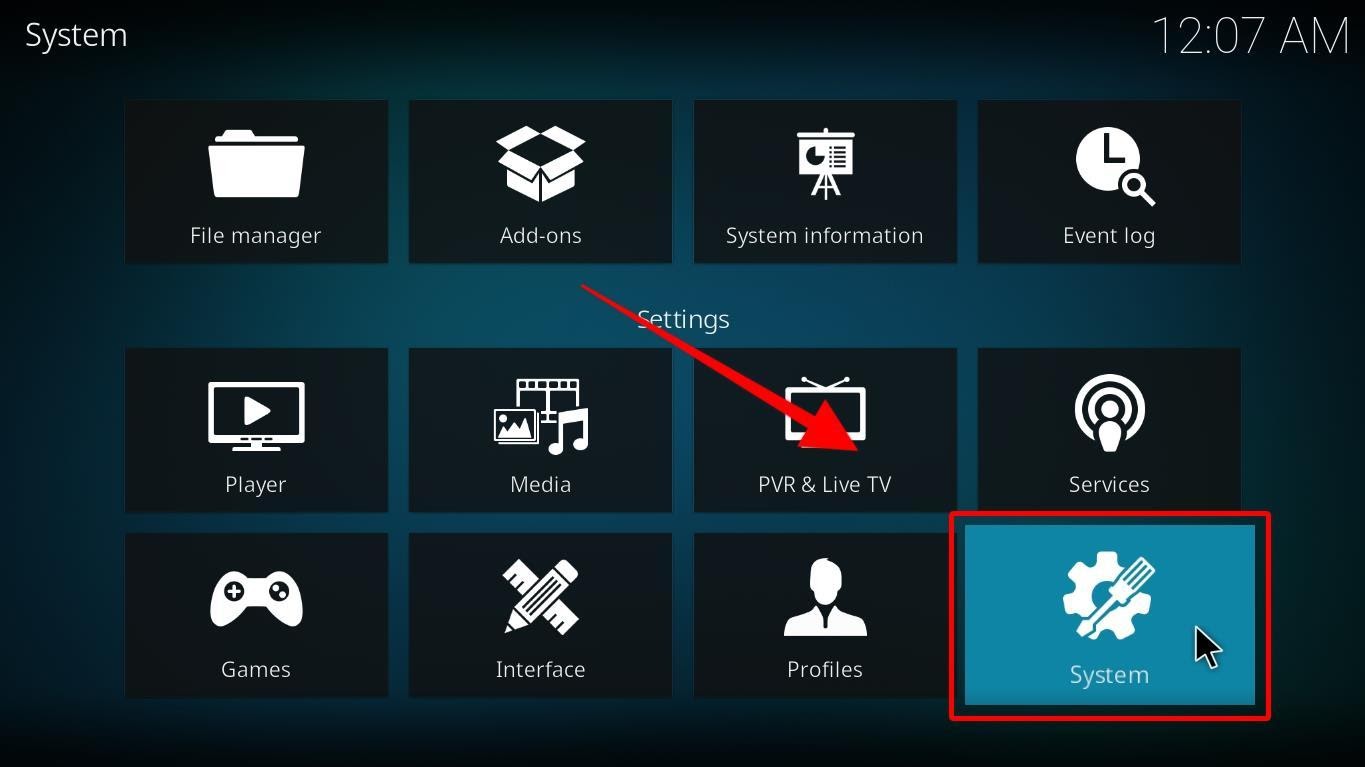
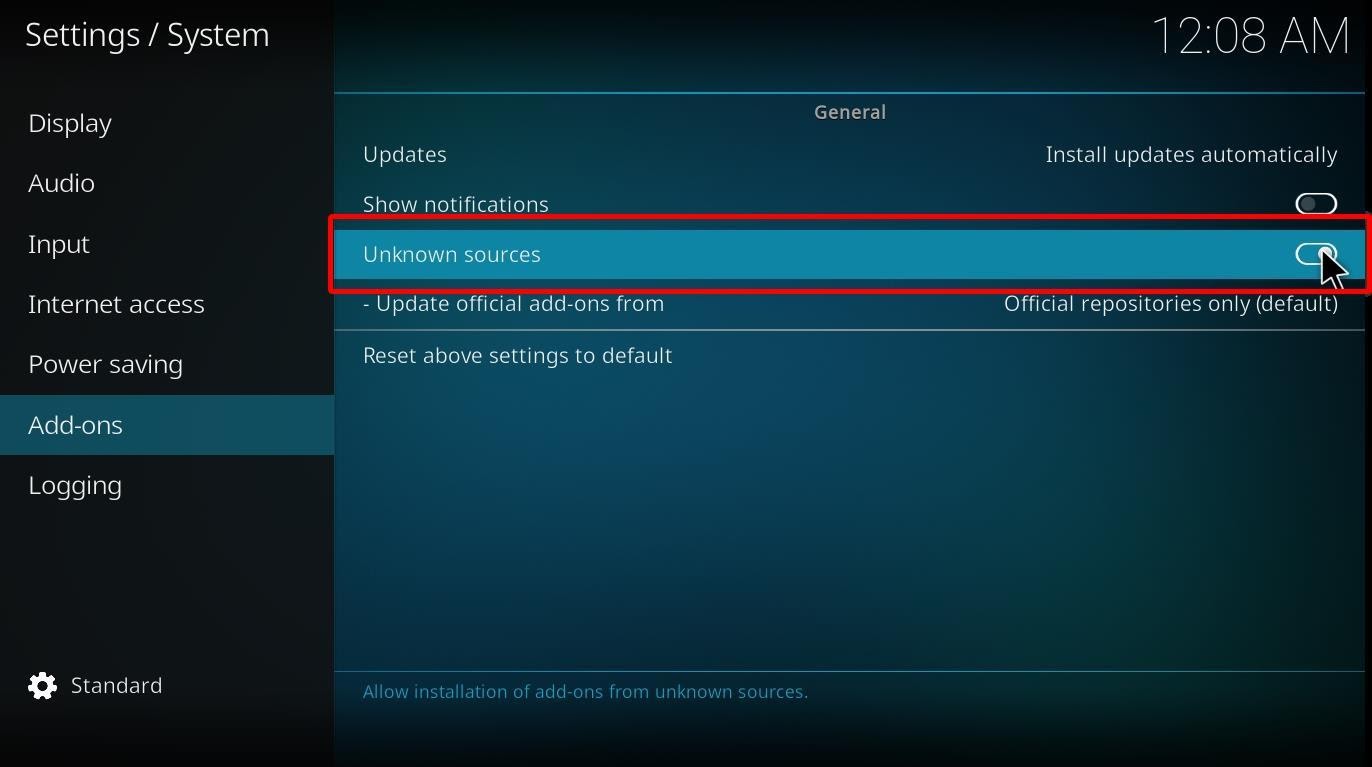
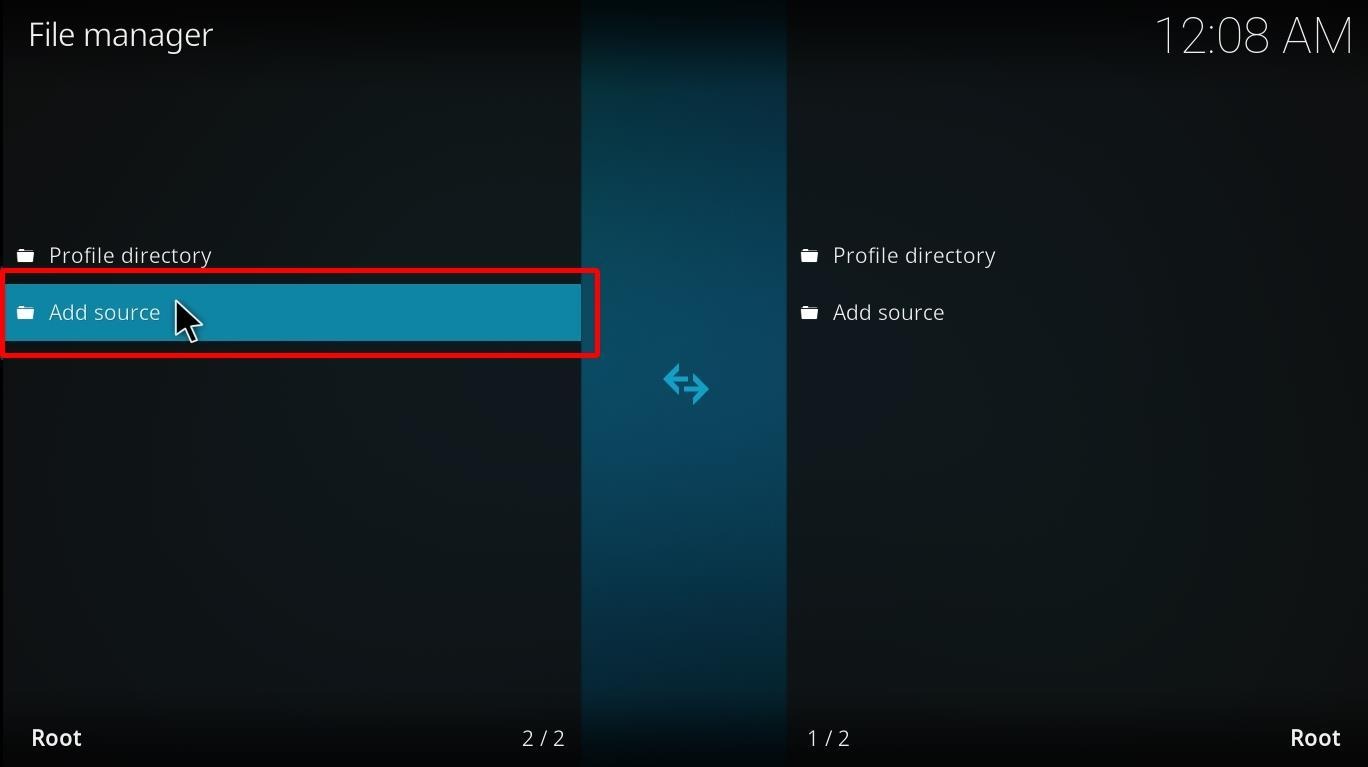
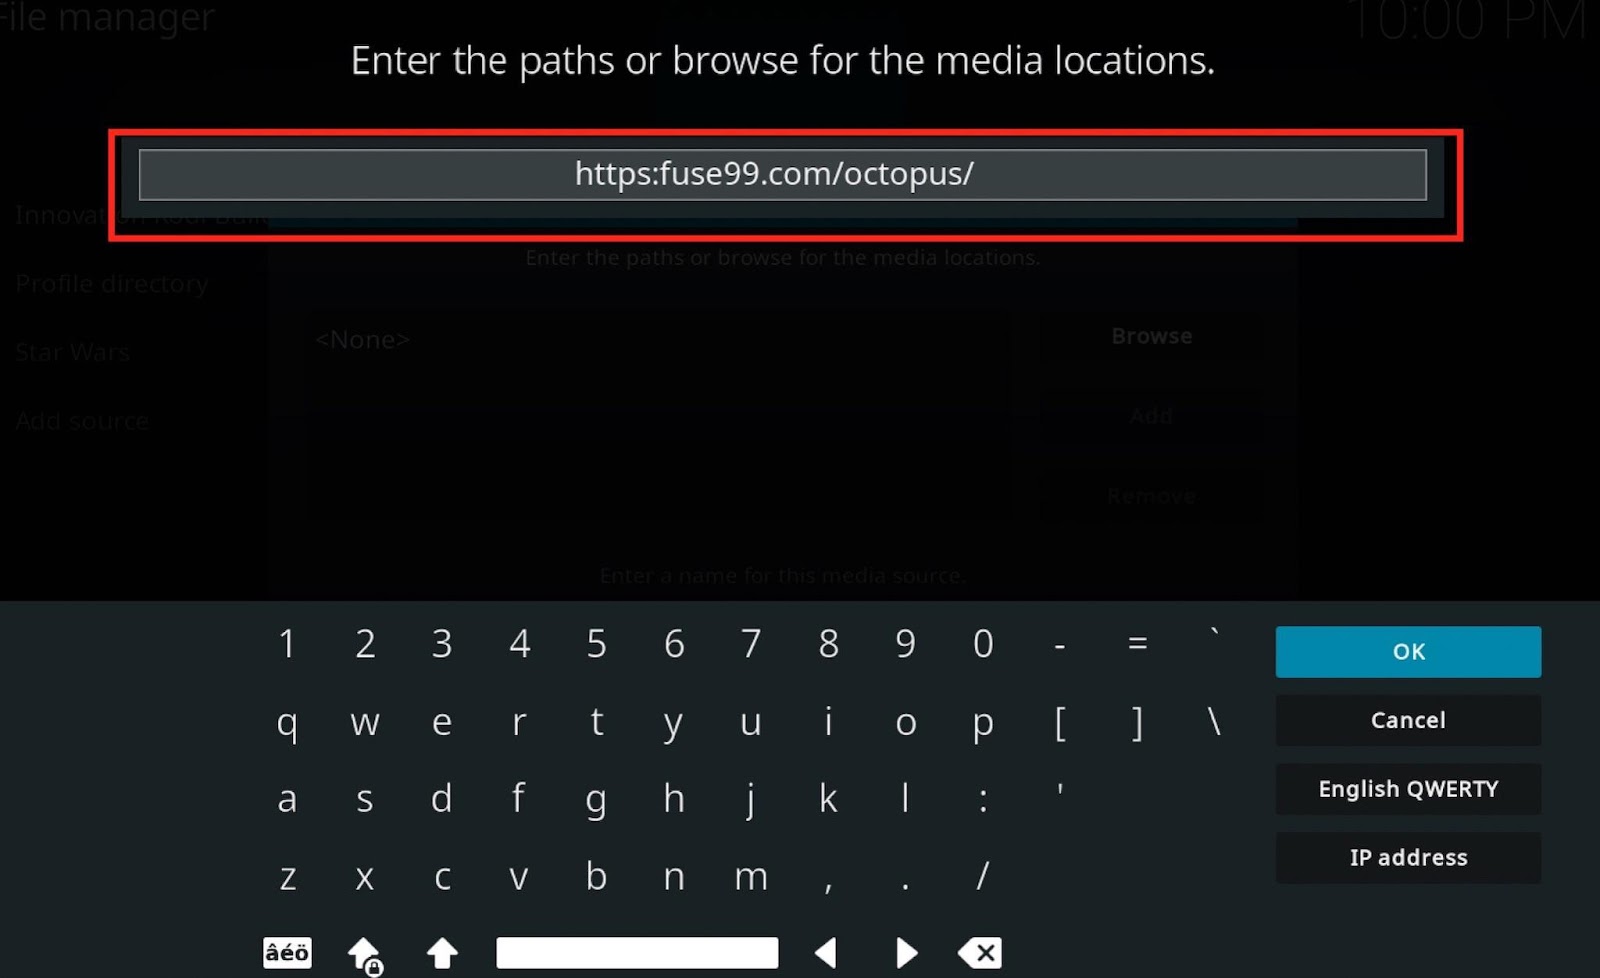
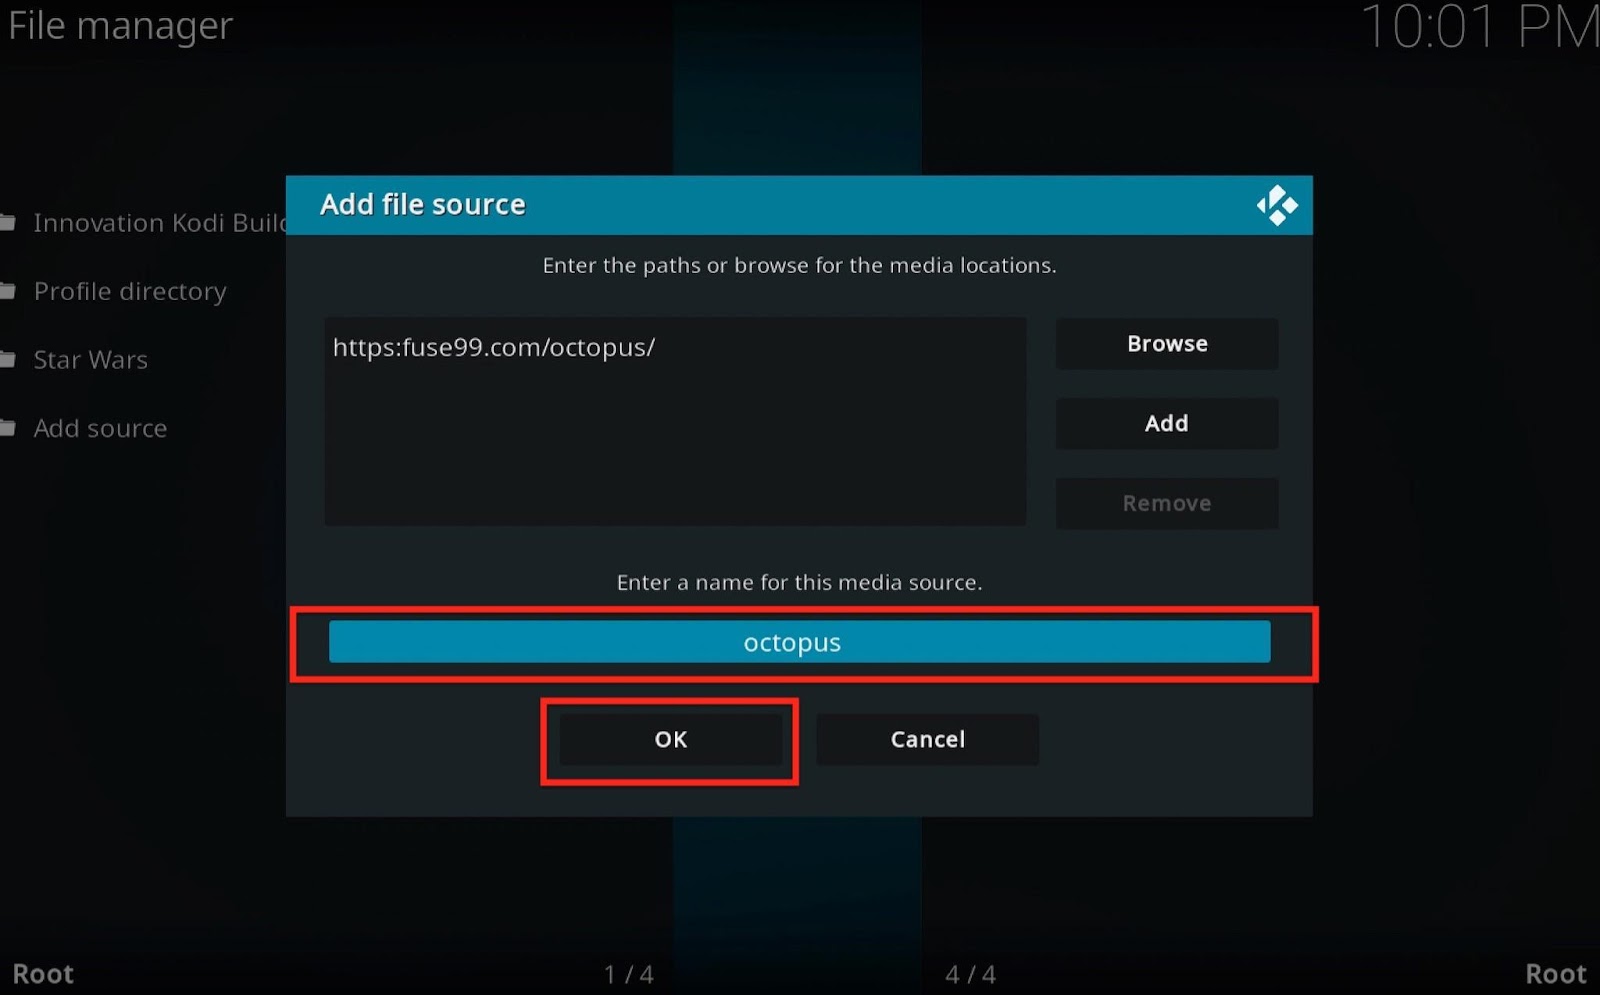
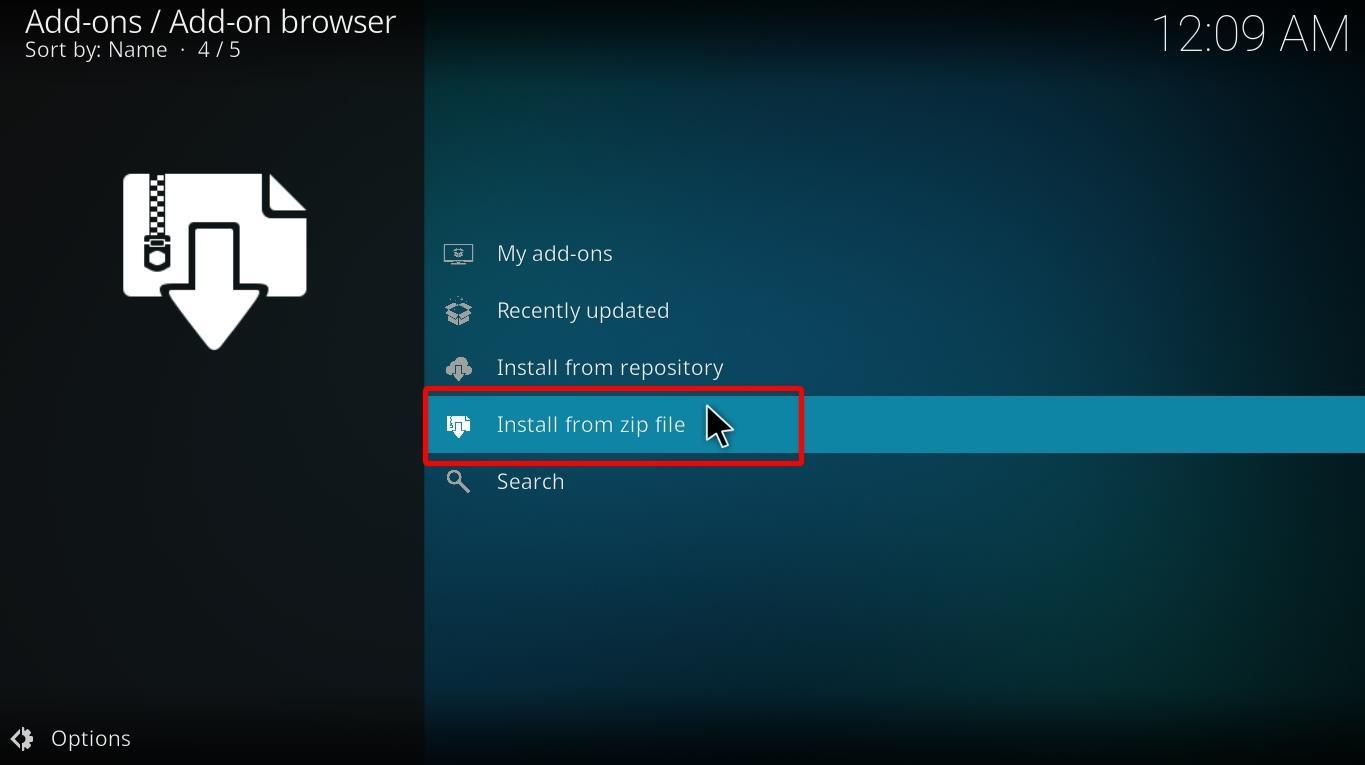
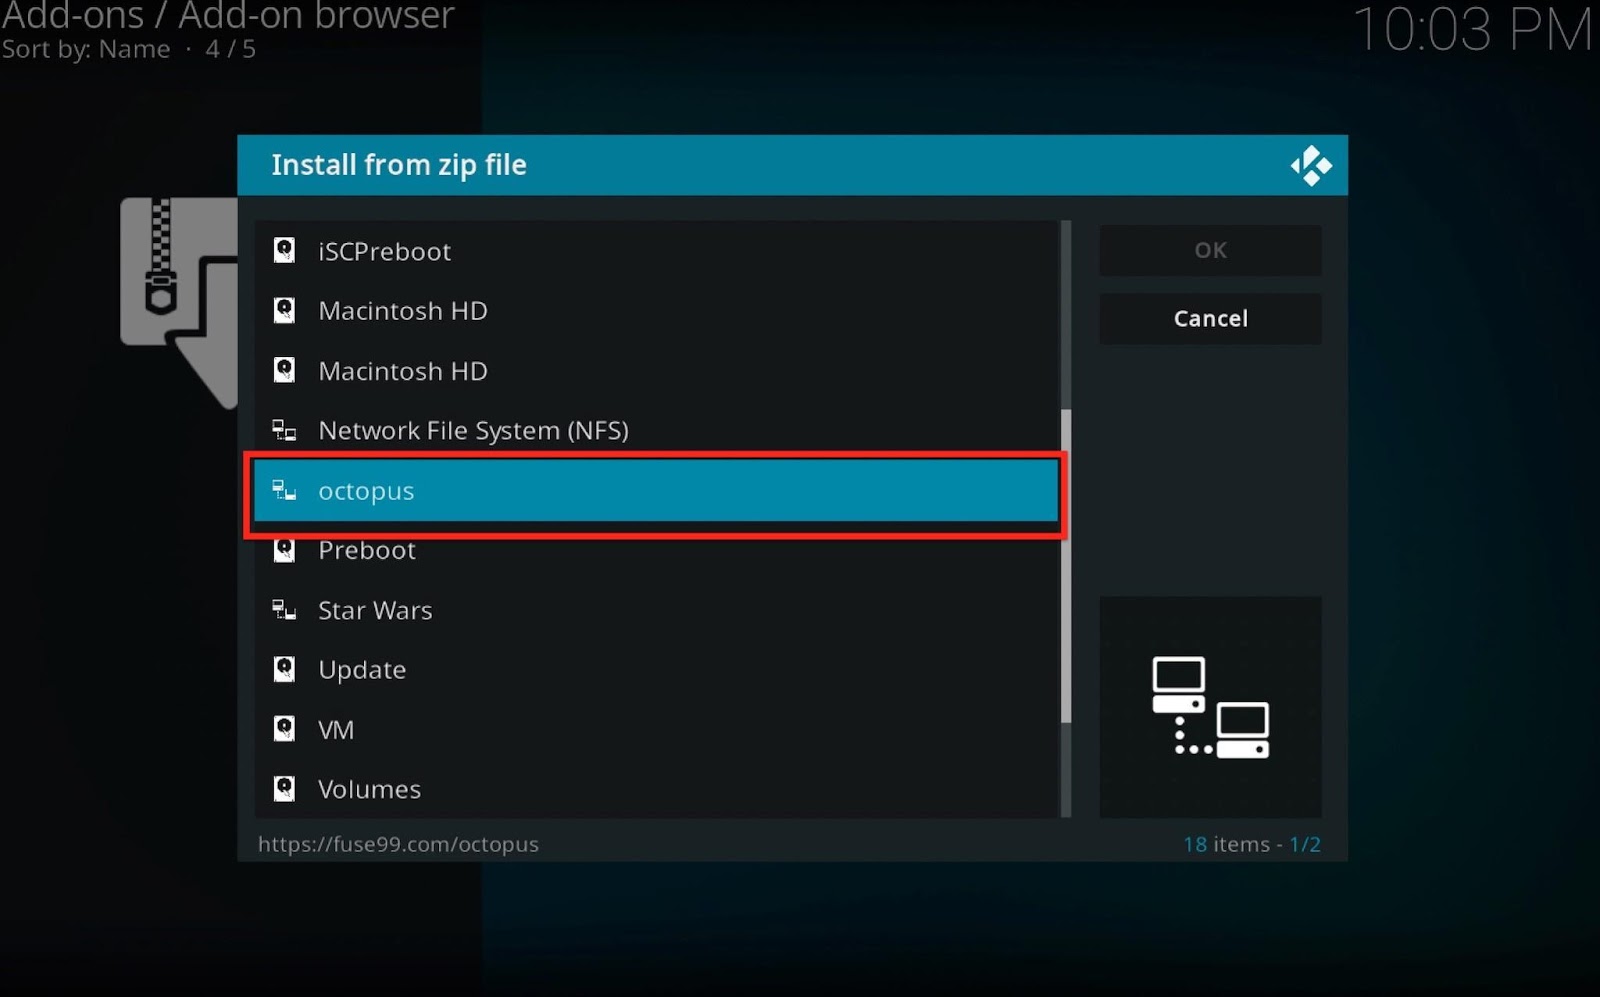
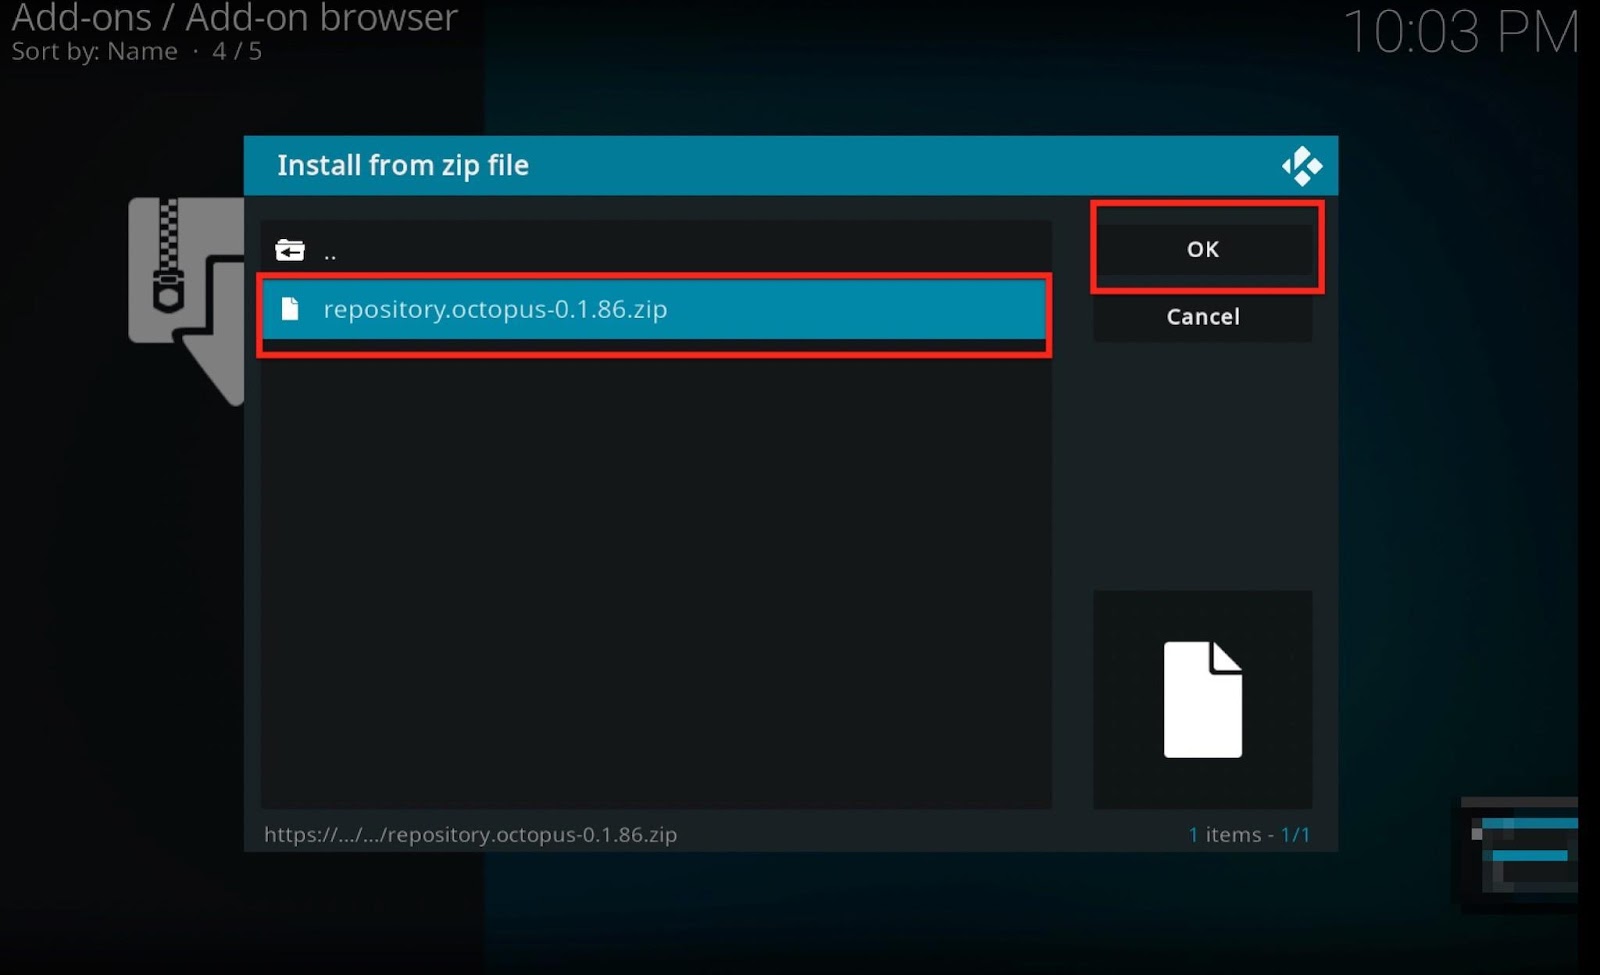
If you are a frequent Kodi user, you might have come across add-ons that take a lot of time and effort for the installation process. However, for the TVOne addon, you will have to follow some easy steps. Before that, let’s first enable Unknown Sources.
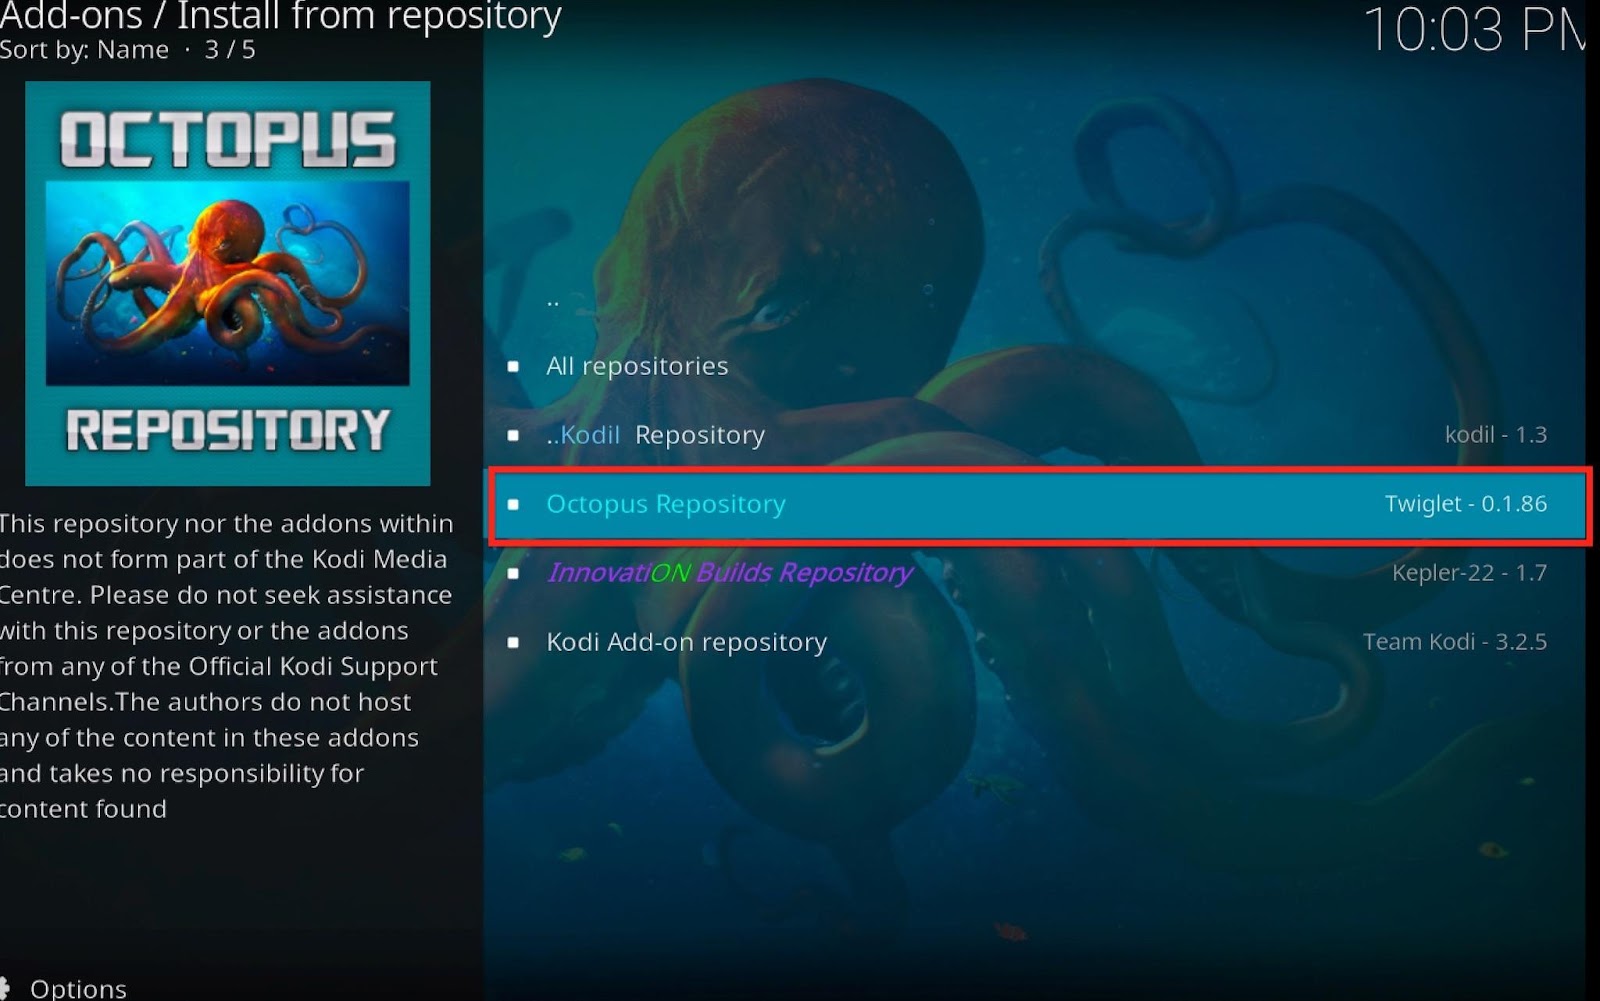
TVOne add-on is a third-party add-on. So, it isn’t officially available in the Kodi repository. We need to enable third-party installation on the Kodi app to install the TVOne addon.
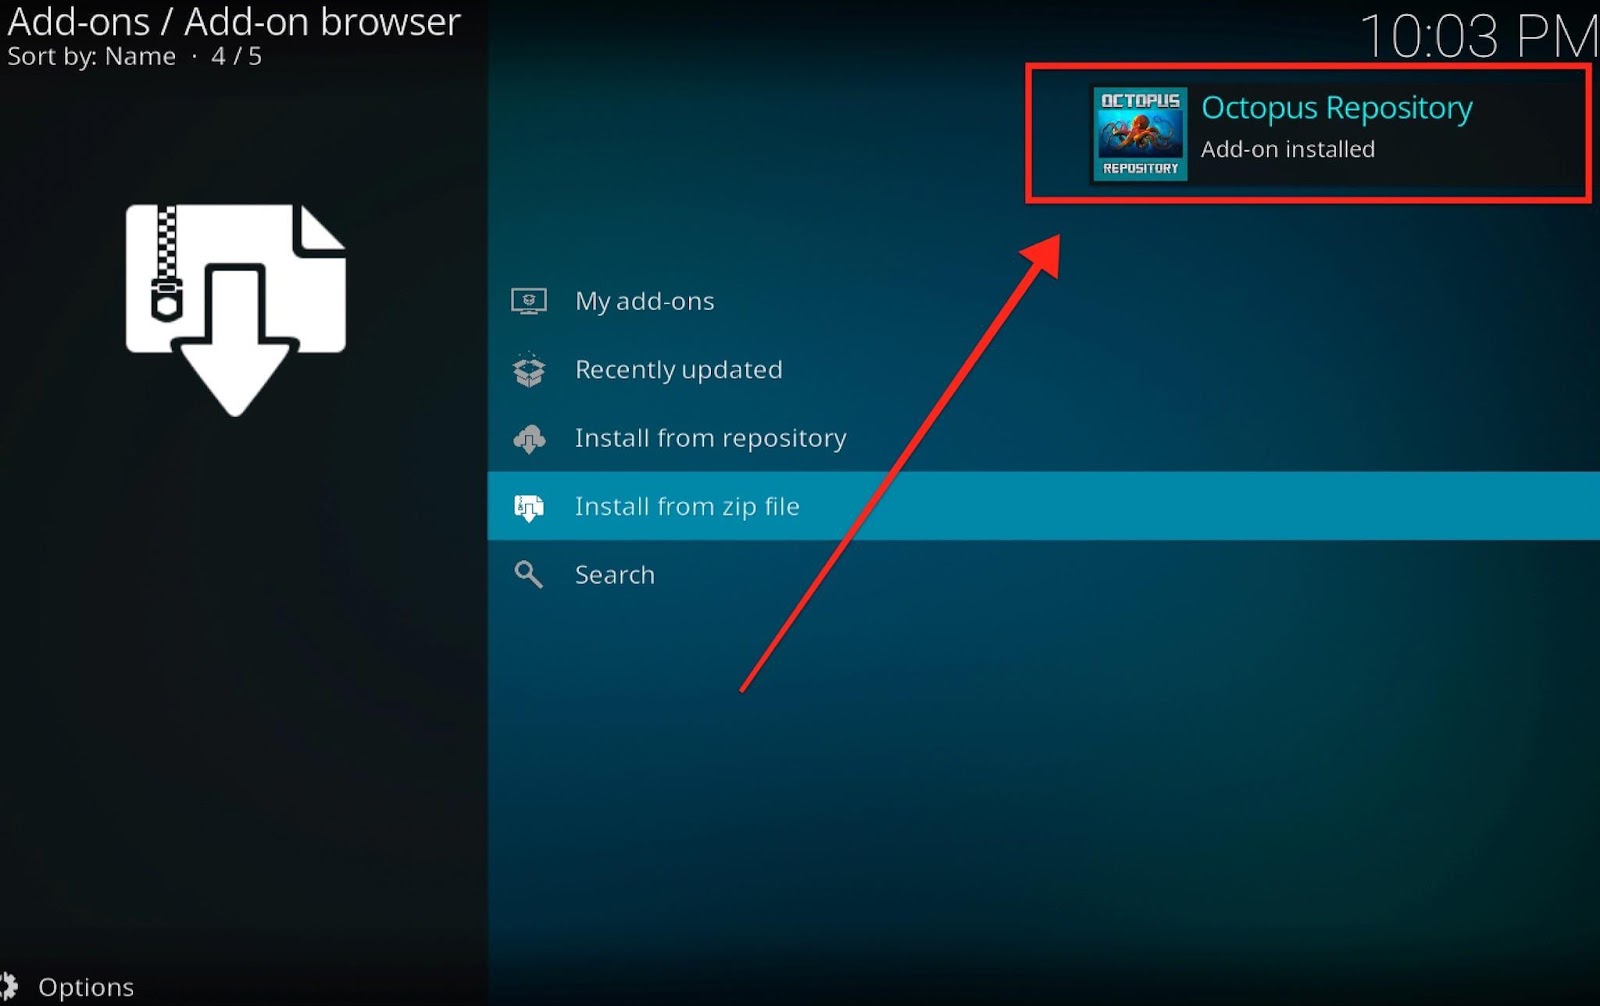
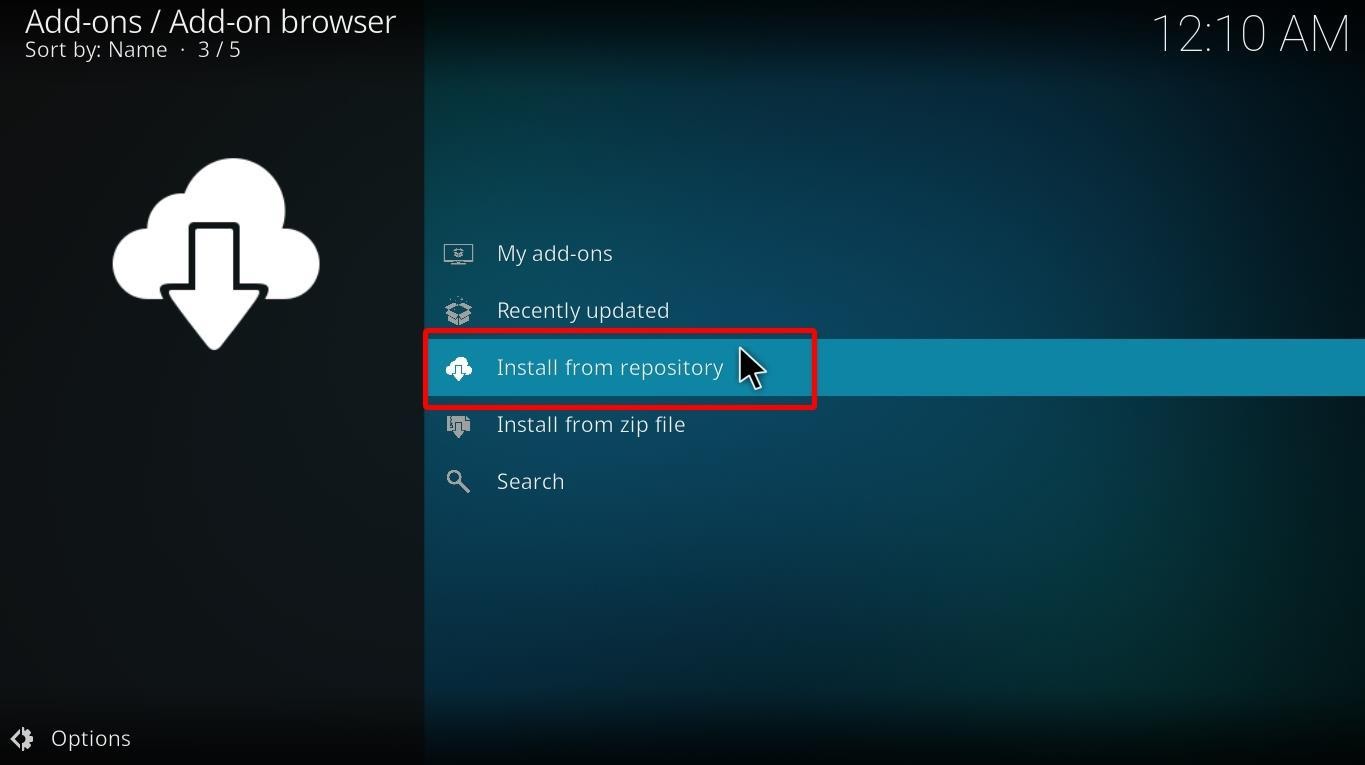
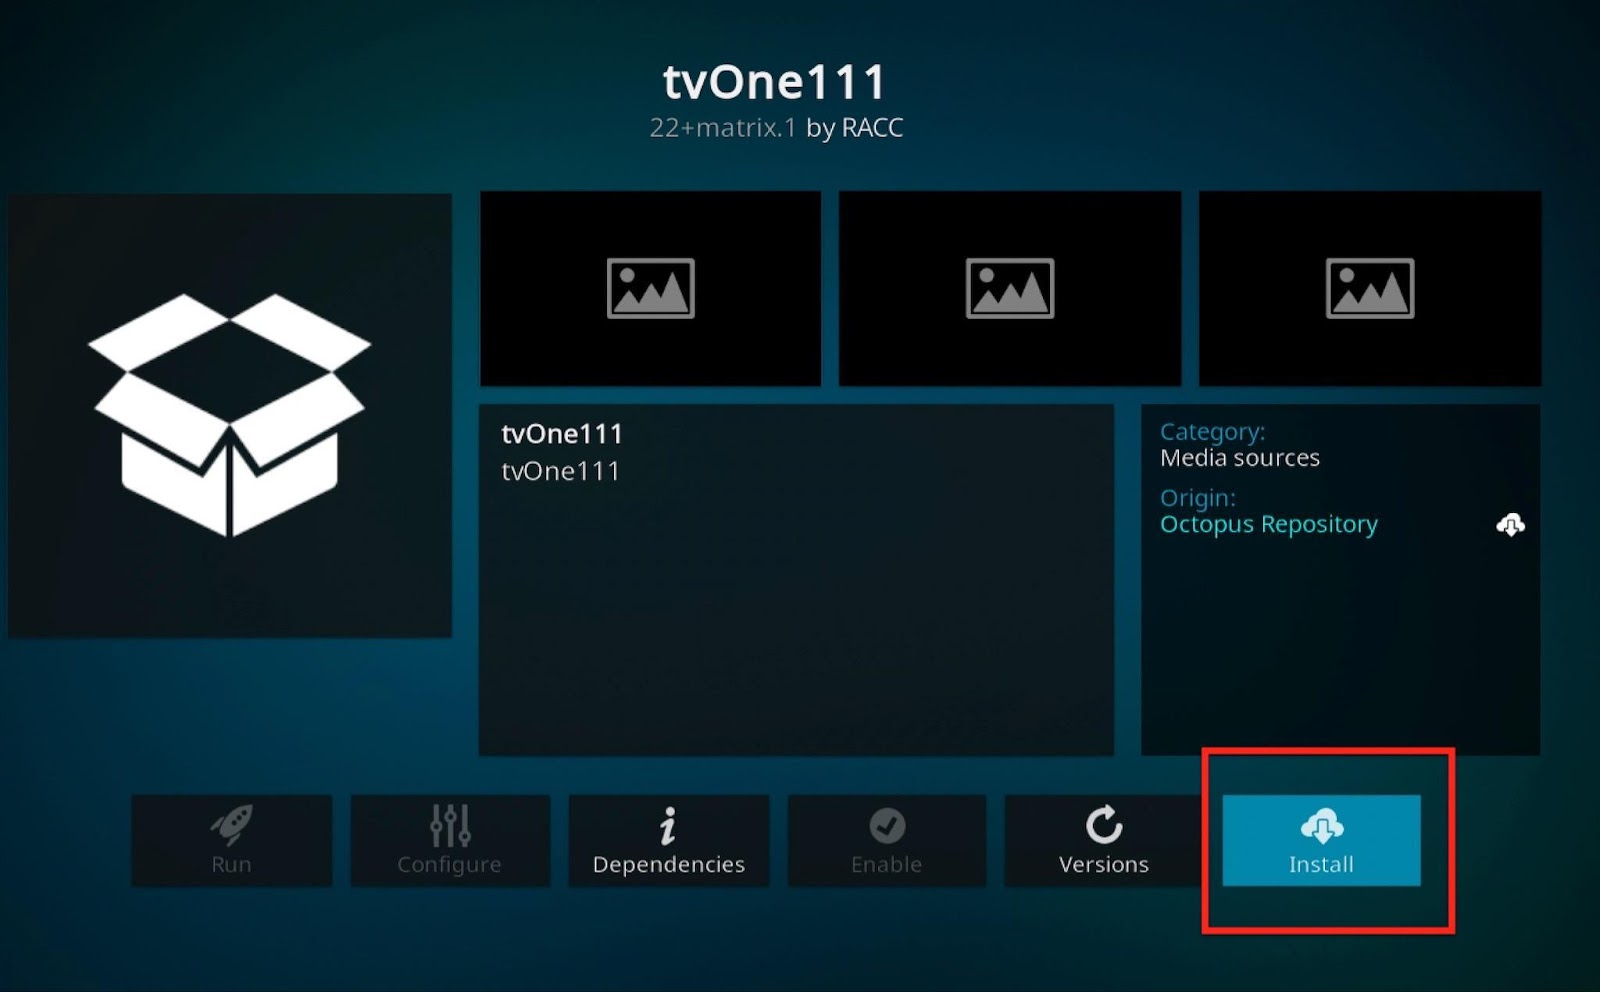
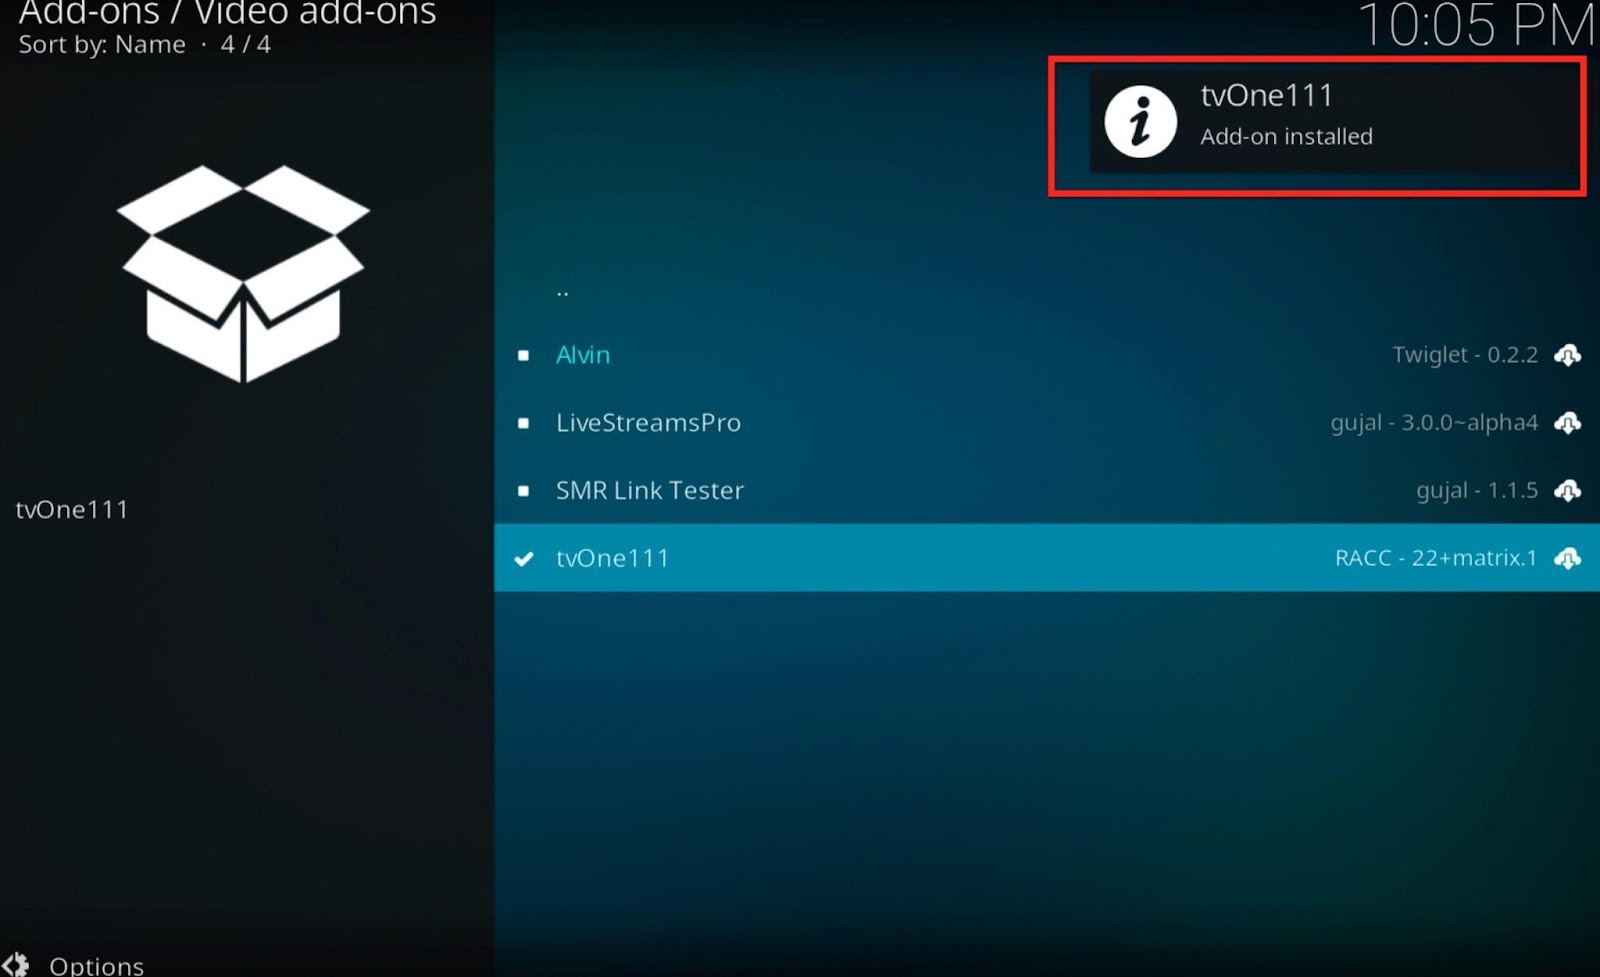
Great Job! You’ve successfully installed TVOne Kodi addon on the Firestick. Now, let’s understand how to use it.
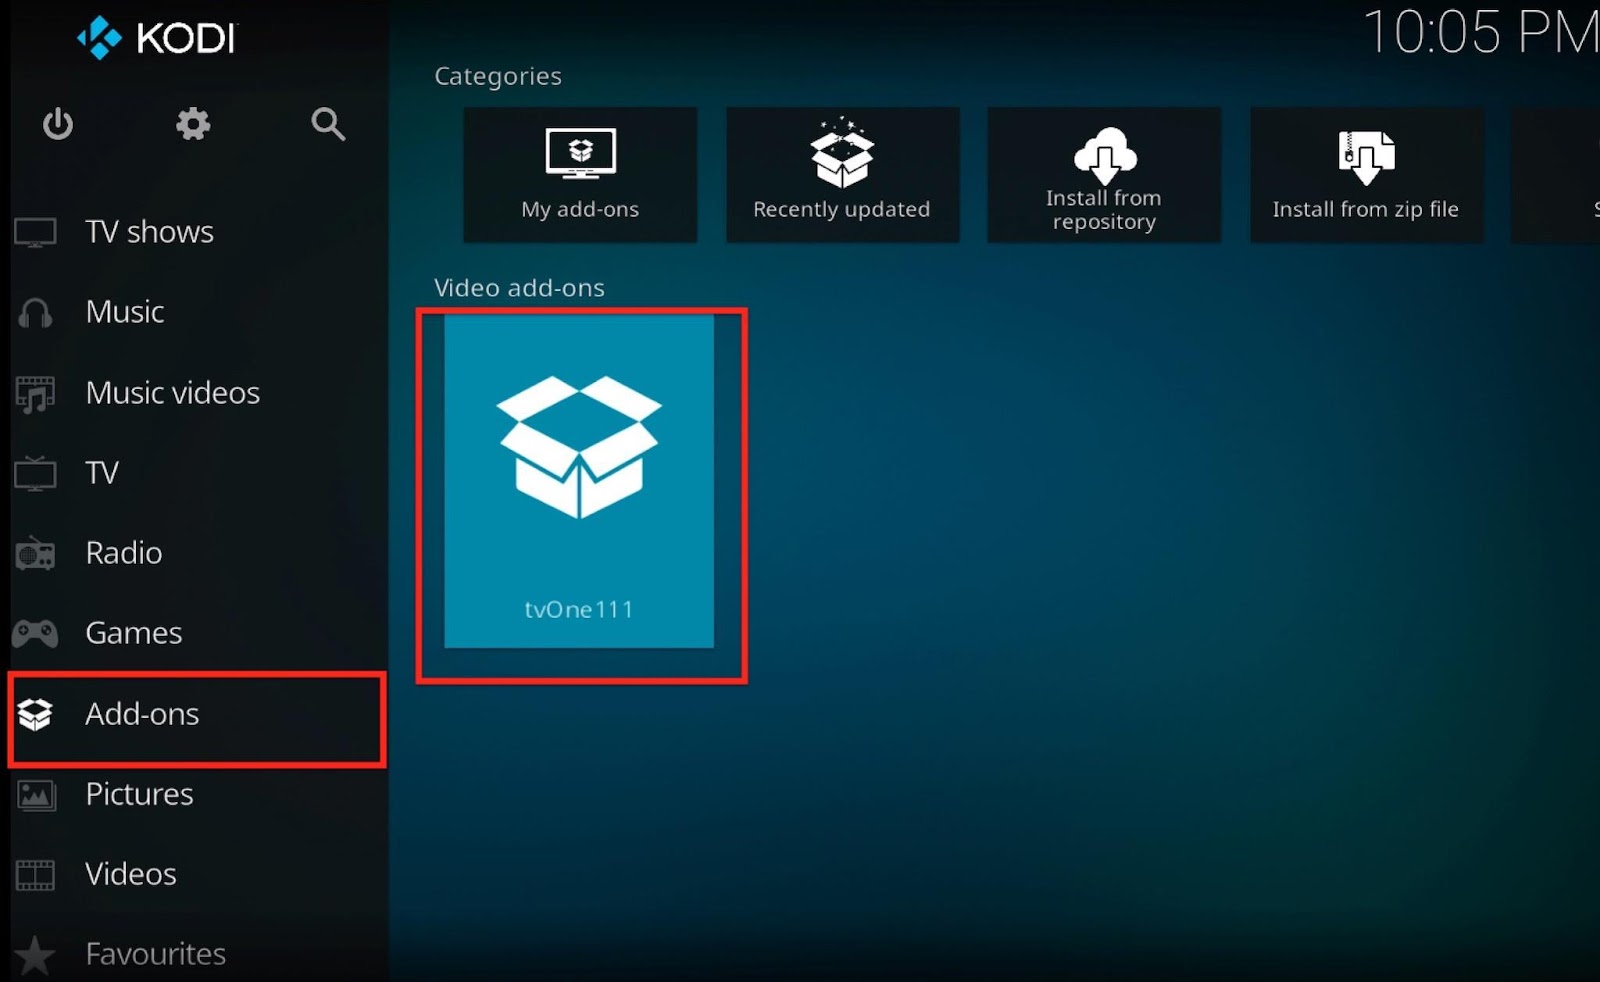
Here’s a quick guide to how you can access the TVOne addon on Kodi. If you have already installed dozens of addons before, you might be familiar with them.
If you launch the TVOne Kodi addon, you will realize that it is pretty different from other addons. It has the user interface as Kodi. The first thing you’d see when you open it is a list of probably all the countries in the world. For instance, you will see Sports, Pakistani, Indian, Turkish, South Indian, Kids, Religious, Portugal, Science, the UK, the USA and more. So, you can access content from all these countries. Just choose the one you prefer.
Each category consists of the most popular channels, which you can get an abundance of streaming channels for. TVOne is an incredible addon for sports lovers. It includes sports channels from the Middle East, North America, Europe, and they are all free.
Let’s select a country.For the purpose of this example, we will go with the USA, but you can choose other countries if you’d like.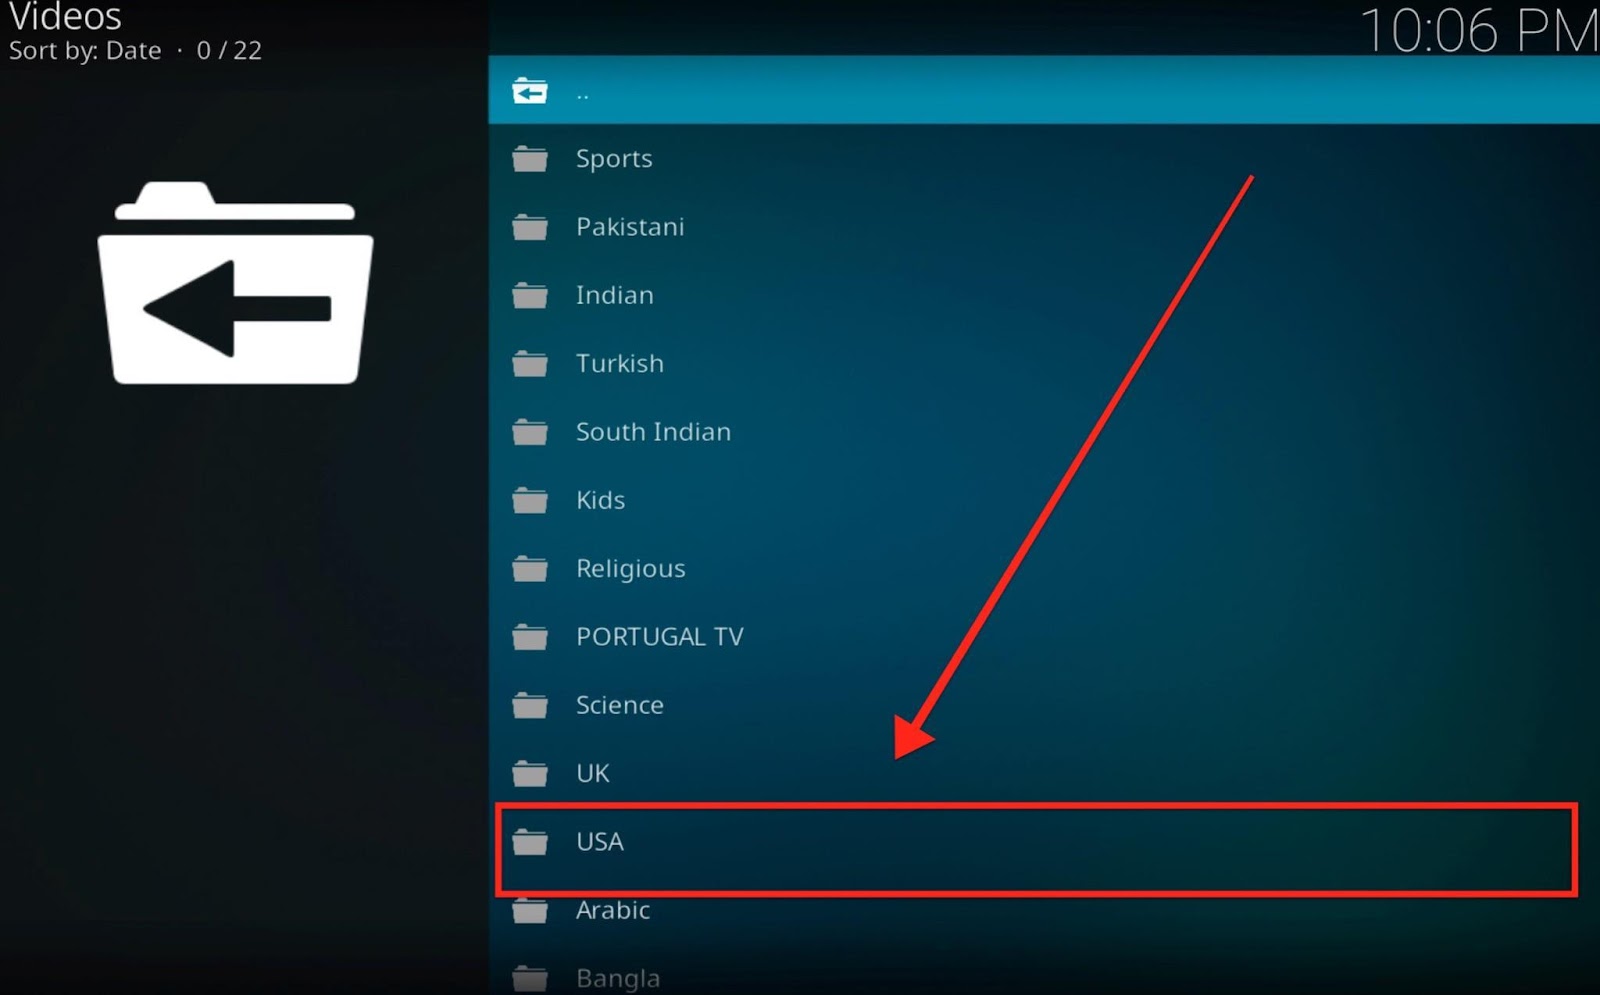 On the next page, you will see a list of all available channels that you can stream.
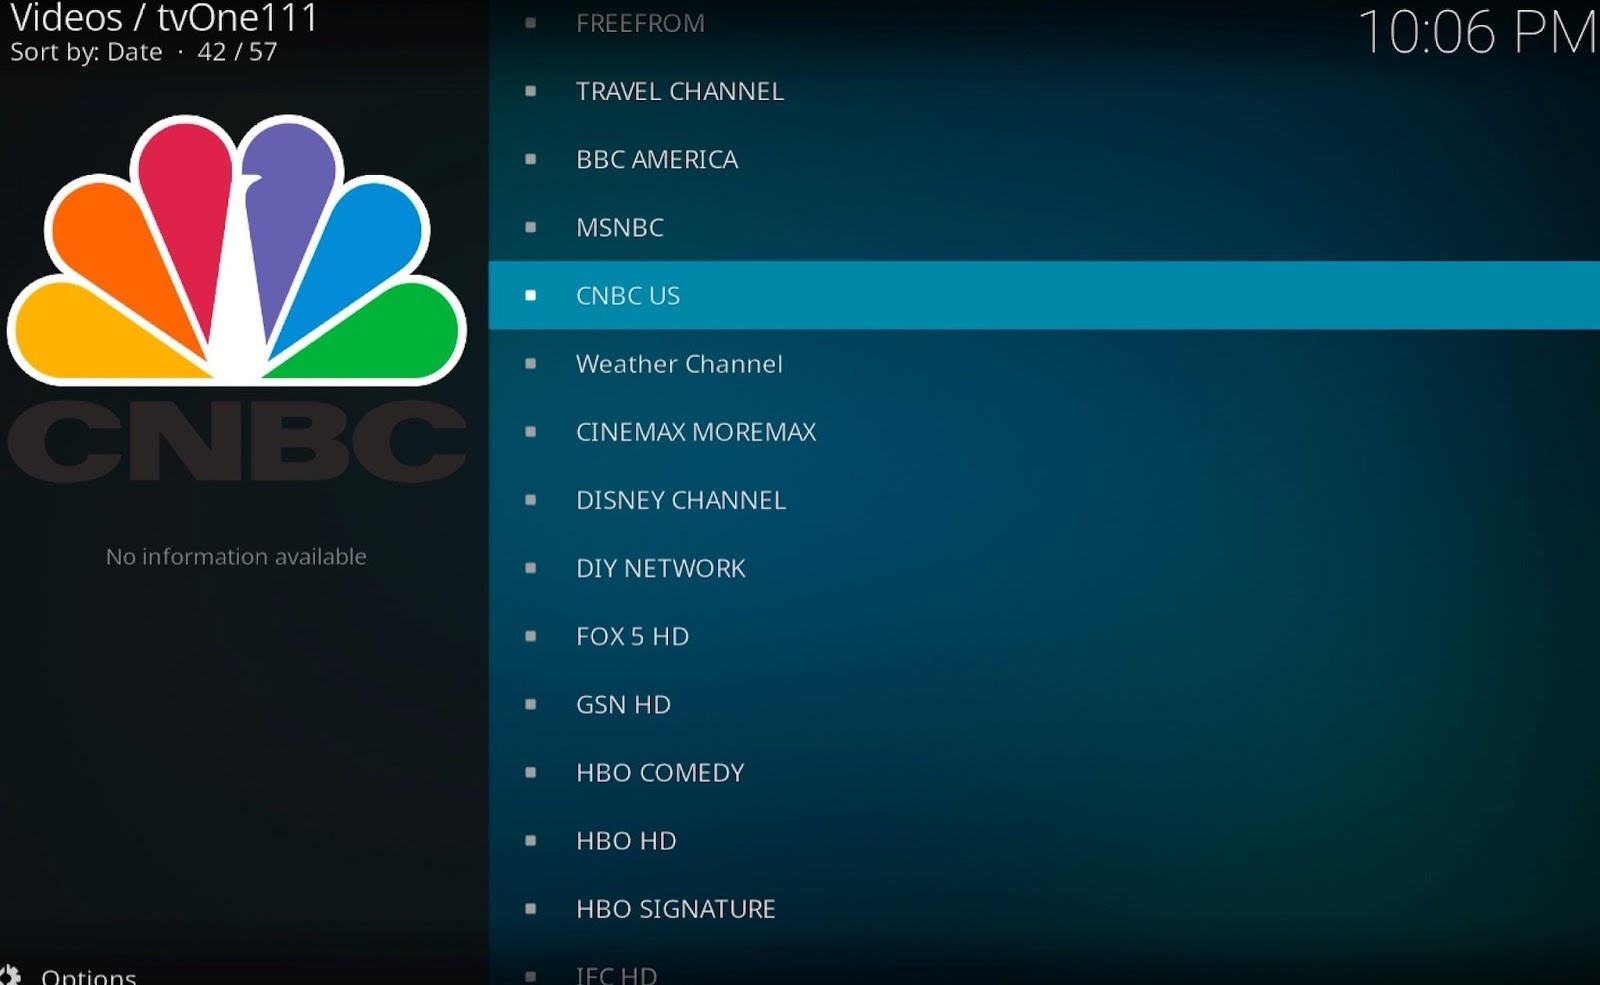 You can choose which channel you like to start streaming content on TVOne Live TV Kodi addon.
Now that we’ve installed the addon and learned how to use it let’s also take a look at its features.
There are many reasons why TVOne Kodi Addon is popular. We’ve listed some of them here:
As we mentioned before, the URL to download TVOne keeps changing. Although we constantly update our blog to keep you posted, there are times when you might struggle to download it. Here are the best Live TV addons that you can install on Kodi. Most of the addons listed below are free and offer a range of categories. You can enjoy all the live TV on Kodi for free using these addons:
We are so excited to let you enjoy all the features of your Kodi, but we can’t leave you without a glimpse in the legal matters related to it. Generally, it is not allowed to stream movies, TV shows, and over types of copyrighted content for free. Therefore, you have to ensure that your IP is not exposed and can’t be tracked by your Internet Service Provider or the government.
How do you do that? Using a VPN. Not a random one, but one that is reliable and secure – ExpressVPN, for example, is a leader in the industry. We have also tested it frequently, and it exceeded our expectations every time. ExpressVPN doesn’t only hide your IP address; it also gives you access to libraries from other countries, keeping the connection secure and fast. Moreover, this VPN provides a wide large number of servers to choose from. If you’re a little bit confused, let us help you with a short step-by-step guide on downloading and installing ExpressVPN.
You should subscribe to Express if you want to get the best out of it. ExpressVPN offers several packages, and you can choose according to your needs. We recommend opting for the annual subscription. That’s because Express VPN has a 30-day money-back guarantee. So, even if you don’t like the service, you can always get a full refund.
Let’s see which are the steps you have to follow to easily install and use ExpressVPN:
Step 1: Make sure you are on Firestick’s home screen.
Step 2: On the Find section, click on the Search option.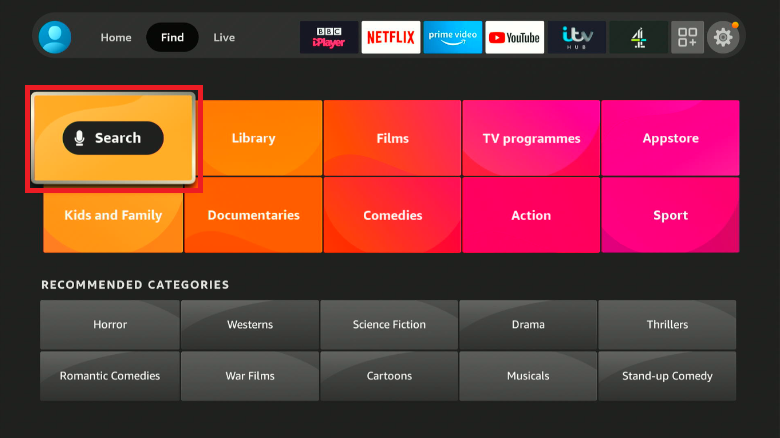 Step 3: Next, enter ExpressVPN using the keyboard on your screen or the voice search command.
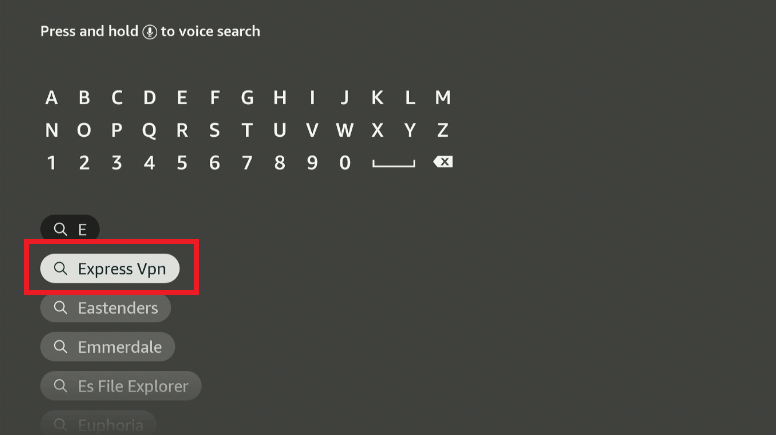 Step 4: Select ExpressVPN and download it.
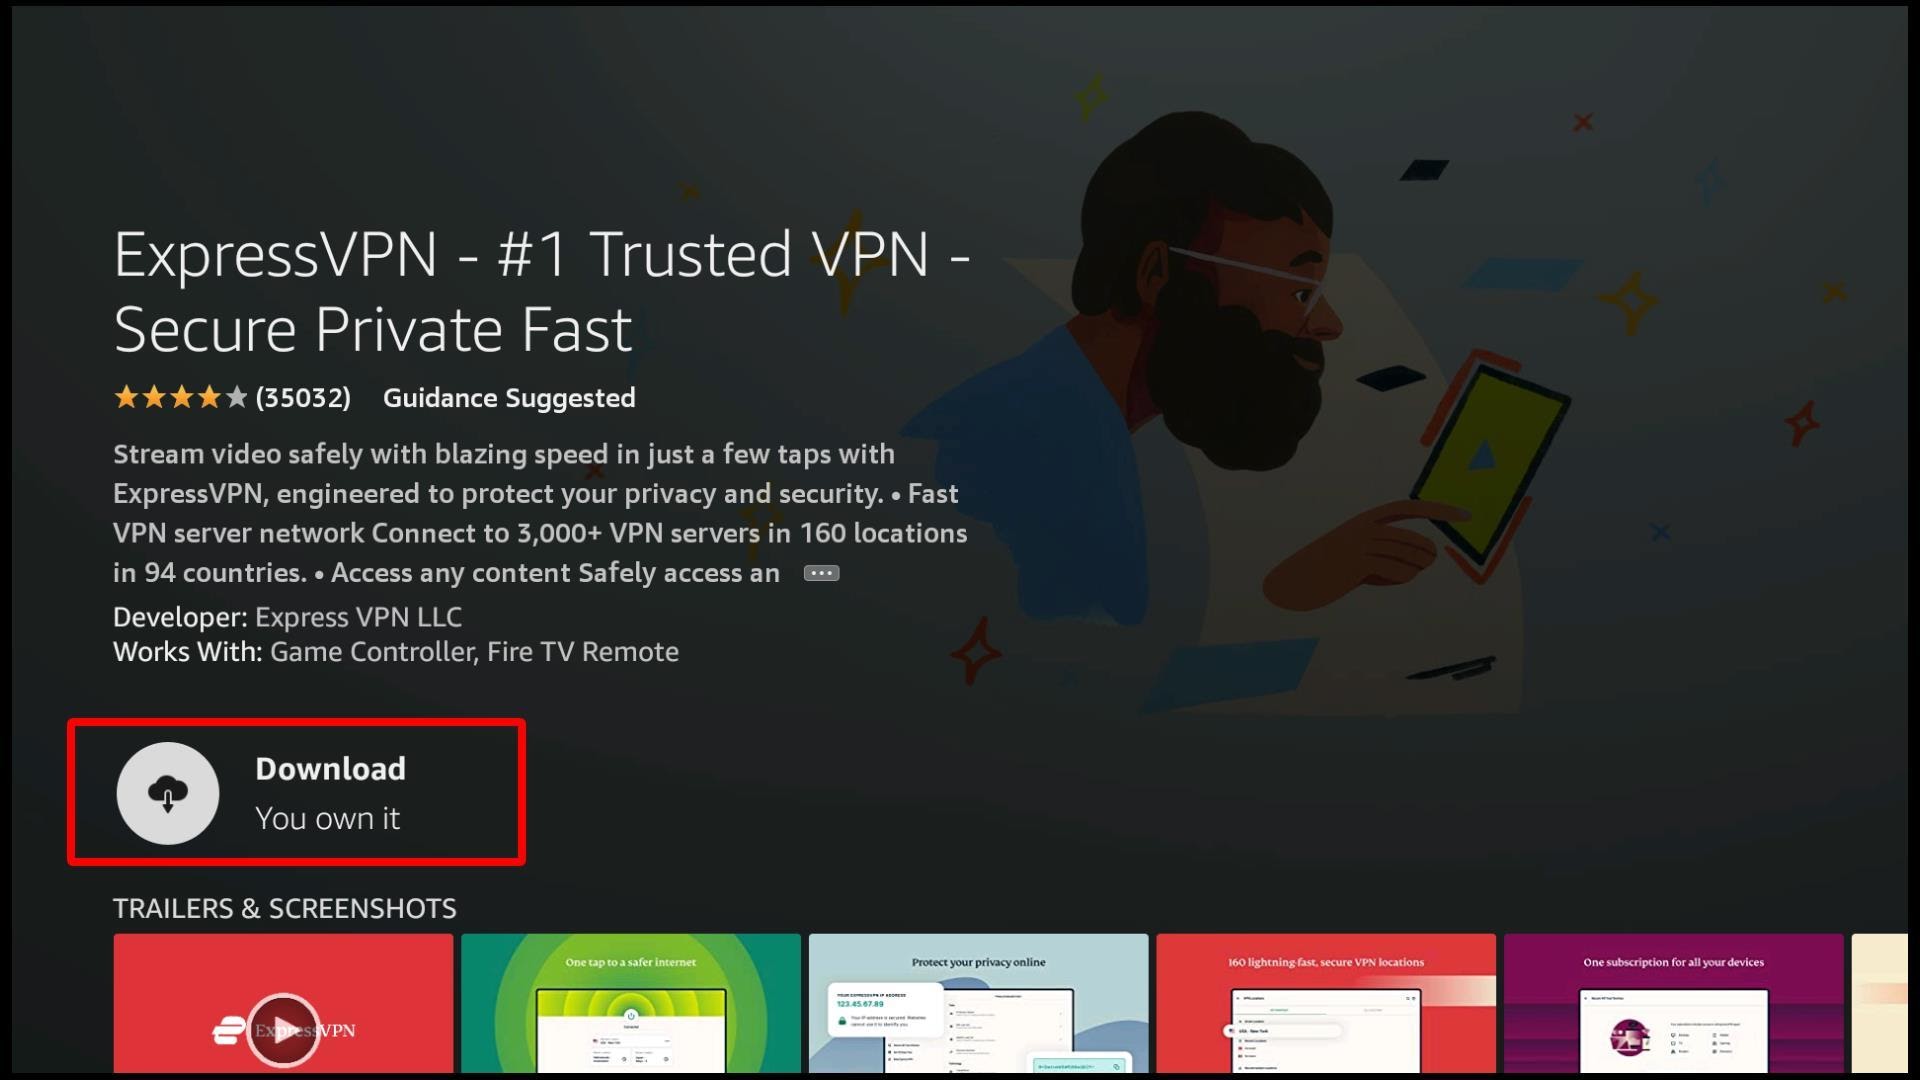 Let’s wait for the app to download and install.
Step 5: Next step is to sign in to the app using the same credentials you entered when signing up on the ExpressVPN website.
Don’t you have these credentials? Maybe you didn’t subscribe yet. Do it now.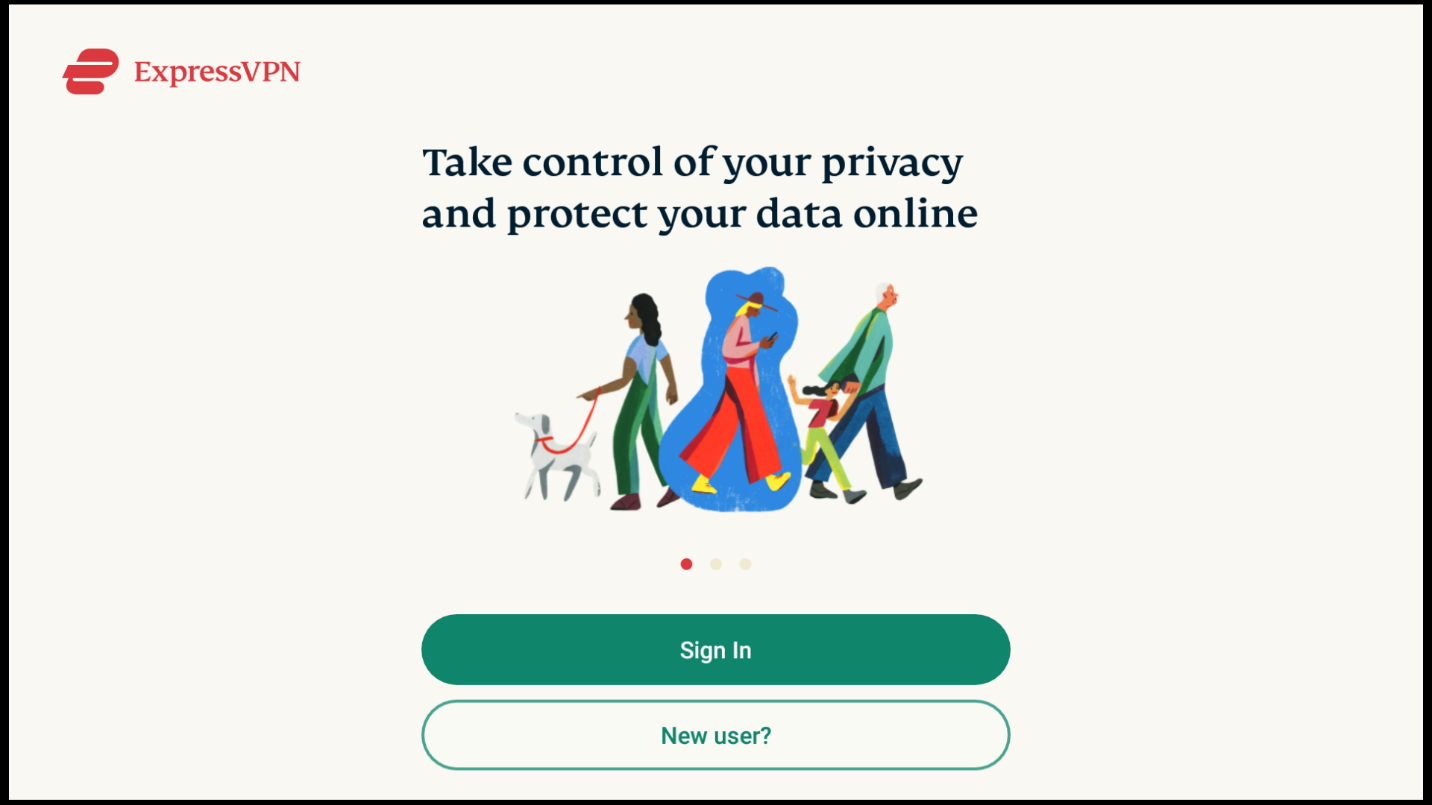 Step 6: You’ve now signed into the app. Let’s open and check it out.
The first thing you will see will be a big Power icon – the connecting button. You will use that to connect to an encrypted virtual server.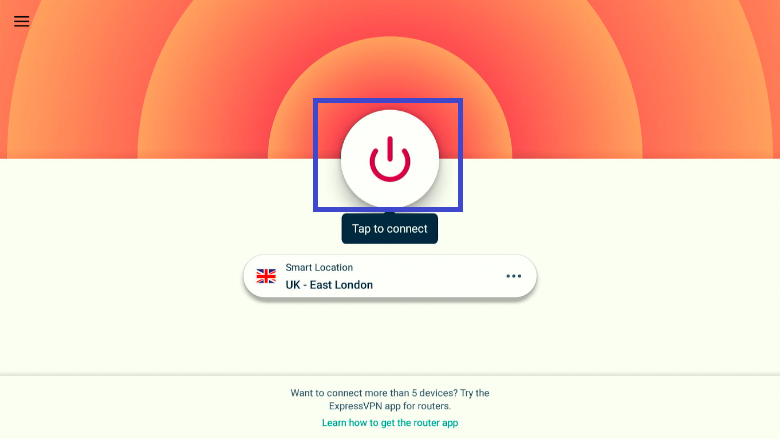 Once you click on it, you will be connected to a server. You can start streaming your favorite content for free without worrying much. You can also choose which country you’d like to connect to by clicking on the smart location option.
TVOne is one of the most simple Live TV addons we’ve used. It doesn’t have a lot of high-end features, but it has a large number of categories. You don’t even need a mouse toggle to use it. All you need to do is click. However, it would have been better if it also had sub-categories under each country, such as entertainment, cartoon, news, etc. Nonetheless, You can easily navigate the TVOne addon and watch content globally.

You need to load content from reCAPTCHA to submit the form. Please note that doing so will share data with third-party providers.
More InformationYou are currently viewing a placeholder content from Turnstile. To access the actual content, click the button below. Please note that doing so will share data with third-party providers.
More InformationYou are currently viewing a placeholder content from Facebook. To access the actual content, click the button below. Please note that doing so will share data with third-party providers.
More InformationYou need to load content from reCAPTCHA to submit the form. Please note that doing so will share data with third-party providers.
More InformationYou are currently viewing a placeholder content from reCAPTCHA. To access the actual content, click the button below. Please note that doing so will share data with third-party providers.
More InformationYou are currently viewing a placeholder content from Instagram. To access the actual content, click the button below. Please note that doing so will share data with third-party providers.
More InformationYou are currently viewing a placeholder content from X. To access the actual content, click the button below. Please note that doing so will share data with third-party providers.
More Information