Kodi is, no doubt, one of the best Firestick apps you can get. It helps you to access a wide range of television shows, documentaries, movies, and a lot more. The top Kodi builds and addons can help you get the most out of your Kodi (and your Firestick).
However, if you have an issue with your Kodi build due to any reason and need assistance uninstalling it, you have come to the right place. This article will provide you with all the information you need to uninstall your Kodi build. Just keep reading to find out!
Although you get access to an endless variety of content through your Kodi builds, there is always a risk of getting caught by legal authorities. It is because you get to stream all the content for free that might be legally problematic. You may not know, but your IP address is always visible to everyone who works for mass surveillance, and that could get you in trouble.
Therefore, to save yourself from this scenario, always use a secure VPN whenever streaming. There are several benefits of using a quality VPN service. It not only shields you from mass surveillance but also provides you buffer-free streaming and access to blocked/banned content. We recommend that you get ExpressVPN for Kodi before you start streaming. You can freely stream whatever you want with ExpressVPN, as they block intruders from accessing your personal information and online activities.
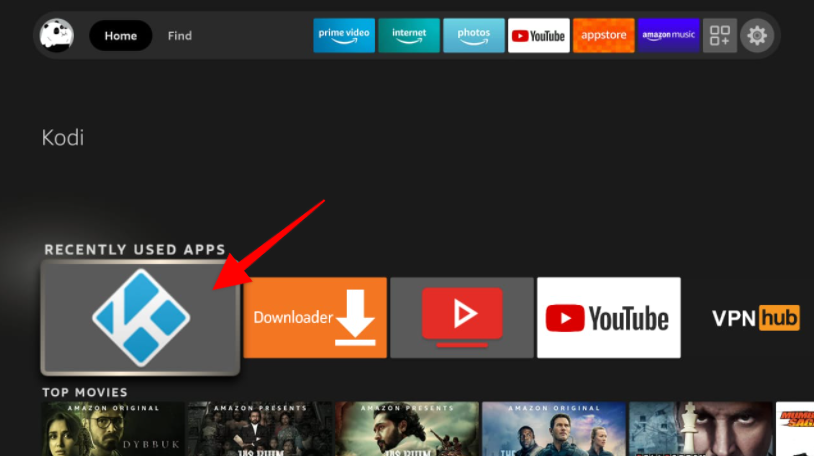
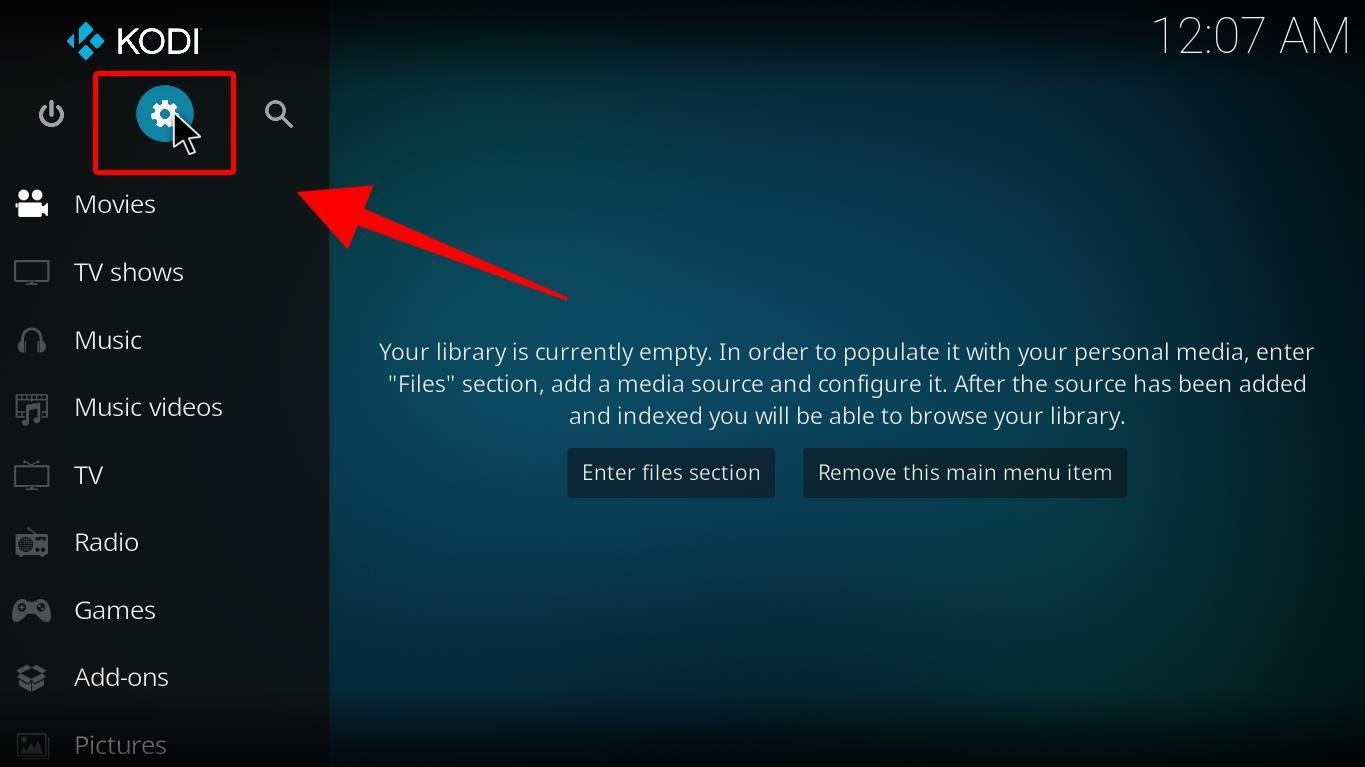
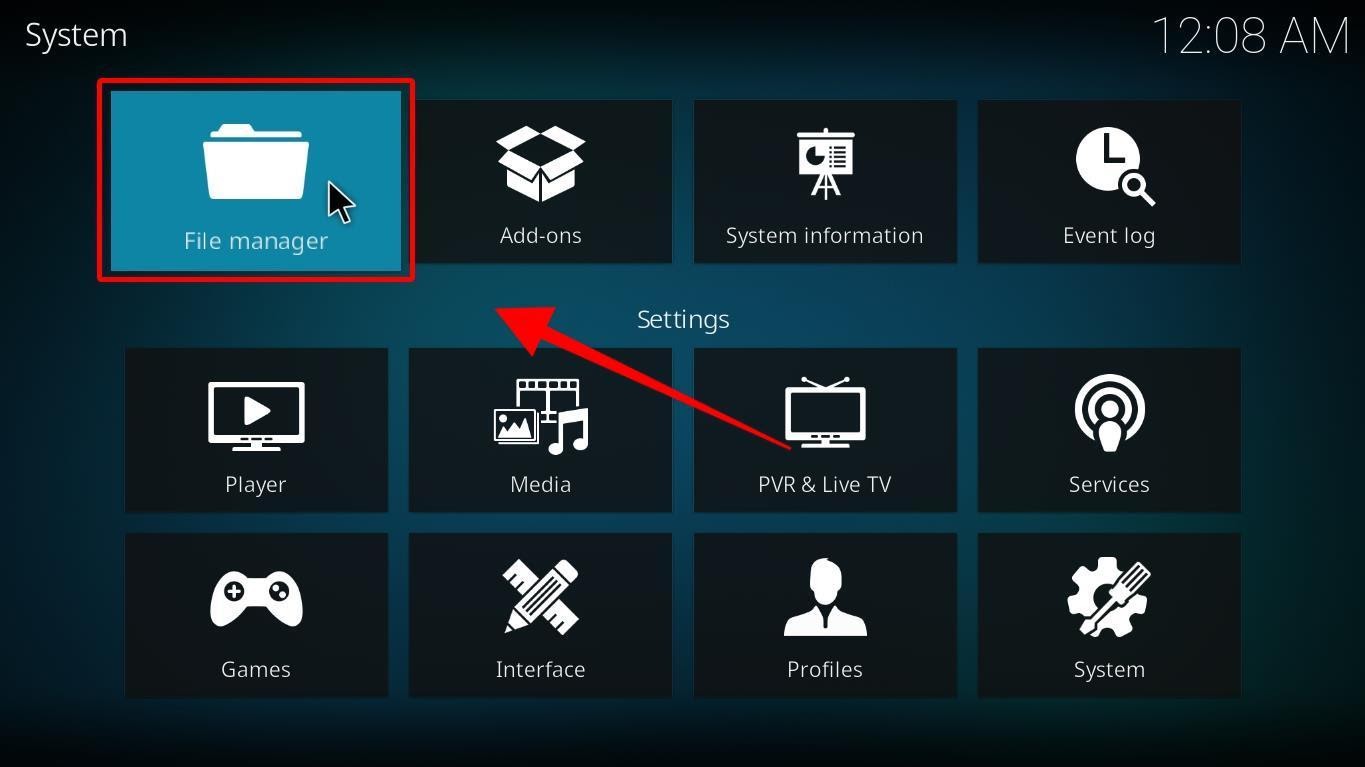
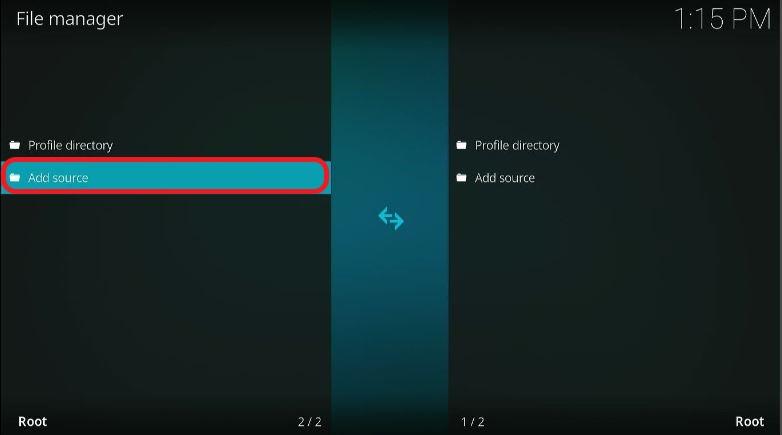
The following guide walks you through each step from start to finish, so there’s nothing you need to know before you begin. Let’s get started!
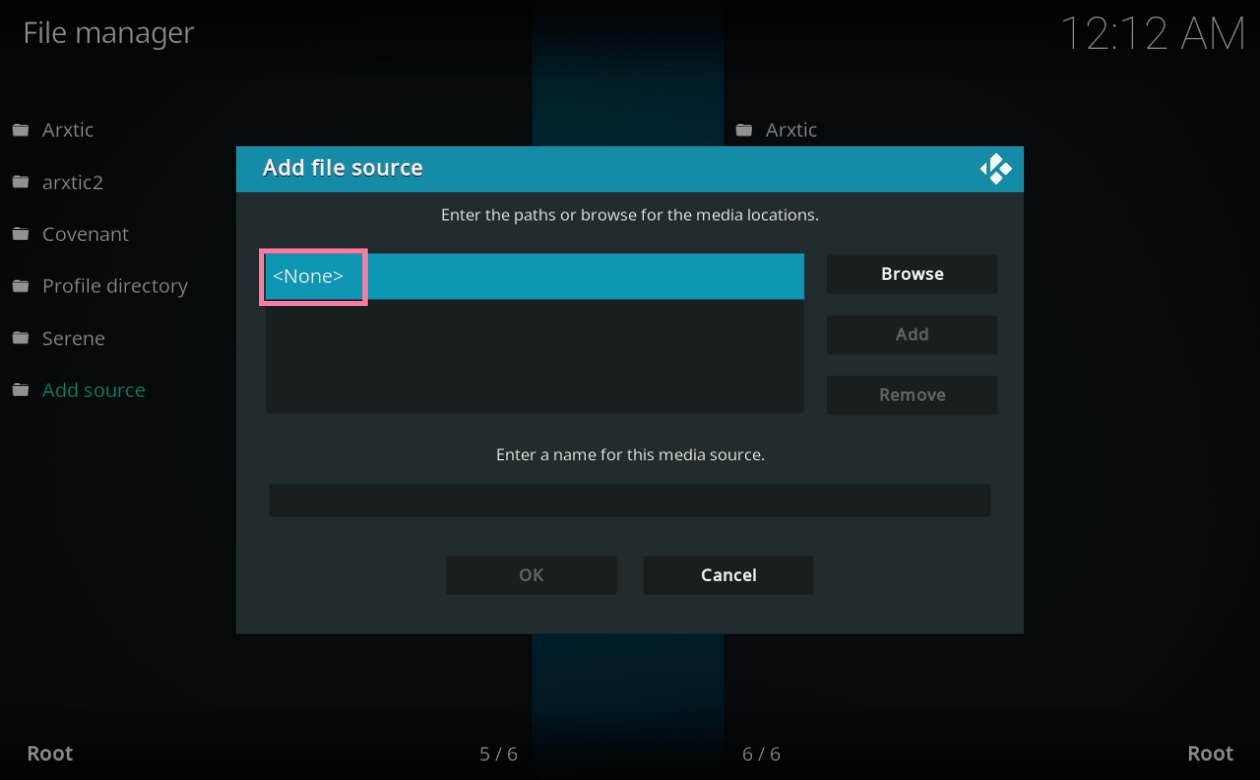
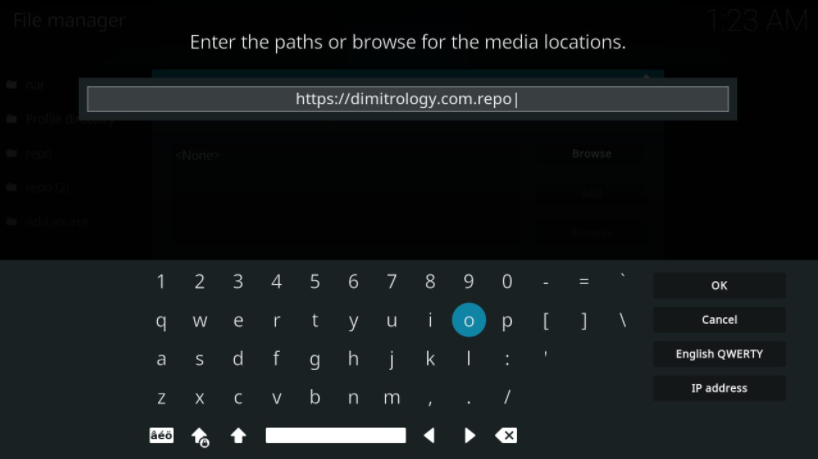
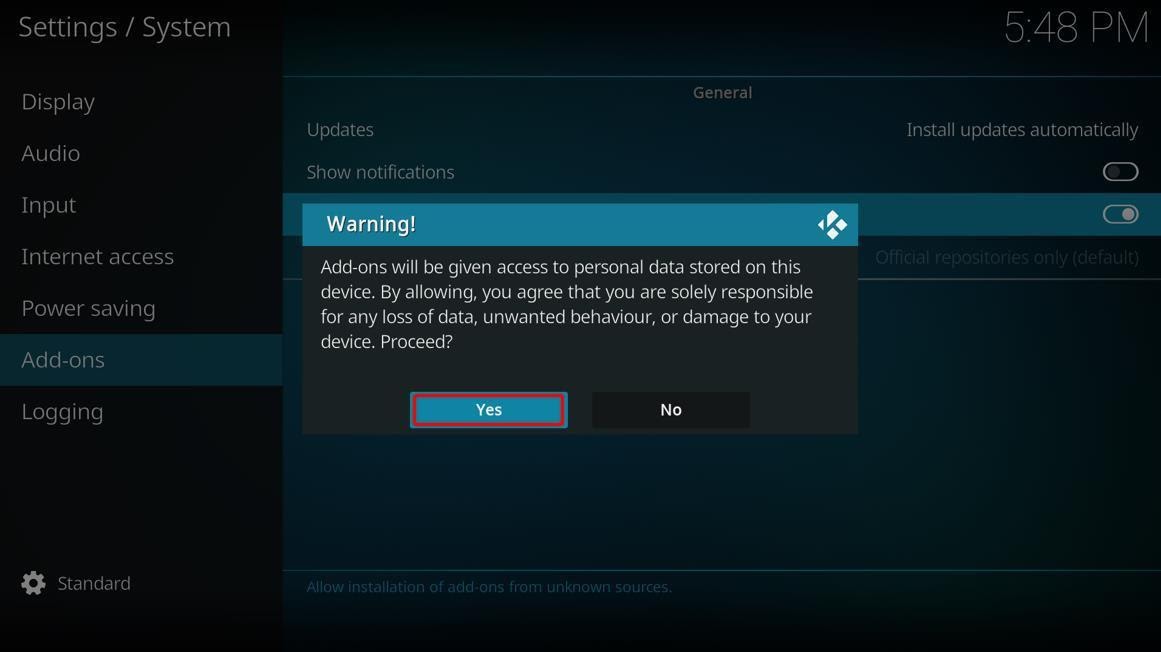
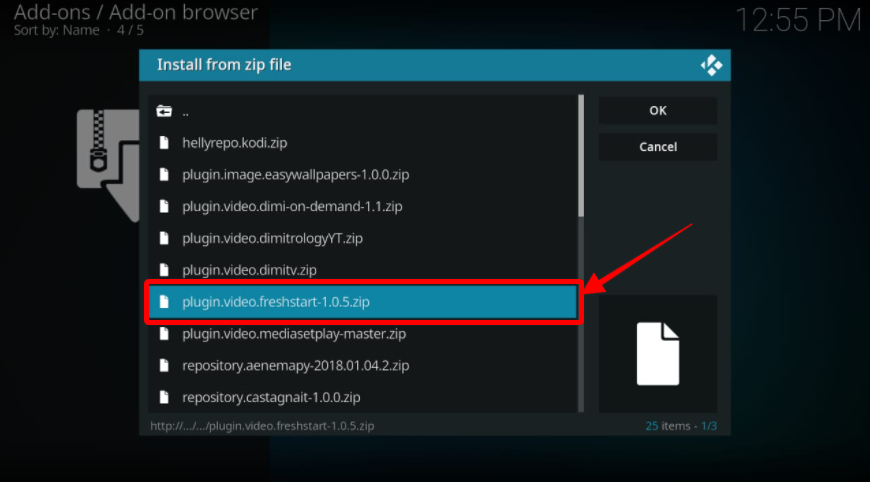
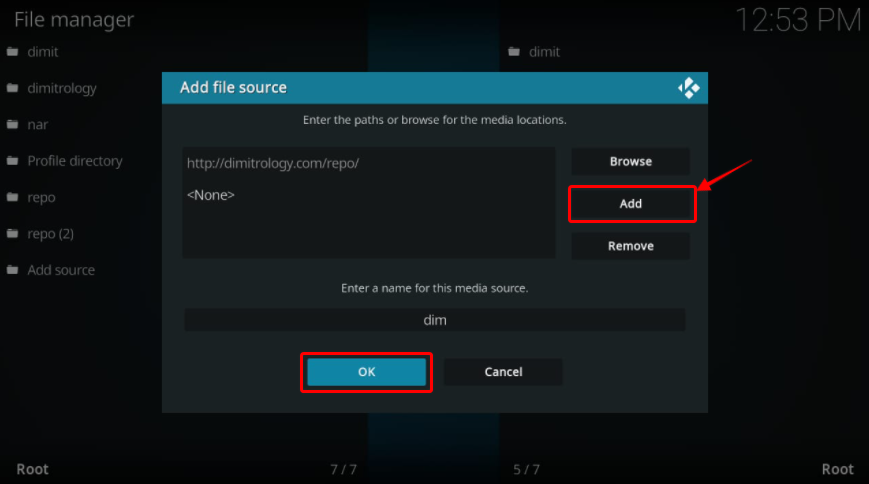 Press the OK option, and continue with uninstalling your Kodi.
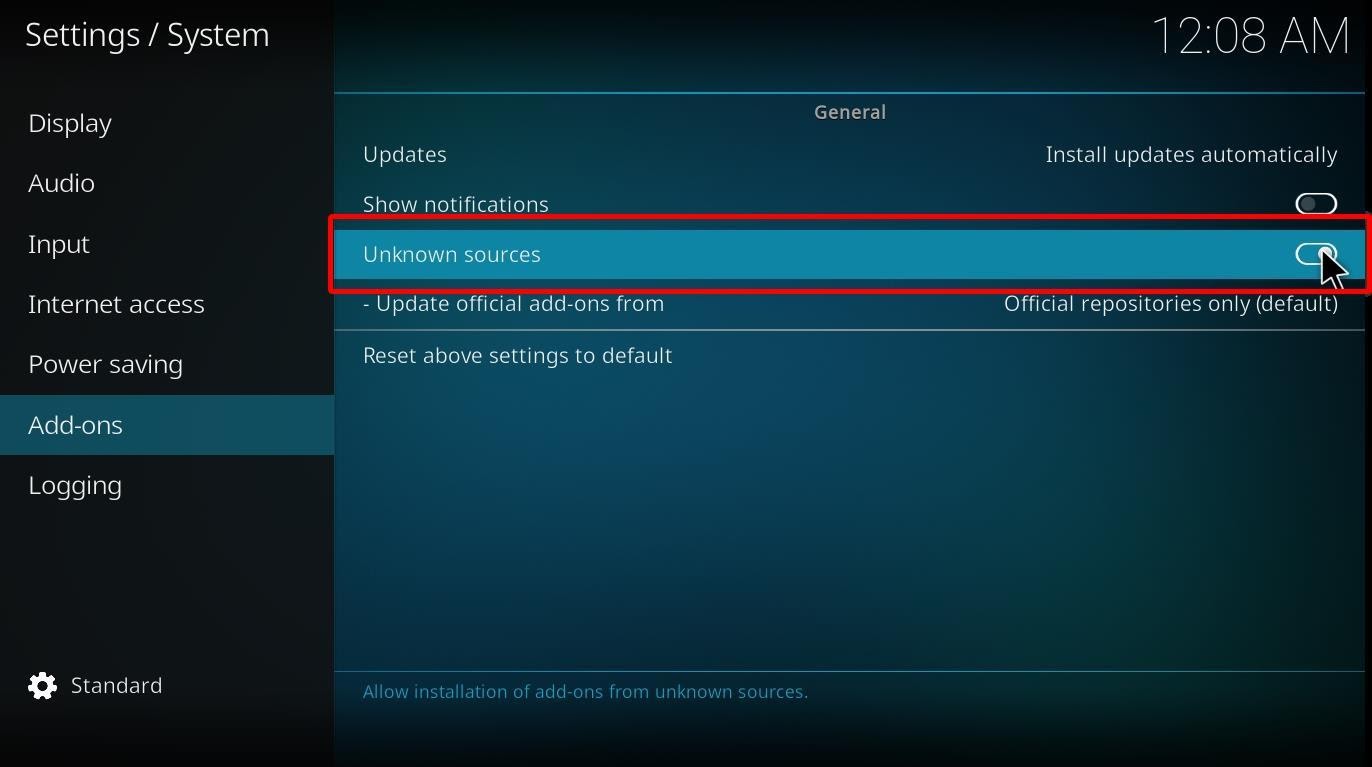
If you see a security message on your screen, don’t worry. This message pops up when you have not enabled the installation of Add-ons from unknown sources before this process.
Now that you know the complete procedure of uninstalling the Kodi build, let’s move on to the reasons why you need to do so.
While Kodi builds are very helpful for streaming, they sometimes cause sudden buffering and freezing in the system. It is a common issue, and several reasons can cause it. While you keep streaming content on the device, you don’t know if an excessive cache is producing and is consuming the storage continuously. Kodi builds take up a lot of the device’s hard drive space, which slows down the rate at which you download content and install new add-ons.
For effective use of Kodi, make sure to follow up all the steps of the uninstallation method mentioned above. This specific method is really quick and will definitely make the entire procedure much easier. Furthermore, if you want to clear more space on your device, it would be better to delete all the excessive add-ons and repositories beforehand and then carry on with the uninstallation process.

You need to load content from reCAPTCHA to submit the form. Please note that doing so will share data with third-party providers.
More InformationYou are currently viewing a placeholder content from Turnstile. To access the actual content, click the button below. Please note that doing so will share data with third-party providers.
More InformationYou are currently viewing a placeholder content from Facebook. To access the actual content, click the button below. Please note that doing so will share data with third-party providers.
More InformationYou need to load content from reCAPTCHA to submit the form. Please note that doing so will share data with third-party providers.
More InformationYou are currently viewing a placeholder content from reCAPTCHA. To access the actual content, click the button below. Please note that doing so will share data with third-party providers.
More InformationYou are currently viewing a placeholder content from Instagram. To access the actual content, click the button below. Please note that doing so will share data with third-party providers.
More InformationYou are currently viewing a placeholder content from X. To access the actual content, click the button below. Please note that doing so will share data with third-party providers.
More Information