Addons have to be one of the best features Kodi has in its toolkit. Addons fetch streaming links from multiple host servers and let you stream your favorite movies, TV serials, and dramas online. Without them, Kodi might not be as popular as it currently is.
One thing most people don’t know about these addons is that they don’t function on their own. Instead, they rely on what users call ‘dependencies’. As a result, when these dependencies fail to install, you’ll get the error ‘failed to install a dependency’.
When this error shows up on the screen, it means that the addon has failed to install. This, in turn, means you can’t enjoy the perks that particular addon has to offer. That’s why we’ve come up with this step-by-step guide to help you fix this error.
There are multiple reasons why this error might have popped up on your screen. All of them cannot be resolved with a single solution. That’s why we’re going to provide you with multiple solutions. Apply all of them one by one, and we’re confident you’d be able to fix this error.
Let’s explore all the solutions:
The cache is a short-term memory for an app. It stores the frequently used information and helps you navigate faster when using the app. Clearing Kodi’s cache will free up this temporary memory and boost the media player’s speed. Hopefully, it will also fix the ‘Failed to install a Dependency’ error.
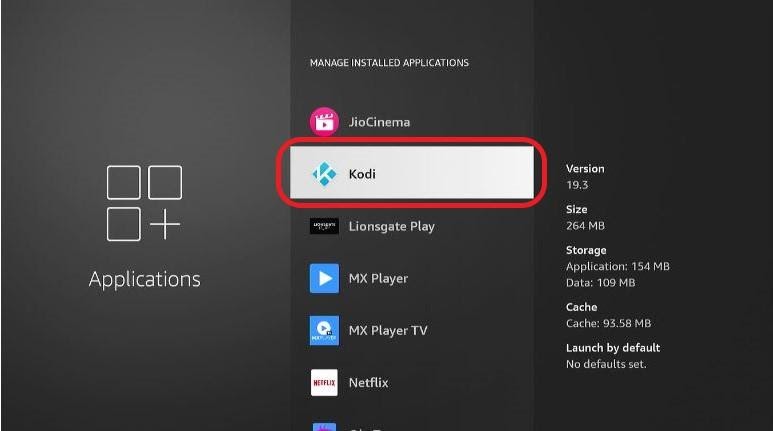
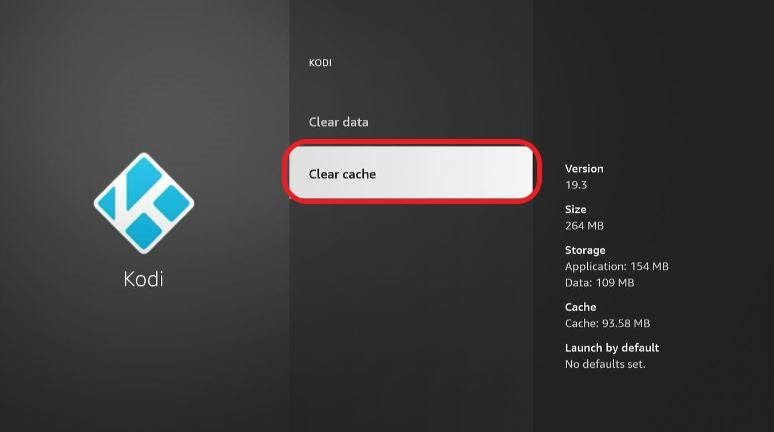
Follow these steps to clear Kodi’s cache:

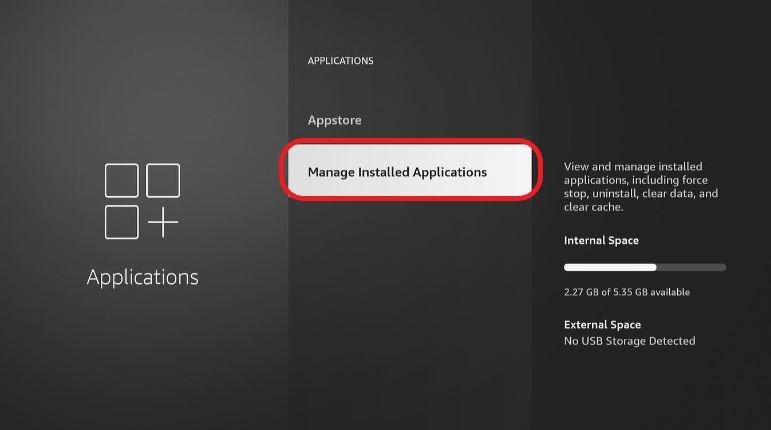
To clear the cache in Kodi, you will require a tool called Ares Wizard. If Ares Wizard isn’t already installed, you can easily install it in 4-5 minutes. Keep in mind that Ares Wizard is a third-party addon. You cannot download it. Instead, you’d have to sideload it.
After installing Ares Wizard, follow these steps to clear Kodi’s cache:
Clearing cache often will optimize the Kodi app. When you use Kodi for a long time and have many addons, the size of the cache will continue to grow, slowing down the app. Therefore, it’s recommended that you clear your Kodi app’s cache every once in a while.
If clearing your cache hasn’t fixed the ‘failed to install dependency’ error, then it might be time to clear your Kodi data. The other solution requires you to delete Kodi and then reinstall it.
Given how drastic the alternative option is, we suggest you don’t apply it before exhausting all the other possible scenarios. One of which is cleaning the media player’s data.
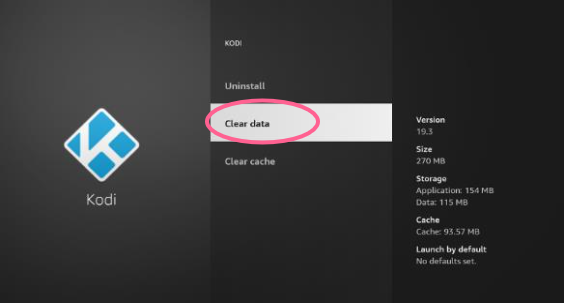
Follow these steps to clear Kodi’s data:
Restart Kodi and reinstall the addons you require.
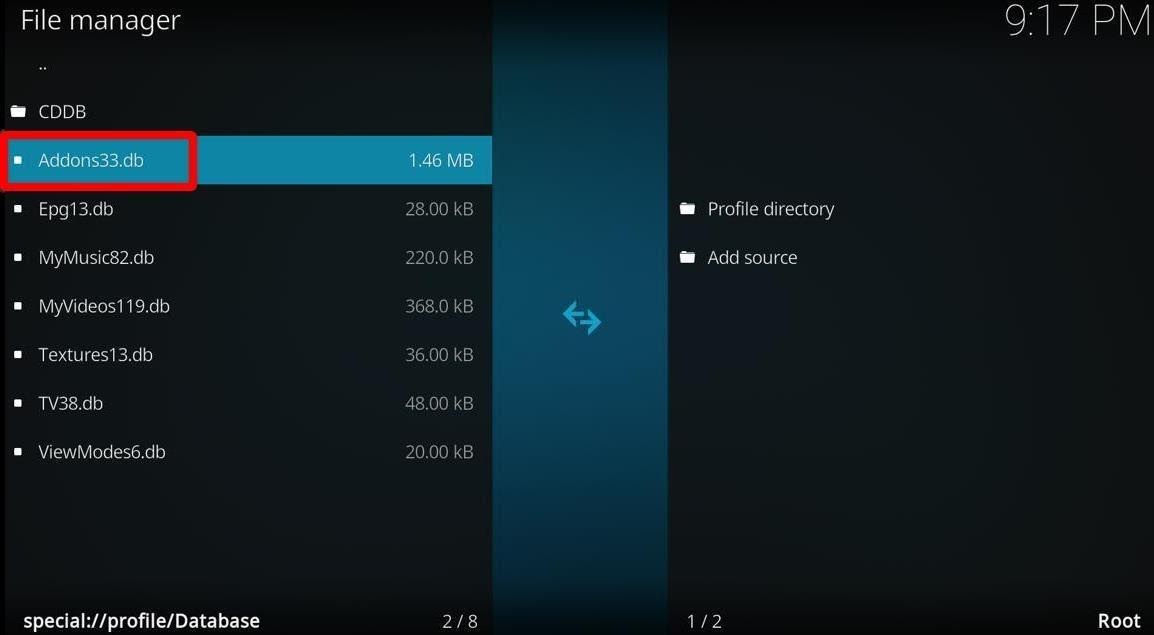
Kodi’s database contains many things. When it gets corrupted, you start getting all sorts of errors, one of which is the ‘Failed to Install a Dependency’ error. Removing and reinstating Kodi’s database might help you get rid of this error.
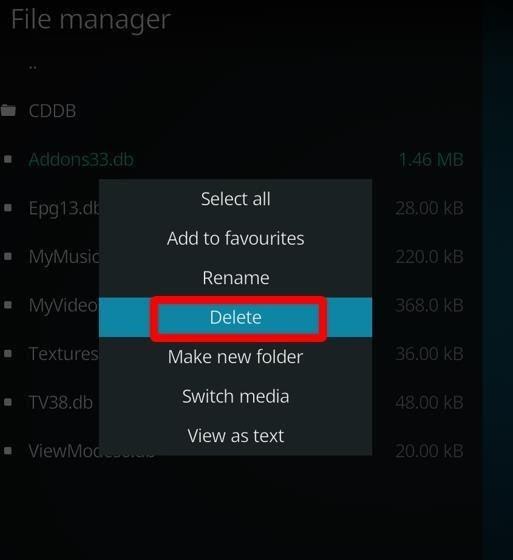
Follow these steps to remove and reinstate Kodi’s database:
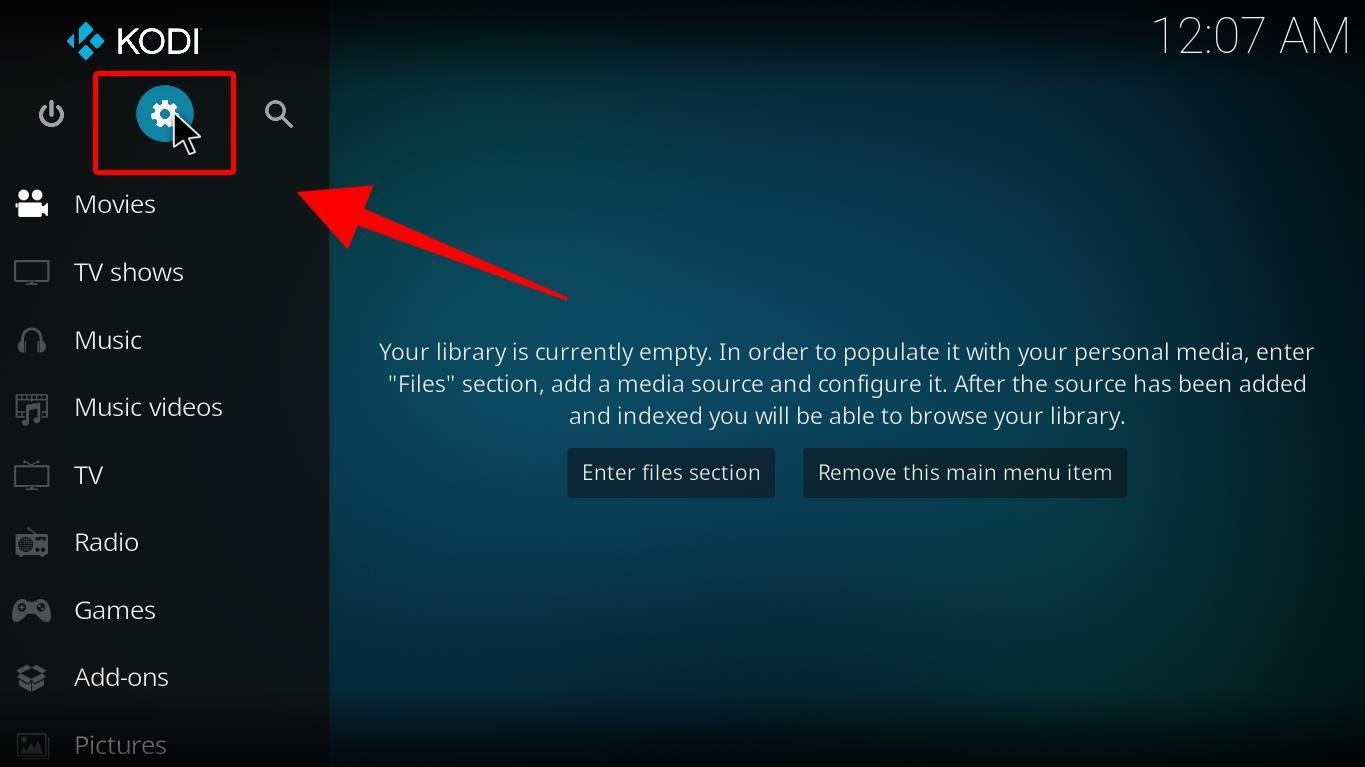
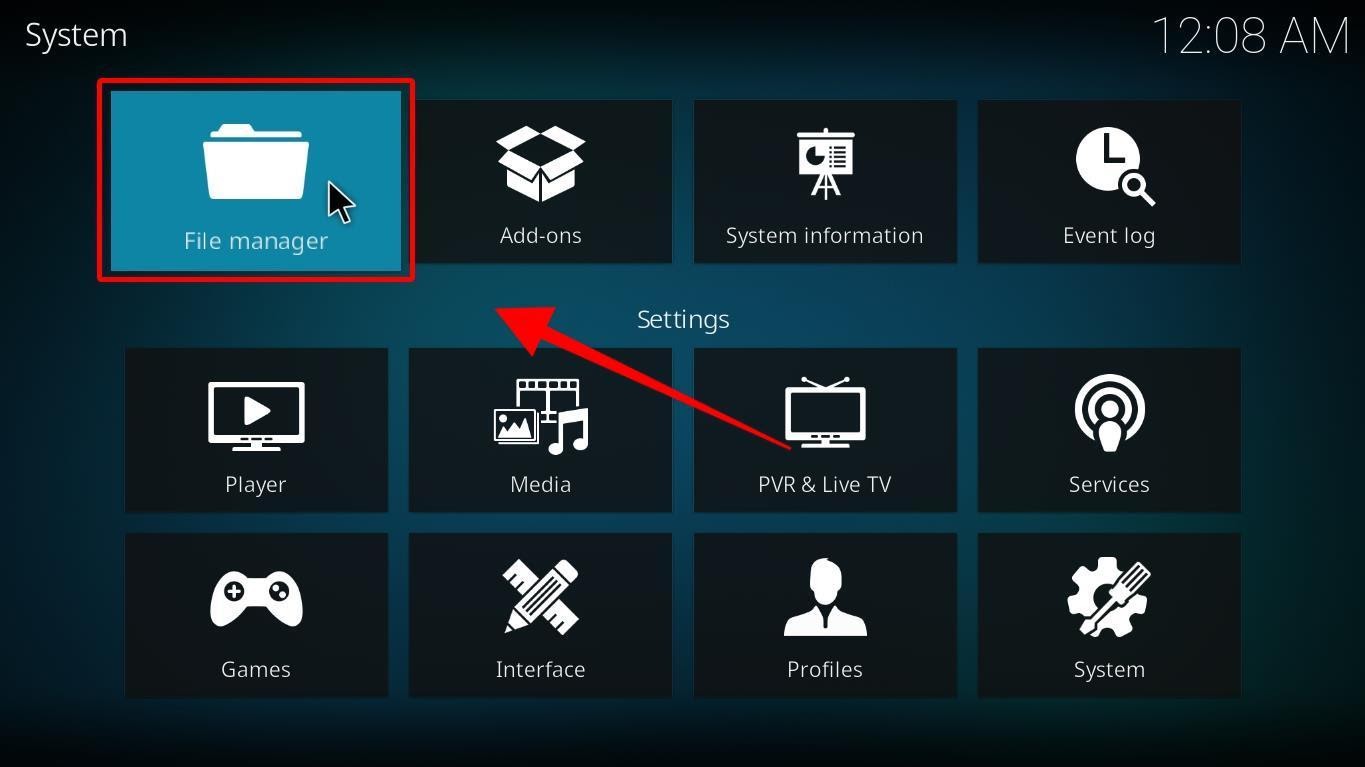
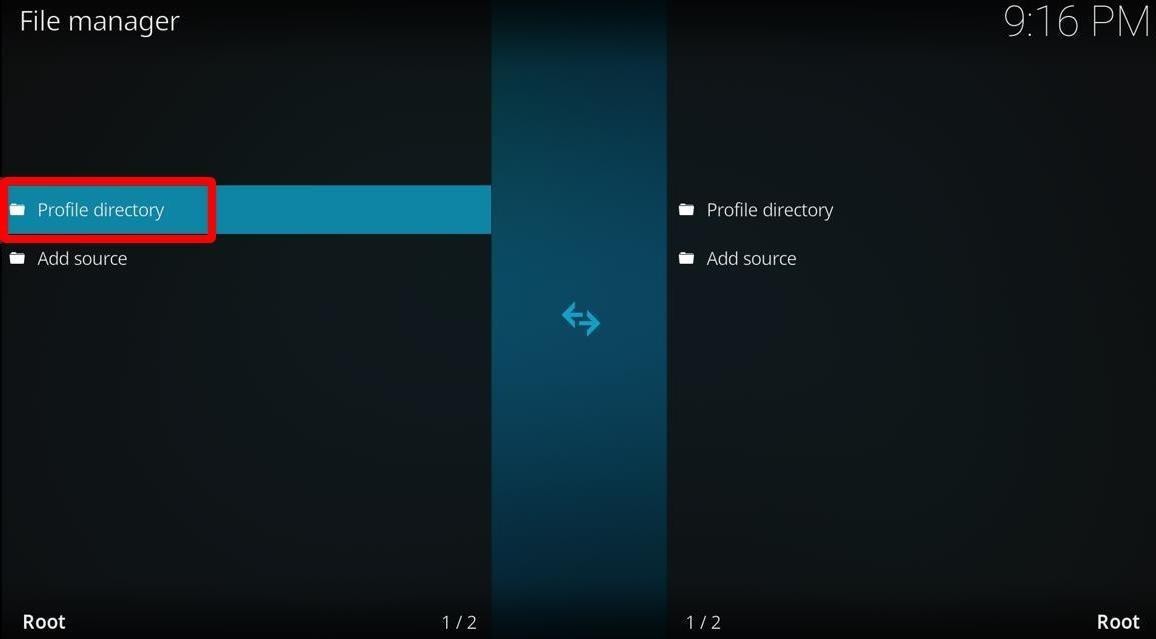
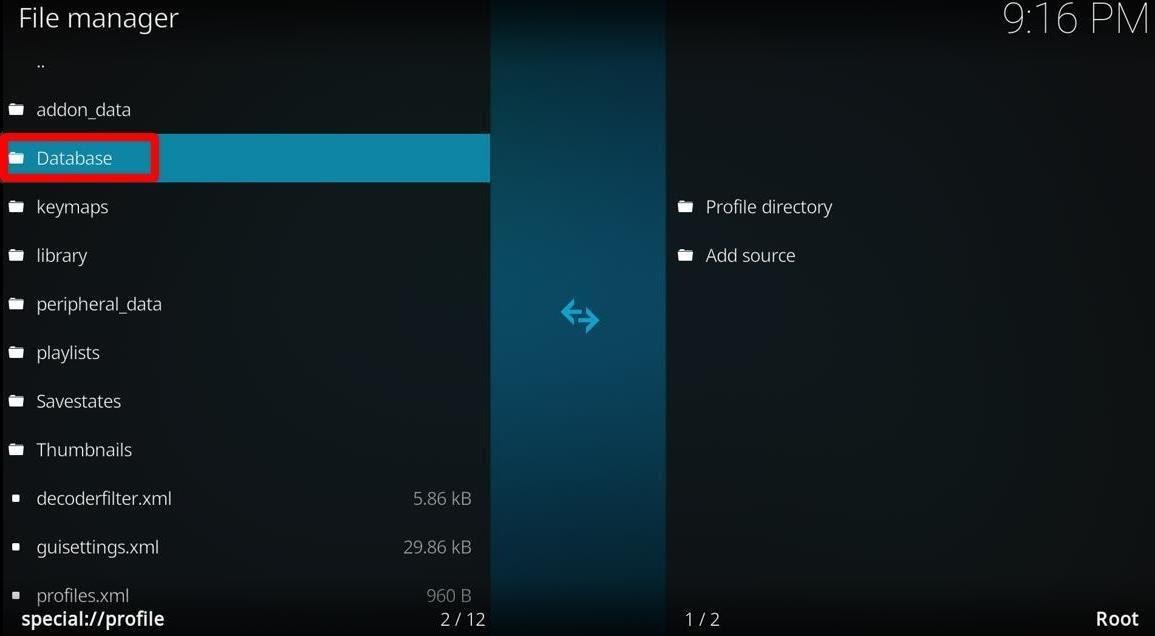
 A prompt will appear; click on Yes to continue.
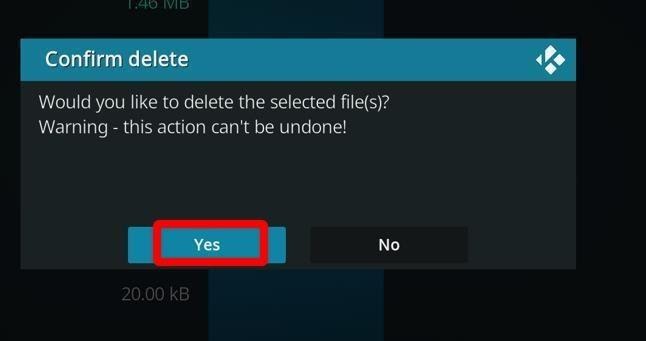 The next step is to close Kodi and wait for a few minutes. After waiting, restart Kodi and try to install the addon you were trying to install earlier.
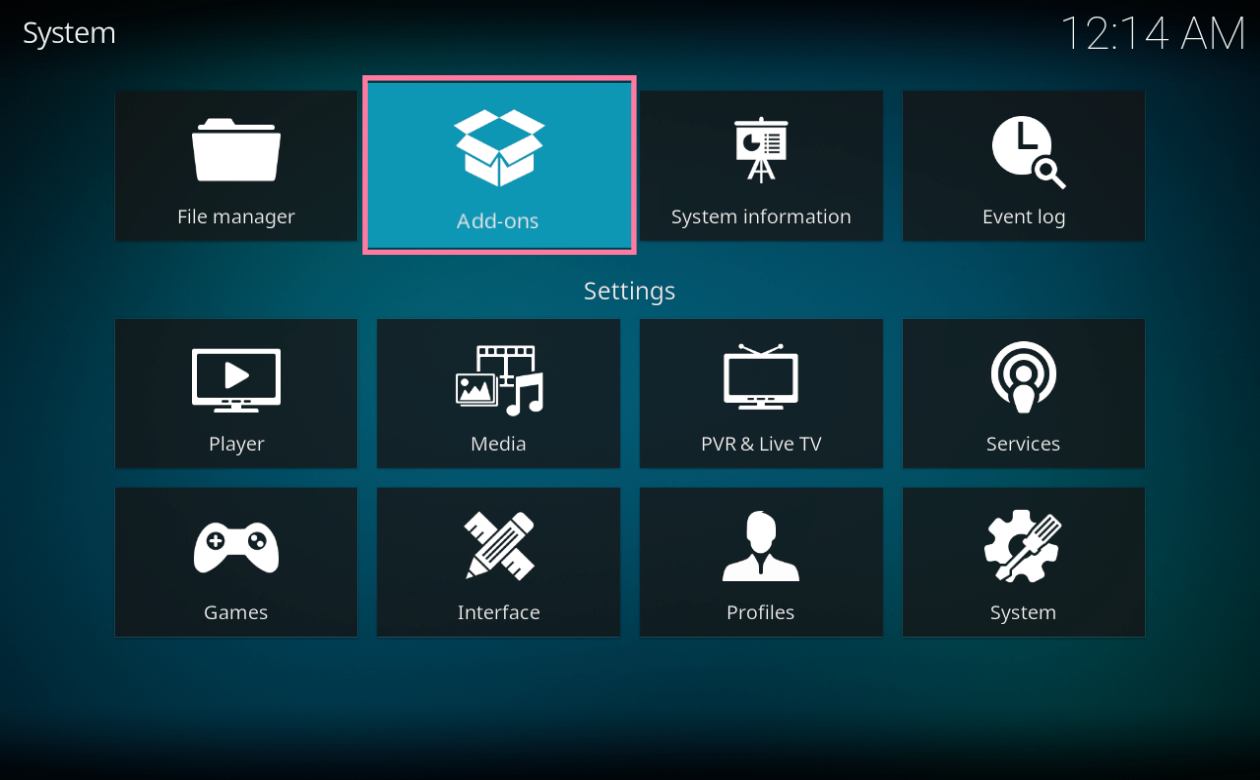
You will need to enable your addons again when you’ve cleared the database. You can do that by going to Add-ons> My Add-ons and enabling them from here.
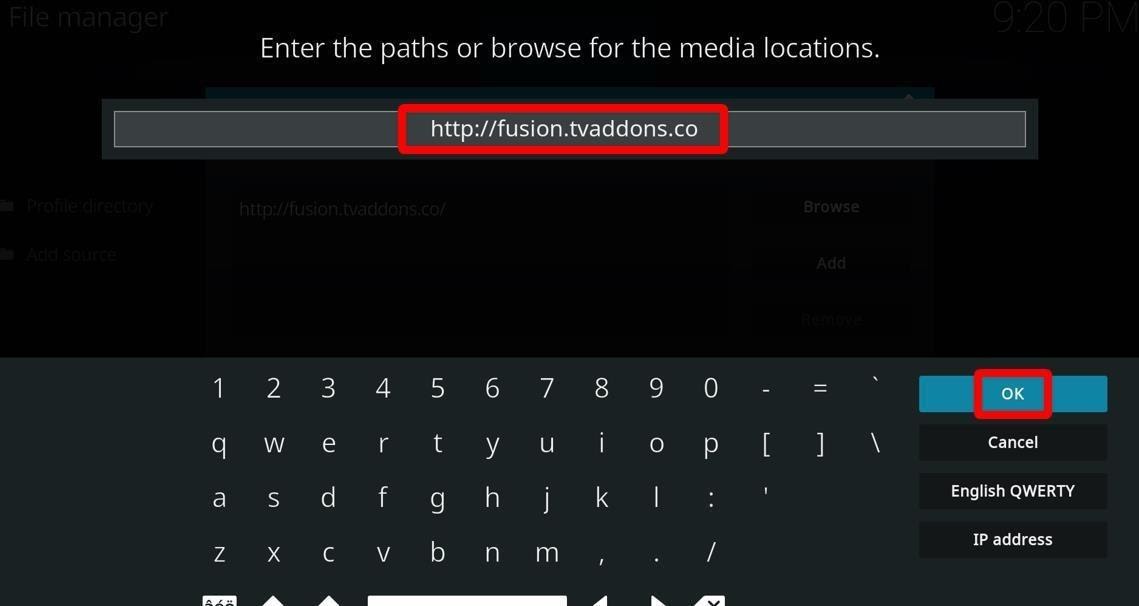
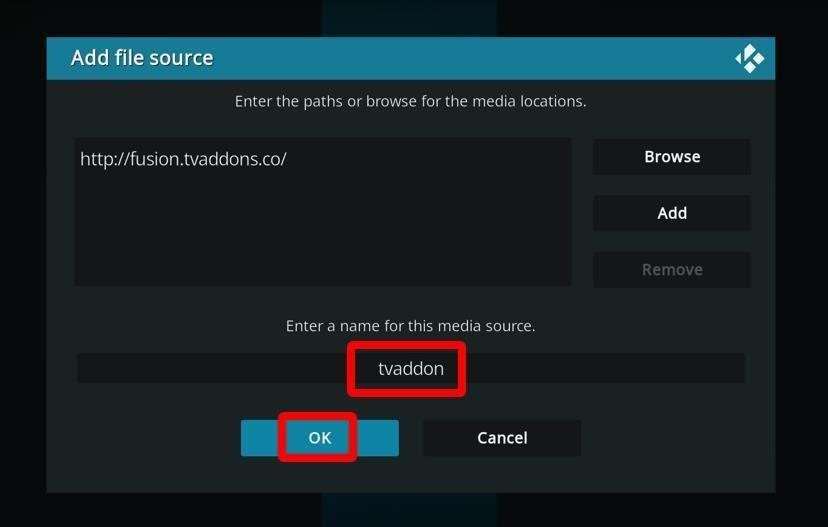
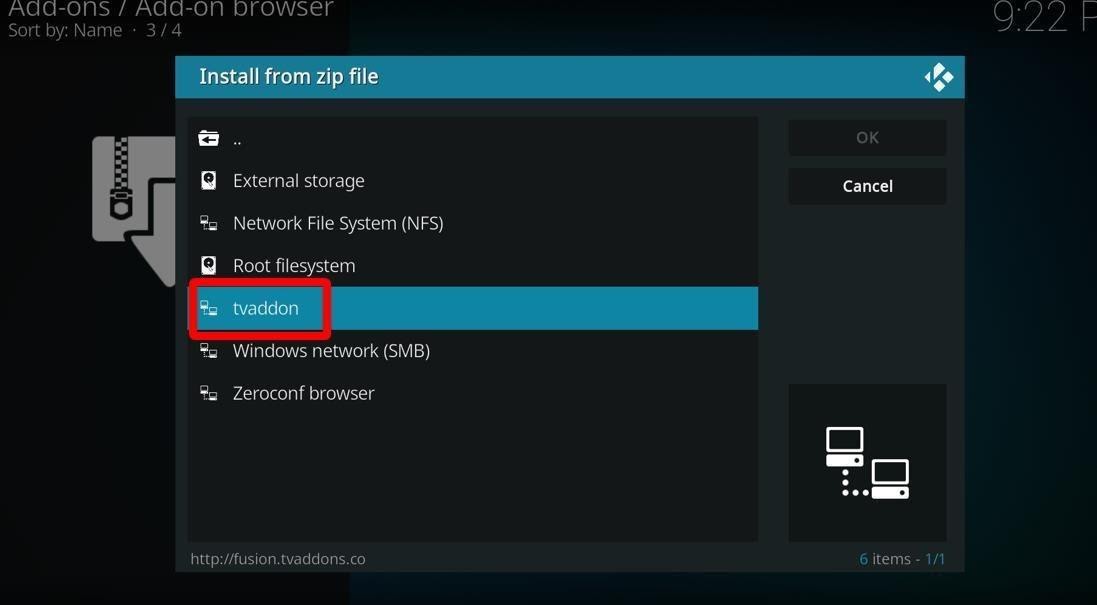
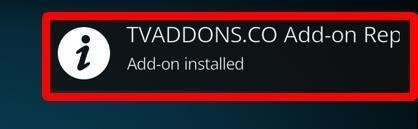
Applied all the abovementioned solutions but the error still appears? It’s time you go for our favorite solution—the one which requires you to install dependencies from the TVAddons repository. Keep in mind that this is the final solution. Go for it only after you’ve exhausted all other avenues.
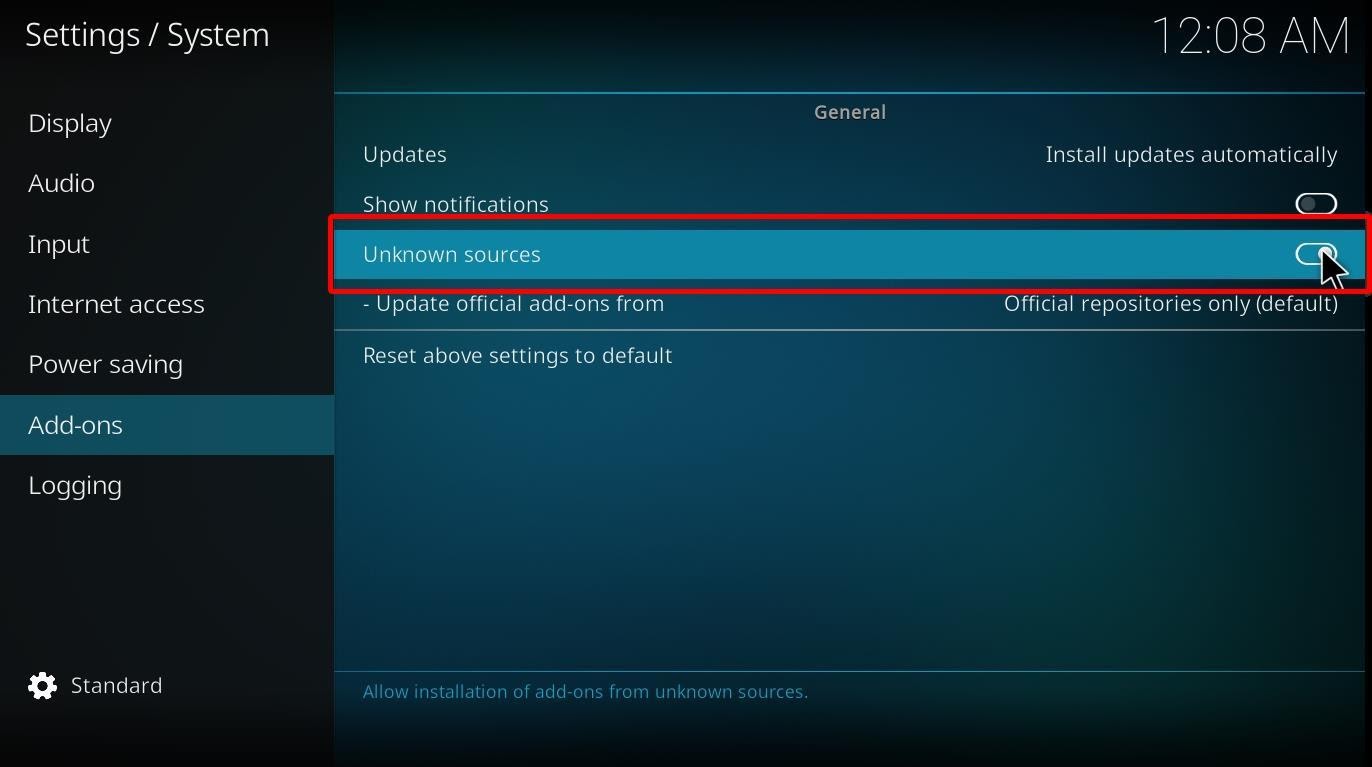
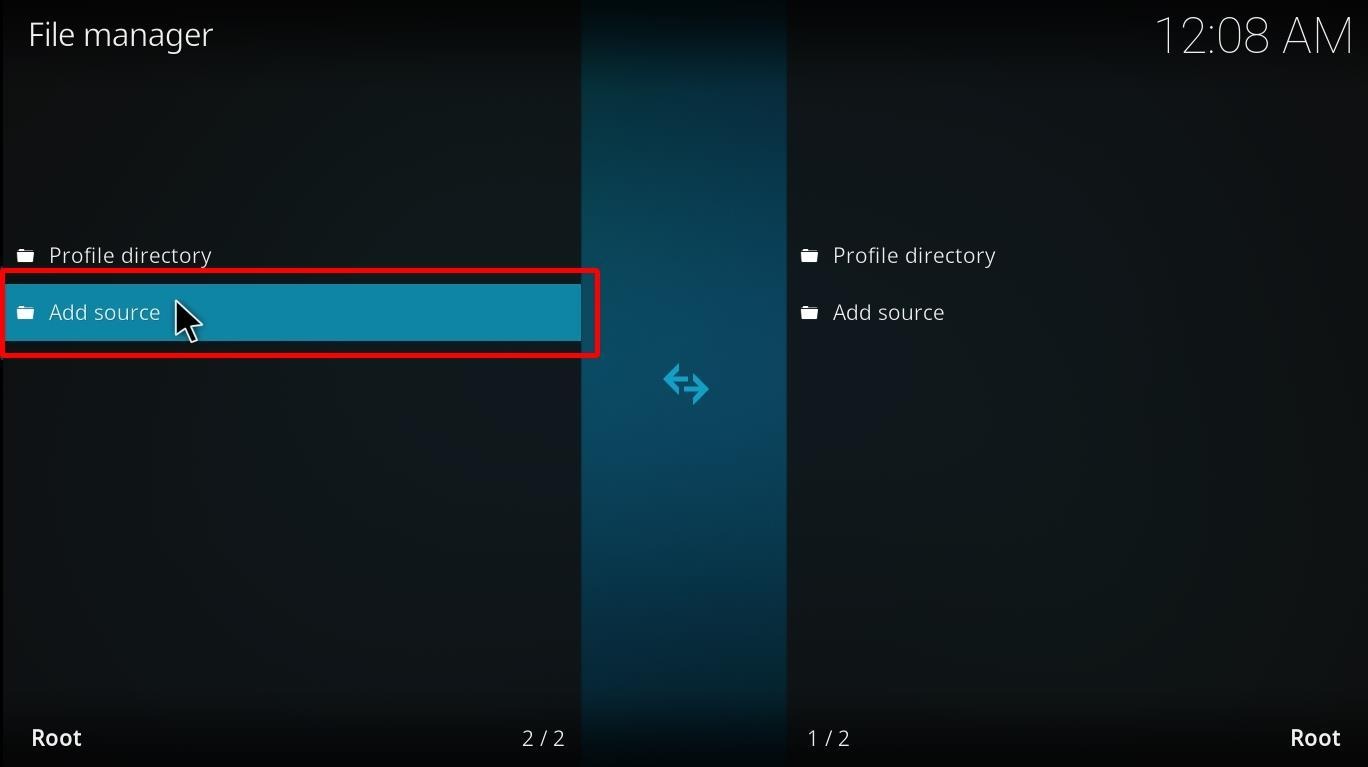
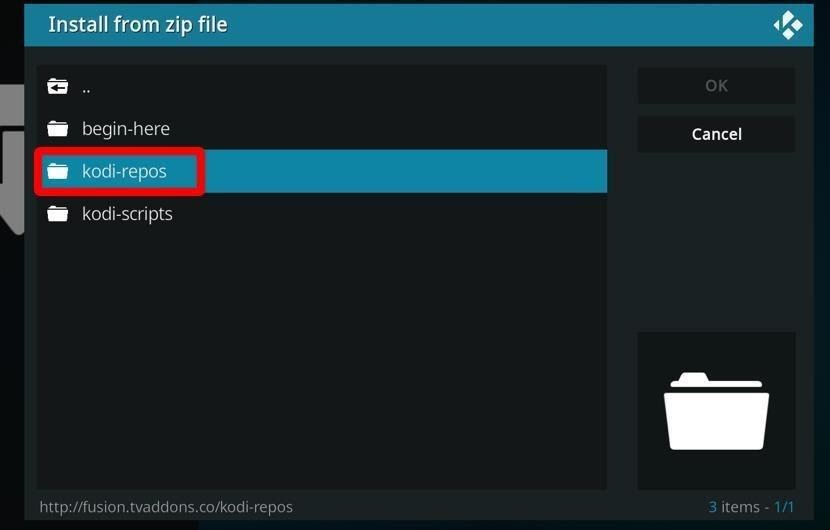
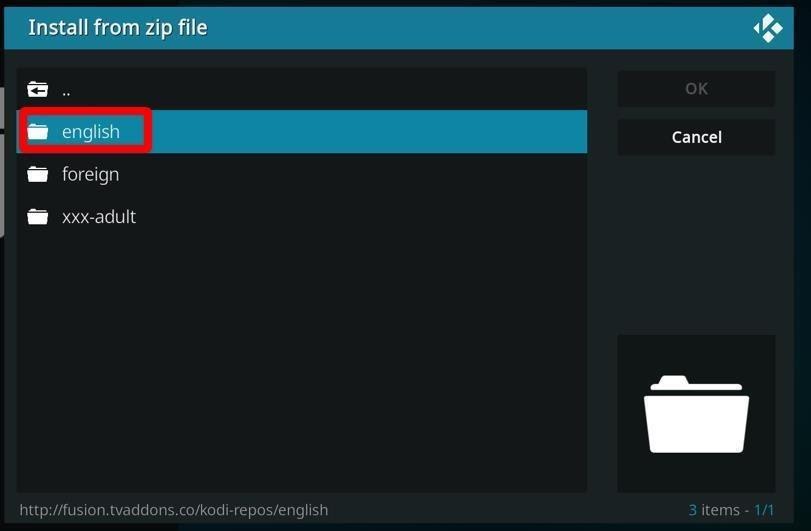
Let’s see how we can manually install dependencies.
Afterward, from the right-side menu, toggle Unknown Sources on.
 A warning prompt will appear; select Yes.
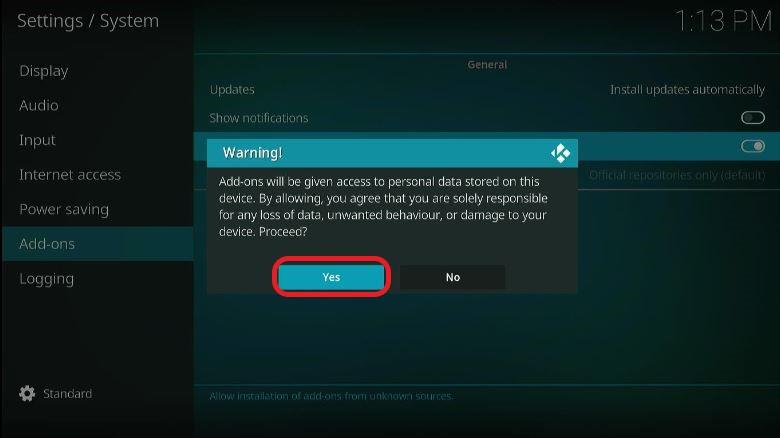

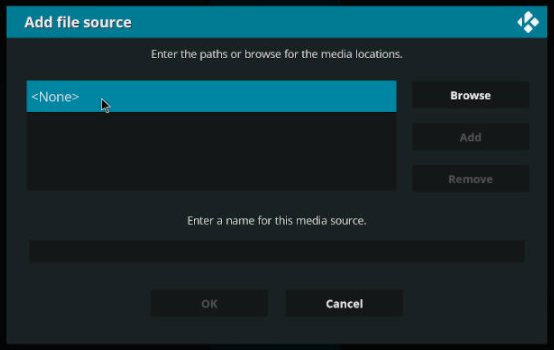
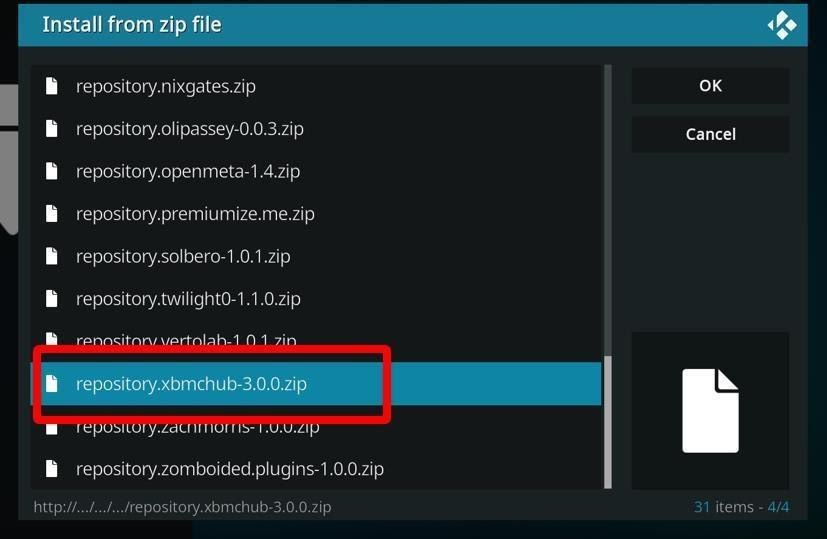
Select OK to continue.
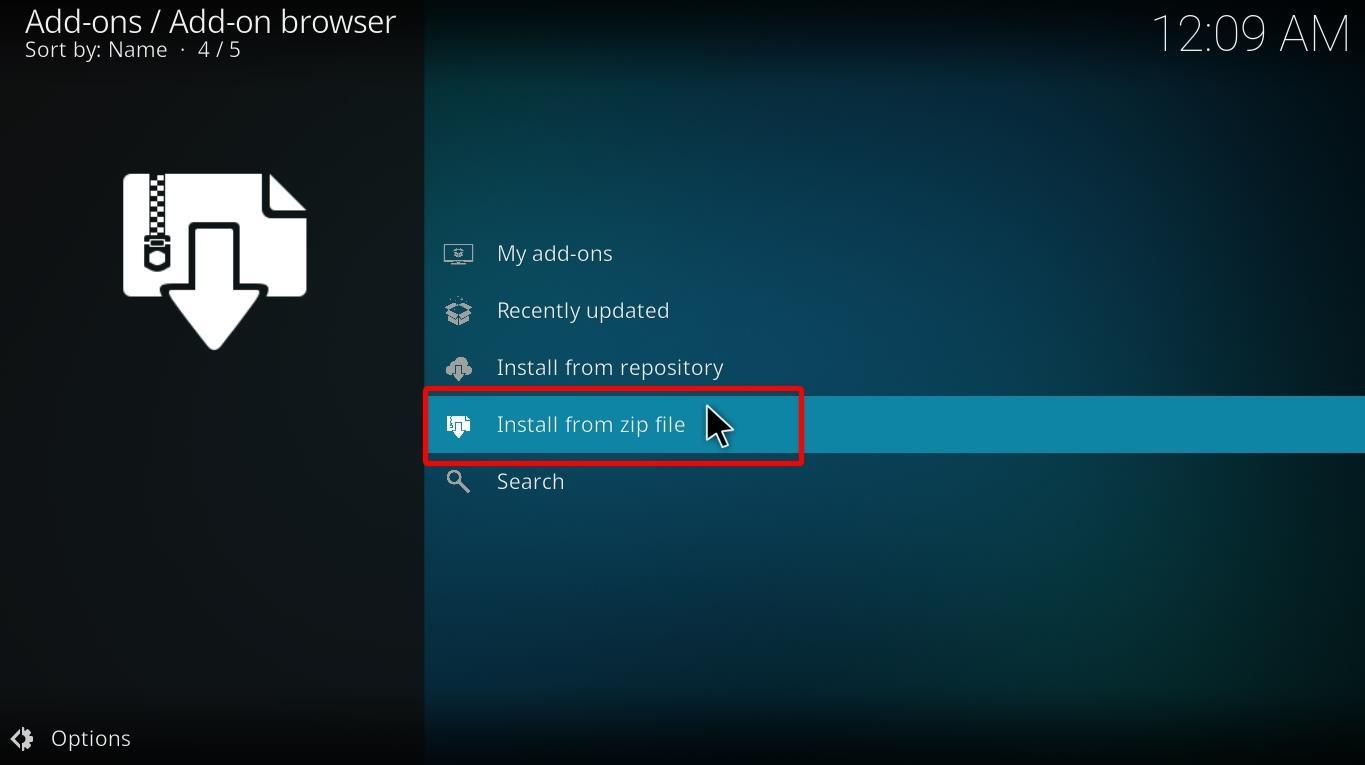
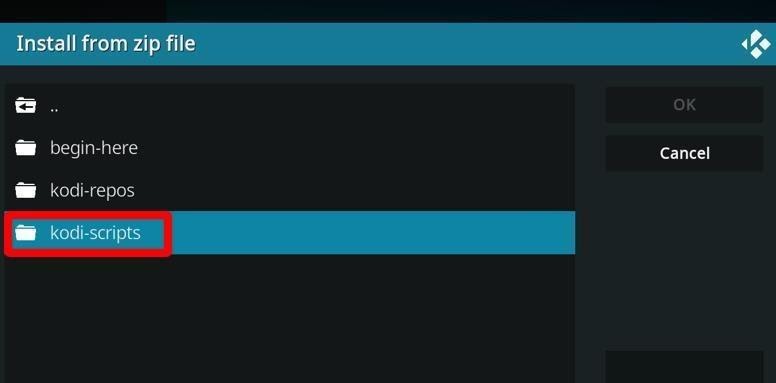
 If you need to install more dependencies, here’s how you can do it:
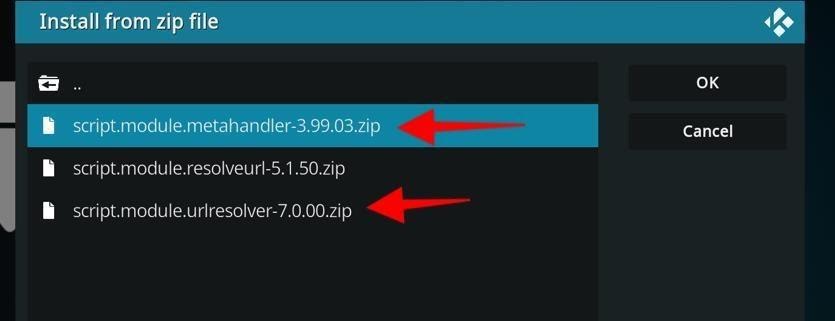
All the necessary dependencies have been installed, and you should be able to install the addon you were trying to install earlier.
Another common error you might get while installing an addon in Kodi is ‘Kodi Dependencies Not Met’. Since this is a standard error, it only made sense to include it in this article.
This error might appear when you try to use a Kodi addon that has been updated for Kodi’s latest version on one of the media player’s older versions. For instance, you’ll get the ‘Kodi Dependencies Not Met’ error if you try to install an addon updated for the Kodi 19 Matrix version on Kodi 18 Leia.
If you’re seeing this error on your Kodi’s home screen, the solution is pretty simple. Just update Kodi to the latest version. This means deleting the Kodi app you’re currently using and reinstalling it. This means losing all your settings, bookmarks, builds, and addons. You’d have to reinstall everything.
Here are other ways you can fix ‘Kodi Dependencies Not Met‘ error:
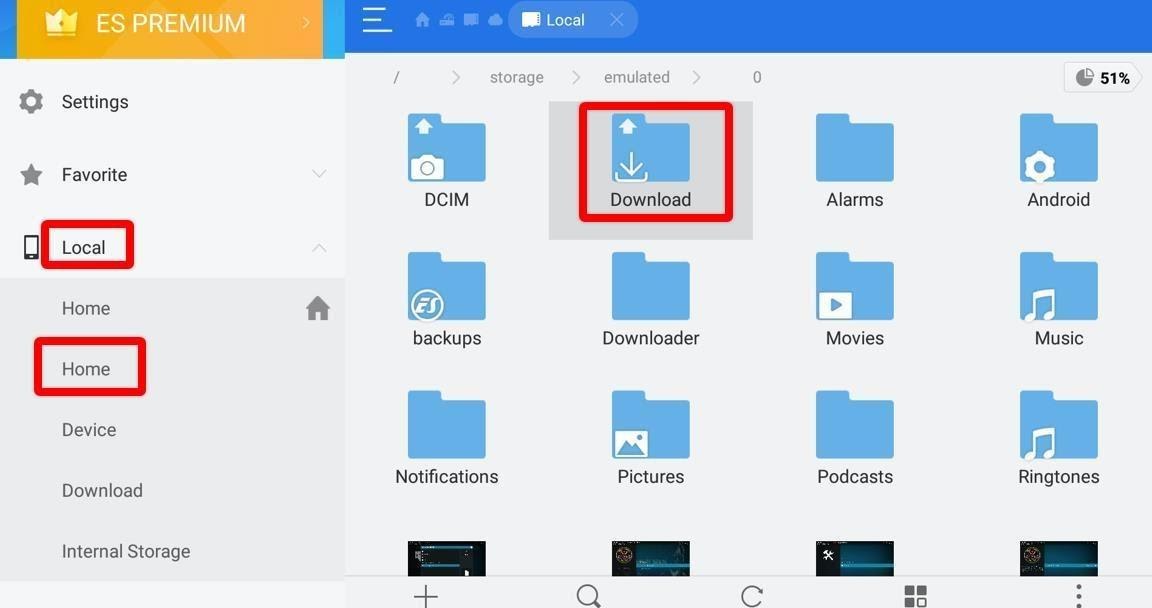
If nothing seems to work and you are still facing errors, we suggest checking the Kodi error log file. This will help you in determining what is causing the error. Once you have determined the root cause of the problem, you’d be able to find a solution.
Kodi’s log file is a simple text file and can be accessed via other devices, such as Windows PC, Mac PC, Firestick devices, or Android devices. Given that it is a simple text file, you will have to manually go through it and search for the error log. Most probably, it will be at the end of the log file.
You can also upload the log file and ask for help online. Alternatively, you can find the error log on your own and then consult Kodi users for a solution. Either way, you’d have to install addons to access Kodi’s log file. As long as you haven’t installed the addons, you won’t be able to open the log file.
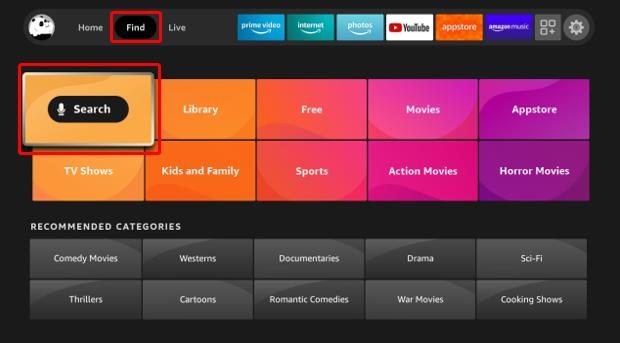
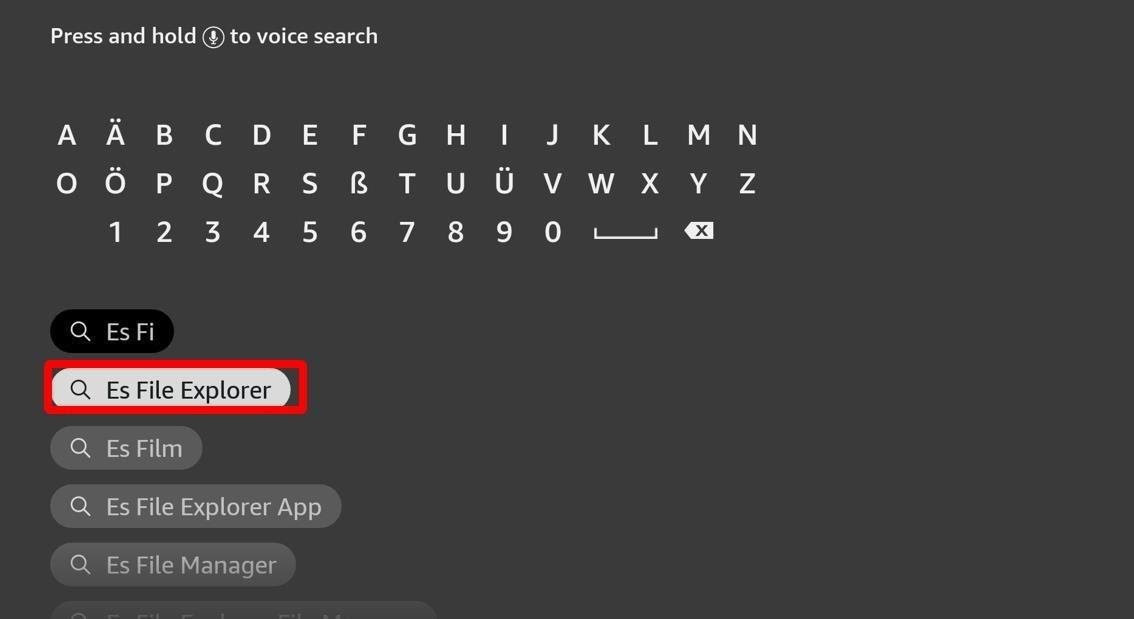
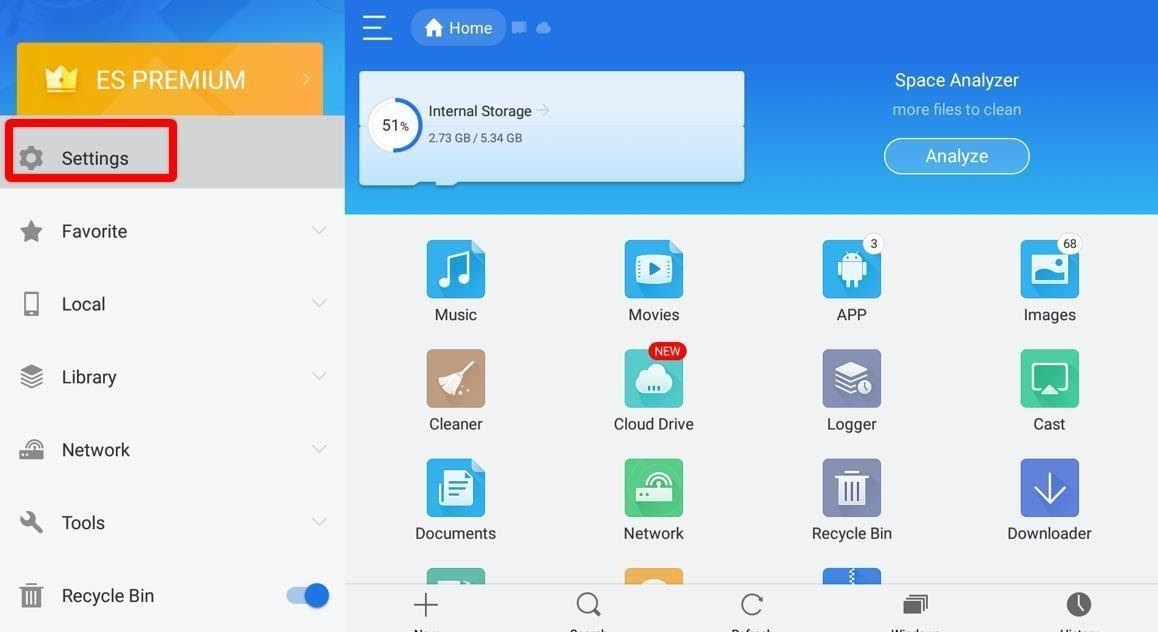
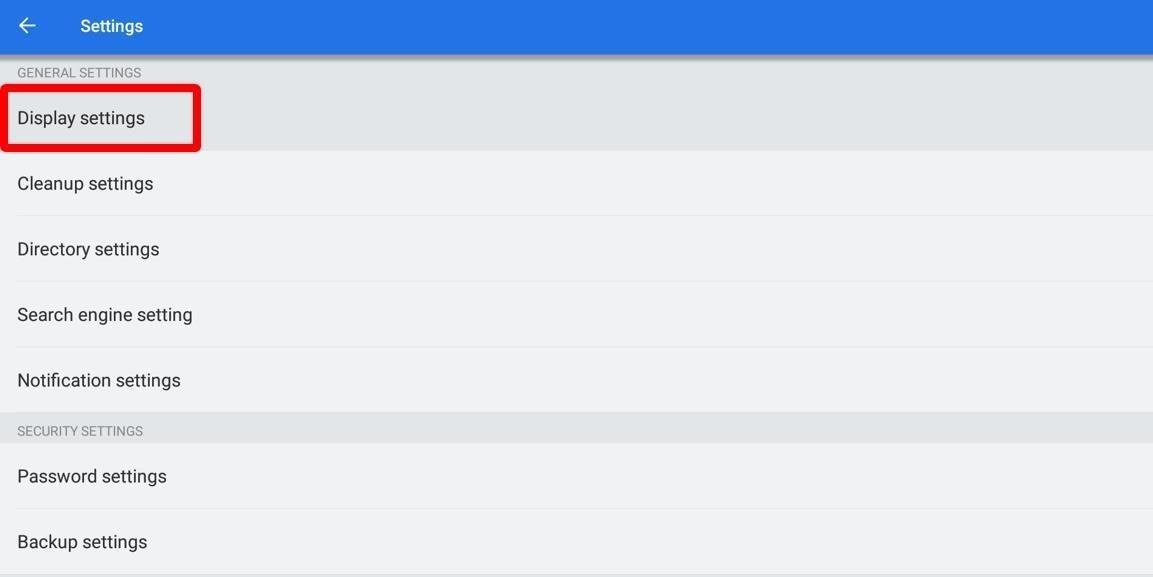
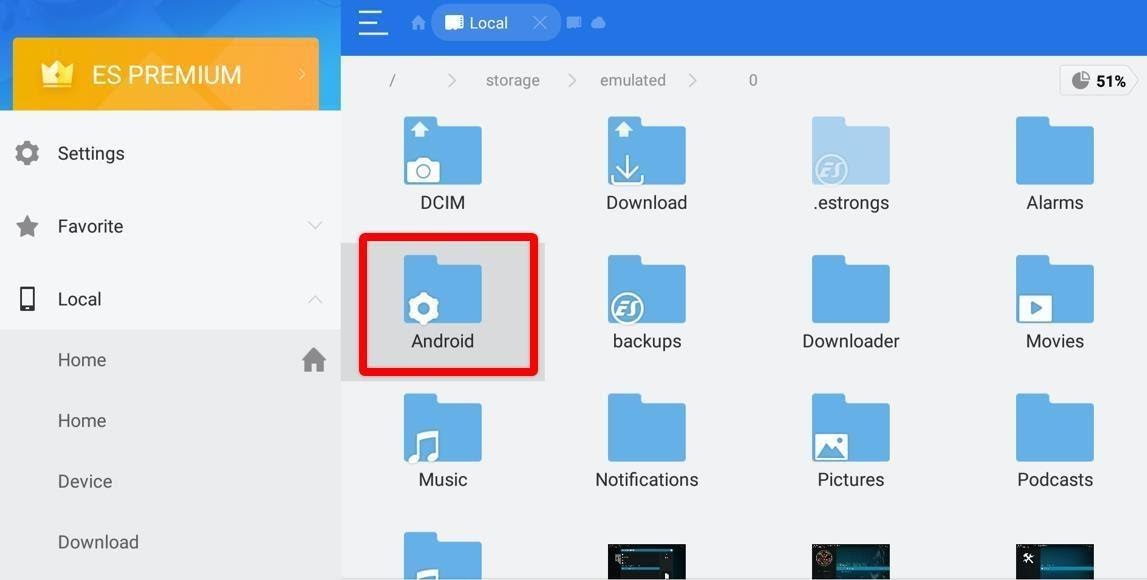
To check Kodi’s log file on Firestick devices, you need to use a File Manager app. Kodi’s log file is saved on the Firestick storage and can be accessed via a file manager app. Follow these steps to download the ES File Manager app to check your Kodi’s log file:
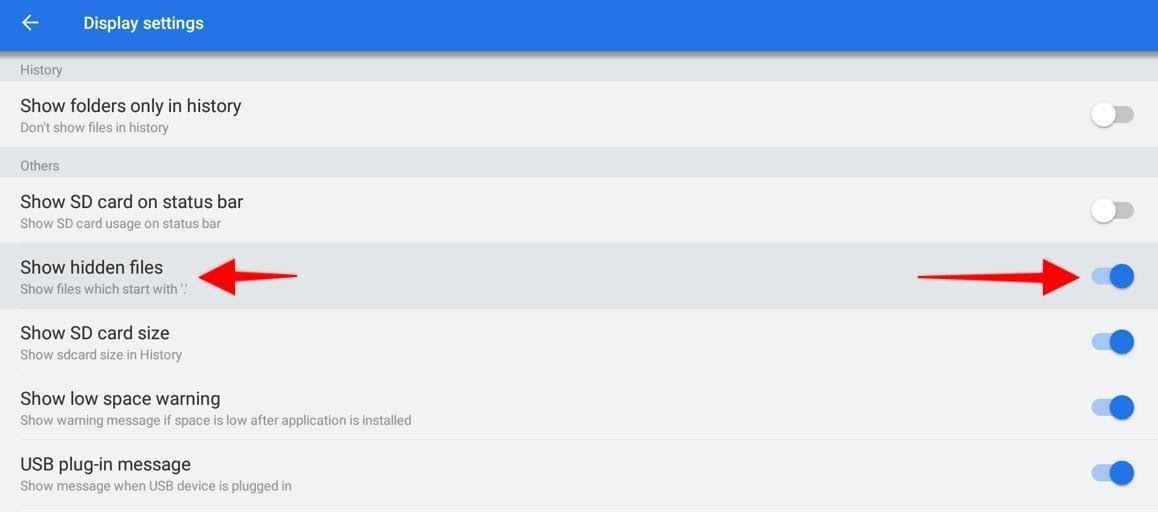
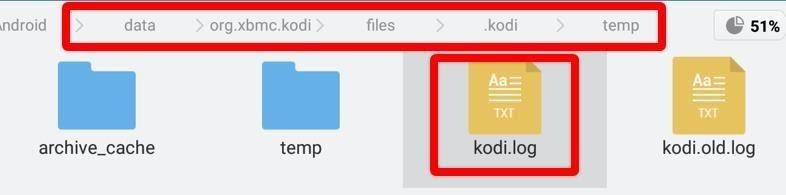
Once you’ve accessed the log file, patiently go through it and try to find the cause of the error. If you can’t seem to pinpoint the error, feel free to get in touch.
Kodi is a unique media player, letting you stream high-quality video content for free. It lets you install as many addons as you want, and these addons will search the web to find HD streaming links for you. You can then use these links to stream your favorite movies and TV shows
However, while Kodi isn’t illegal, you might get in hot waters with your government if you’re found streaming copyrighted content on this media player. Most people think this cannot happen to them, but the reality is often different.
Your internet browsing activity, whatever you search, watch, play or buy, is often monitored by your ISP and the government in the name of cyber security. This means that your ISP and government regularly keep a log of all of your online data without your consent.
Worse, while the government only keeps a watchful eye on your online data, your internet service provider sells your data to advertisement companies. These companies then use your data to show you relevant ads whenever you’re browsing the internet.
That is why we suggest that you use ExpressVPN whenever you stream your favorite content on Kodi. As explained in our ExpressVPN review, this virtual private network has what it takes to shield your data from your ISP as well as your government.
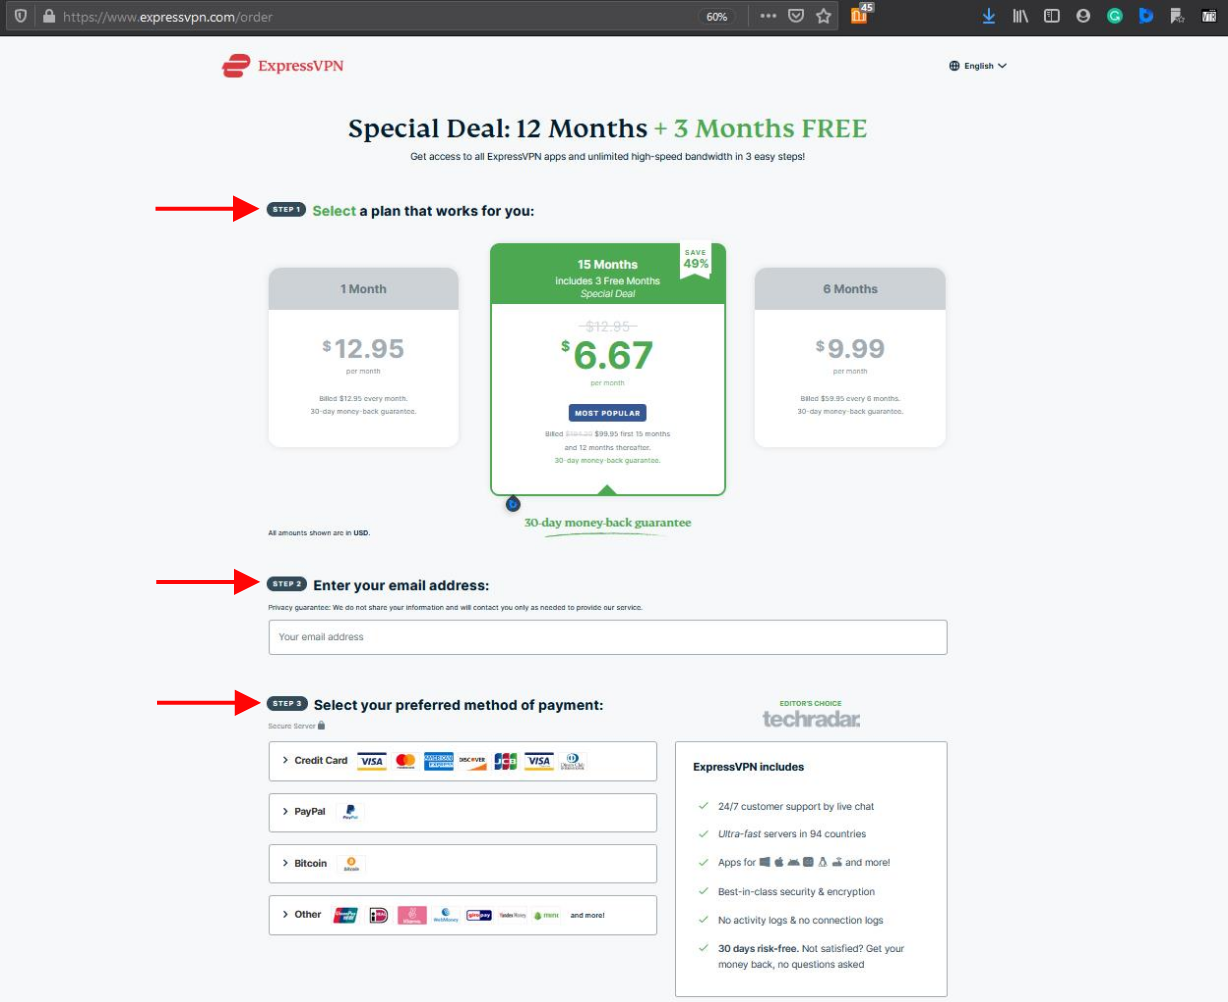
ExpressVPN is a subscription-based VPN, meaning you will have to buy a subscription to use it. However, given that it comes with a 30-day moneyback guarantee, you can easily claim a refund if you’re unsatisfied with its services (the chances of which happening are pretty slim).
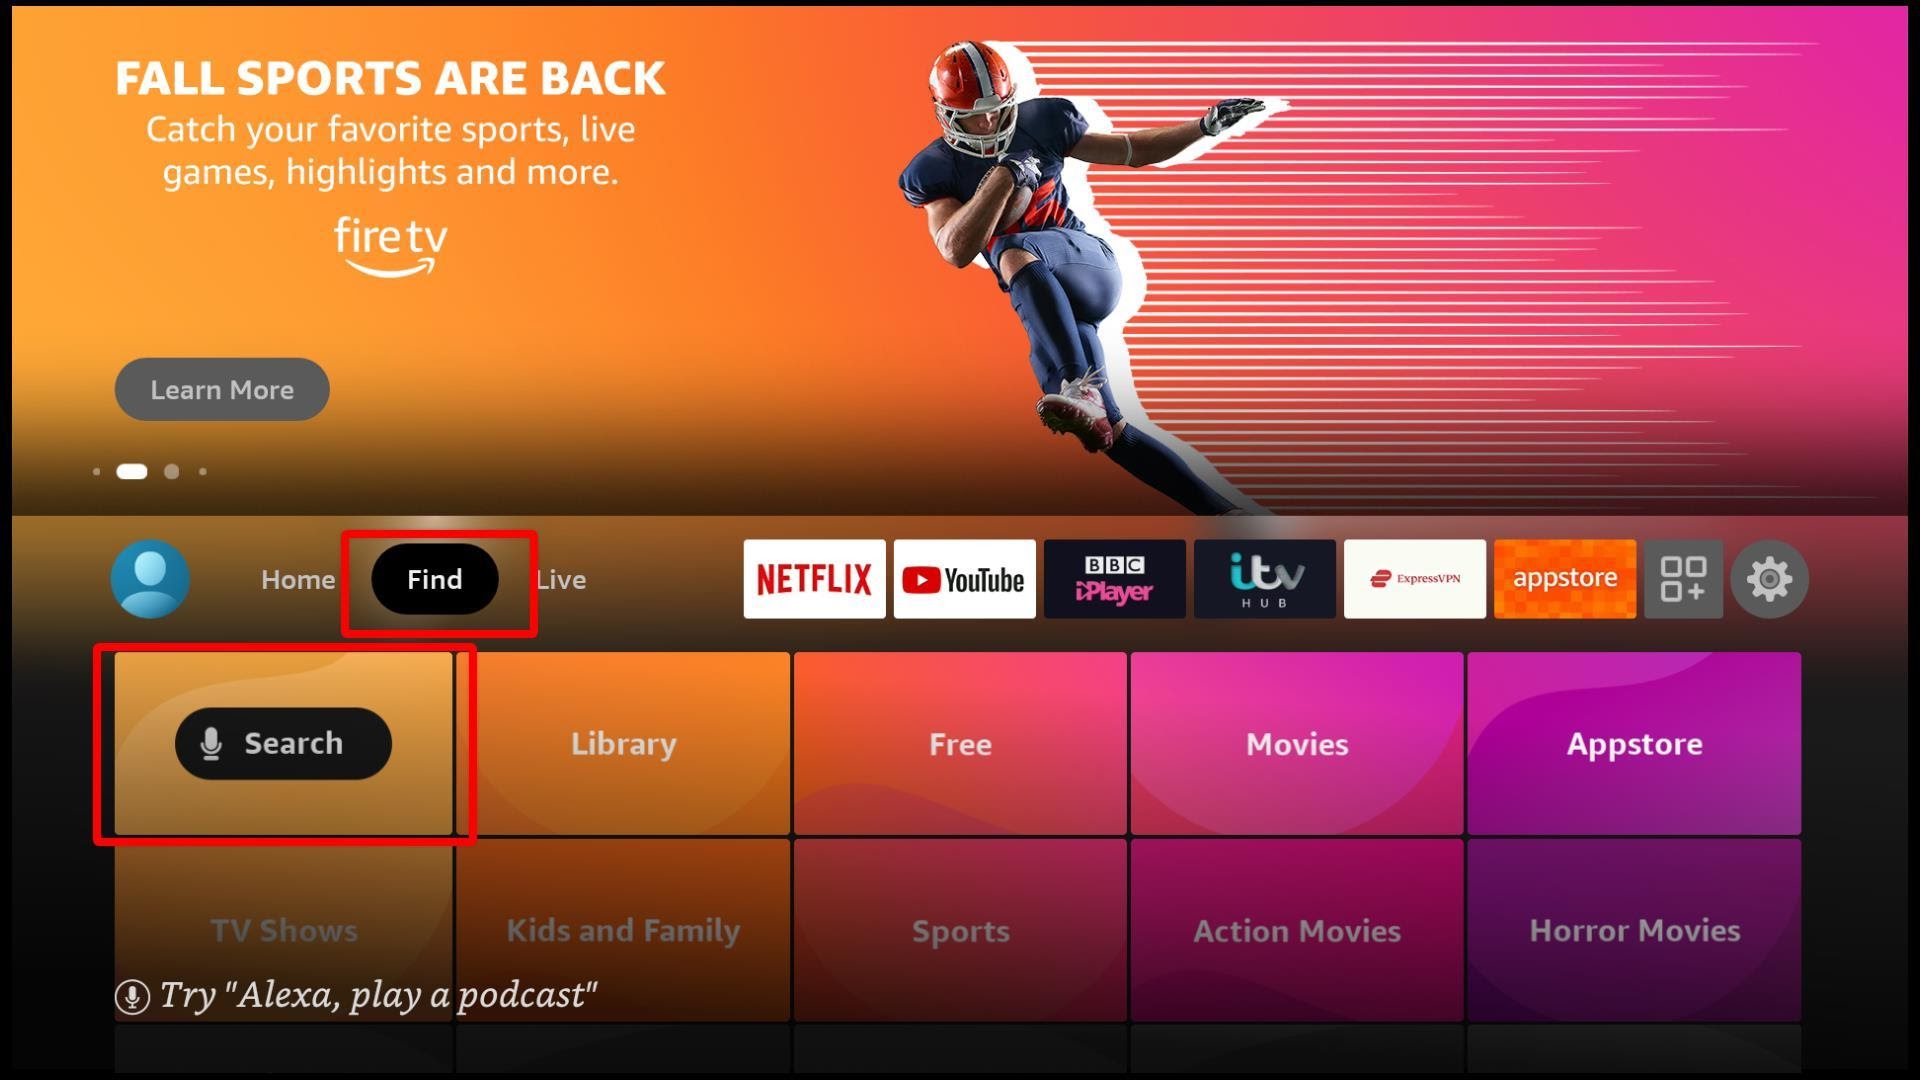
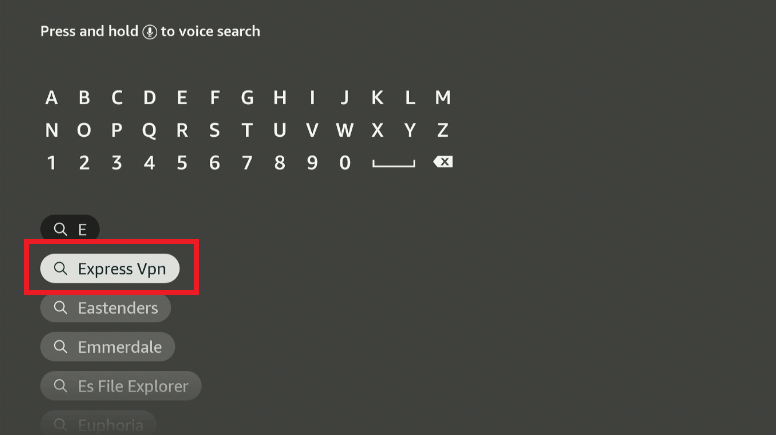
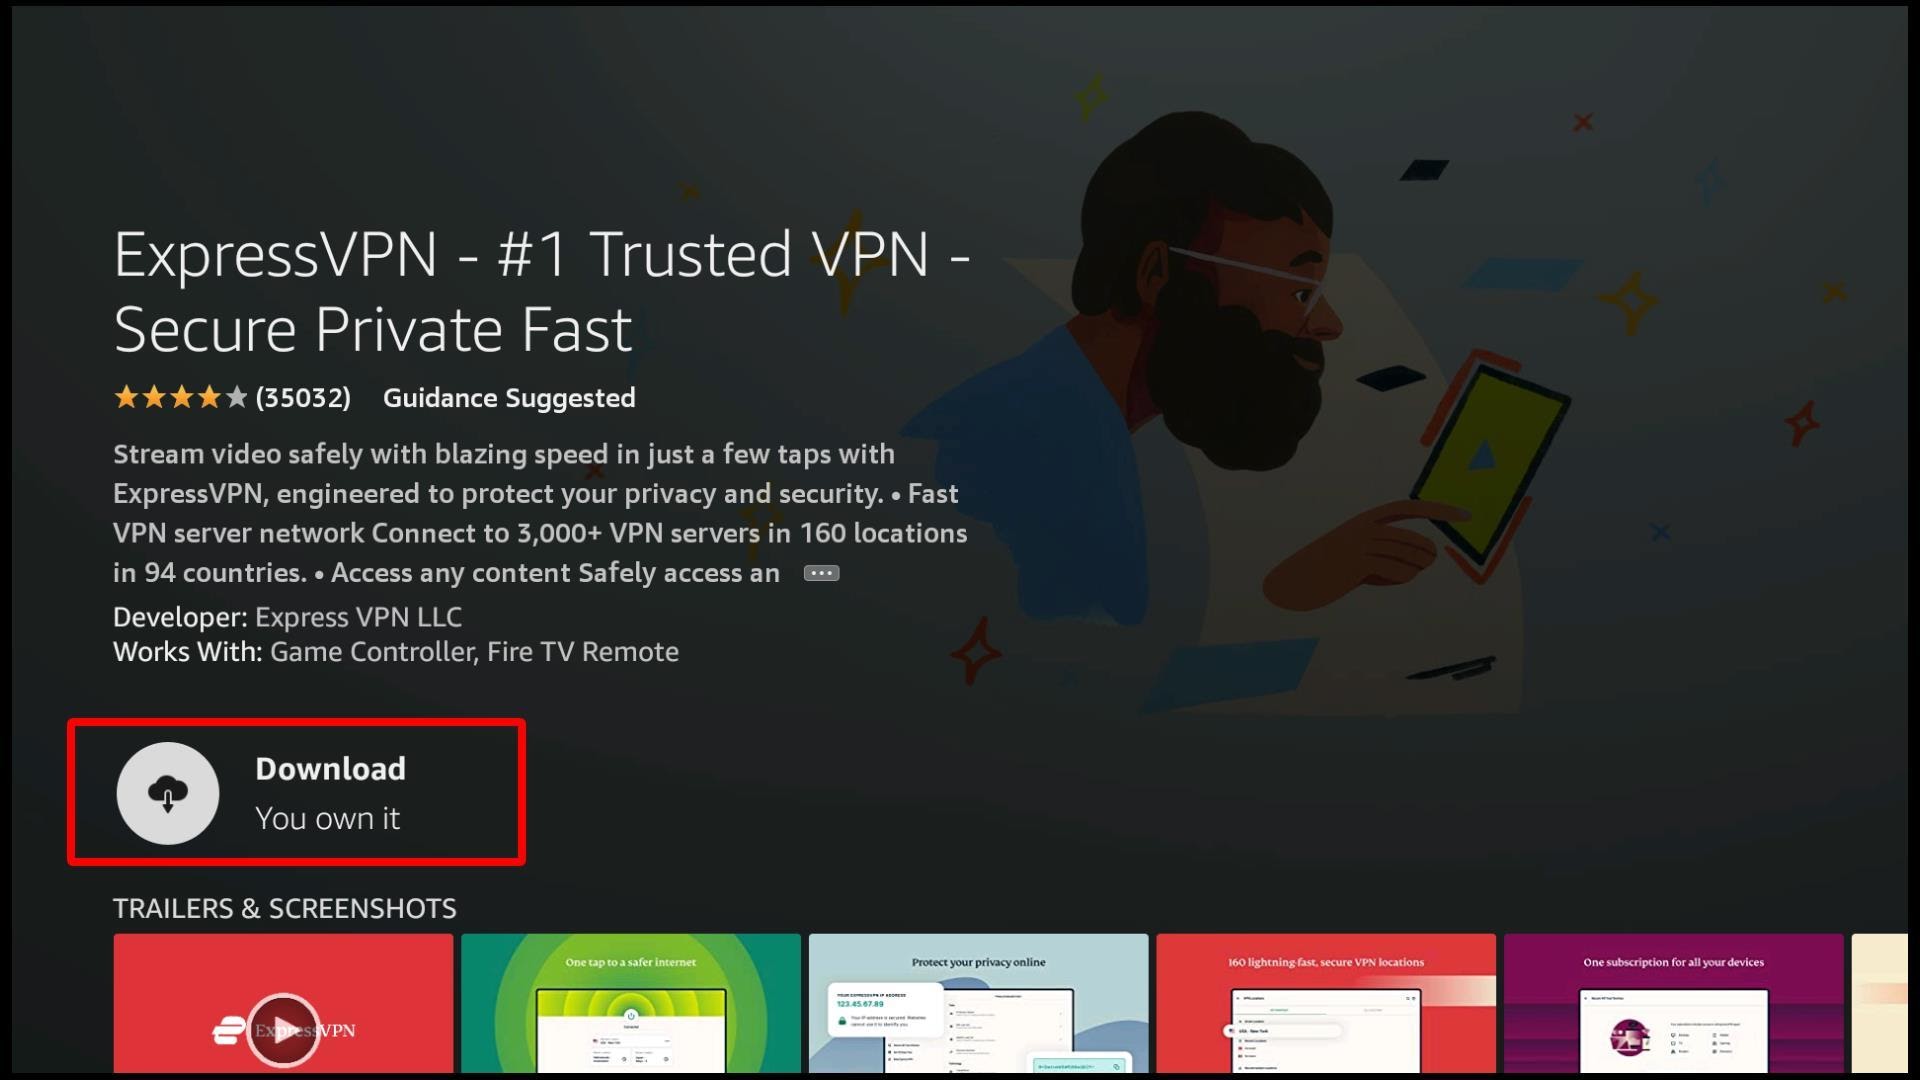
Setting up ExpressVPN on your Amazon Firestick Devices is easy, and all you need to do is buy a subscription using your laptop, tablet, or smartphone. Please note that you can’t make an account or buy a subscription for ExpressVPN on your Firestick device. Make sure to do that on one of your other devices before installing ExpressVPN on your Firestick.
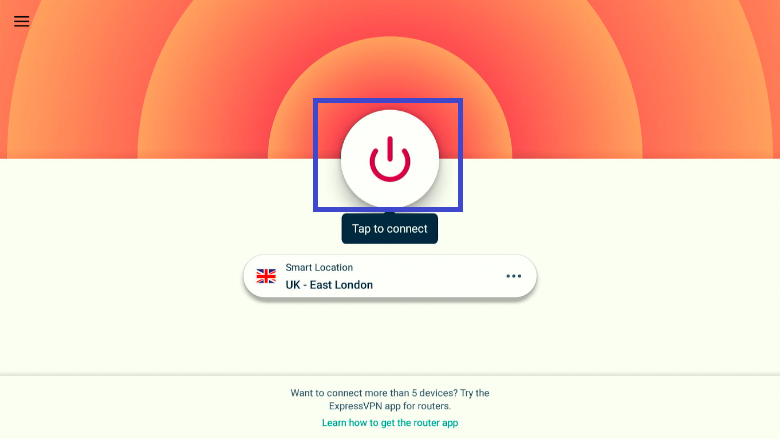
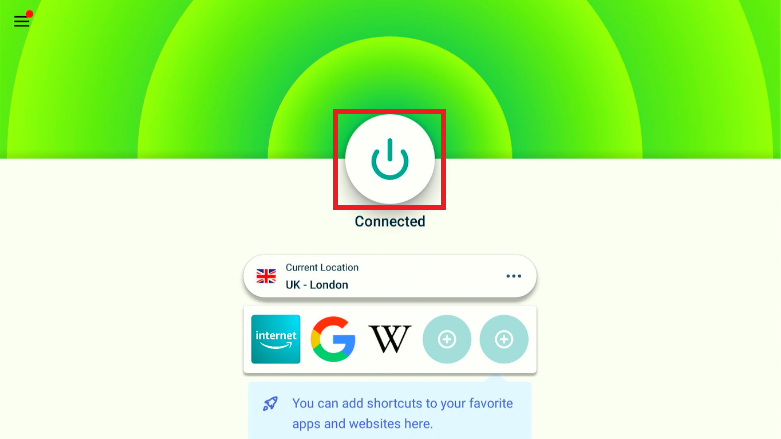
Follow these steps to setup ExpressVPN on your Firestick:
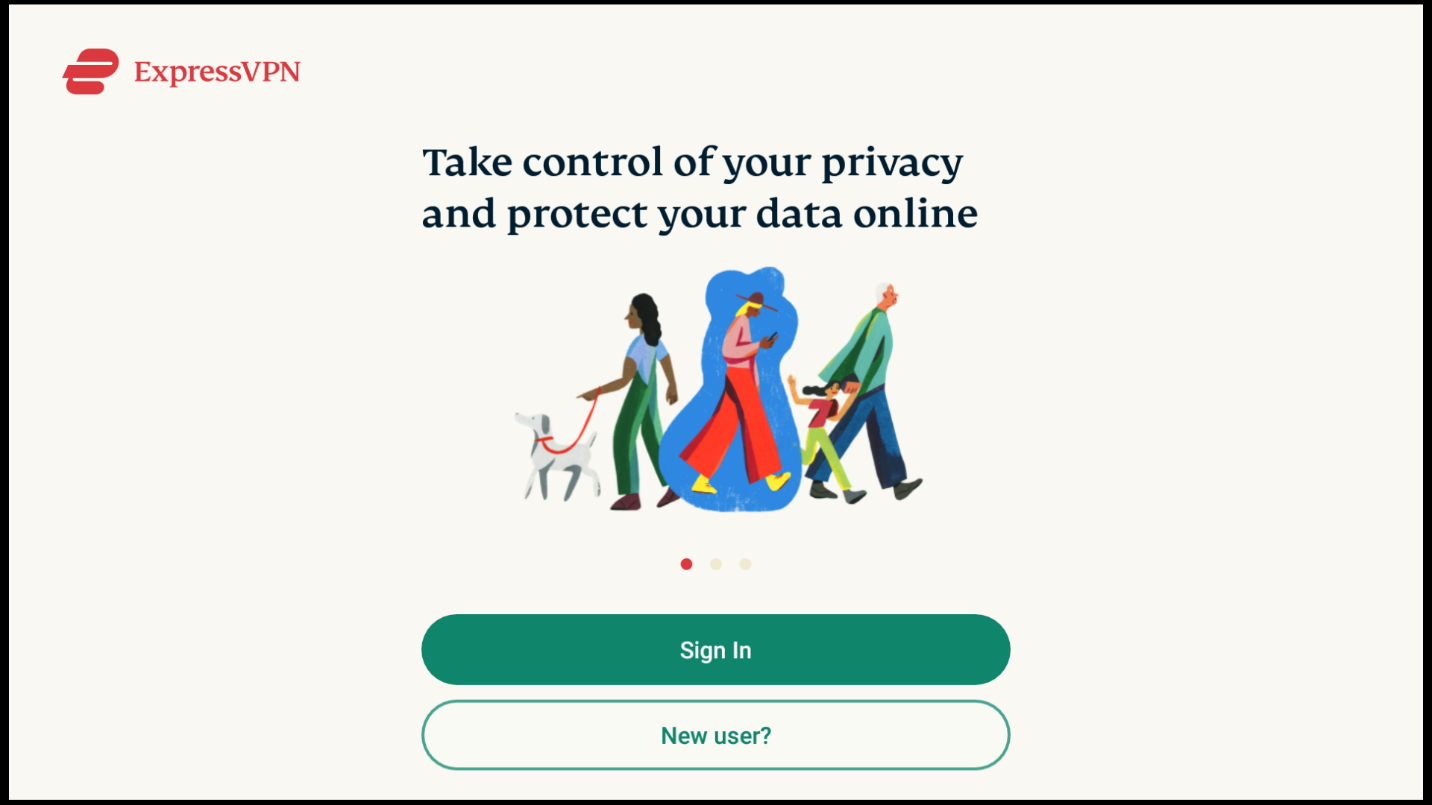
We also recommend you start using the same ExpressVPN account on your personal computer, laptop, and handheld devices such as tablets and smartphones.
Kodi addons rely on dependencies to fetch streaming links for you. Failure to install a dependency can result in various errors, one of which is the “Failed to Install a Dependency’ error. This error is highly frustrating as it prevents you from installing your favorite addon on Kodi. If you’re facing this error, fix it by applying the solutions given above.

You need to load content from reCAPTCHA to submit the form. Please note that doing so will share data with third-party providers.
More InformationYou are currently viewing a placeholder content from Turnstile. To access the actual content, click the button below. Please note that doing so will share data with third-party providers.
More InformationYou are currently viewing a placeholder content from Facebook. To access the actual content, click the button below. Please note that doing so will share data with third-party providers.
More InformationYou need to load content from reCAPTCHA to submit the form. Please note that doing so will share data with third-party providers.
More InformationYou are currently viewing a placeholder content from reCAPTCHA. To access the actual content, click the button below. Please note that doing so will share data with third-party providers.
More InformationYou are currently viewing a placeholder content from Instagram. To access the actual content, click the button below. Please note that doing so will share data with third-party providers.
More InformationYou are currently viewing a placeholder content from X. To access the actual content, click the button below. Please note that doing so will share data with third-party providers.
More Information