Kodi is one of the best media players around. It enables you to play locally stored media, lets you stream online content through its various addons, and is compatible with a wide range of platforms. So, it’s no wonder that it’s the go-to choice of millions of cord-cutters.
However, as great as Kodi is, it suffers from more than a few problems. The most annoying among which is the buffering issue. Nothing frustrates Kodi, and, by extension, Firestick users as much as the repetitive interruptions while watching their favorite TV show or movie.
Fortunately, there are various ways to stop Kodi buffering on Firestick. Some of them will eliminate the Kodi buffering issues altogether. Others are capable of minimizing the frequency of interruptions. In this article, we’ll look at various actionable solutions to stop Kodi buffering on Amazon Fire TV devices.
There are two quick-fire methods to stop Kodi buffering on Firestick:
Heavy apps running in the background could significantly hurt your Firestick’s performance, forcing Kodi to buffer. A quick restart of your Firestick device will force such apps to shut down, potentially resolving the Kodi buffering issue.
Uninstalling and reinstalling Kodi will allow the media player to get rid of all the heavy add-ons weighing down on its performance. The clean-up of such add-ons will enable Kodi to have a fresh start, hopefully keeping the buffering issue at bay for some time.
If slow internet speed is to blame for Kodi buffering, restarting the internet modem might end up fixing the problem. The soft modem reset and subsequent boost in internet speed might end up preventing Kodi from buffering on your Firestick.
If none of these solutions help fix your Kodi buffering issues, follow the methods given below.
Below are the four methods that will help you fix Kodi buffering issues:
Addons that work with one version of Kodi stop working with the newer version. Or, in the best-case scenario, their performance nosedives. Make sure you’re only using those addons that are compatible with the version of Kodi you’re using.
Sometimes Kodi buffers because of the limited number of backlinks available for an addon. The poor health of these links might cause Kodi buffering. That’s why you need to pick up links from multiple sources for your Kodi addons.
Read: The 30 Best Kodi Addons – The ones we actually use
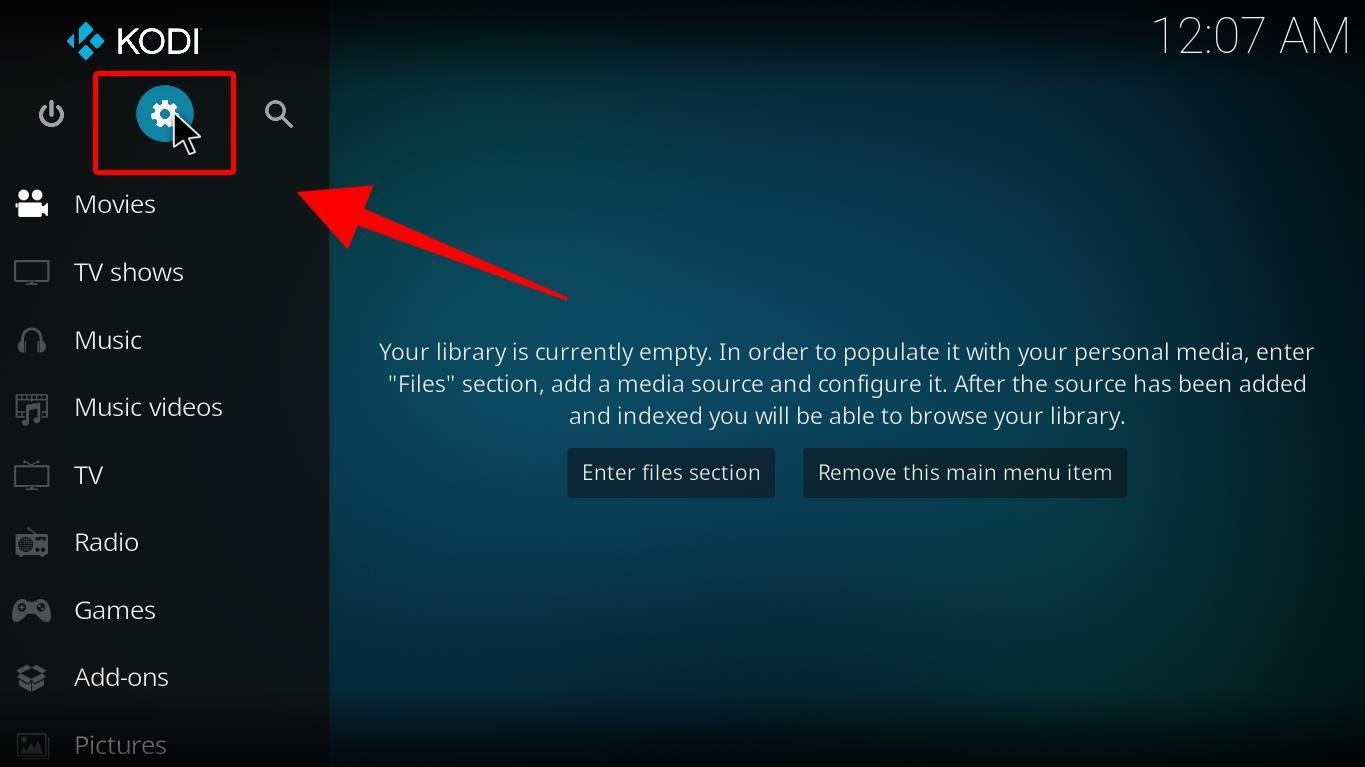
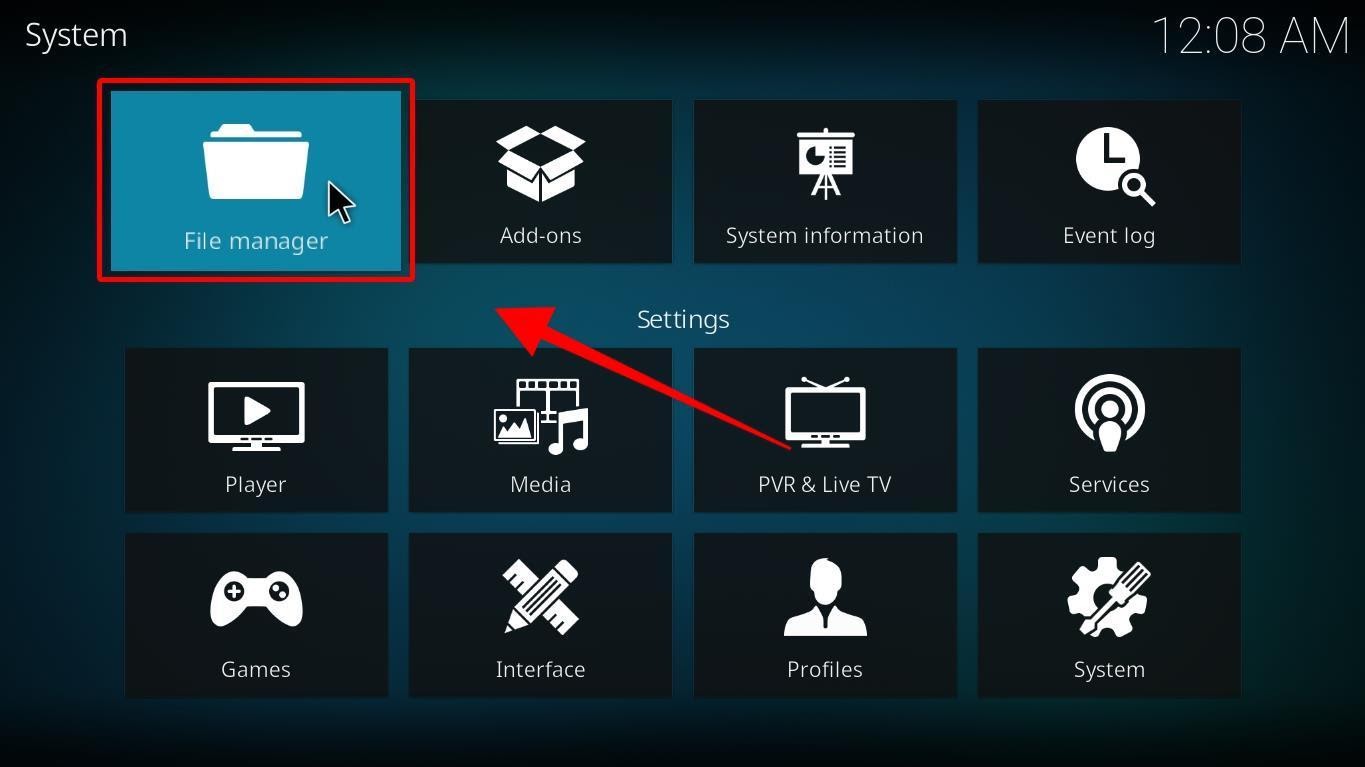
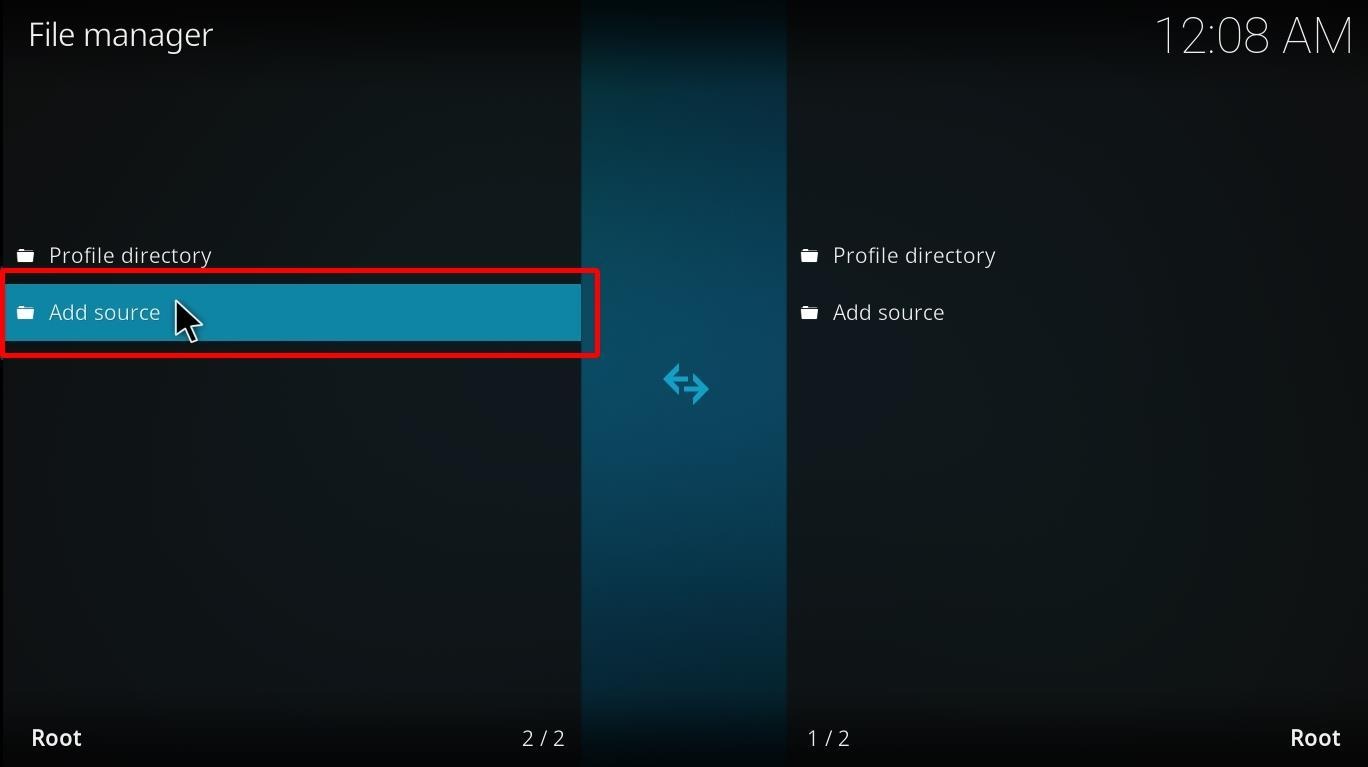
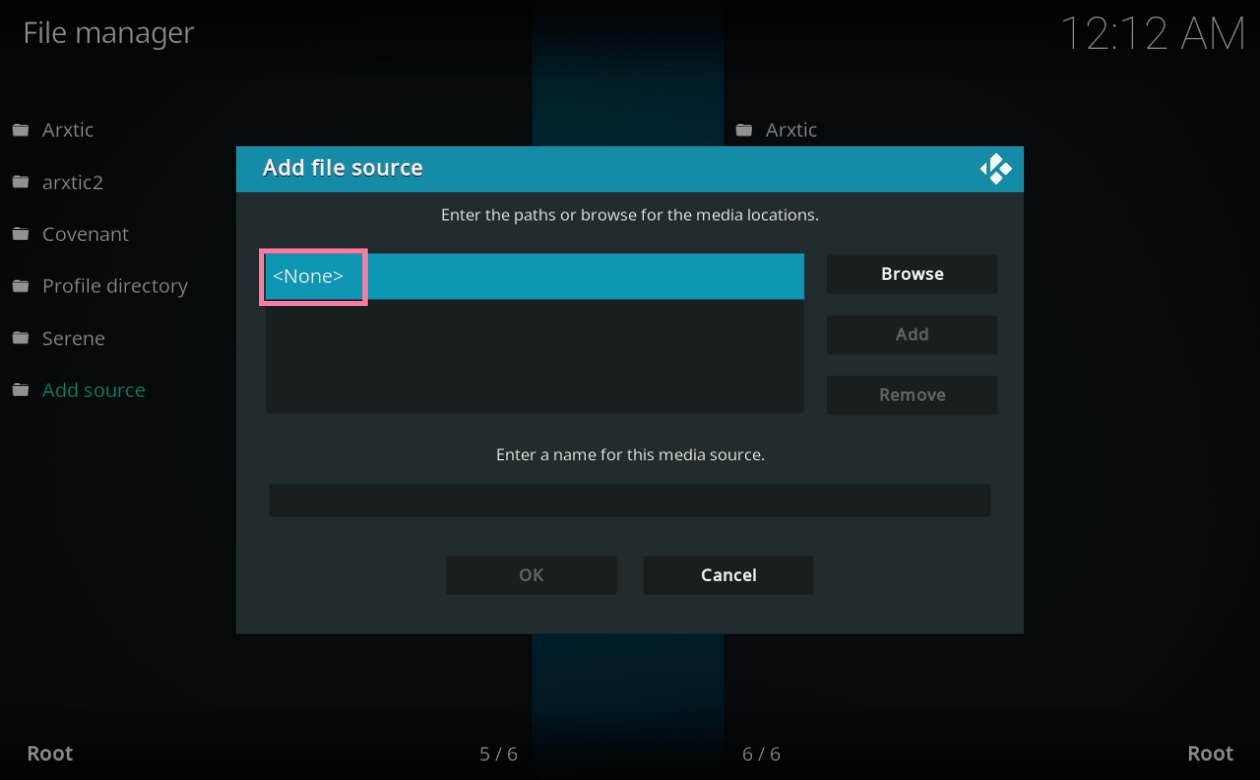
Follow these steps to fix Kodi buffering from the Advanced Settings file:

This method requires you to register, install, and integrate Real-Debrid in your Kodi.
If you’re using VPN, make sure to turn it off while registering and integrating Real-Debrid. You need to have the same IP address while streaming with Real-Debrid as the one you had while registering for a Real-Debrid account. Any difference in the IP address won’t allow you to implement this method.
Here’s how you can fix Kodi buffering with Real-Debrid:
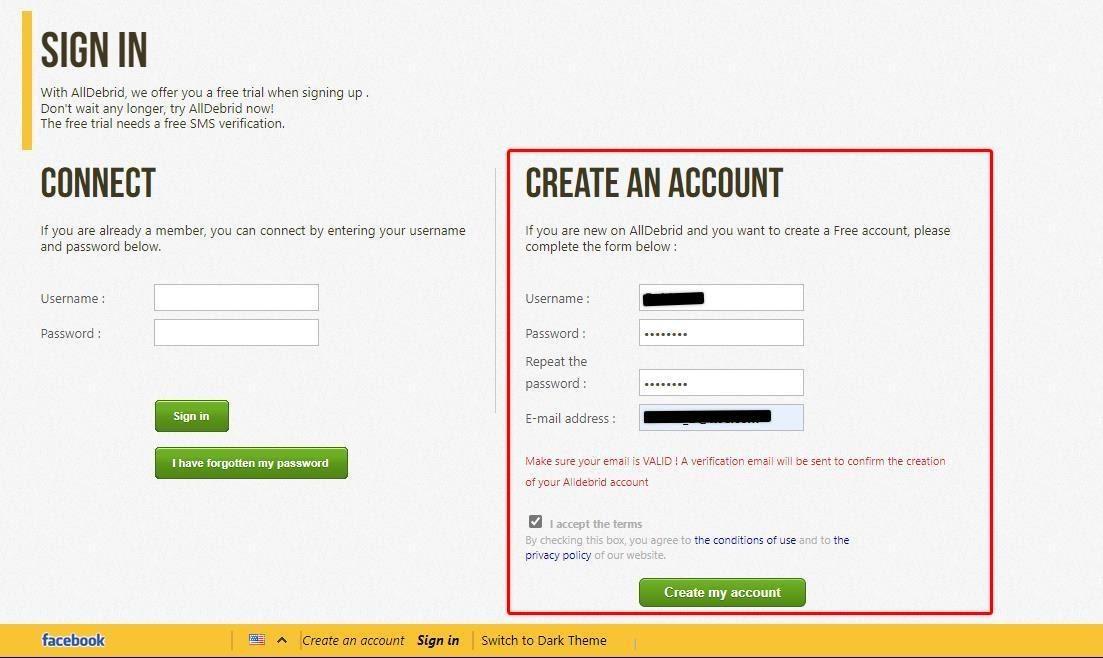
You’ve now completed the registration. An activation email from real-Debrid will be sent to your email account – make sure you follow the steps given in the email to activate your Real-Debrid account.
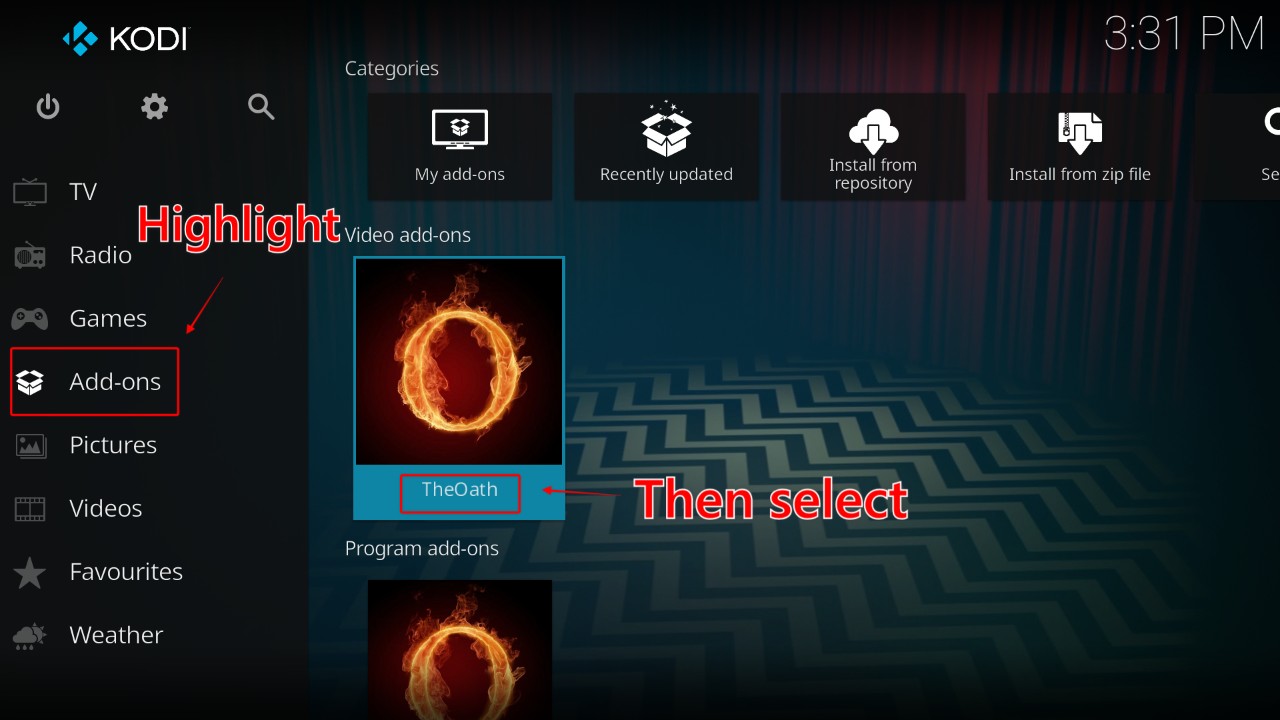
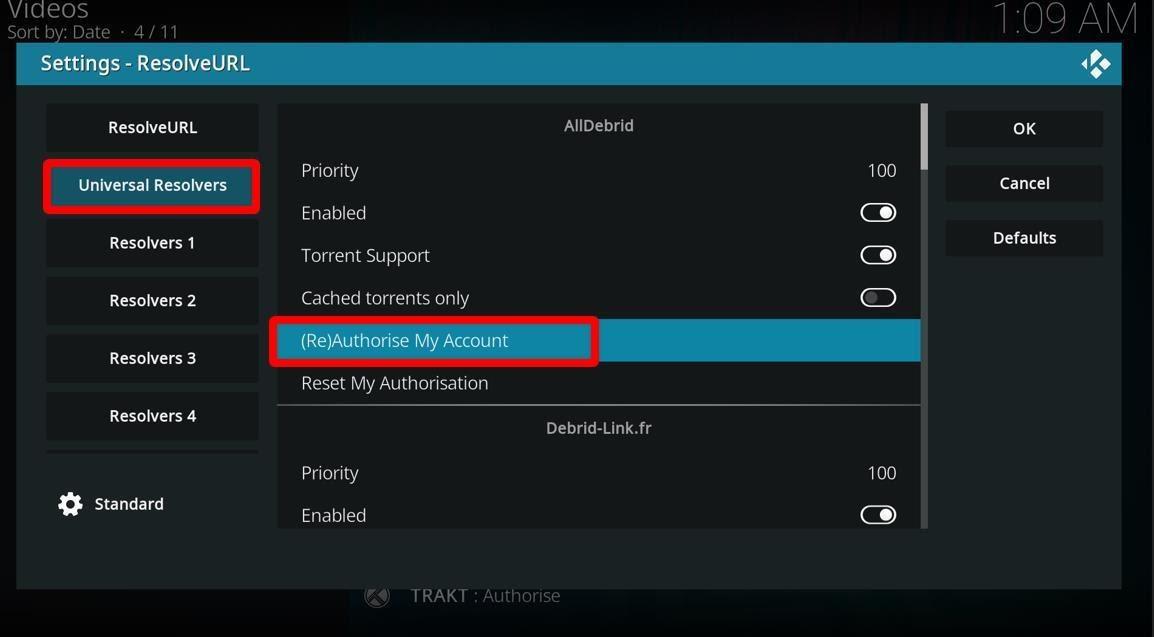
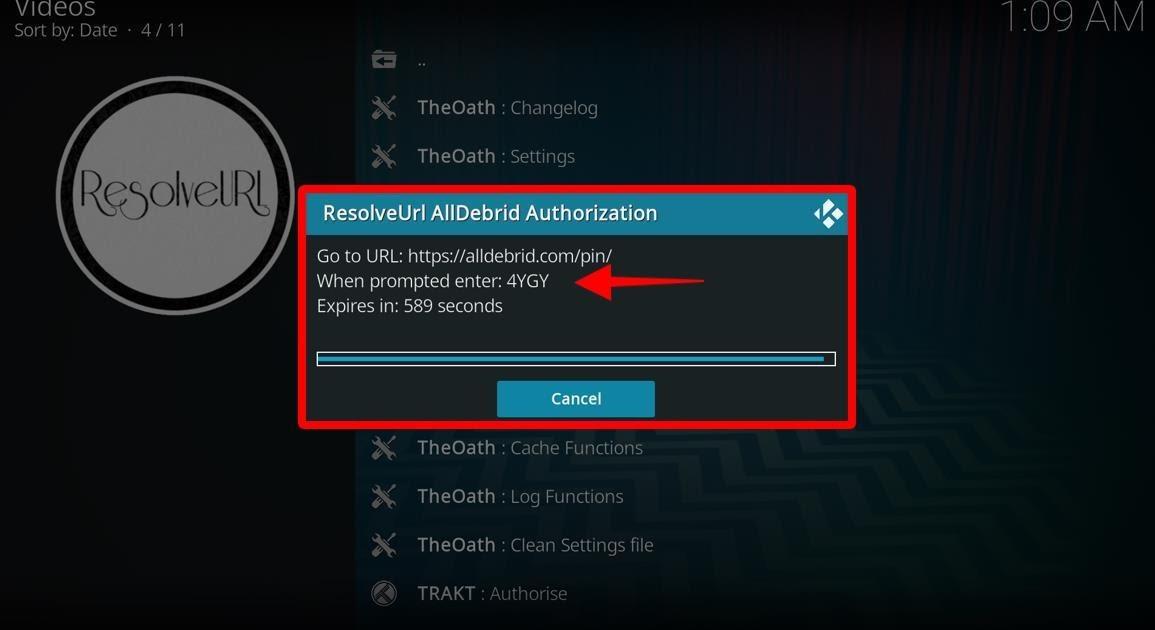
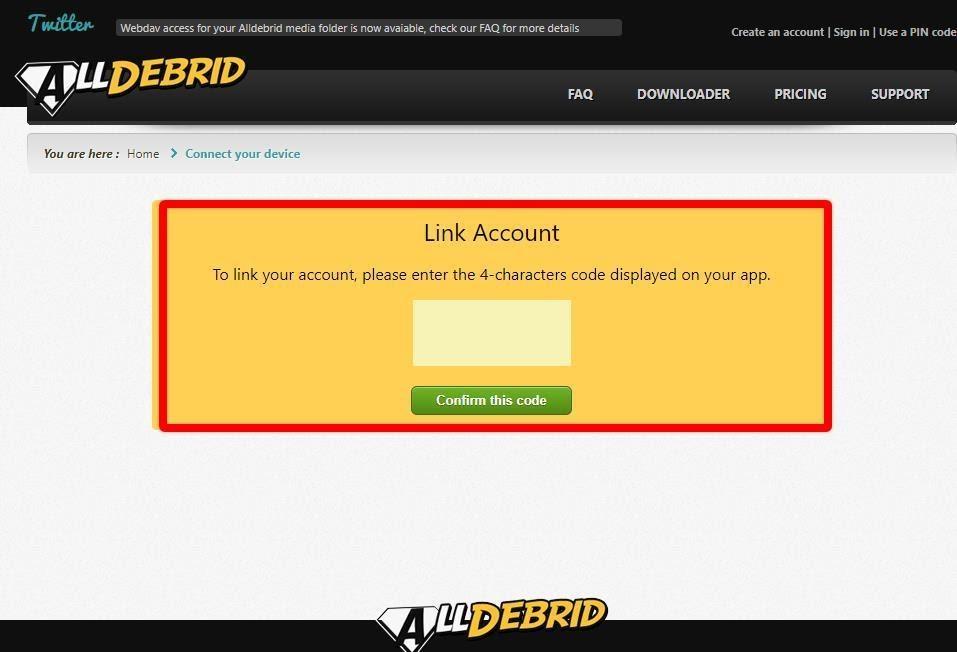
Next thing you need to do is to integrate Real-Debrid within your Kodi. This requires you to use a dependency. We’re using The Oath addon, which uses ResolveURL and URLResolver dependencies to install Real-Debrid on Kodi.
Follow these steps to integrate Real-Debrid within your Kodi:

In some cases, the problem isn’t with Kodi or your Firestick. Instead, it’s your ISP who’s to blame for the Kodi buffering issue. The reason we’re saying that is because we have heard countless stories of ISPs throttling the internet speeds of users whose data consumption exceeds a certain limit, making sure that other users keep getting the same bandwidth.
To be entirely sure, run a speed test on your Firestick. If the speed test’s results show that your internet speed is below average, know that your ISP has throttled your internet speed. The only way out of this for you is to use a fast VPN like ExpressVPN.
When you use ExpressVPN, your online activity is shielded from the eyes of your ISP. This prevents them from keeping tabs on your data consumption. This, in turn, makes sure that regardless of how much data you consume, your internet speed stays the same, keeping the Kodi buffering issue at bay.
Follow these steps to set up ExpressVPN on your Firestick:
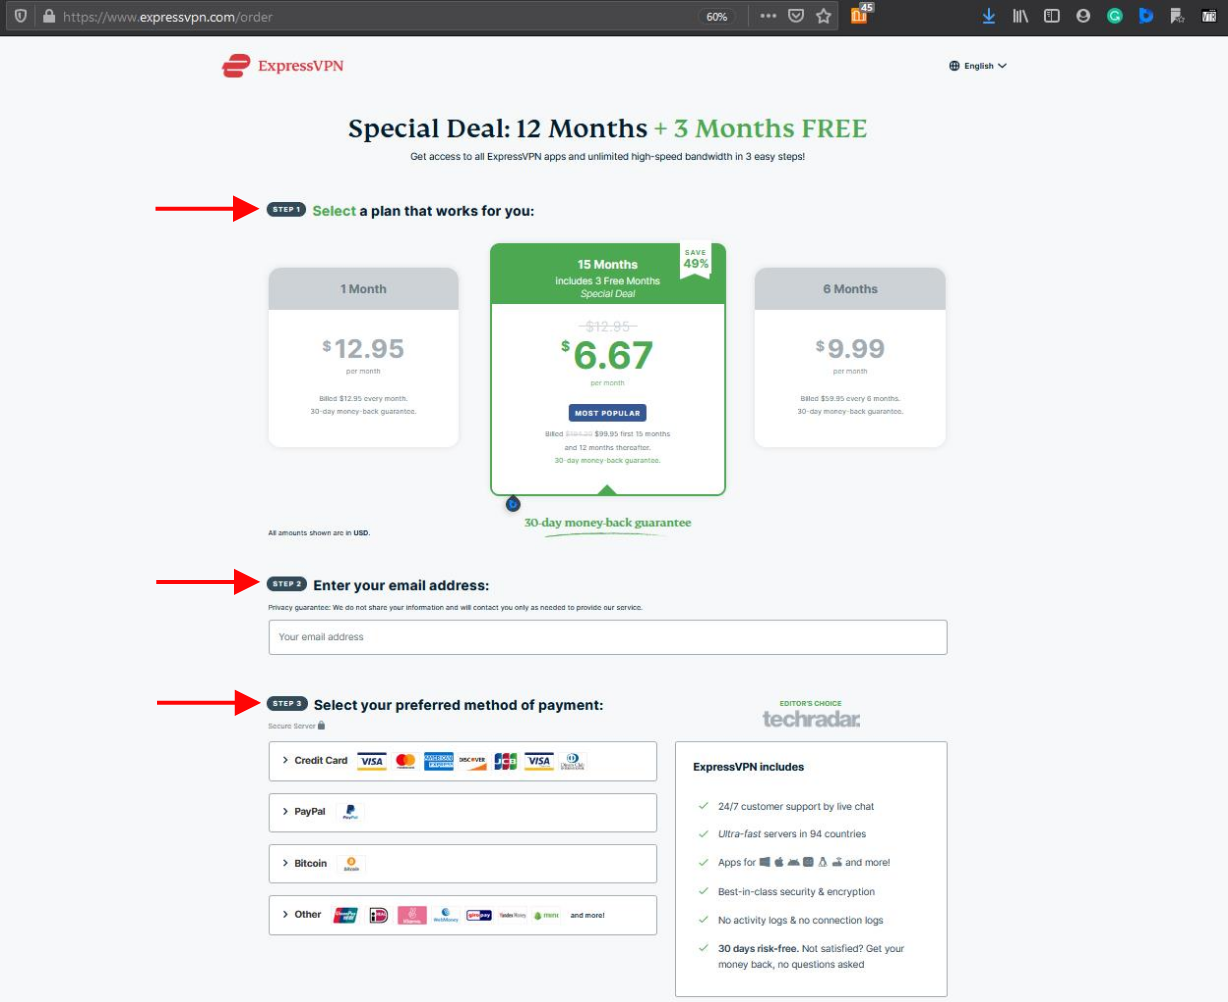
1. Go to the ExpressVPN website.
You will see three steps given on the website:
Complete all three steps to set up your ExpressVPN account.
2. Luckily, the ExpressVPN app is available in Amazon App Store and can be downloaded directly on your Firestick devices, saving you from the trouble of sideloading it.
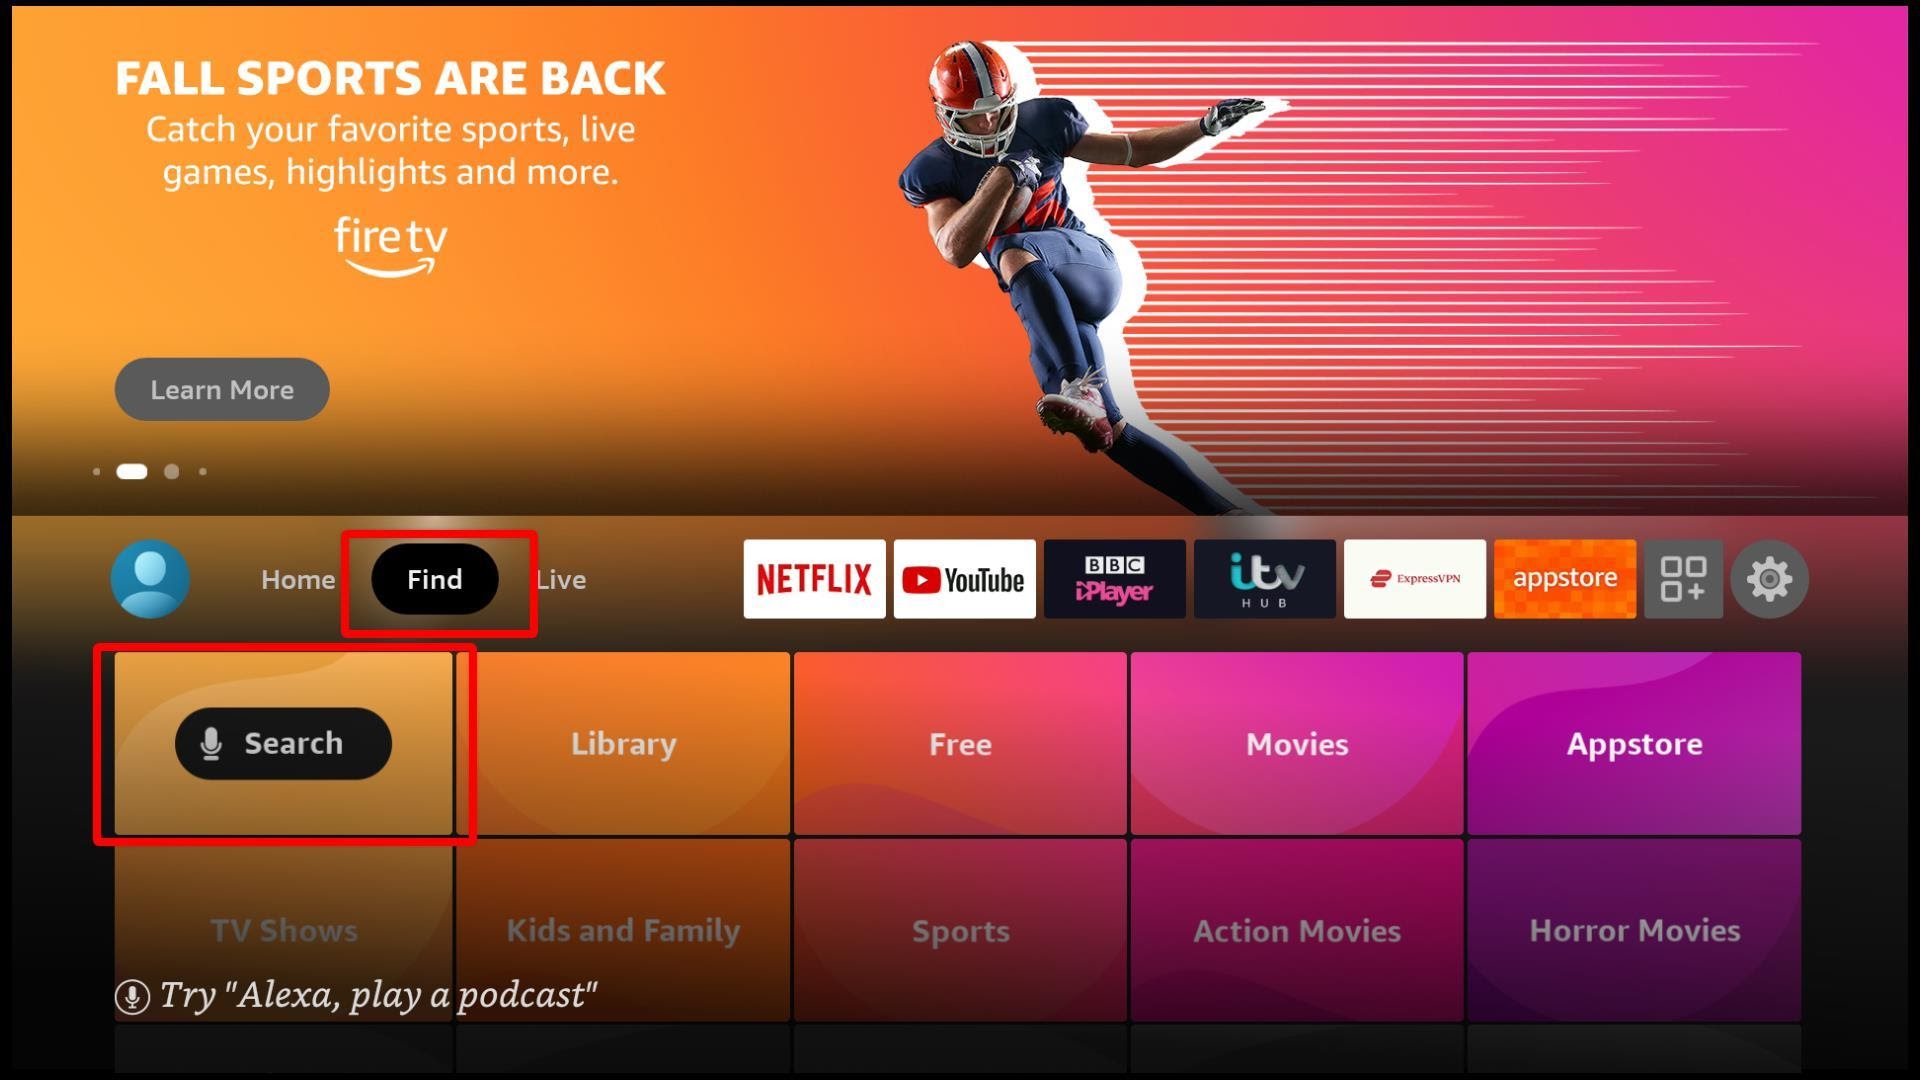
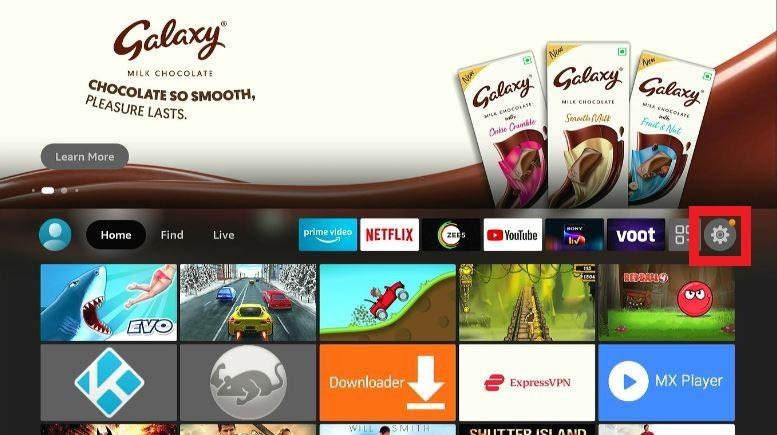
Go to your Firestick’s home screen. Click on Find then Search
3. Type ExpressVPN and press enter.
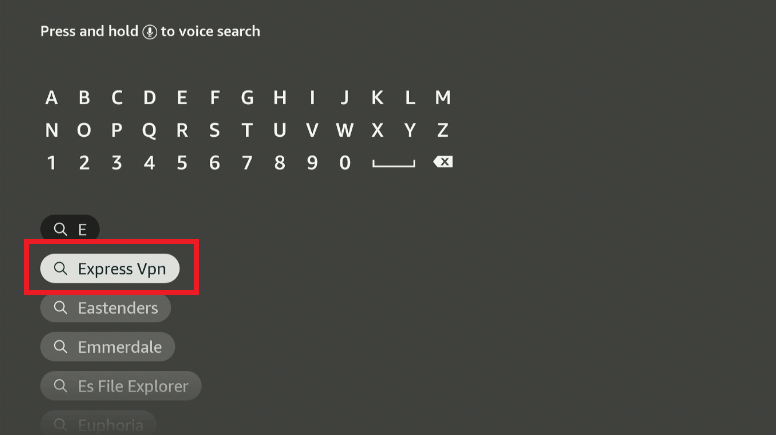
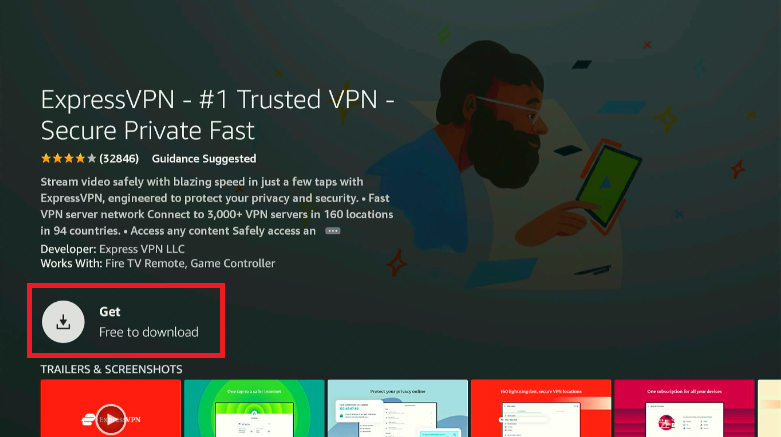
4. Select the ExpressVPN icon from the search results.
Start the download and wait until it’s complete.
5. Once the download is complete, sign in to ExpressVPN by entering your login details (email and password).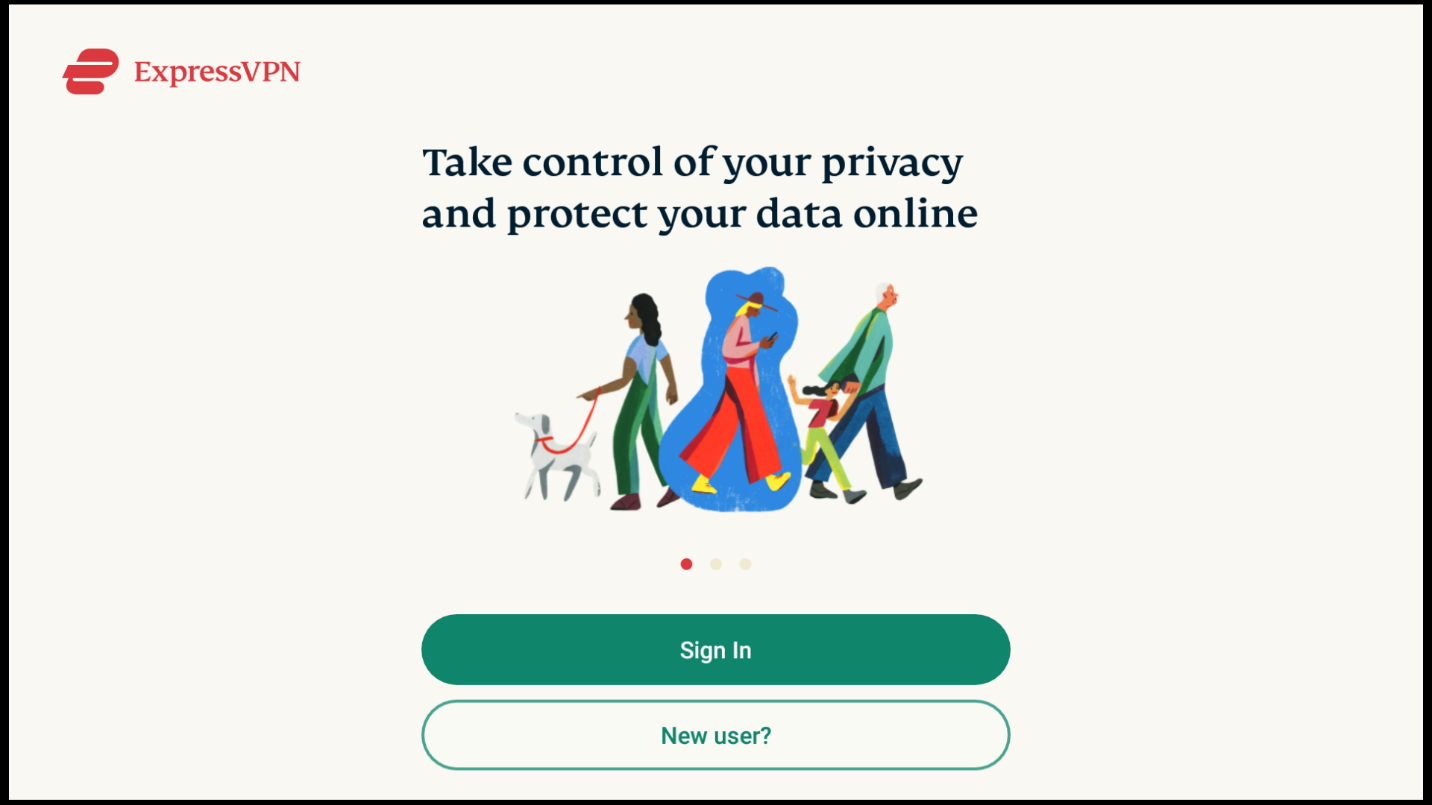
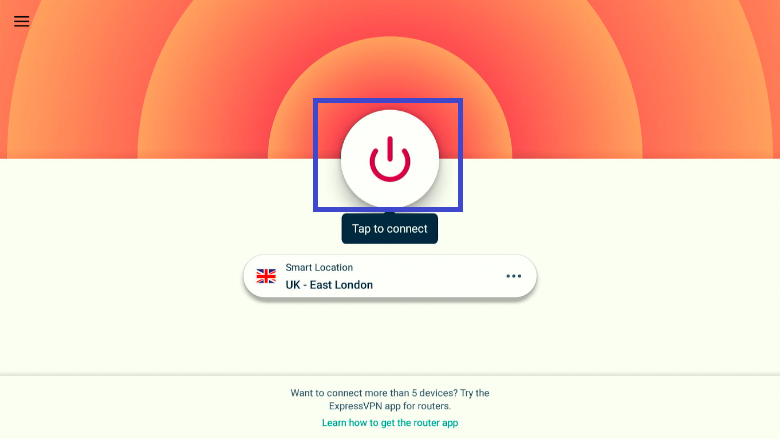
The only thing left for you to do now is connect to a server location. You will see the connecting symbol on the screen. Click on it and let the VPN automatically connect you to a reliable server location.
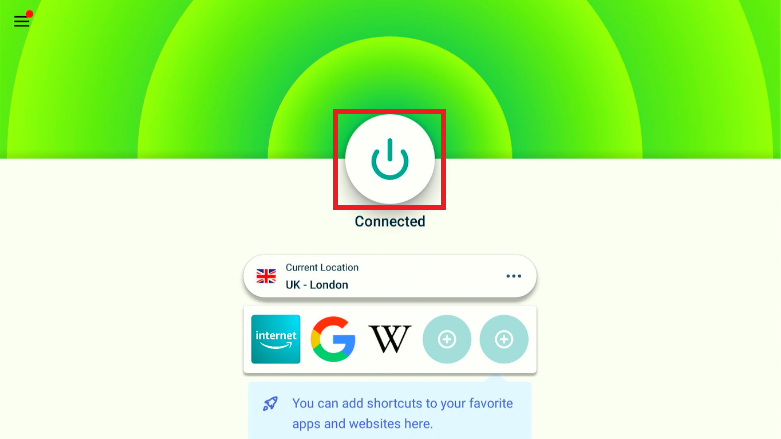
7. ExpressVPN screen’s top part will turn green, indicating that you’ve successfully connected to ExpressVPN.
The cache is a short-term memory for an app. It stores the frequently used information and helps you navigate faster when using the app. Clearing Kodi’s cache will free up this temporary memory and boost the media player’s speed. Hopefully, it will also fix the Kodi buffering issue
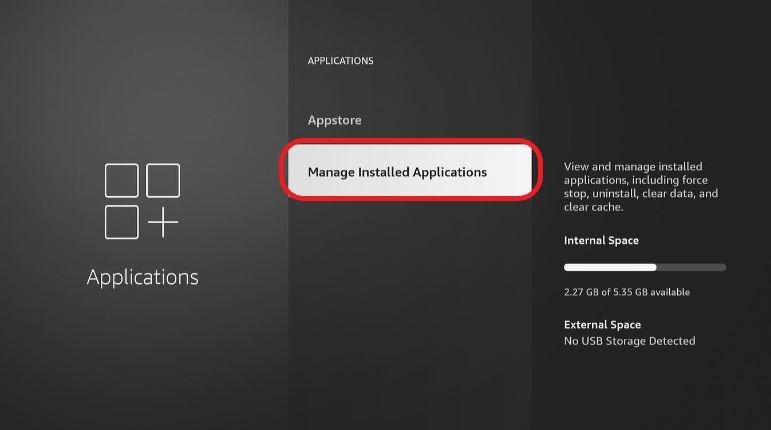
The cache can be cleared in two ways. The first method requires you to clear cache from the Firestick settings. The second method needs you to use SG Wizard. We’re going to explain both these methods.

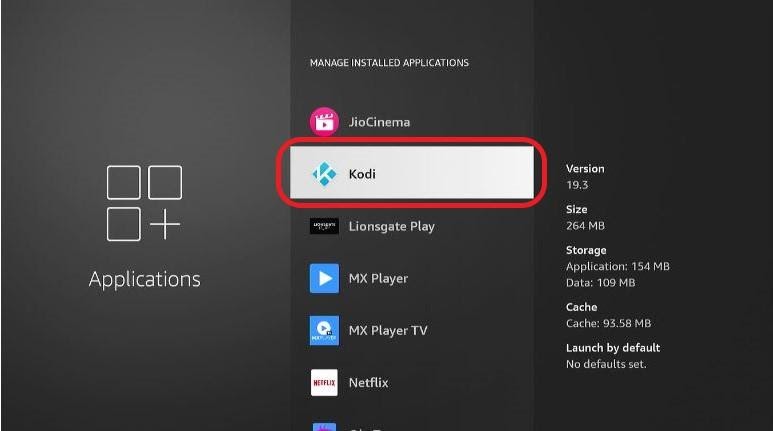
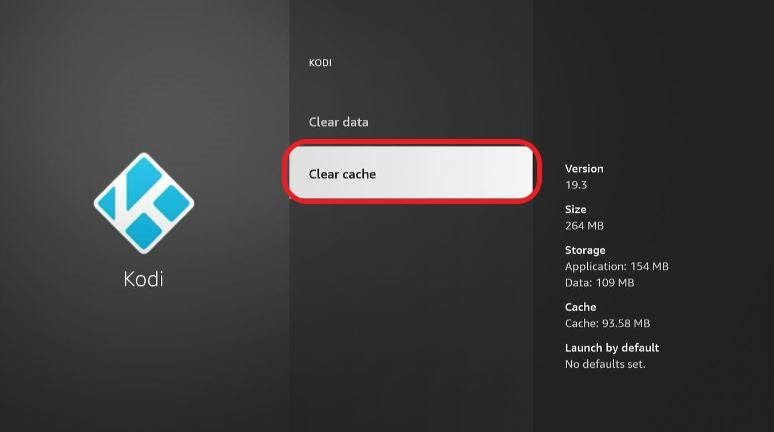
Once you’ve clicked on Clear cache, it will clear the cache, and you will see the size become 0 MB. This is how you clear the cache of Kodi via Firestick Settings.
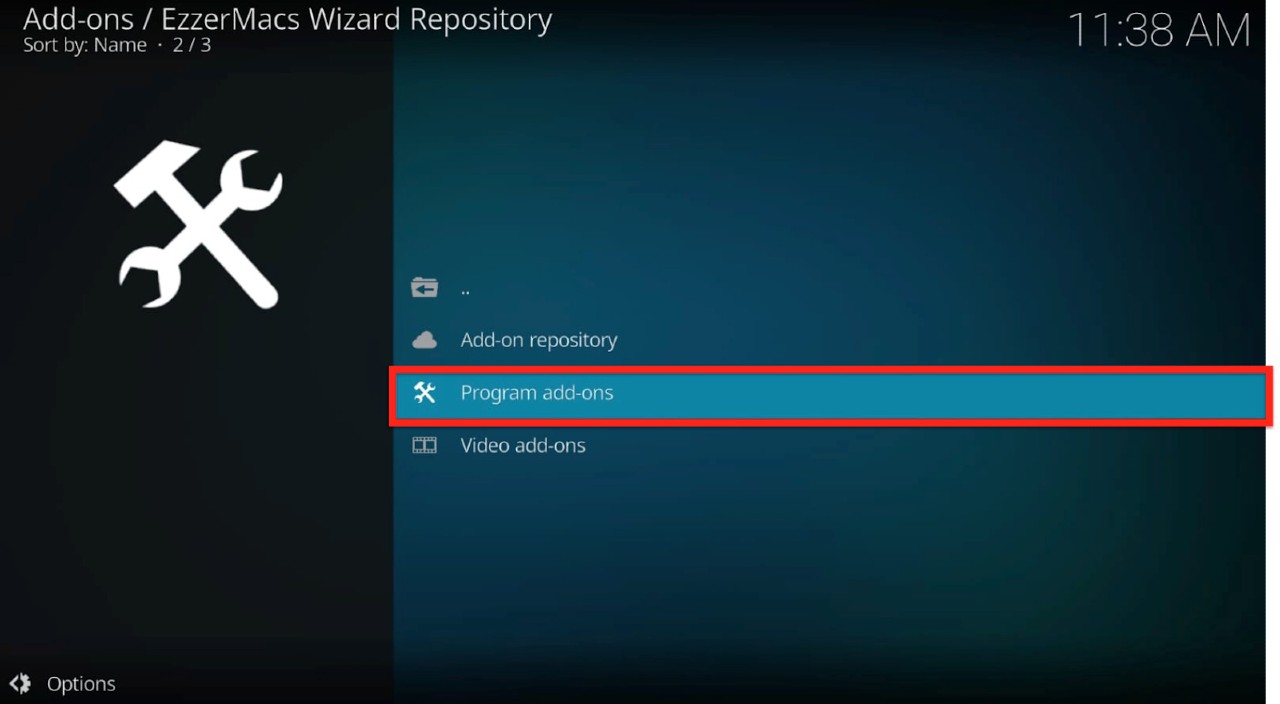
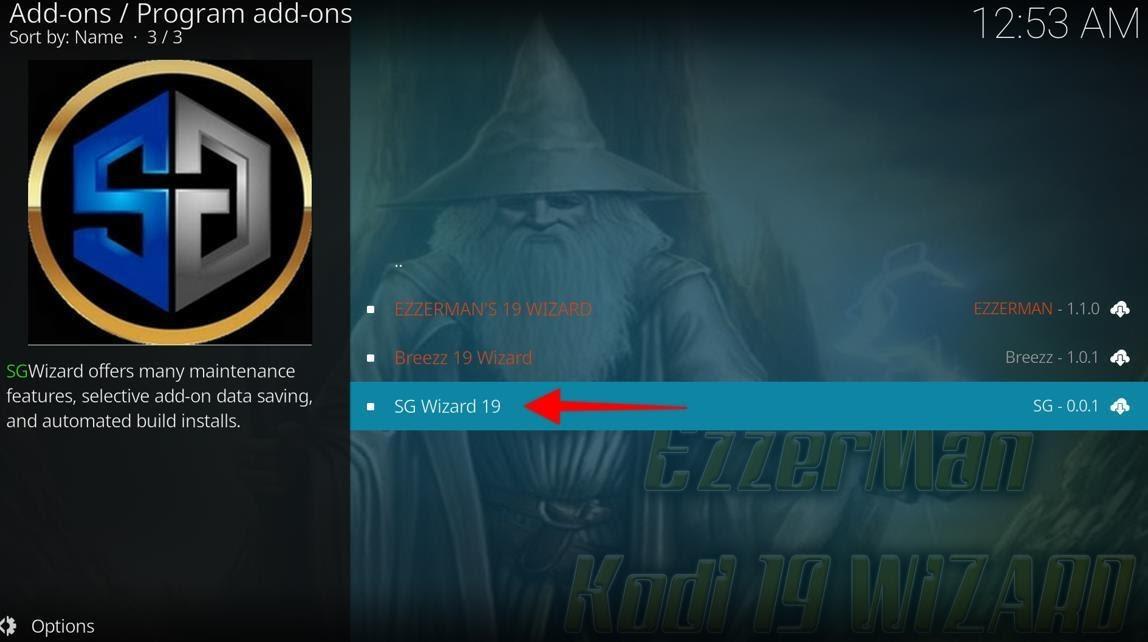
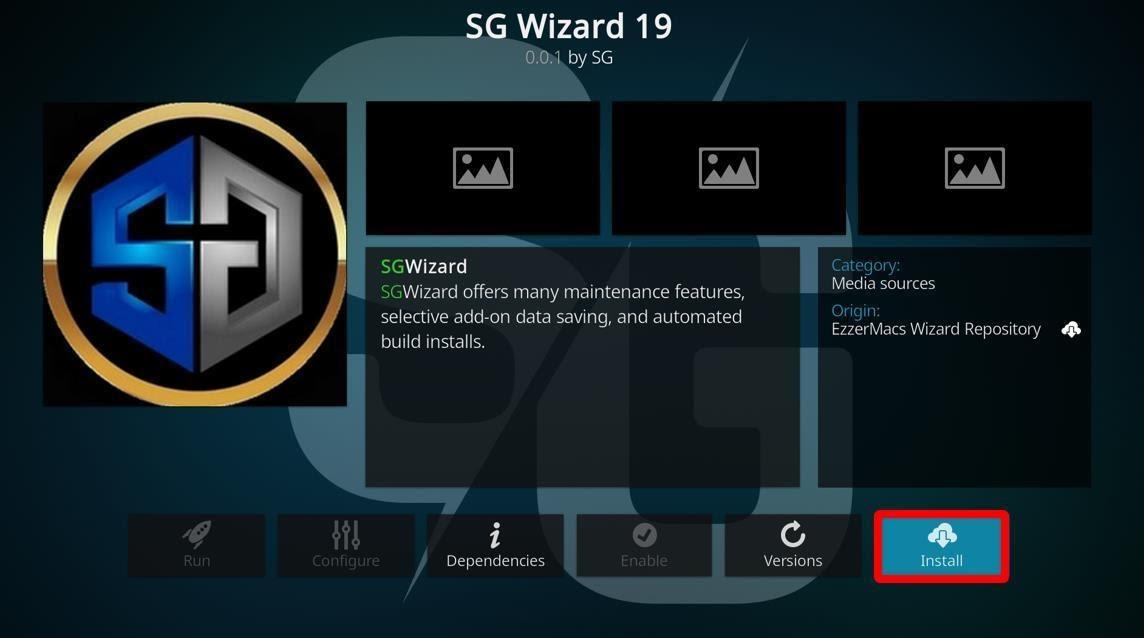
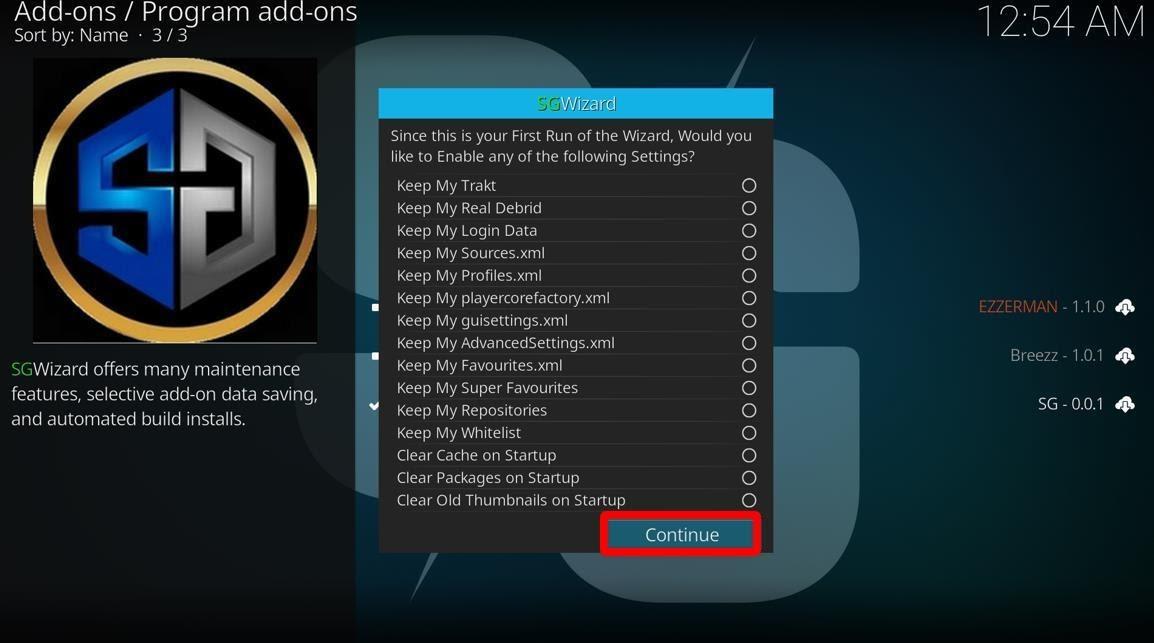
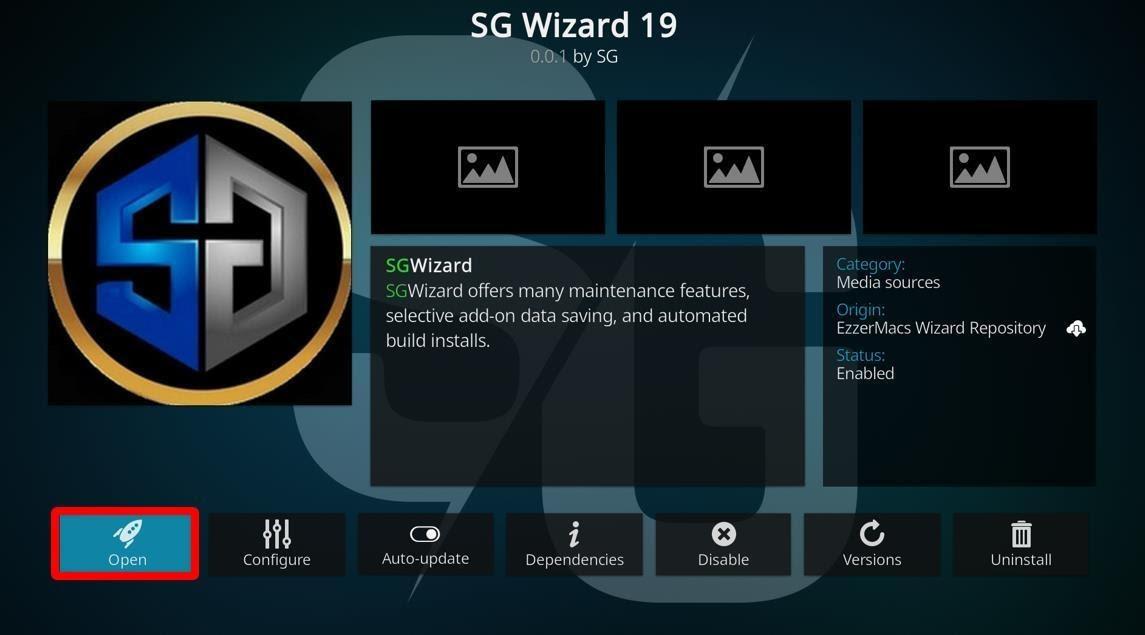
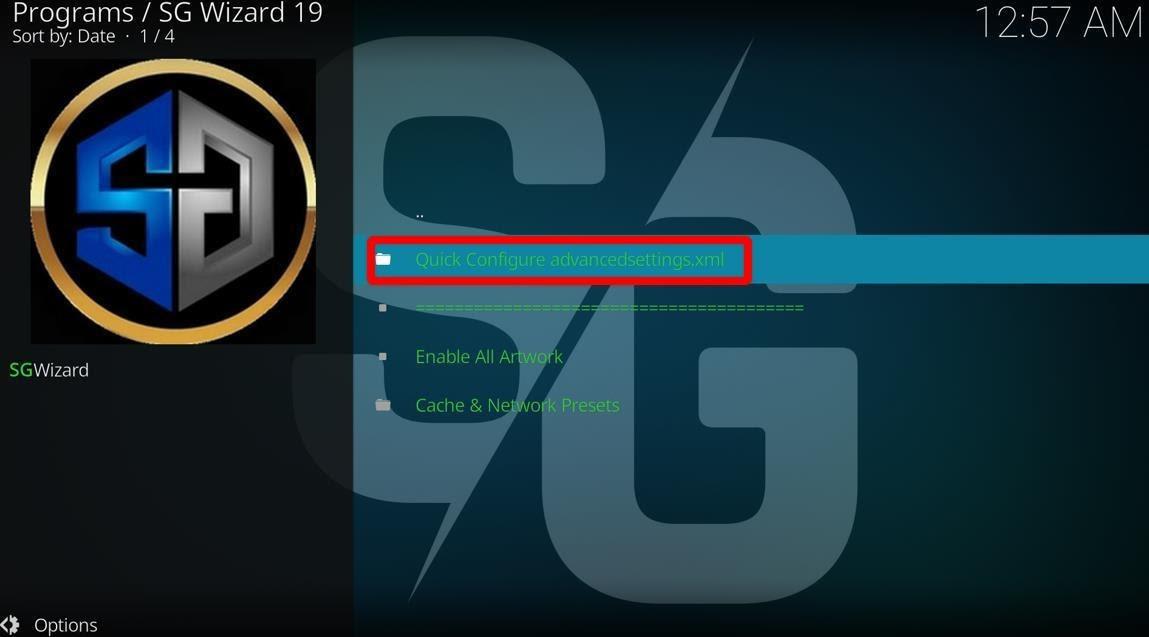
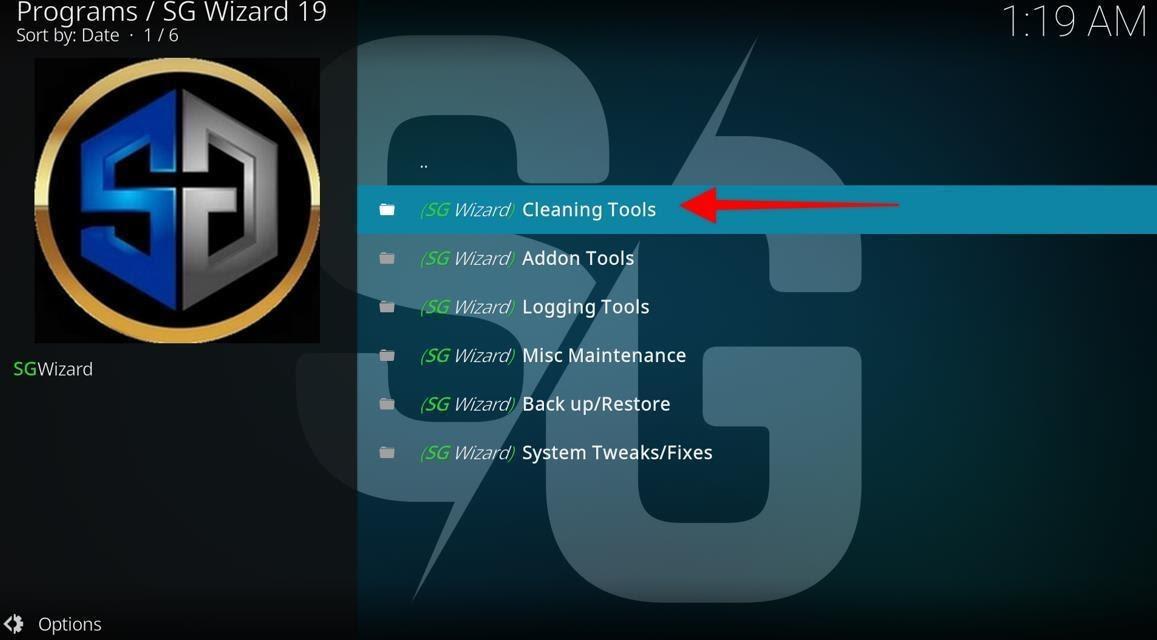
Now let us show you how to clear Kodi’s cache using SG Wizard Addon.
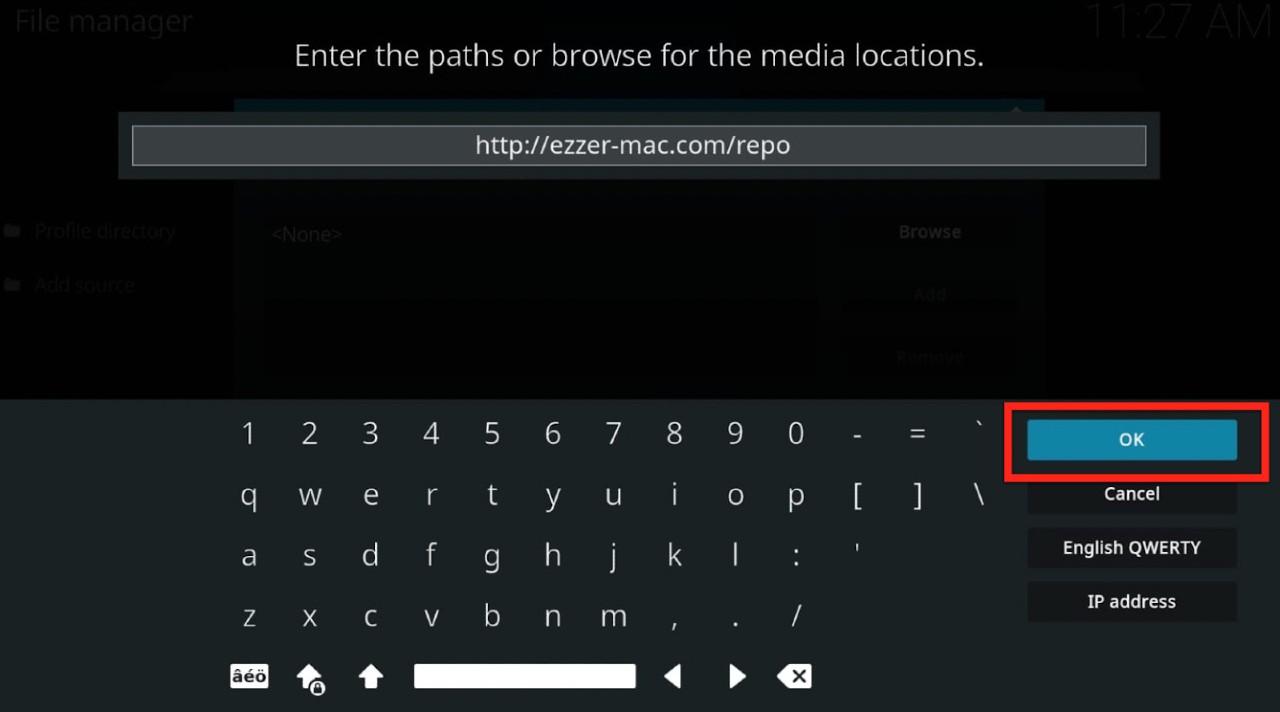
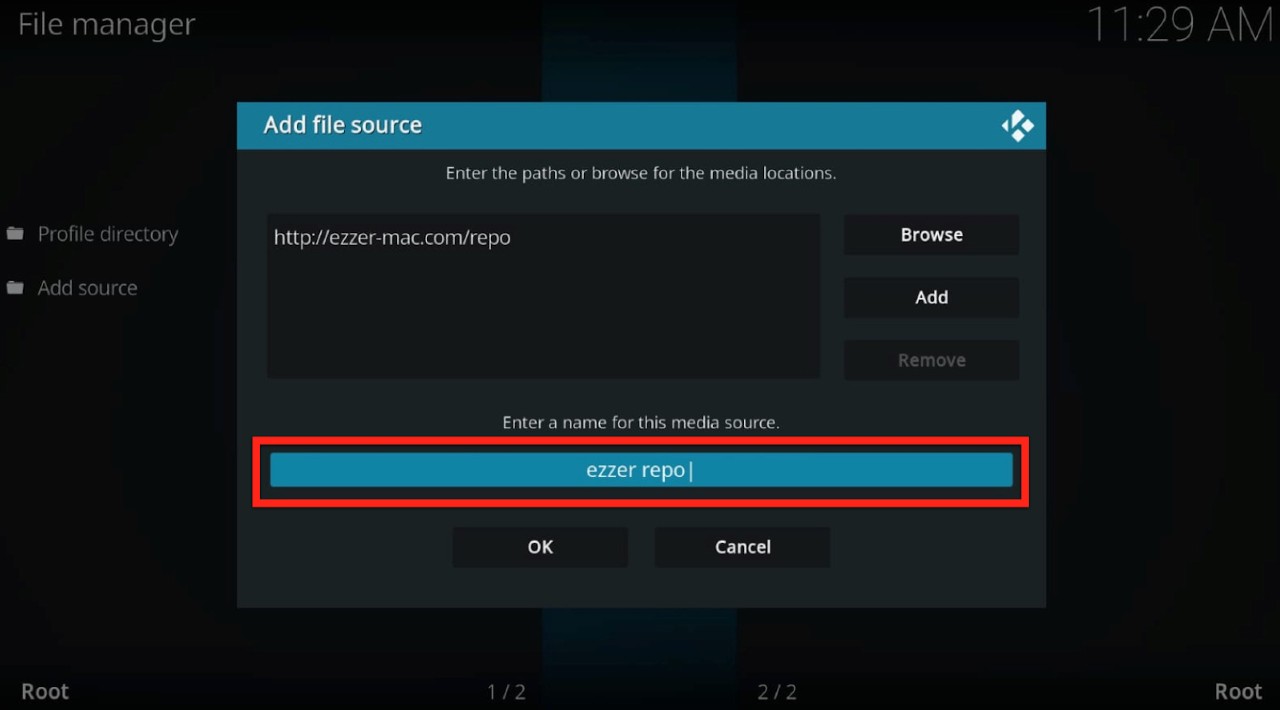
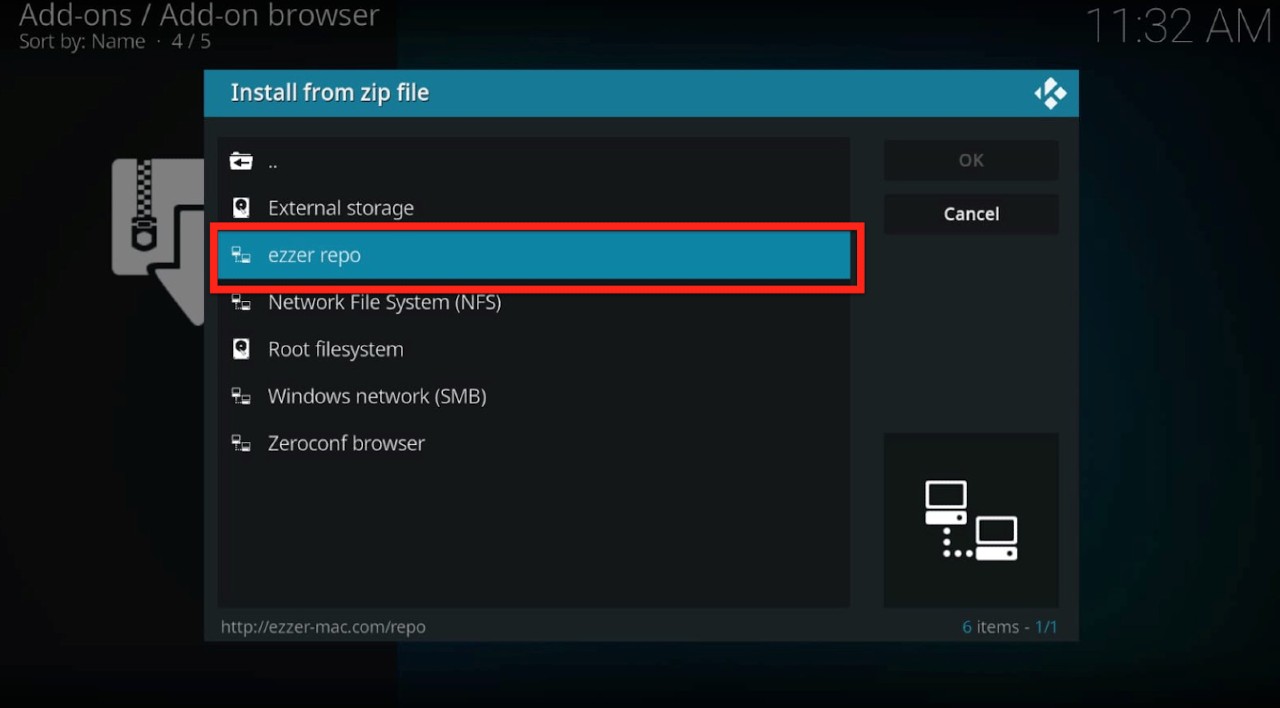
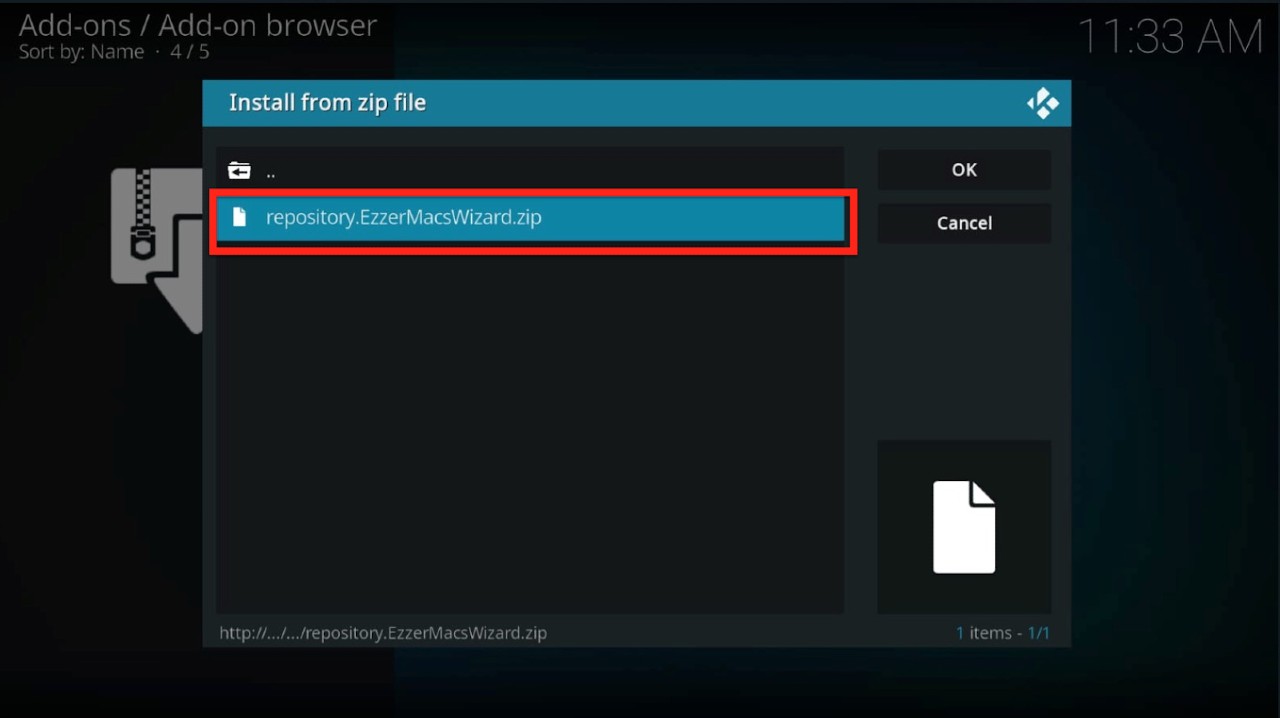
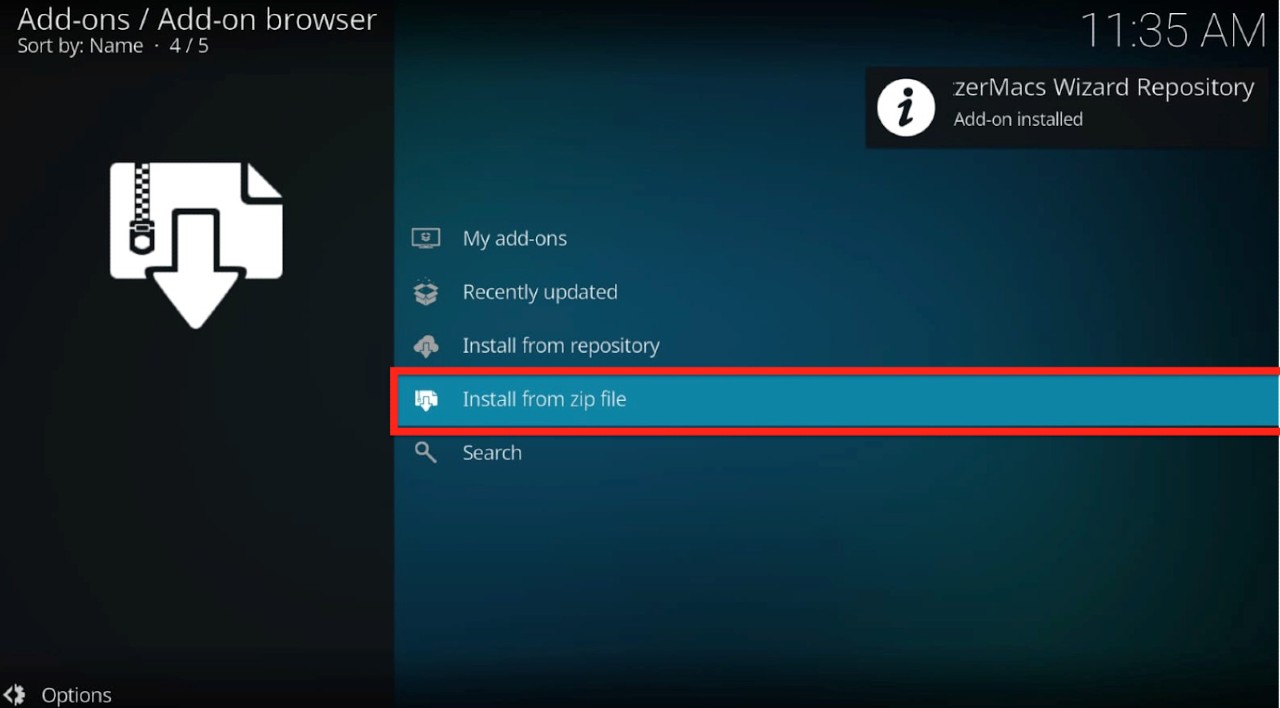
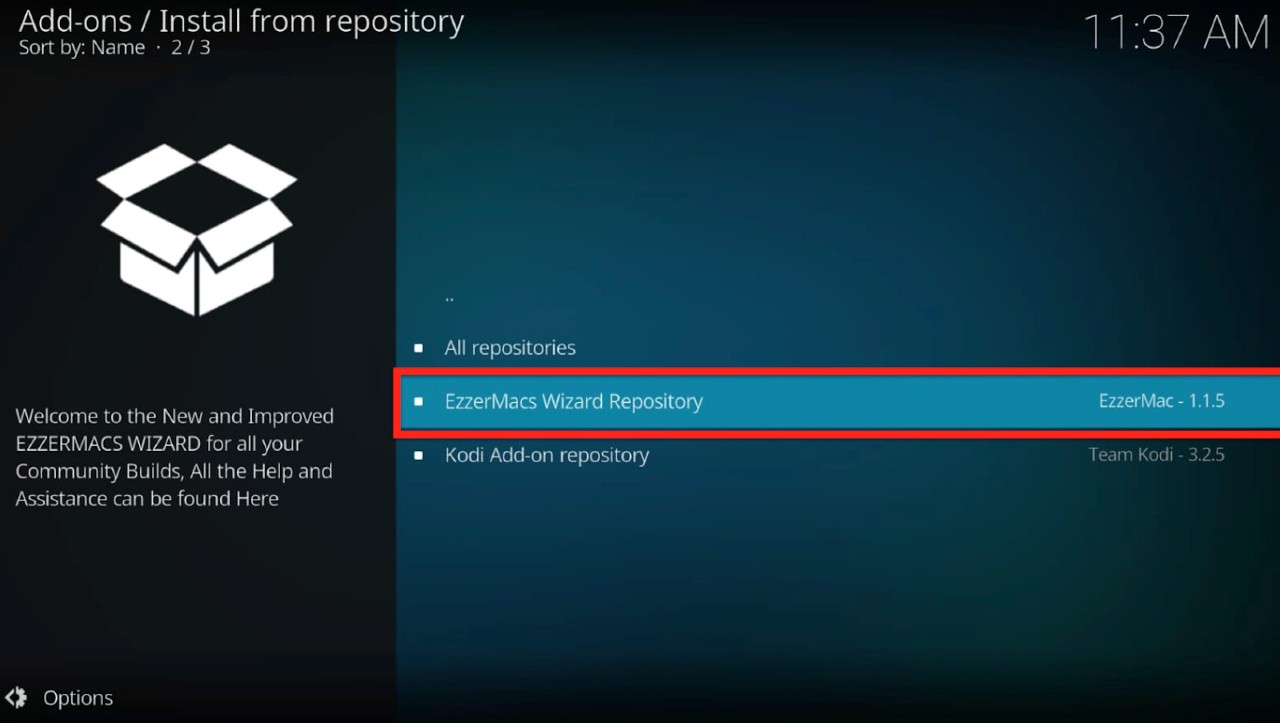
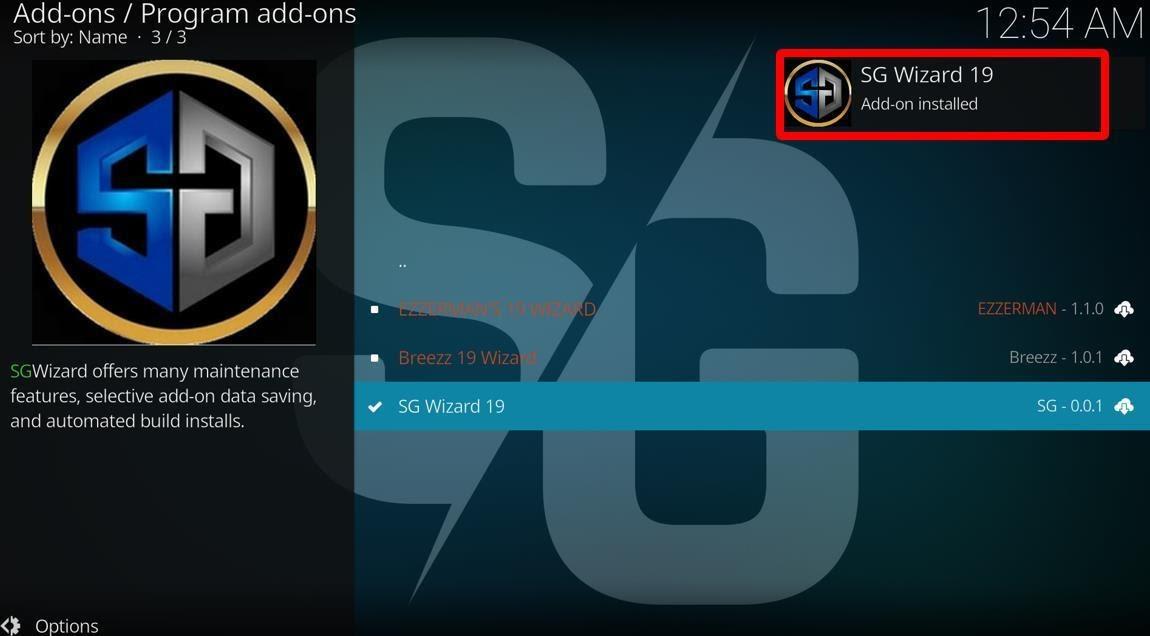
To clear cache for Kodi, you will require a tool called SG Wizard. If SG Wizard isn’t already installed, you can easily install it in 4-5 minutes, and it certainly is a handy tool to have. You can install it by following steps 1 to 19 mentioned in method #1 at the article’s start.
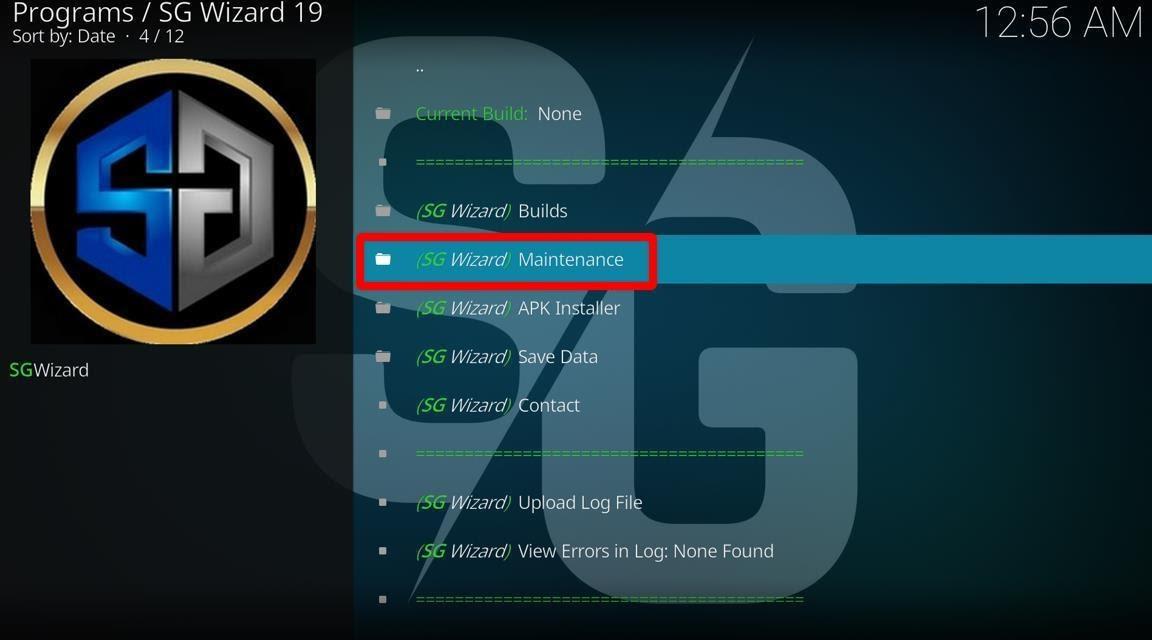
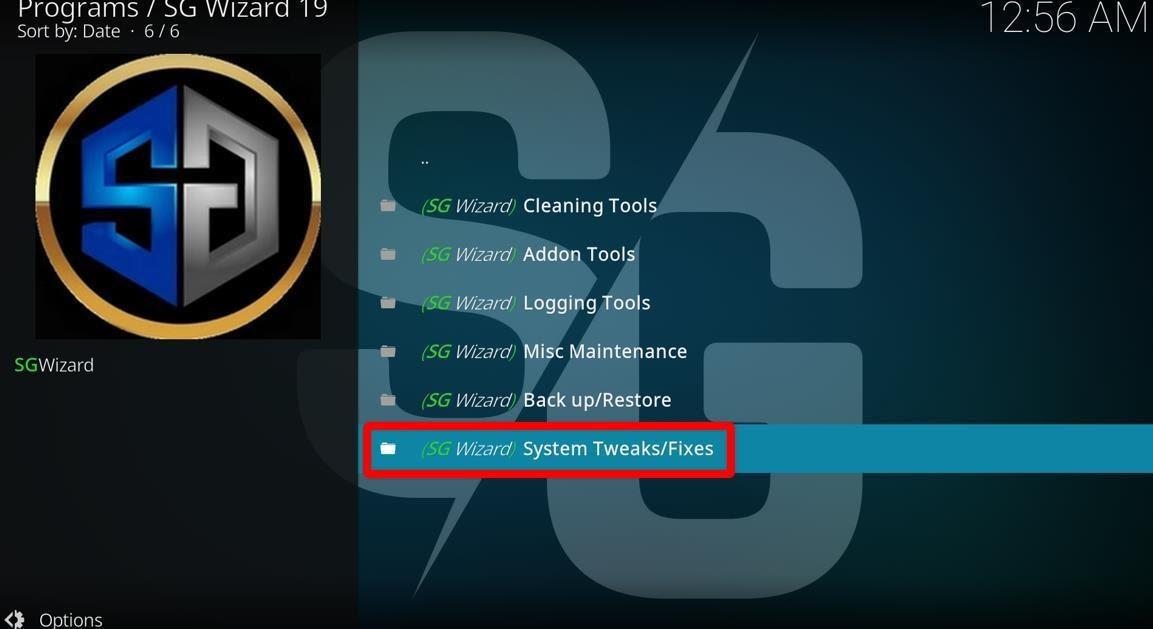
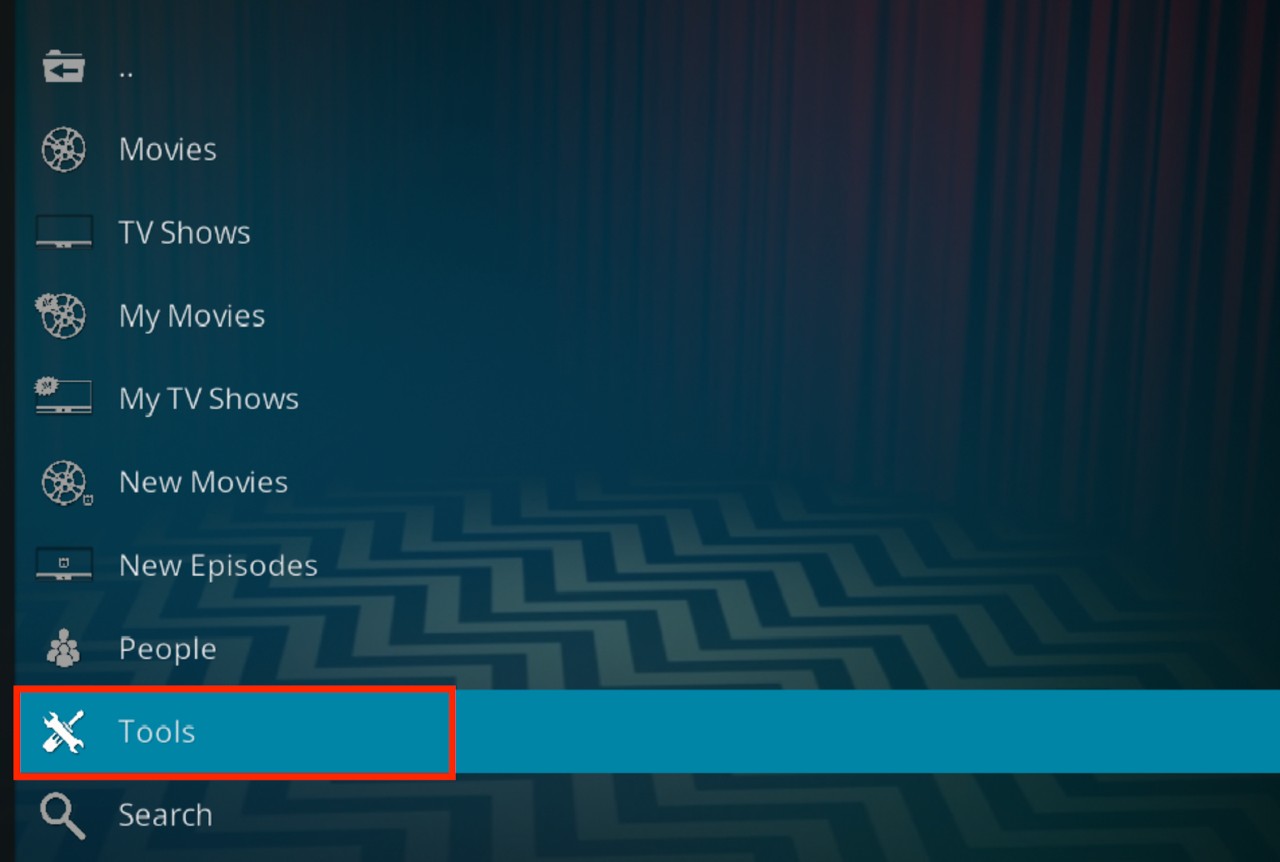
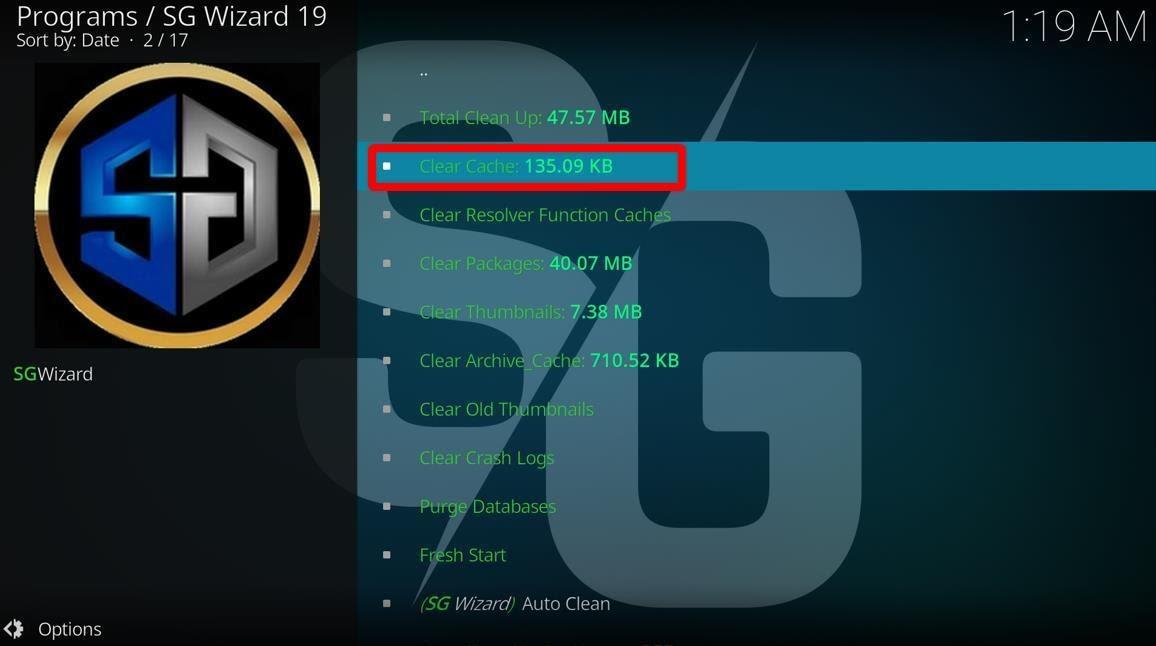
Once you’ve installed SG Wizard, follow the following steps to clear the Kodi’s Cache.
(Here, you will be able to see the size of the cache as well)
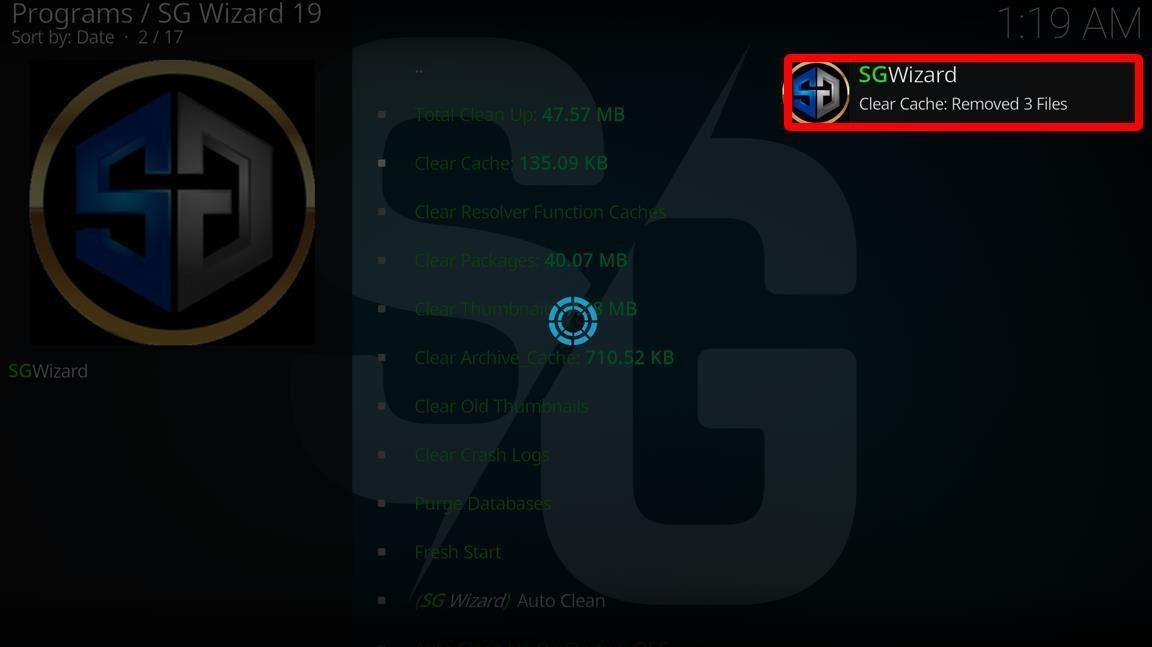
Clearing Kodi’s cache will allow the media player to run faster and smoother than ever before. When you use Kodi for a long time, the cache’s size will continue to grow, slowing down the media player. That’s why it’s recommended to clear Kodi’s cache once every few weeks.
If the aforementioned solutions failed to fix your Kodi buffering issue, there’s an excellent chance your internet speed is poor. You can check your internet speed by connecting your Smartphone or PC to the same internet and running a speed check.
If you love to stream HD movies, TV shows, and other video content, it is highly recommended that you use high-speed internet (a minimum of 10 Mbps). Higher-speed internet will give you a smoother streaming experience and will stop Kodi buffering issues.
If you can’t upgrade your internet to a higher speed, there are a few other things you can do, such as:
Kodi buffering issues can spoil your streaming experience. If you’ve to wait every time you want to watch something, it will ruin the cord-cutting experience for you. That’s why we have mentioned various methods to fix the Kodi buffering issue on Firestick.
We highly recommend you start using a VPN with your devices, as it keeps your ISP from throttling your internet speed. At the same time, a reliable VPN like ExpressVPN will prevent your government and ISP from keeping track of your online activity.

You need to load content from reCAPTCHA to submit the form. Please note that doing so will share data with third-party providers.
More InformationYou are currently viewing a placeholder content from Turnstile. To access the actual content, click the button below. Please note that doing so will share data with third-party providers.
More InformationYou are currently viewing a placeholder content from Facebook. To access the actual content, click the button below. Please note that doing so will share data with third-party providers.
More InformationYou need to load content from reCAPTCHA to submit the form. Please note that doing so will share data with third-party providers.
More InformationYou are currently viewing a placeholder content from reCAPTCHA. To access the actual content, click the button below. Please note that doing so will share data with third-party providers.
More InformationYou are currently viewing a placeholder content from Instagram. To access the actual content, click the button below. Please note that doing so will share data with third-party providers.
More InformationYou are currently viewing a placeholder content from X. To access the actual content, click the button below. Please note that doing so will share data with third-party providers.
More Information