Managing different Kodi addons in one place can get a little messy as Kodi, on its own, doesn’t provide you with any streaming links or content. Since there are many addons for different types of content, it might be a bit of a challenge to find the right Kodi addon. This is where Kodi builds come in. Titanium build is one of the most popular Kodi builds, and it has passed both expert reviewers and standard users testing and has received splendid reviews.
Titanium creates a pool of addons for your easy access and saves you from the trouble of manually finding and installing an addon; instead, it makes it super easy. You can find and install any Kodi addon with Titanium by just pressing a few buttons.
Without further ado, let’s see how we can get Titanium Kodi build on Firestick.
Like any good tool, Kodi likes to have its security. It keeps you safe from malicious third parties builds and addons as well as hackers. Specific security measures, which you can adjust in the settings, prevent you from installing any third-party software or addon or build in Kodi that is not available on the official Kodi addon repository. In other words, you won’t be able to install addons from third parties, although they’ve been tried, tested, and proved to be safe.
Titanium build is safe, and its popularity and usage by thousands of users prove it. Since a third party develops the Titanium build, we need to disable the security feature for installing it. The process is relatively simple; all you need is to enable ‘Unknown Sources,’ and this is how you do it:
Step 1: Launch Kodi and open Settings.

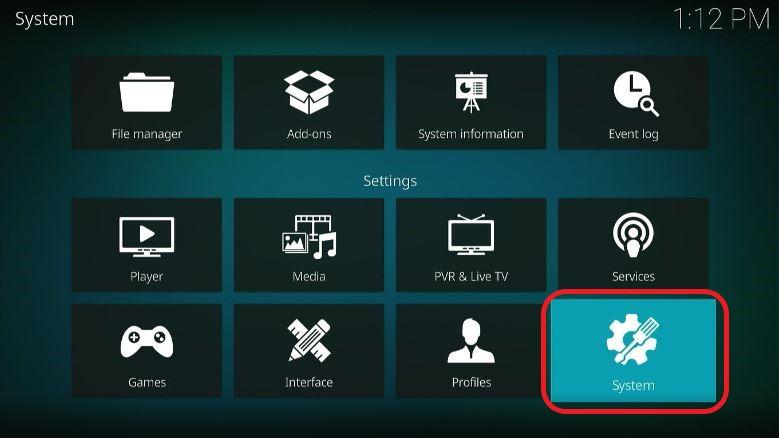
Step 2: Open System from Settings menu.
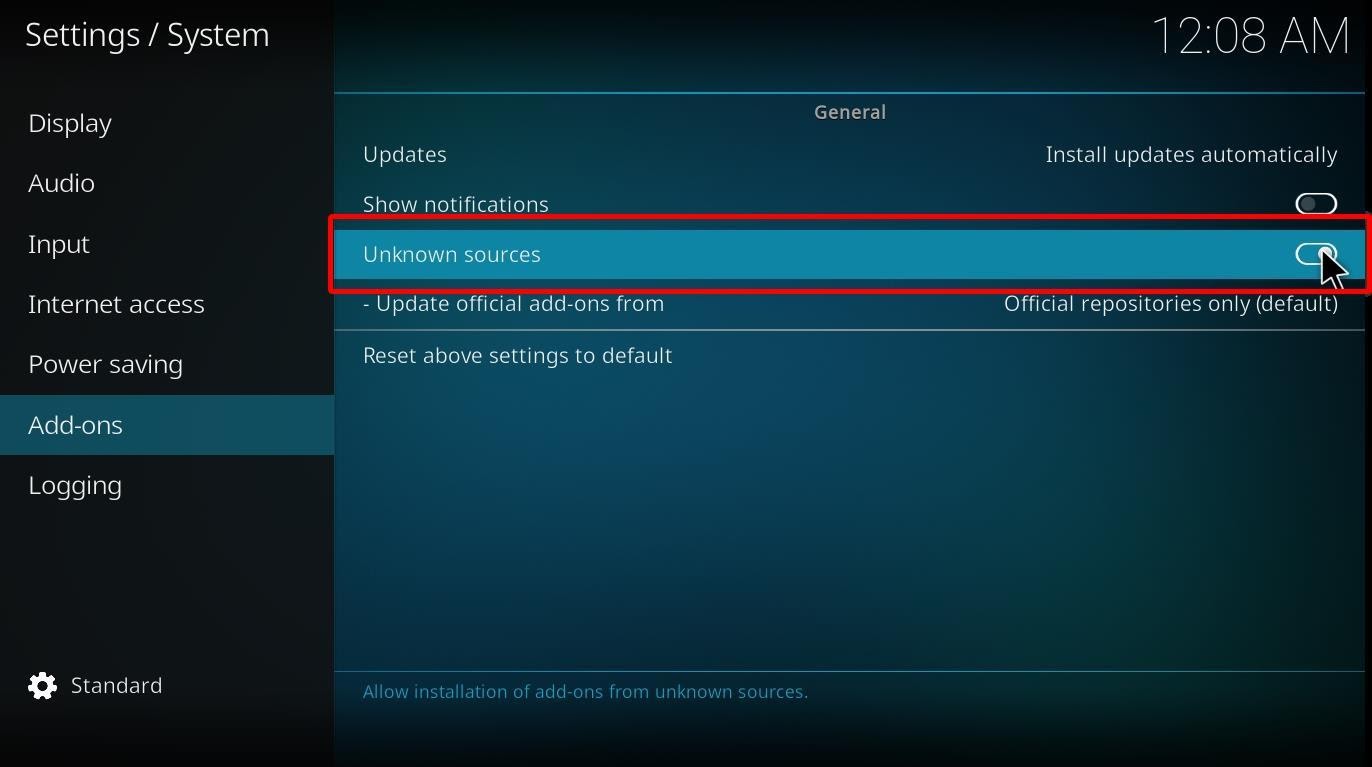
Step 3: From the left-side menu, open Add-ons, go to the right-side menu, and toggle on Unknown sources by pressing the select button.
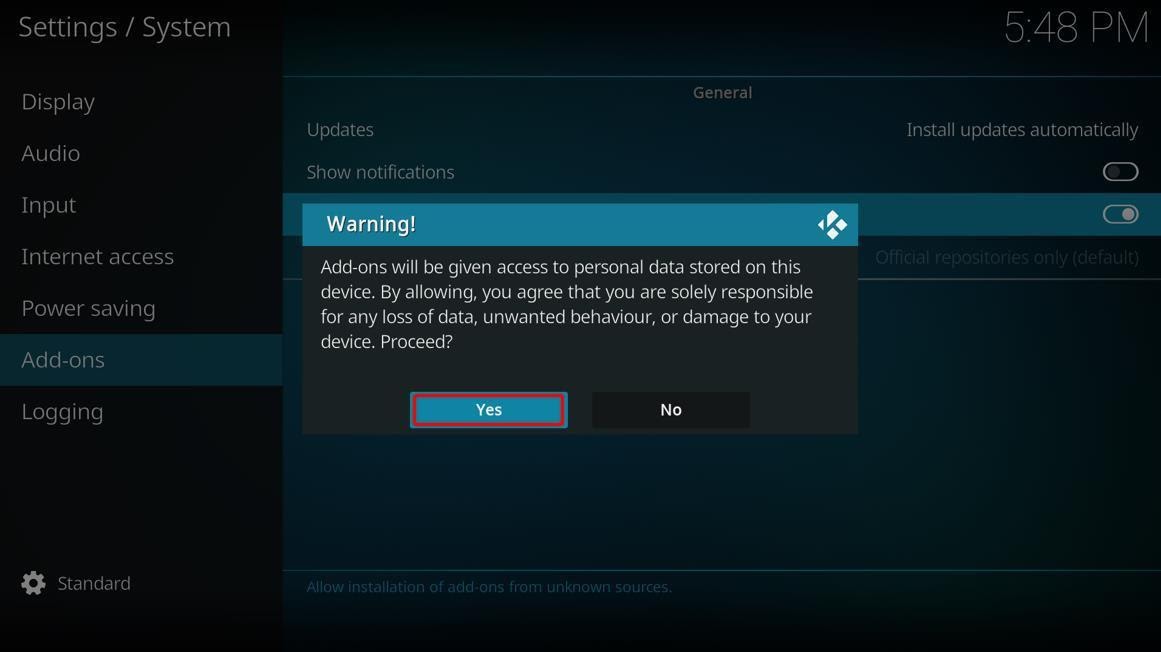
Step 4: A warning prompt will appear, select Yes and continue.
You’ve successfully enabled the Unknown sources, and now you can easily install any addon or build from any third party. Just be careful and do complete background research before installing anything provided by any unknown or suspicious third party.
Now we can move on to the two parts of the installation process for Titanium Build itself. We have divided the entire process into two major parts. First, you have to get Supreme Build Wizard, which will provide you with Titanium Build. More precisely, installing Titanium build starts by installing Supreme Builds Repository; then, we will install Supreme Builds Wizard, and from there, we can install Titanium Build in Kodi. The process may sound long and complicated, but it is relatively effortless, and you will be able to get Titanium Build in no time.
Step 1: Open Settings and then click File manager.

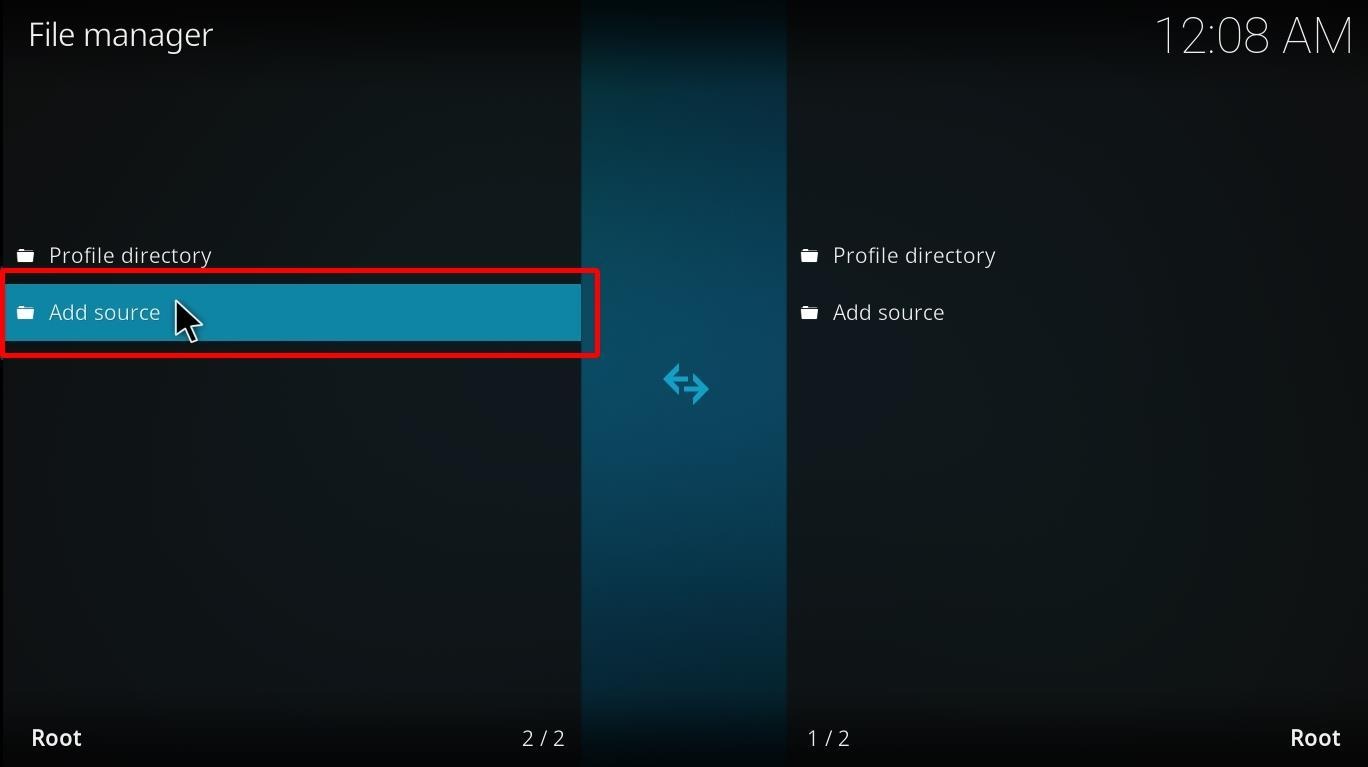
Step 2: Select Add source from either the left or right menu.
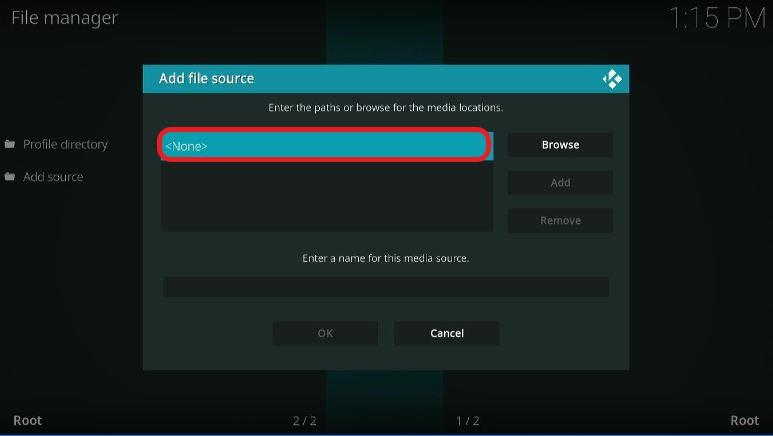
Step 3: A smaller window will open. Click on <None>.
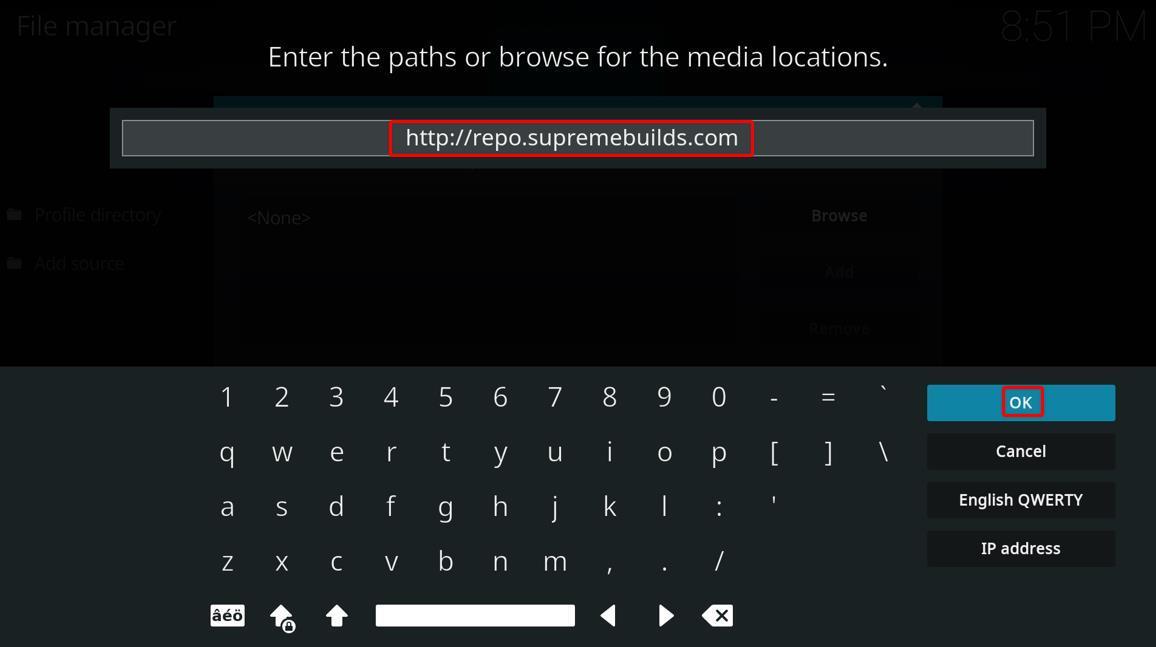
Step 4: Type the following URL in the given area and click OK. Type it exactly how we have written it; any mistake will fail to add the source. This is the URL you need to enter: http://repo.supremebuilds.com
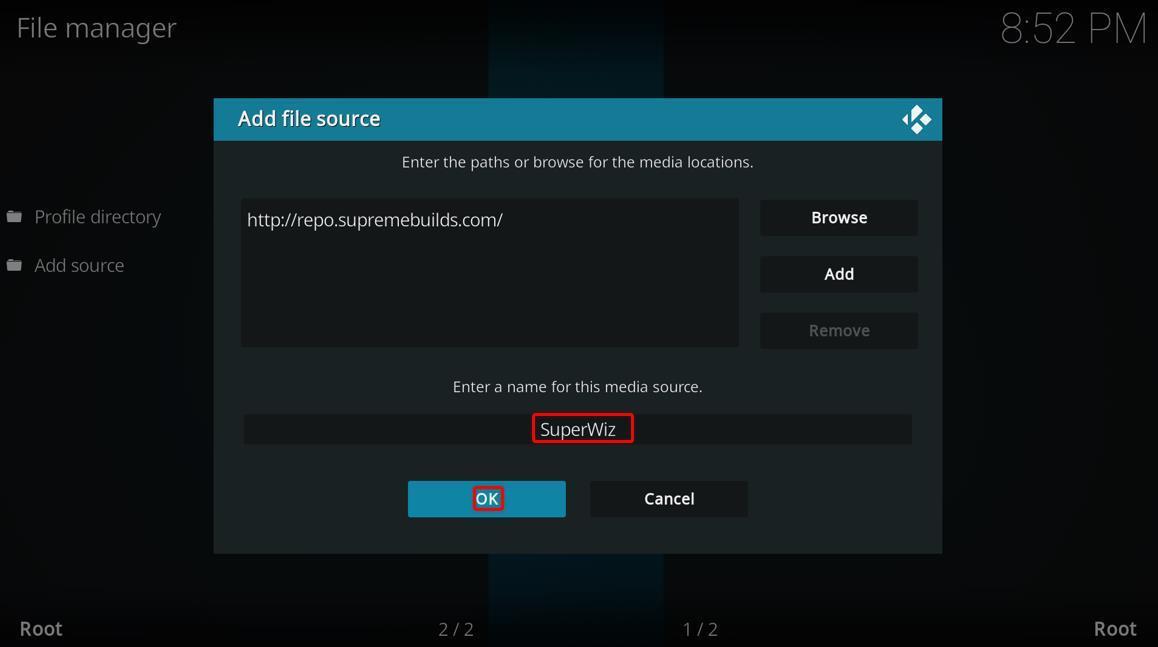
Step 5: Add a name for the source you’ve just added. We are naming it SuperWiz. Click OK to proceed.
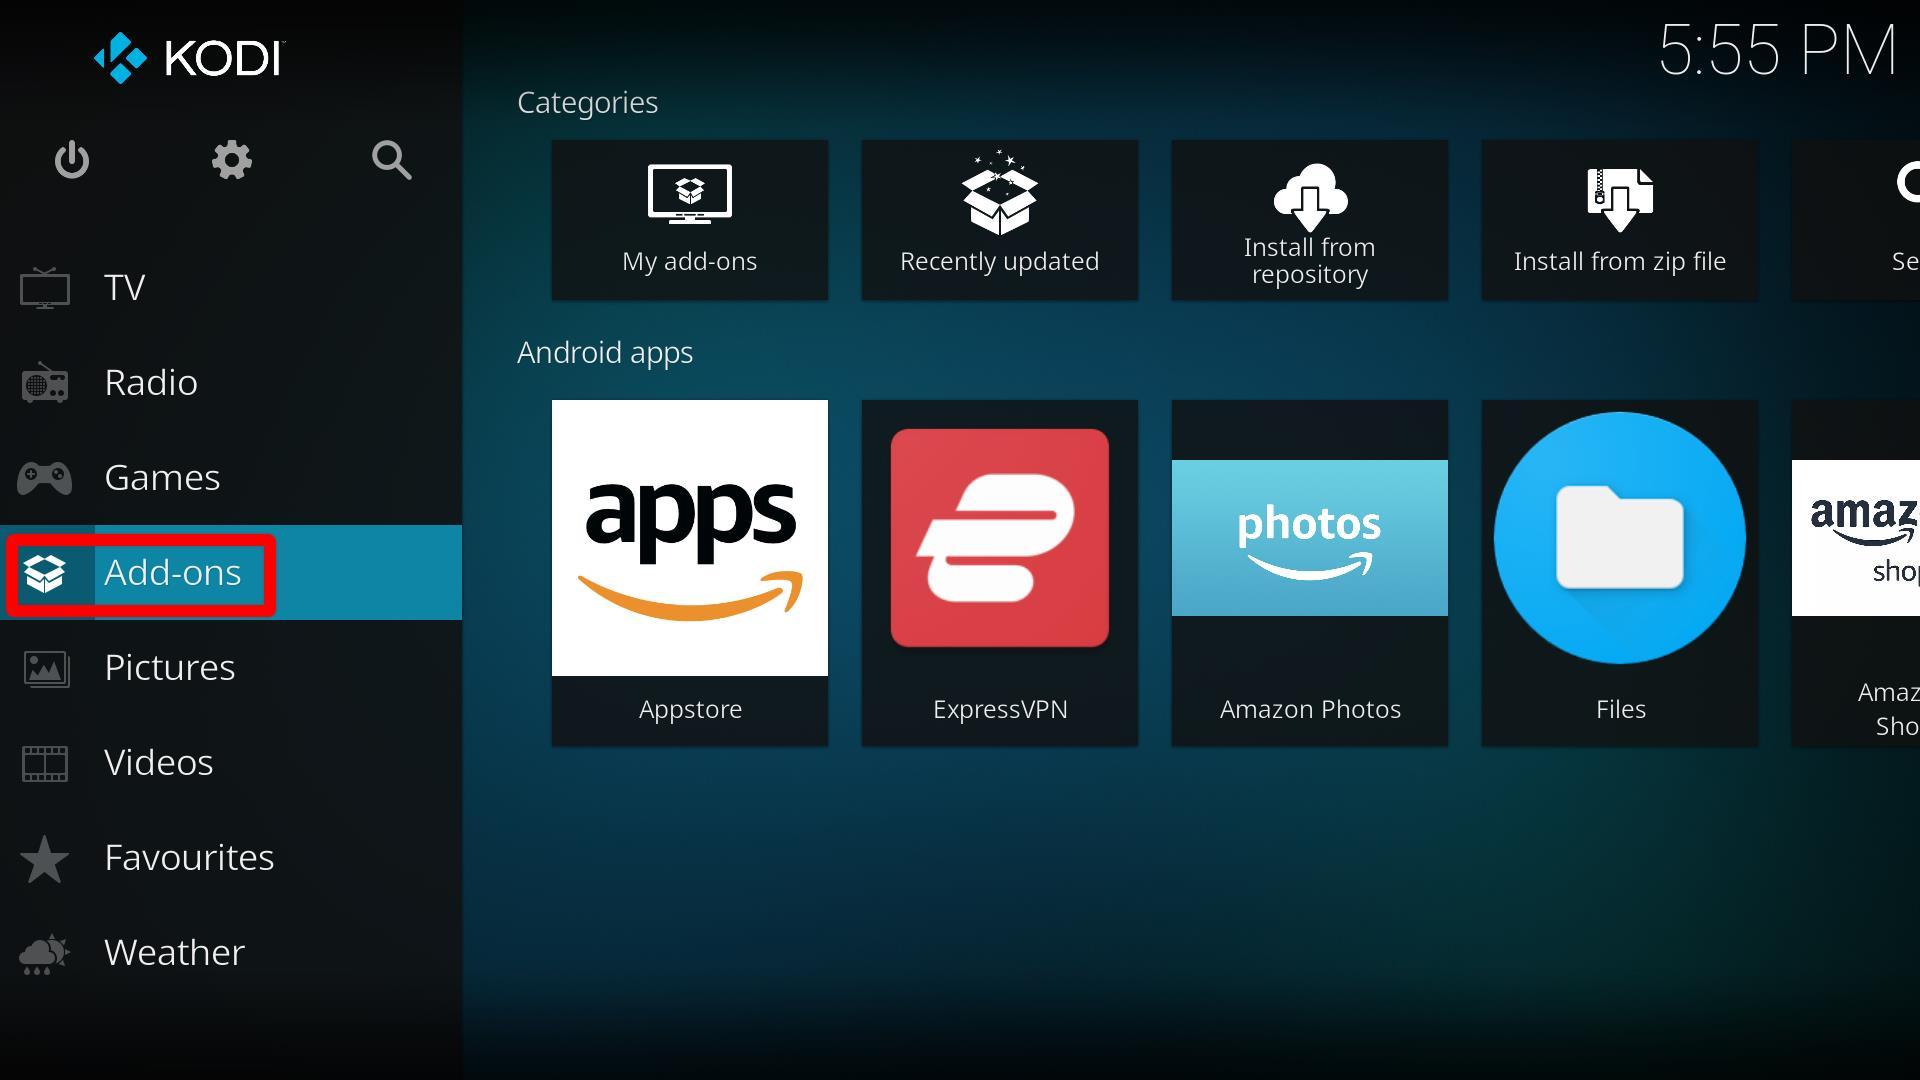
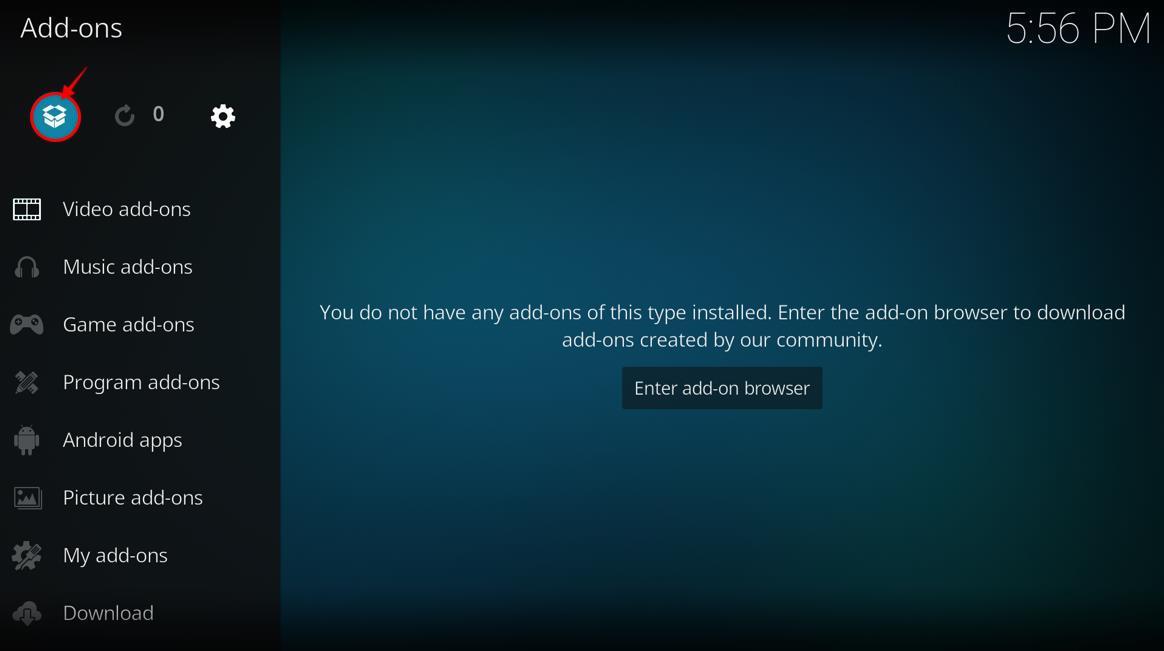
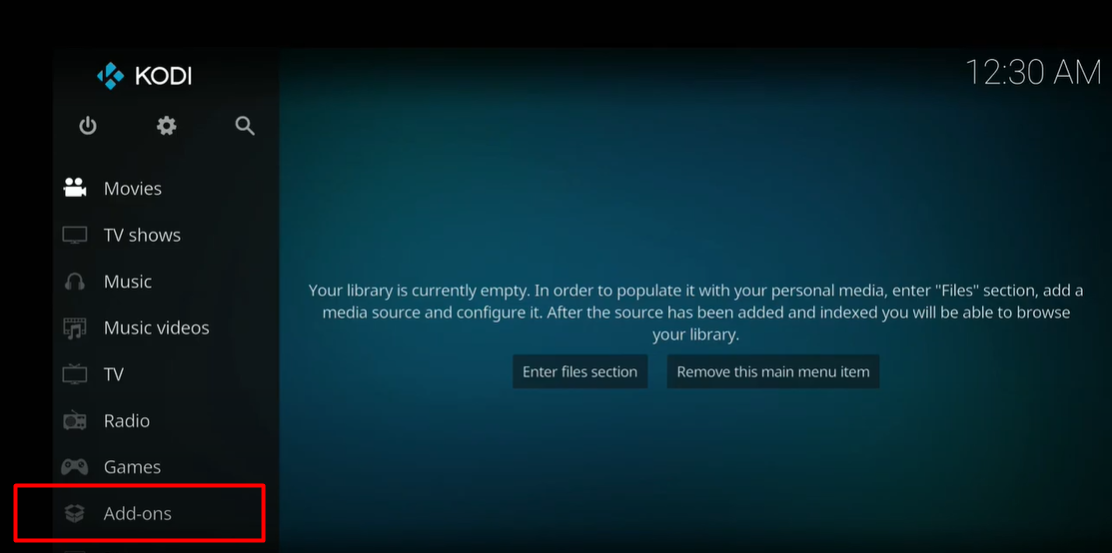
Step 6: Go back to Kodi’s main menu and open Add-on from the left side menu.
Step 7: Now click on the Package Installer icon on the top left side and open it.
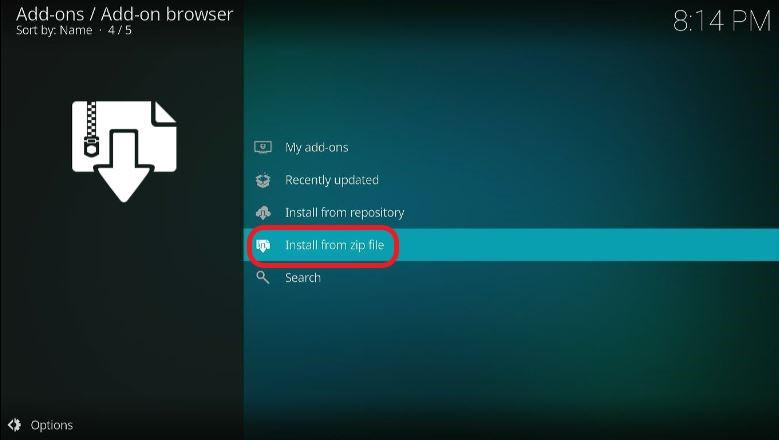
Step 8: Scroll to Install from zip file and open it.
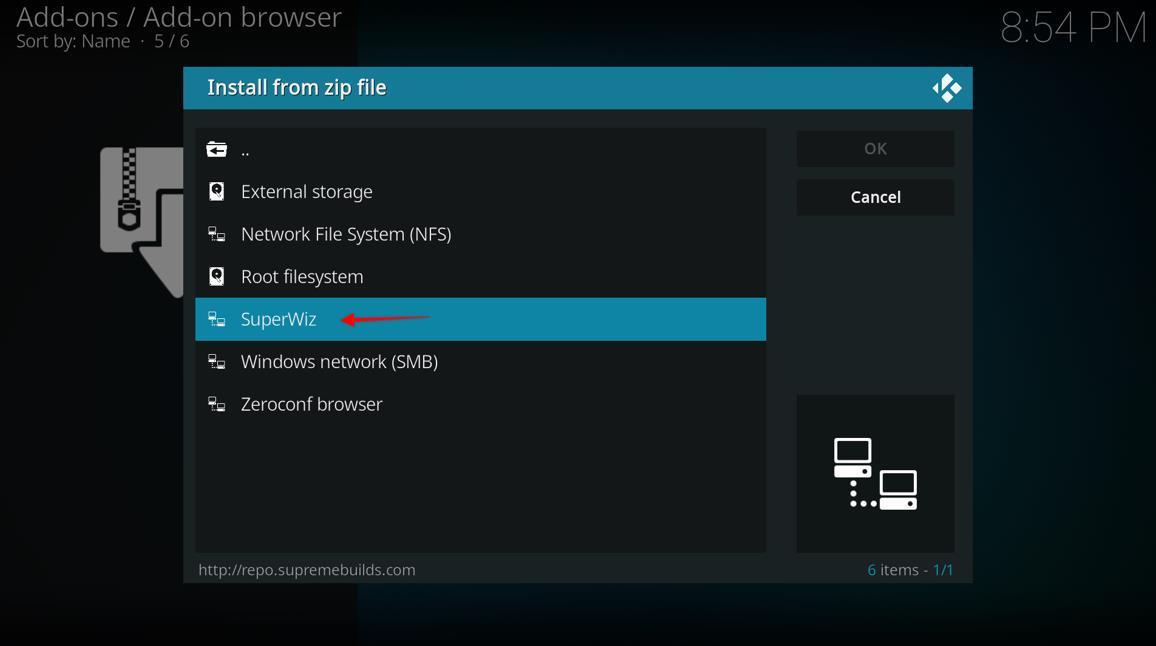
Step 9: Find the source name you added earlier. For us, it is SuperWiz. Open it, and a window will appear.
Step 10: Now click on repository.supremebuilds-X.X.X.zip. The file will have a version number instead of X.X.X.zip. Currently, the latest version available is 1.0.2
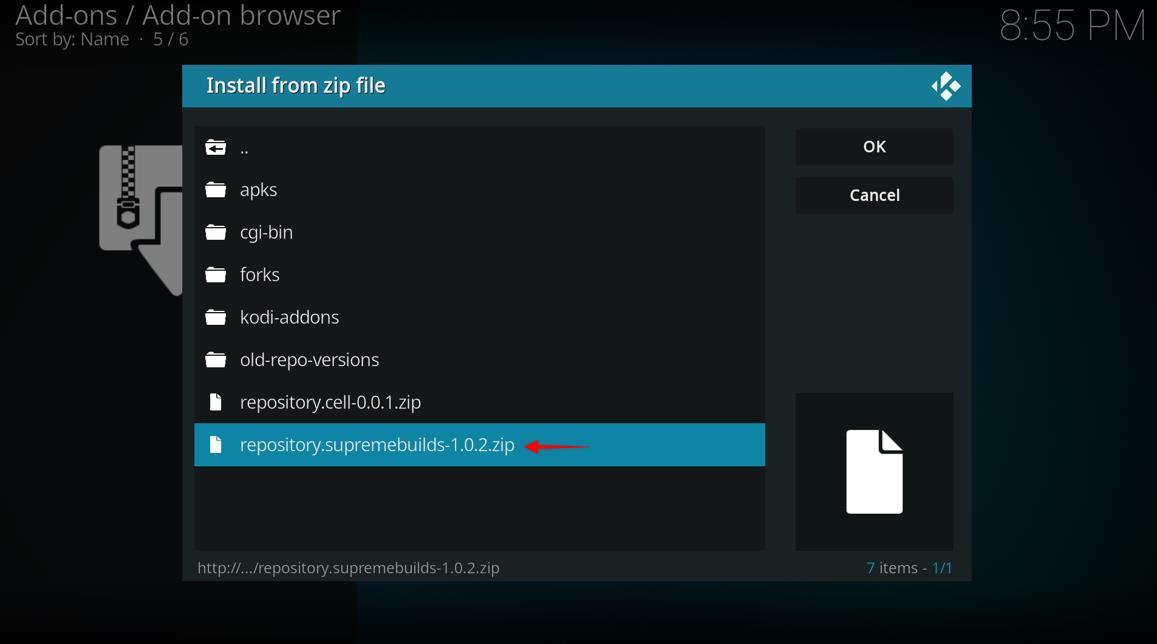
Step 11: Repository will be installed, and you will see a notification on the top right corner of your screen once it has been successfully installed.
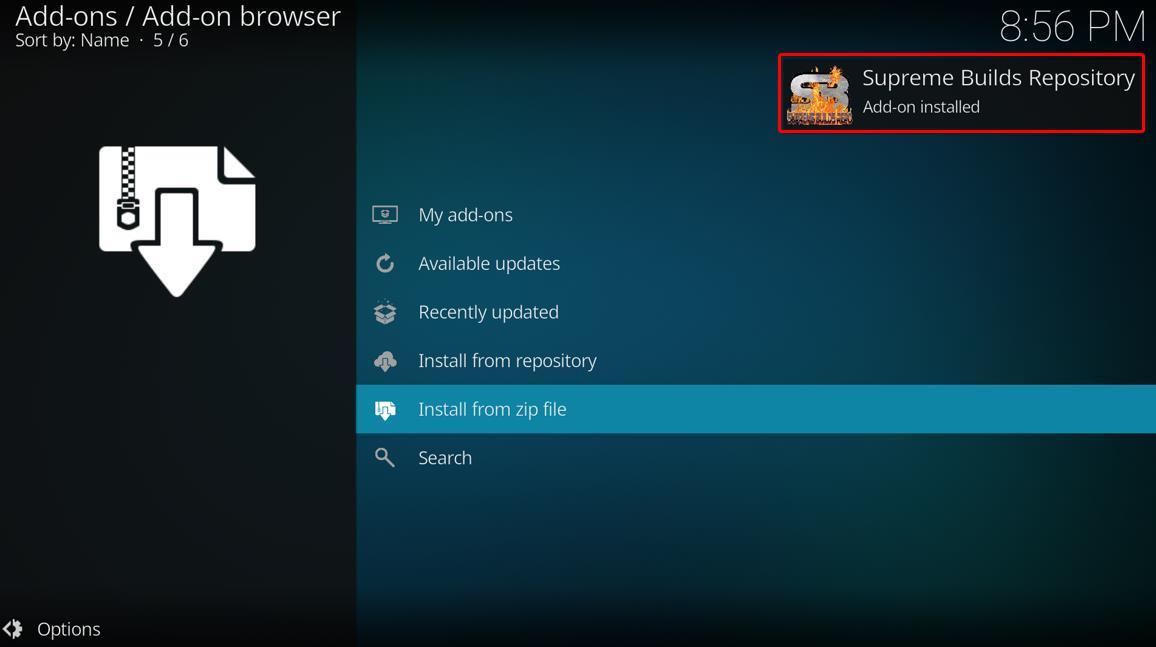
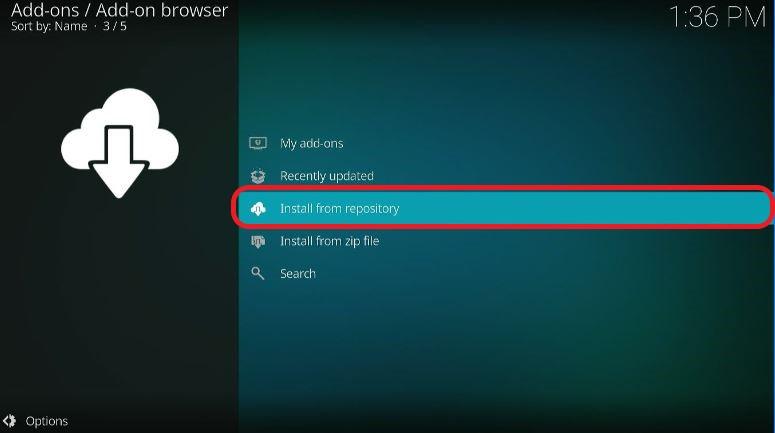
Step 12: Now, from the same screen, select and open Install from repository.
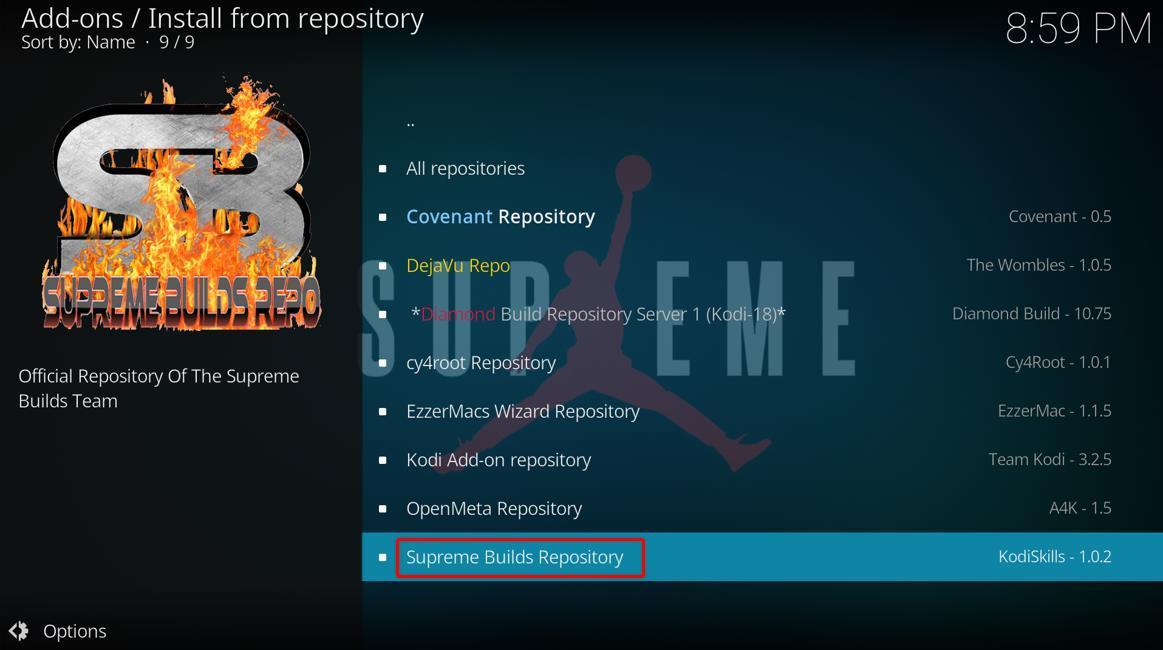
Step 13: A list of available repositories will open. Select and open the Supreme Builds Repository.
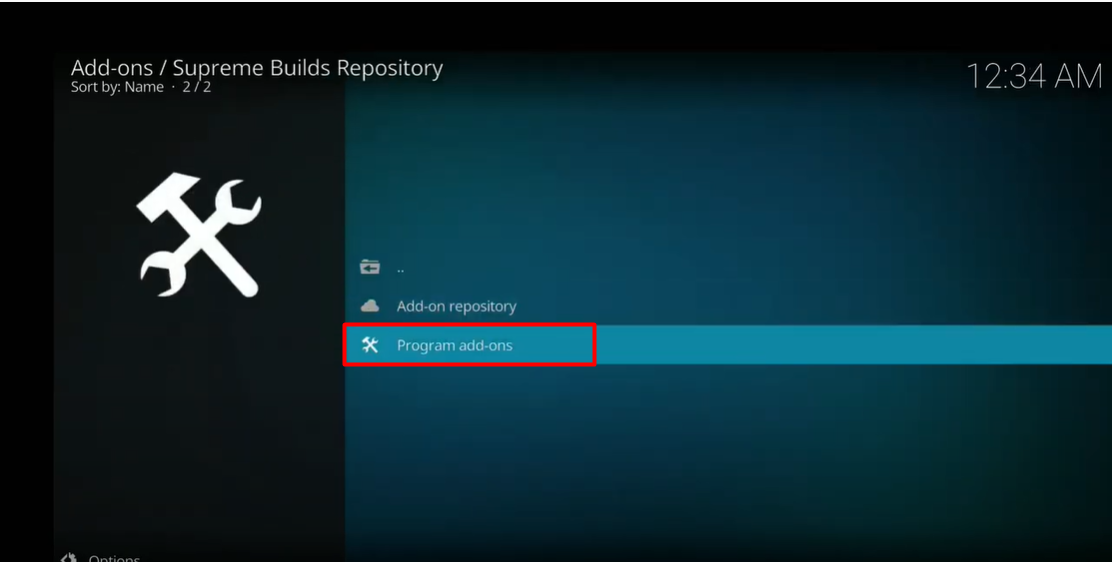
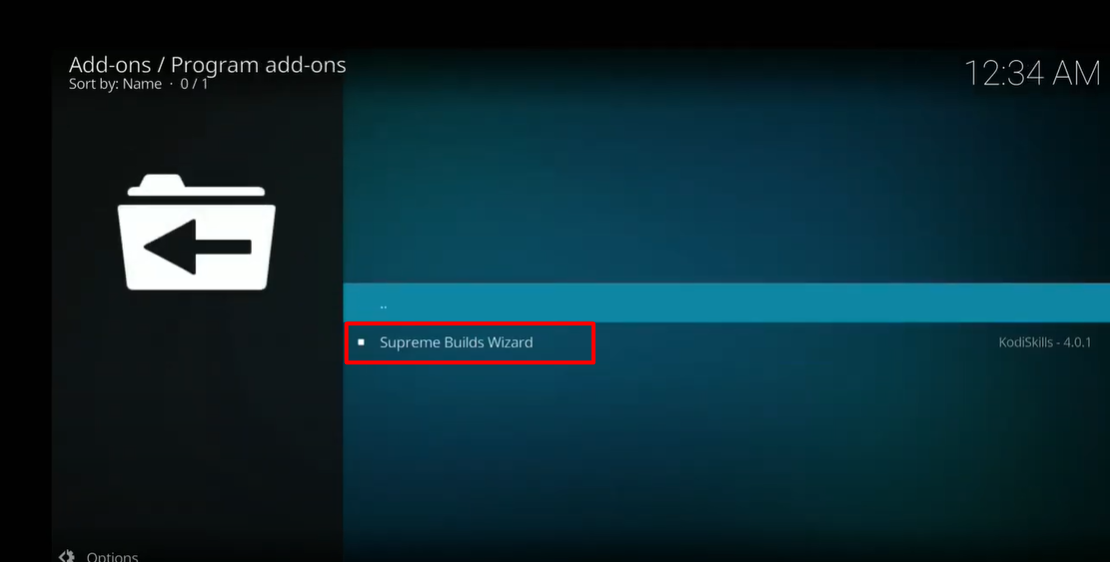
Step 14: Select and open Program add-ons from the menu.
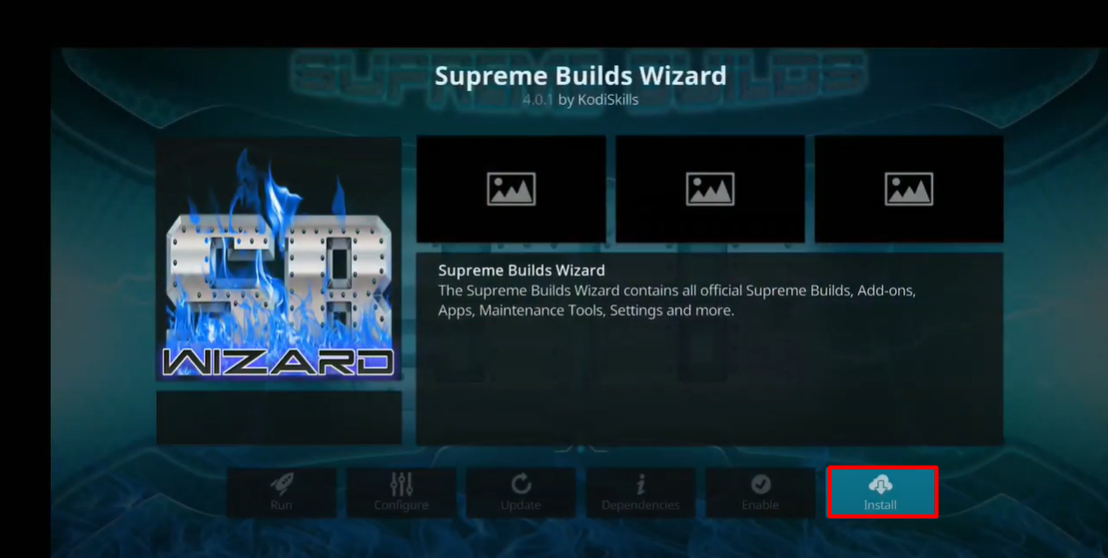
Step 15: Select Supreme Builds Wizard and open it. An installation window will appear.
Step 16: On the bottom right corner of the window, there is an Install button. Select it and let it install.
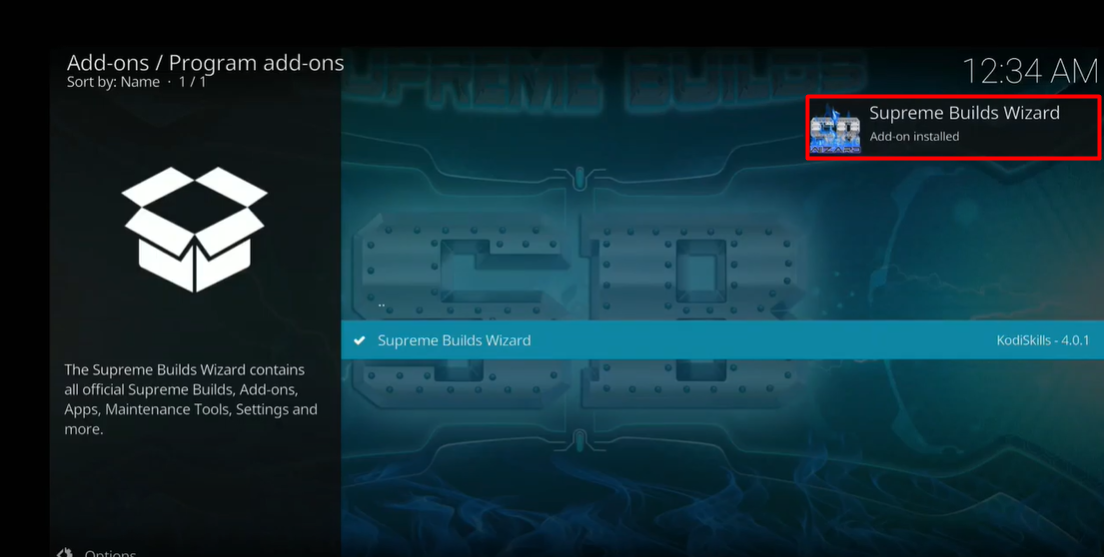
Step 17: Wait for the successful installation notification to appear on the top right corner of your Kodi screen.
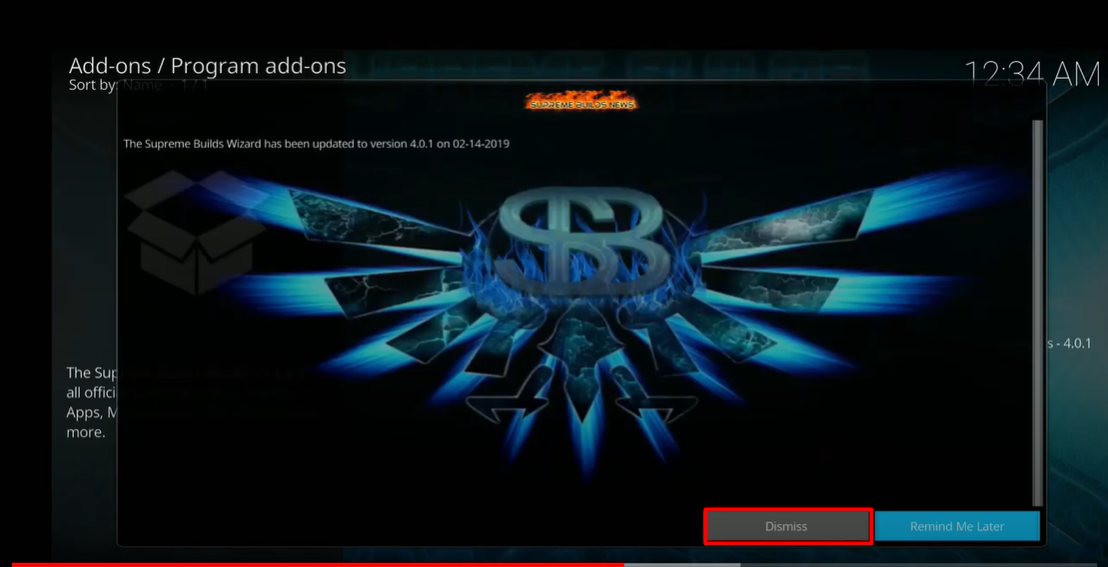
Step 18: Once installed, a bunch of pop-ups will start to appear on your screen. Just ignore them by pressing the Dismiss button.
Step 19: Don’t enable additional settings
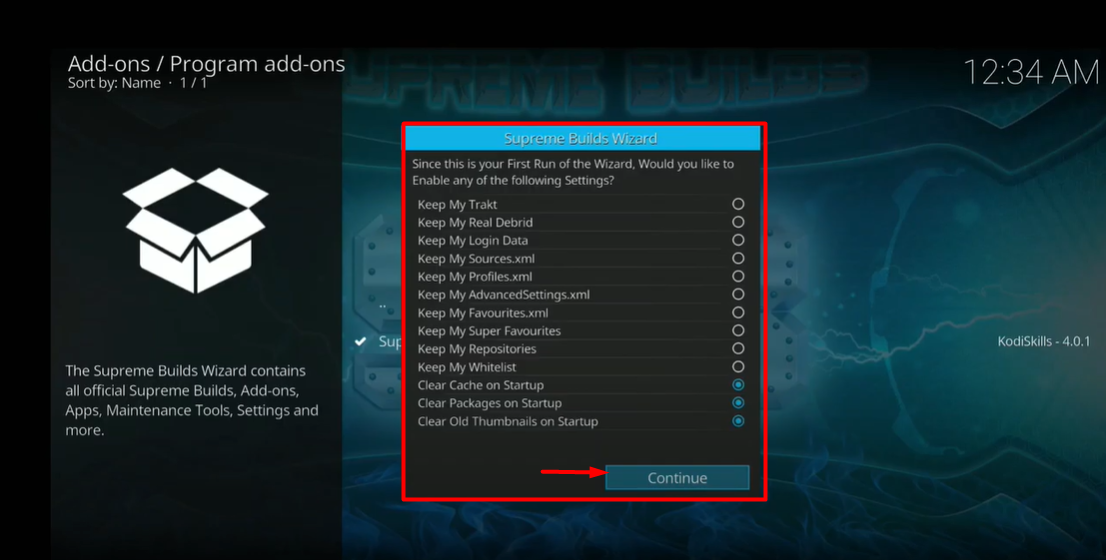
When you install Supreme Builds Wizard for the first time, it will give you a list of settings that you can enable. We suggest you not to enable any of these and ignore this prompt as well. Click on Continue without allowing any of the settings in the list.
You’ve successfully installed Supreme Builds Wizards, and now we can move on to the second part of this tutorial, installing Titanium Build on your Kodi.
We can now proceed to install Titanium Build from Supreme Builds Wizard. The process is simple, and we are going to take you through it step-by-step.
Step 1: Go to Kodi’s Add-ons menu and select Program add-ons. On the right side, you’ll see the Supreme Builds Wizard. Select and open it.
Step 2: A menu will appear. Select (Supreme Builds) Builds from the available options.
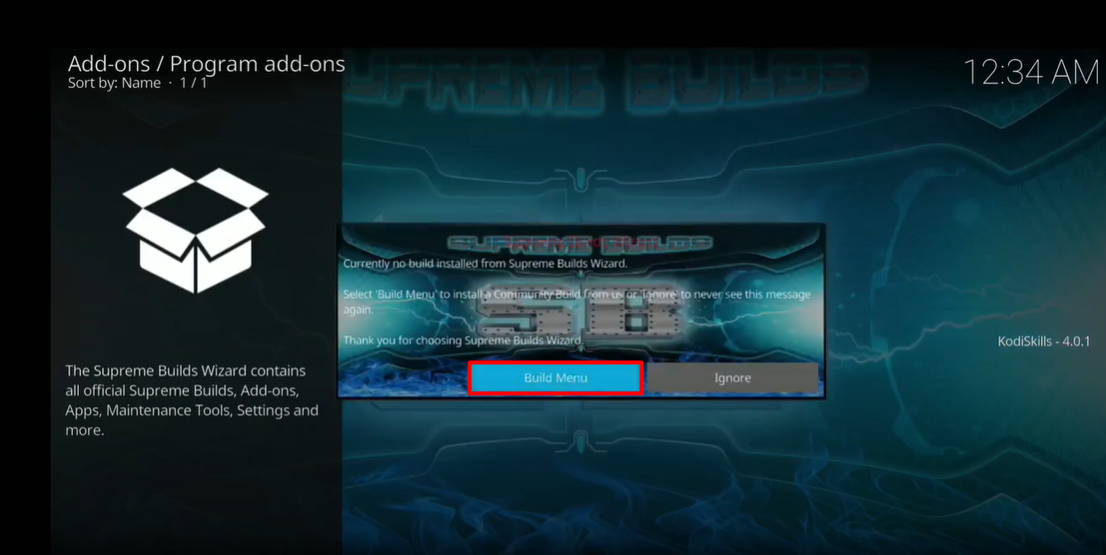
NOTE: If you open Supreme Build directly after installing it, this pop-up will appear, and you should proceed by pressing ‘Build Menu’.
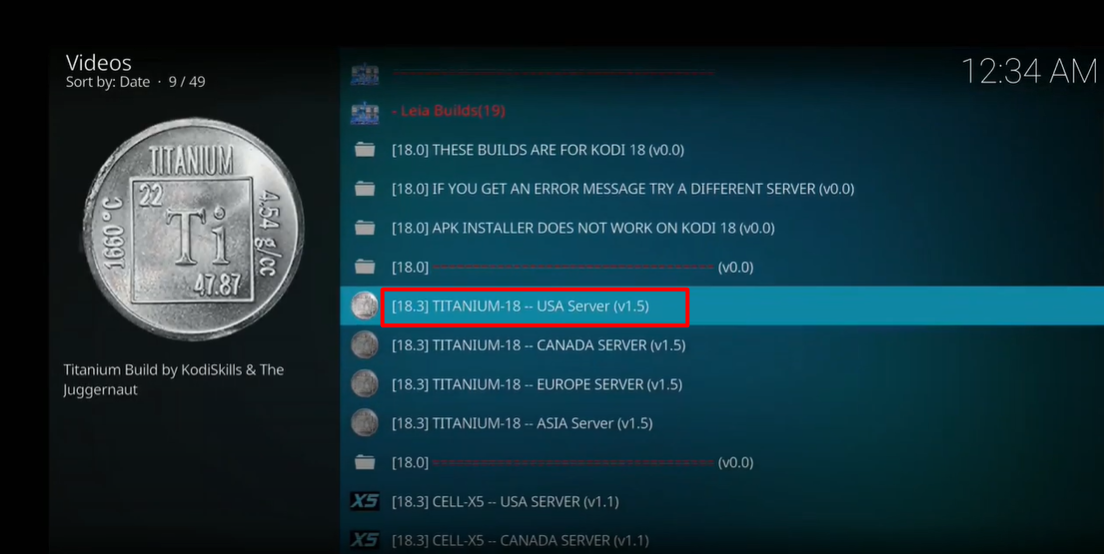
Step 3: Download Titanium from the server
Entering Build Menu will allow you to download the build from a server. The menu gives you a list of several different servers that you can choose from to download Titanium. All servers have the same file. You should choose a server closer to your current location as it will result in a faster download. If your download isn’t starting from one server for some reason, choose any other server to download it from. We are choosing USA Server (v1.5).
Step 4: Once you select the server, two options appear, Standard Install or Fresh Install. Select Fresh Install.
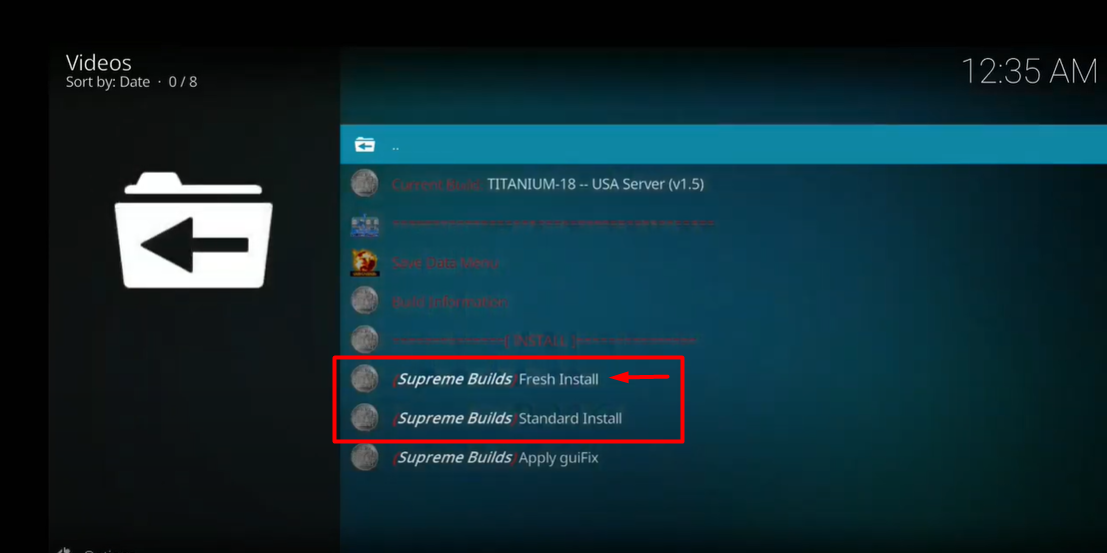
The main difference between Standard Install and Fresh Install is: with Standard Install, all your existing addons will stay, and Titanium build will be installed with them.
Fresh Install will delete all your already installed addons and install Titanium Build on a clean Kodi. This will give your Kodi a fresh, cleaner, and faster start. With Titanium build, you won’t need your already installed addons, and if you ever do need them, Titanium build will provide you with a more straightforward installation.
For us, we are going to install Titanium build as Fresh Install.
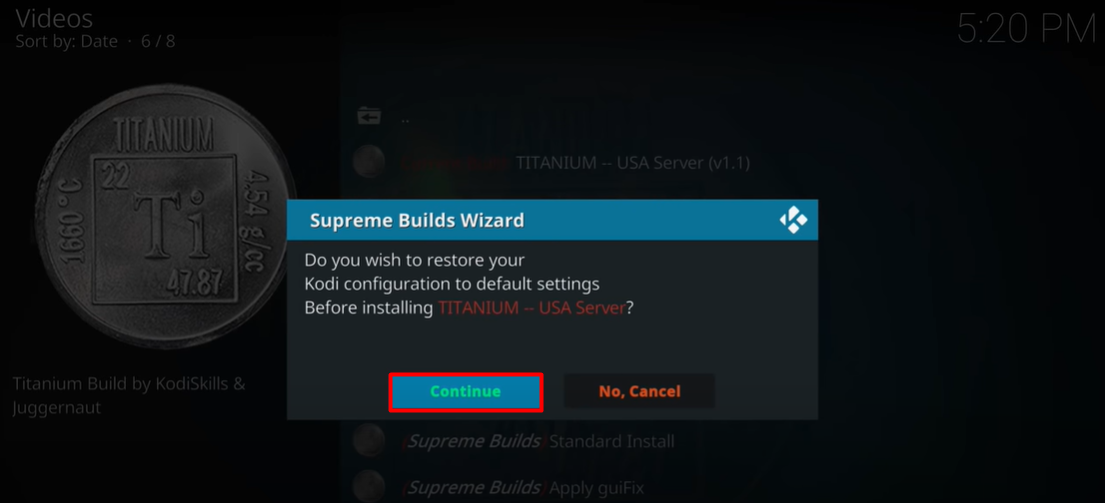
Step 5: If you’ve selected Fresh Install like us, you’ll get a warning prompt informing you that your Kodi data will be erased, and you’ll be taken back to factory settings. Select Continue to finish the installation and restore Kodi’s factory settings.
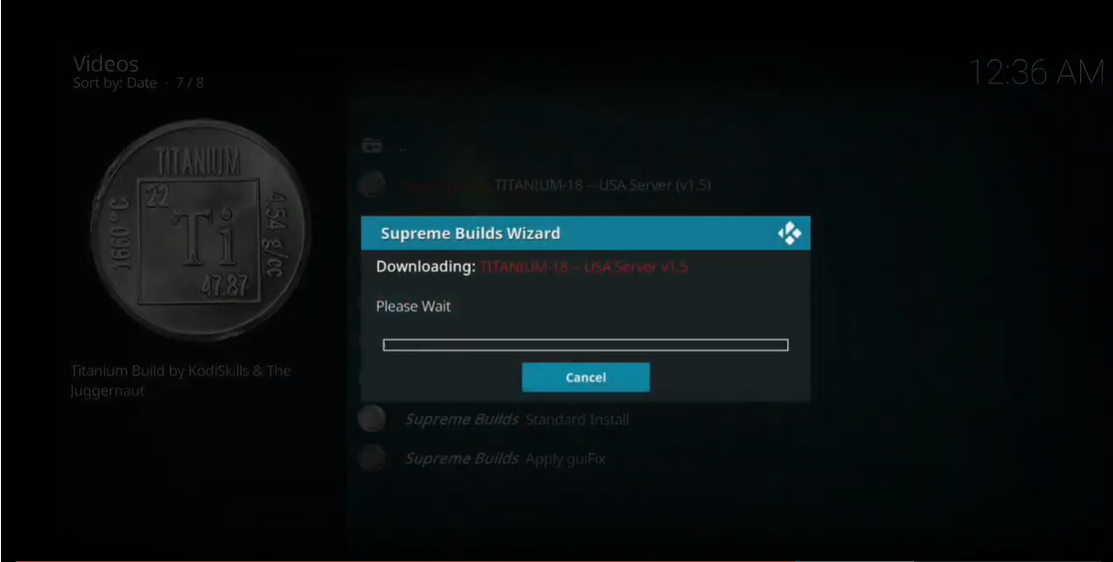
Step 6: Another window will appear, and you’ll see Titanium build being downloaded and then installed.
Step 7: Once the installation has finished, you will see a window asking you to Reload Profile or Force Close Kodi. For us, the Reloading Profile option didn’t work, and it crashed Kodi. We chose the Force close option, and that is what we recommend as well. Select Force Close. Depending on your version of Kodi, the window might force close automatically, too.

Step 8: Once the Kodi has restarted, you will see a new interface. This is Titanium Build, installed on your Kodi. You’ve successfully installed Titanium Build.
Now you are set to stream content, free movies, TV shows, etc., on your newly installed Kodi build. Before you continue, we would like to inform you that Kodi doesn’t hide your content. Whatever you stream will be visible to your Internet service providers and government and can be easily monitored. If you are streaming anything illegal, such as copyrighted stuff, free movies, TV shows, sports, or even live TV, you can get into some serious trouble with legal consequences.
Don’t be scared; we have an easy solution to make your connection and streaming more secure and private. Using a good VPN with Kodi will make your internet exploration journey smoother, faster, and you will be away from the prying eyes of your ISP and government. A VPN makes your private internet connection genuinely private, and it encrypts your data, your searches, your streaming, keeping you safe and secure.
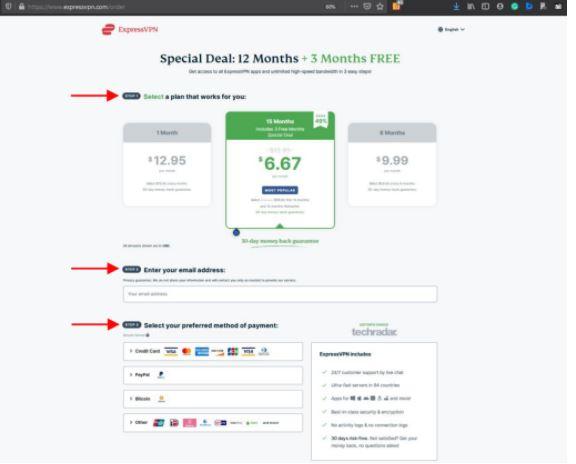
We use ExpressVPN personally and highly recommend it. It is a subscription-based VPN, meaning you will have to buy a subscription, but the good news is, you will get a 30-day free trial when you subscribe to it. It is a money-back guarantee, meaning if you don’t like it, you can ask for your money back, and they will reimburse it to your account. It is the best deal you could ask for if you are new to using VPN and just want to check it out.
Setting up ExpressVPN is simple, and we are going to take you through these steps one by one.
1. Go to the ExpressVPN website and make an account. Select the package that suits your needs and buy it. Follow the 1, 2, 3 steps given, and you have purchased your subscription with a 30-day money-back guarantee.
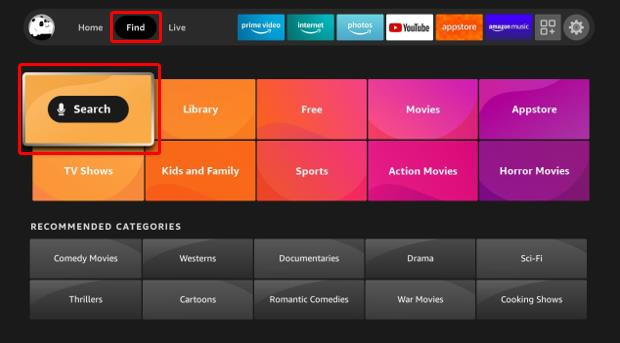
2. Now, we have to download ExpressVPN on our Firestick TV. Go to the Home screen, select Find and Search.
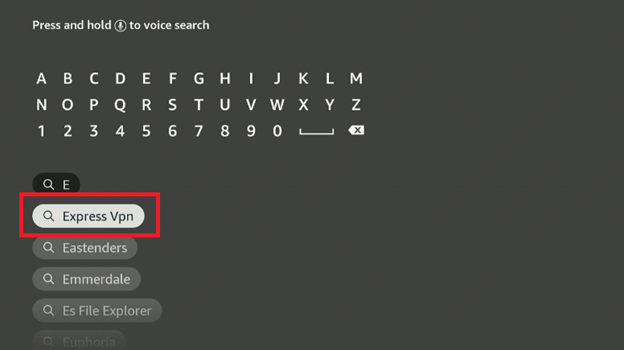
3. Use the remote to either type or voice search with Alexa and search for ExpressVPN.
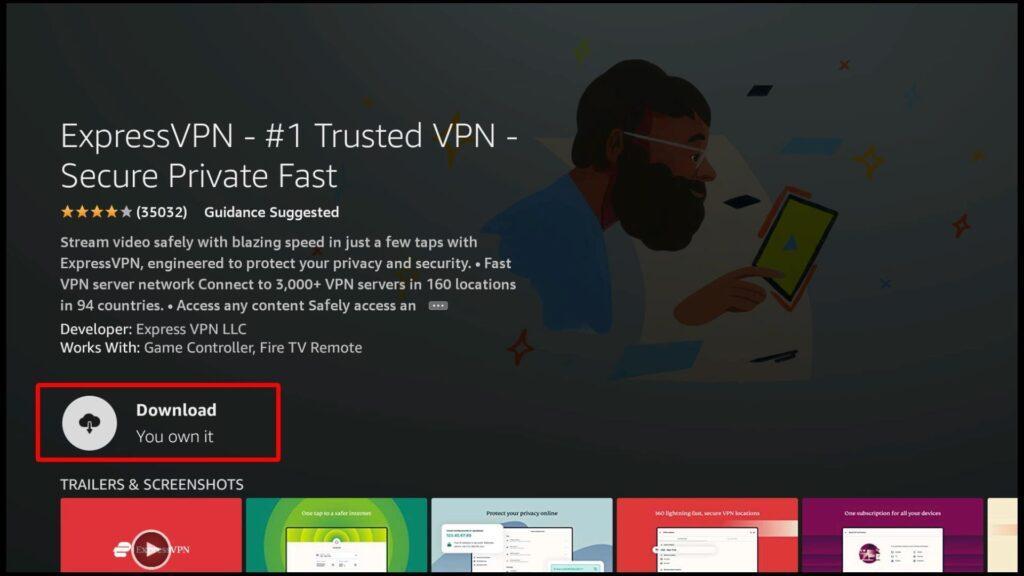
4. It usually leads you to the ExpressVPN app available in the store. Download it.
5. Once installed, open the app and Sign in using your credentials (you used earlier to make your account). It will ask you to enter your Email ID and Passwords.

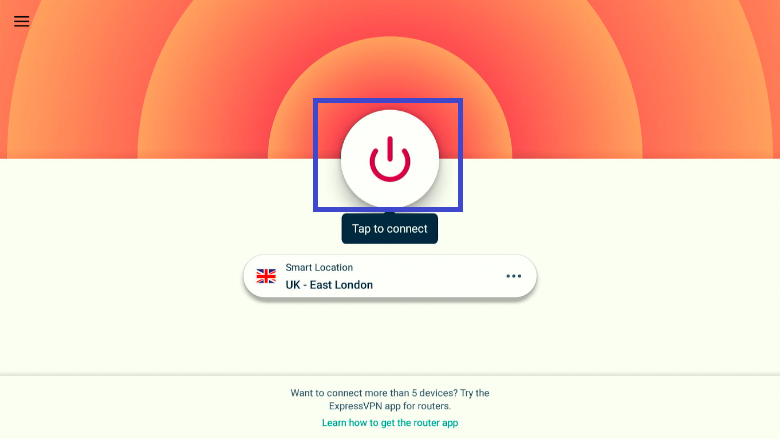
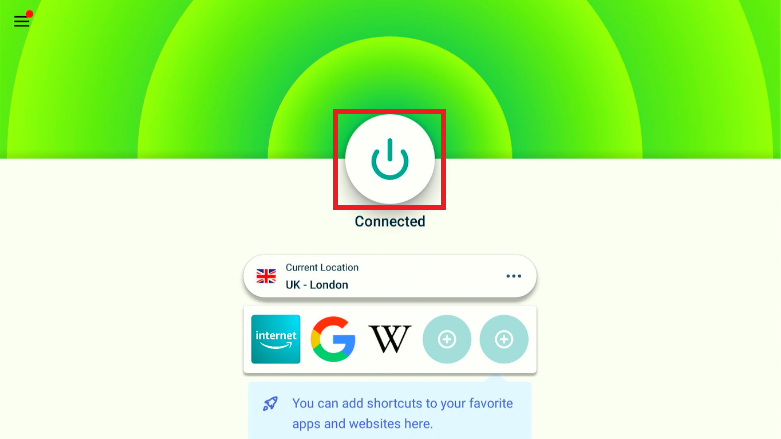
6. Once logged in, select the server you want and click on the Power Icon button to turn it on.
7. You have successfully installed and connected to ExpressVPN. Now roam the internet freely, and let the streaming begin.
You can use the same ExpressVPN account on your PC and handheld devices such as tablets and smartphones.
To sum up everything, Titanium build requires a bit of effort to install it on your Kodi. But we, along with its plenty of users, recommend it as one of the best Kodi builds for your Firestick. It is worth the effort, and you will love the result as it glues all your addons together and brings them to one place for easy access. Further, Kodi Titanium build renovates your old, obsolete-looking Kodi interface to a modern and personalized one. From our personal experience, it makes it easier to find and install any Kodi addon you desire by bringing everything to you instead of painstakingly searching for these addons yourself.

You need to load content from reCAPTCHA to submit the form. Please note that doing so will share data with third-party providers.
More InformationYou are currently viewing a placeholder content from Turnstile. To access the actual content, click the button below. Please note that doing so will share data with third-party providers.
More InformationYou are currently viewing a placeholder content from Facebook. To access the actual content, click the button below. Please note that doing so will share data with third-party providers.
More InformationYou need to load content from reCAPTCHA to submit the form. Please note that doing so will share data with third-party providers.
More InformationYou are currently viewing a placeholder content from reCAPTCHA. To access the actual content, click the button below. Please note that doing so will share data with third-party providers.
More InformationYou are currently viewing a placeholder content from Instagram. To access the actual content, click the button below. Please note that doing so will share data with third-party providers.
More InformationYou are currently viewing a placeholder content from X. To access the actual content, click the button below. Please note that doing so will share data with third-party providers.
More Information