This article will take you through a step-by-step process to install and use the Yoda Kodi addon on Kodi Krypton 17.6 and Kodi 18.6 Leia. You can use the following guide to install the Yoda Kodi addon on any Kodi-supported device such as Amazon Fire TV Stick, Android mobiles, iOS devices, Windows, Mac, etc.
The Yoda addon, inspired by the greatest Star Wars Jedi Knight, is among the most popular Kodi addons for Kodi Leia. It is a part of the Supremacy Repo and is based on Exodus and Covenant. The Yoda Kodi addon is one of the most high-quality additions to Kodi.
Note: Before you begin reading the guide, you must know that the Kodi addon wasn’t accessible the last time we tried to install it in June 2026. However, our team is constantly checking for updates. We will update this article if the repository is back on or relaunched in any other form. Meanwhile, we suggest you try some other popular Kodi addons – such as The Oath, Nemesis AIO, and The Crew.
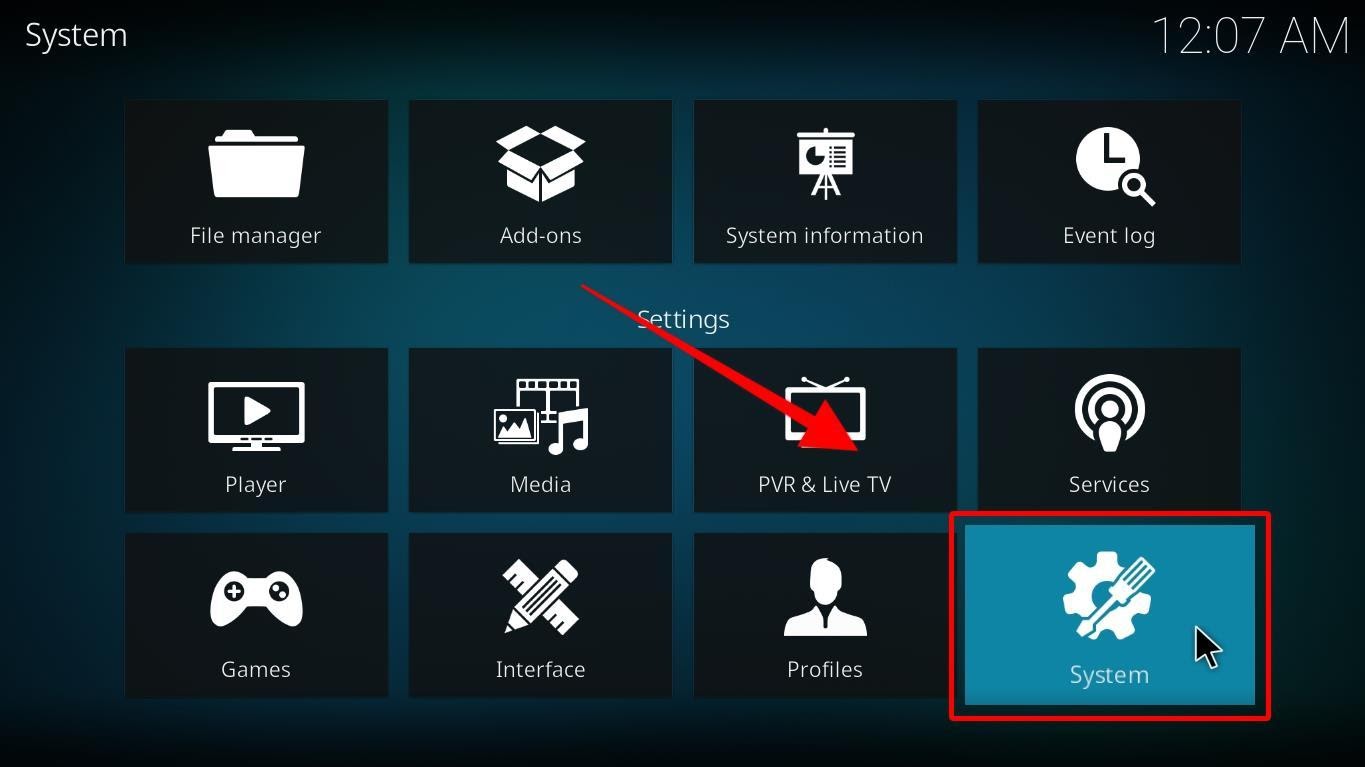
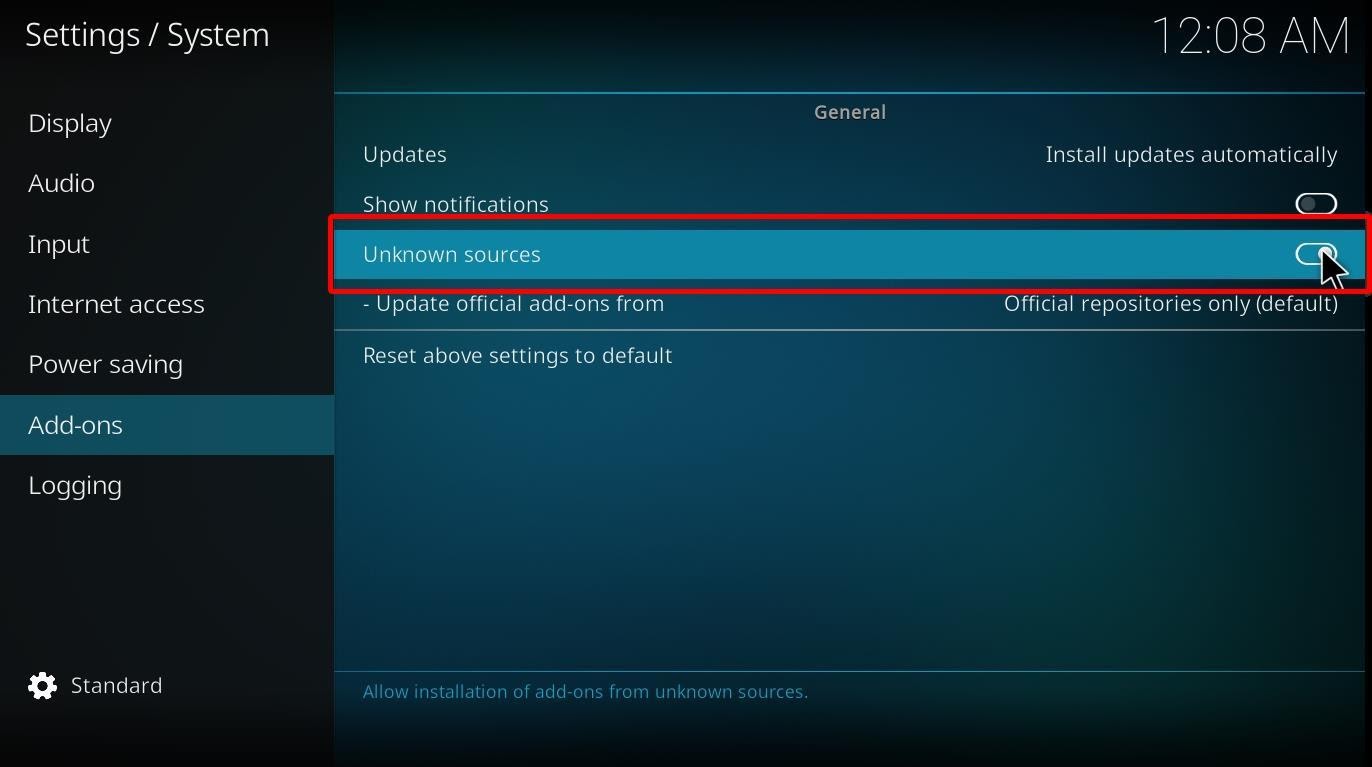
Since Yoda is a third-party addon, it isn’t officially available on the Kodi repository. In order to install the Yoda addon, we first need to allow third-party installation on Firestick. For that, you will have to follow a relatively short process:
There you go! You can now use a third-party app that will allow you to download and install the Yoda addon on Kodi. The next step is to add a source of the repository in order to download the Yoda addon.
As mentioned earlier, Yoda isn’t available on the Kodi repository. Due to that, we have to download the Yoda addon directly from the internet. To do that, we will first need to add a source of the repository. This source will allow us to fetch installation files from the web. Here we go:
Step 1: Let’s head back to the Kodi home screen and select the settings icon from the top left corner of the screen.
(Tip: It is located right under the Kodi logo) 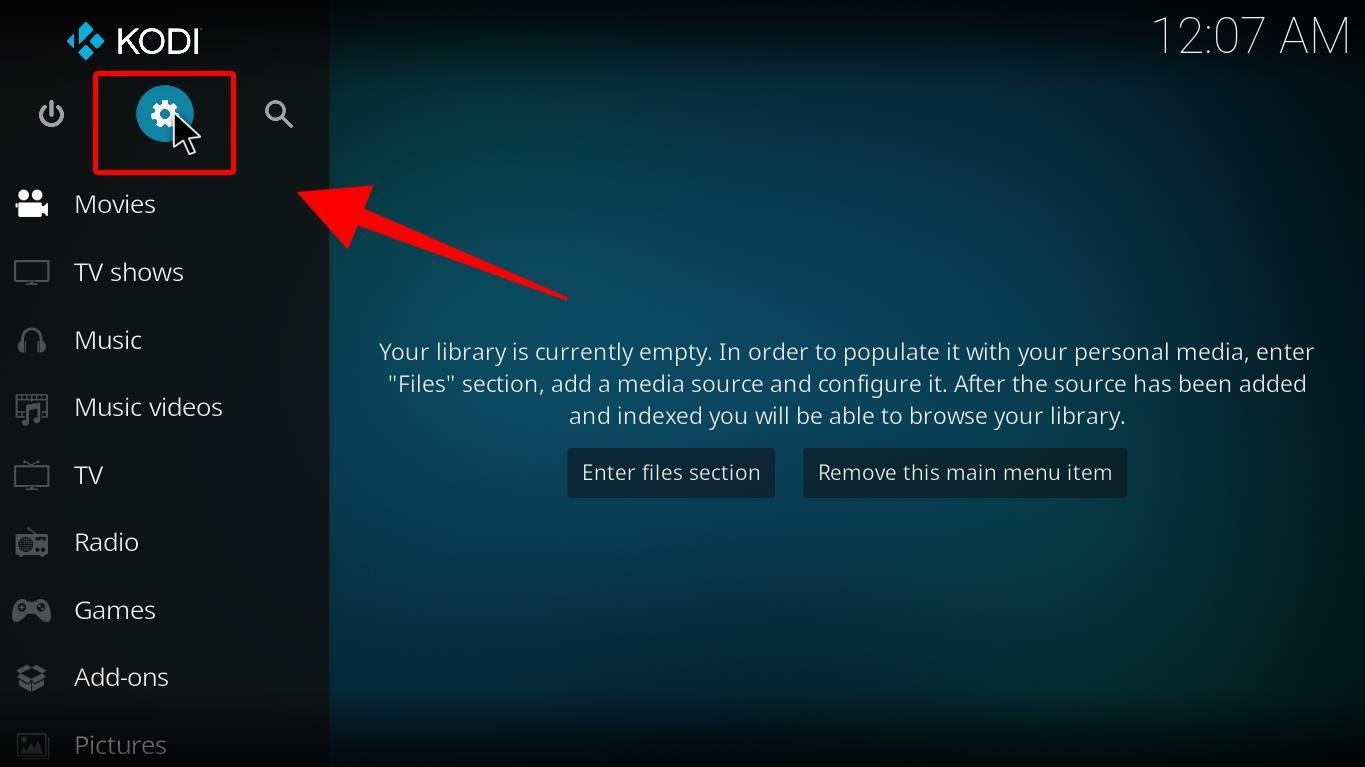
Step 2: Now go to the ‘File Manager’. If you are using Kodi 18, the file manager will be in the top row. 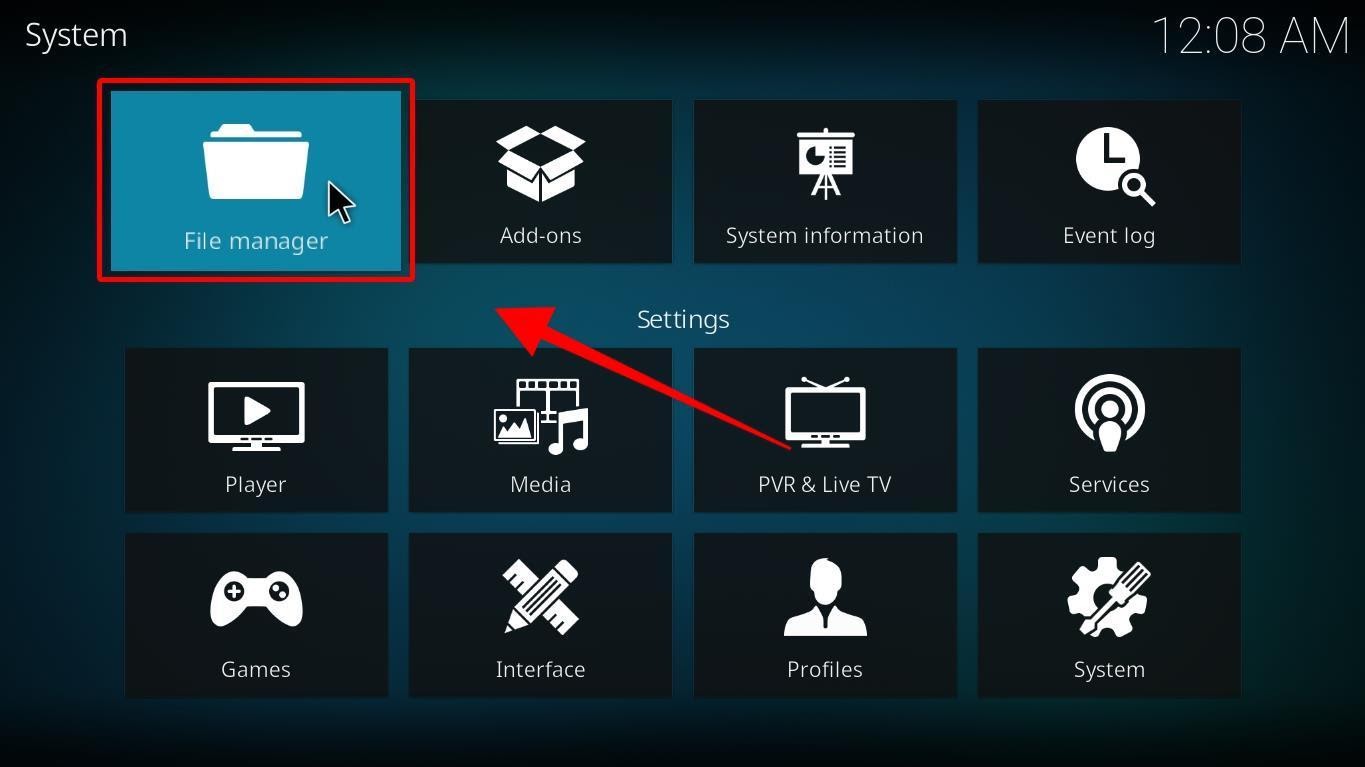
Step 3: Select the ‘Add Source’ option on the right side of the window. 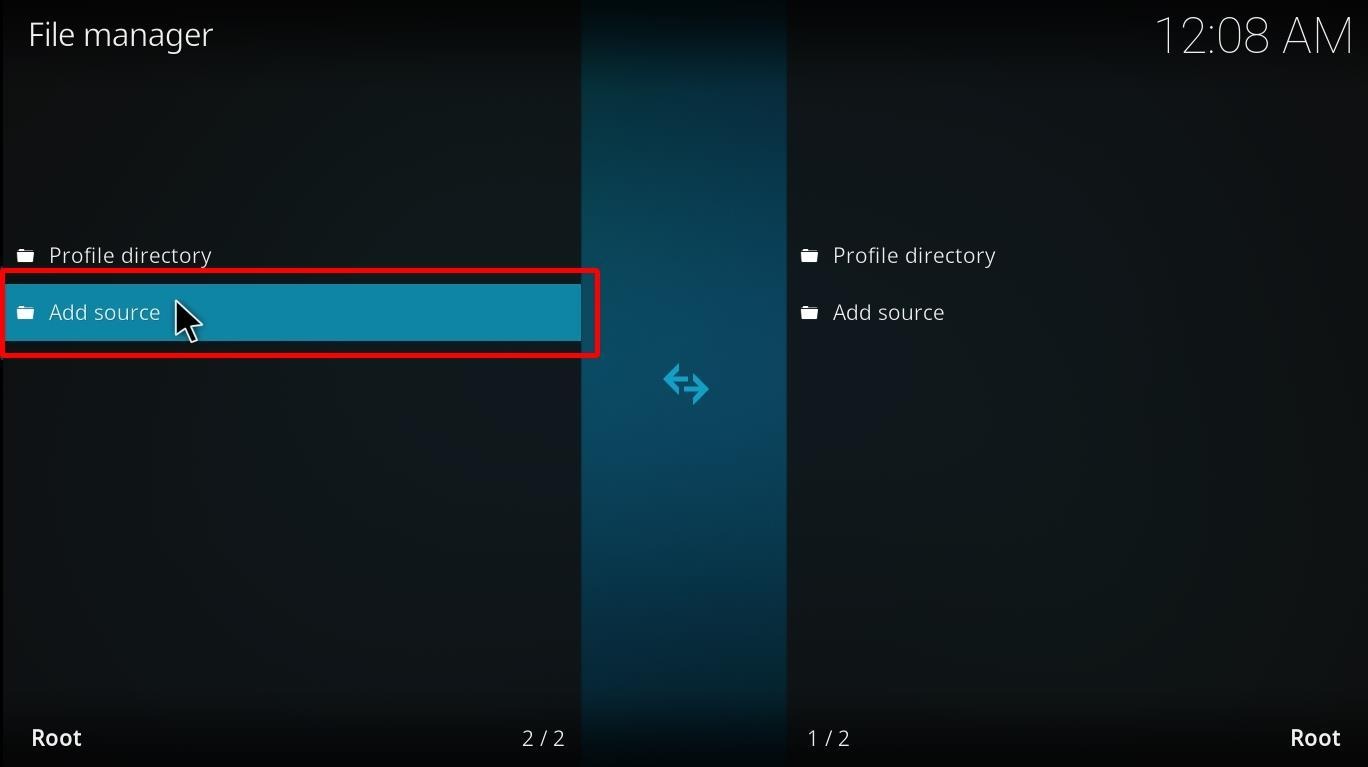
If you are unable to see the ‘Add Source’ option, you might have added multiple sources previously. Don’t worry! You can find the option at the bottom of the list.
Step 4: A pop box will appear. Select ‘<None>’ and type the URL: http://www.lvtvv.com/repo as it is. 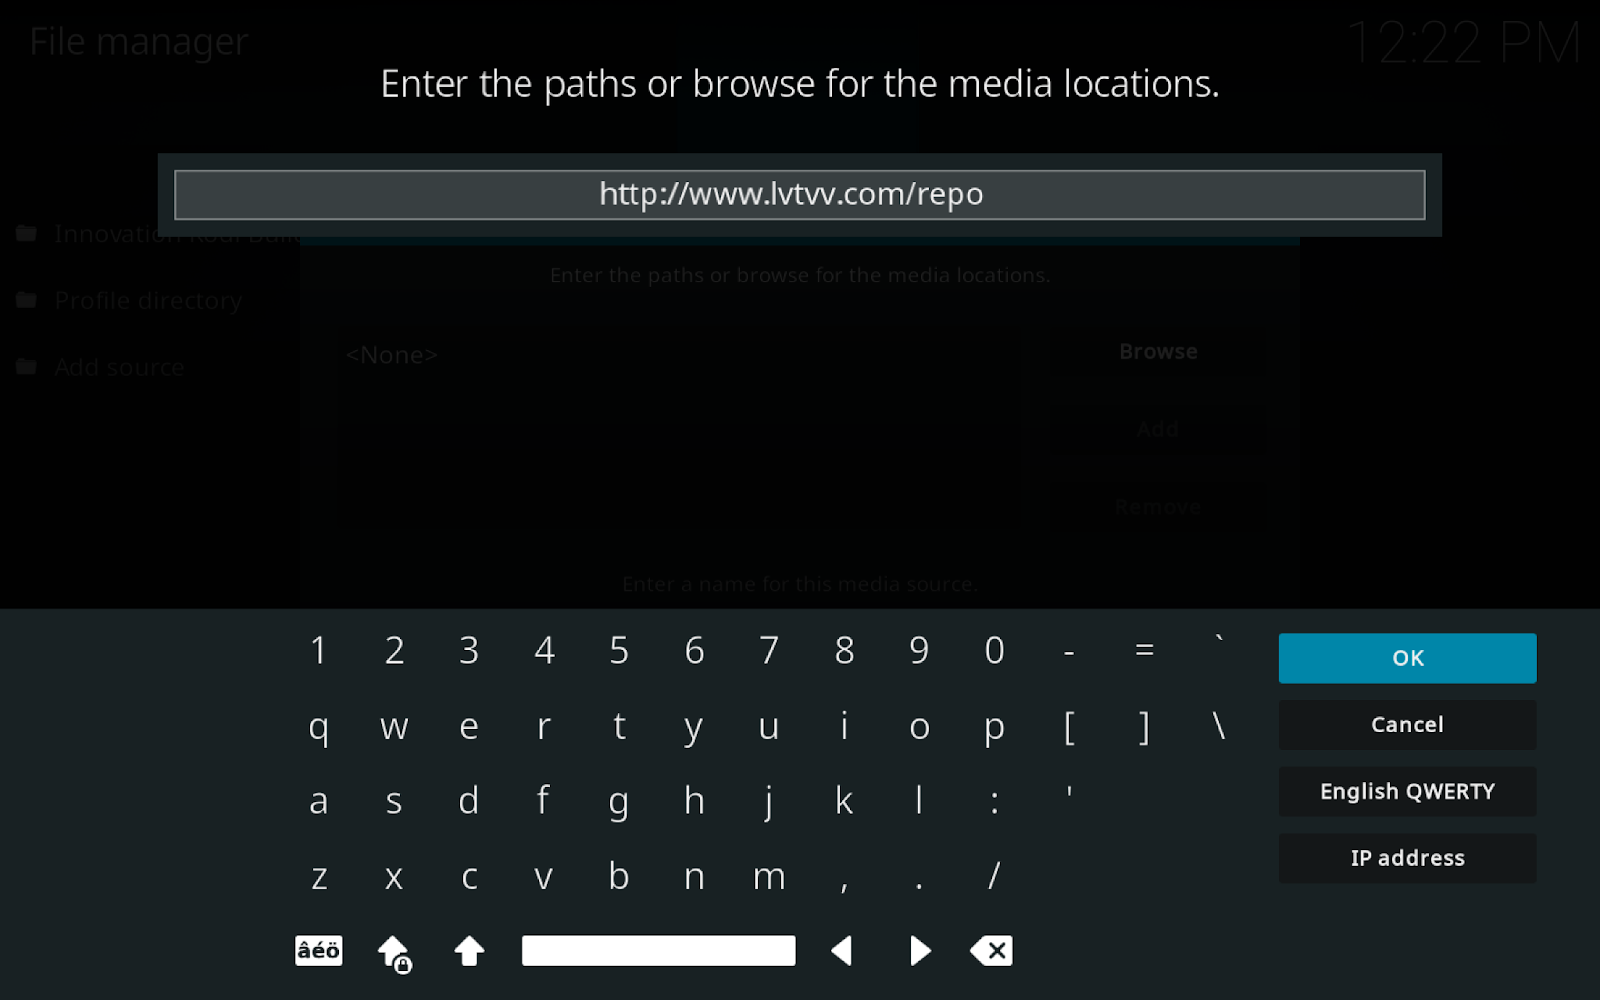
Please type the URL carefully. You might not find the Yoda add-on on Kodi if there are typos in the URL.
Step 5: After entering the URL, select the field ‘Enter a name for this media source’. You can now add a name to the source. We are using the name “Star Wars” for this guide. 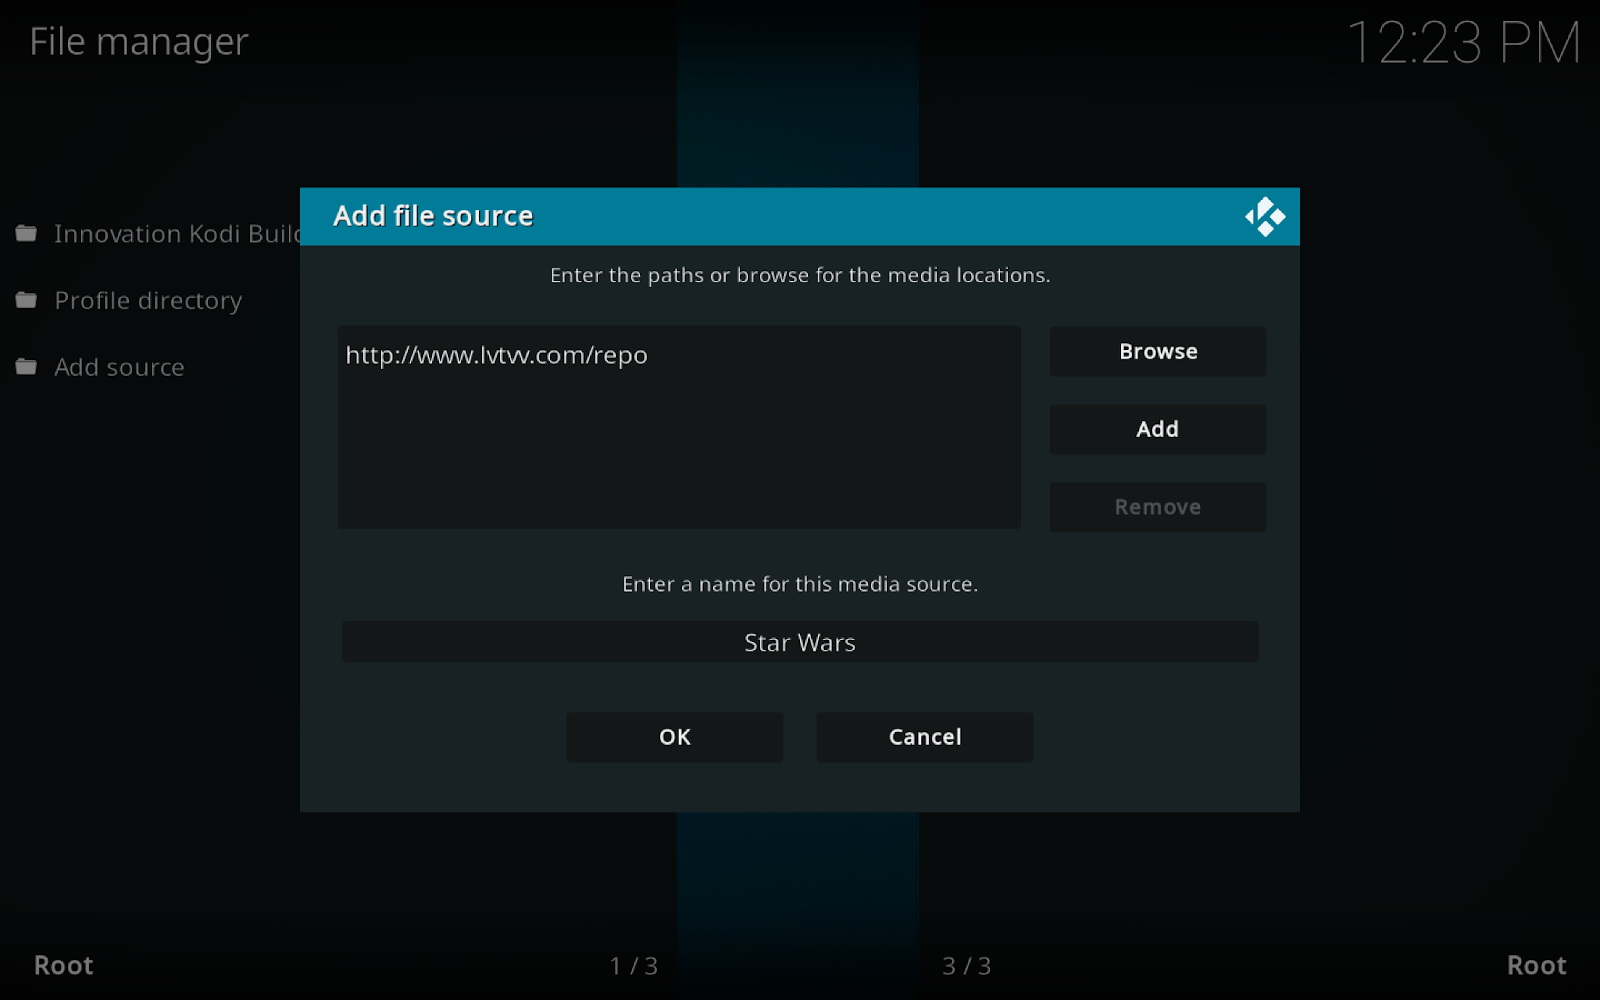
It would be best if you entered a name you’d remember in the future for a seamless installation process.
Step 6: Click on OK.
Well done! You’re halfway through the process. Let’s move on to the next step.
Now let’s install the new repository. You will be using this repository to download and install the Yoda addon on Kodi.
Step 1: Head back to the Kodi home screen and select ‘Add-ons’ from the left. 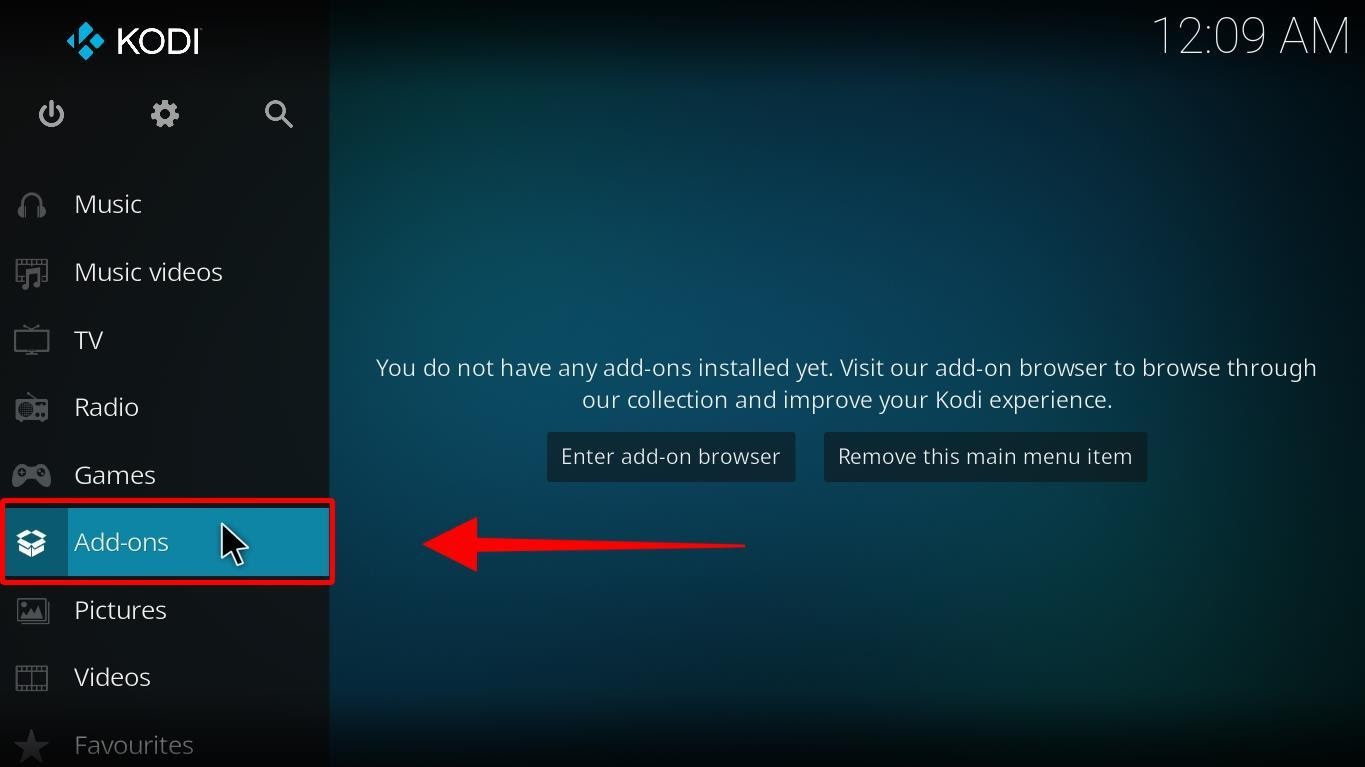
Step 2: Next, select ‘Package Installer’.
It is a dropbox-like logo located on the top left corner of your screen, right under the Kodi logo. ![]()
Step 3: Select ‘Install from zip file’.
Step 4: Now look for the name of your source. We are choosing Kodil for this installation.
Step 5: Now, find a zip file named ‘repository.kodil-1.3.zip.’ Select this file.
The name of the zip file will vary as per the Kodi version you’re using.

Step 6: Let’s sit back and wait. You will see a notification ‘Kodil Repository Add-on installed’ in a minute or two on the top right corner of your screen.
Don’t go back yet. 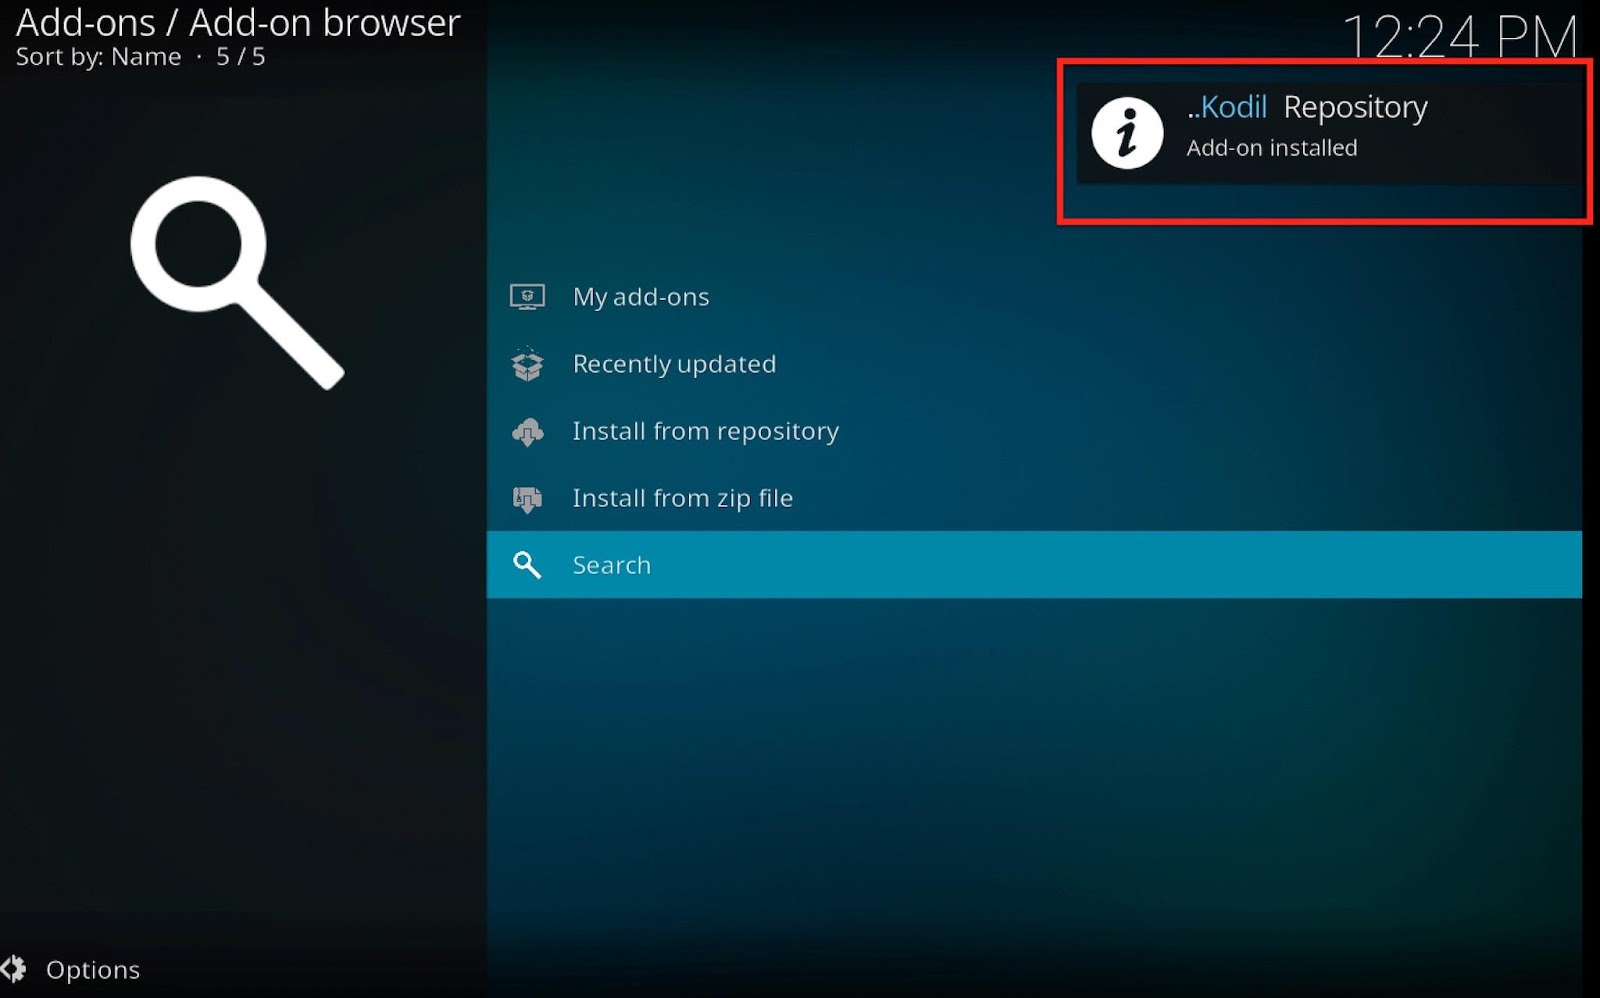
Step 7: Now, select ‘Install from repository’. You will be redirected to a new window. 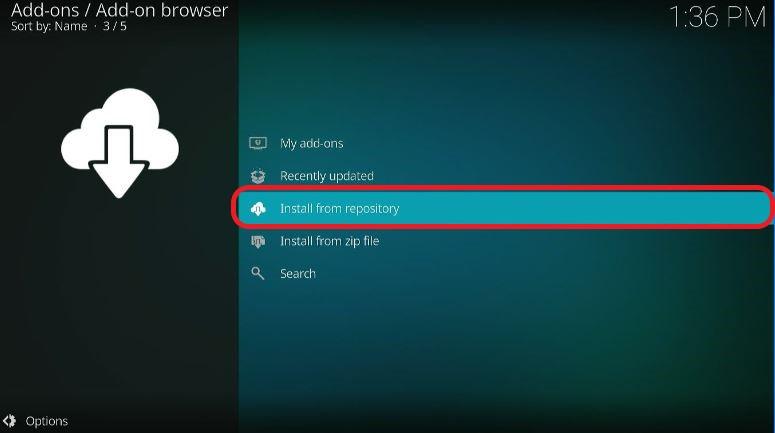
Step 8: Click on the ‘Kodil repository’ from the list of all repositories.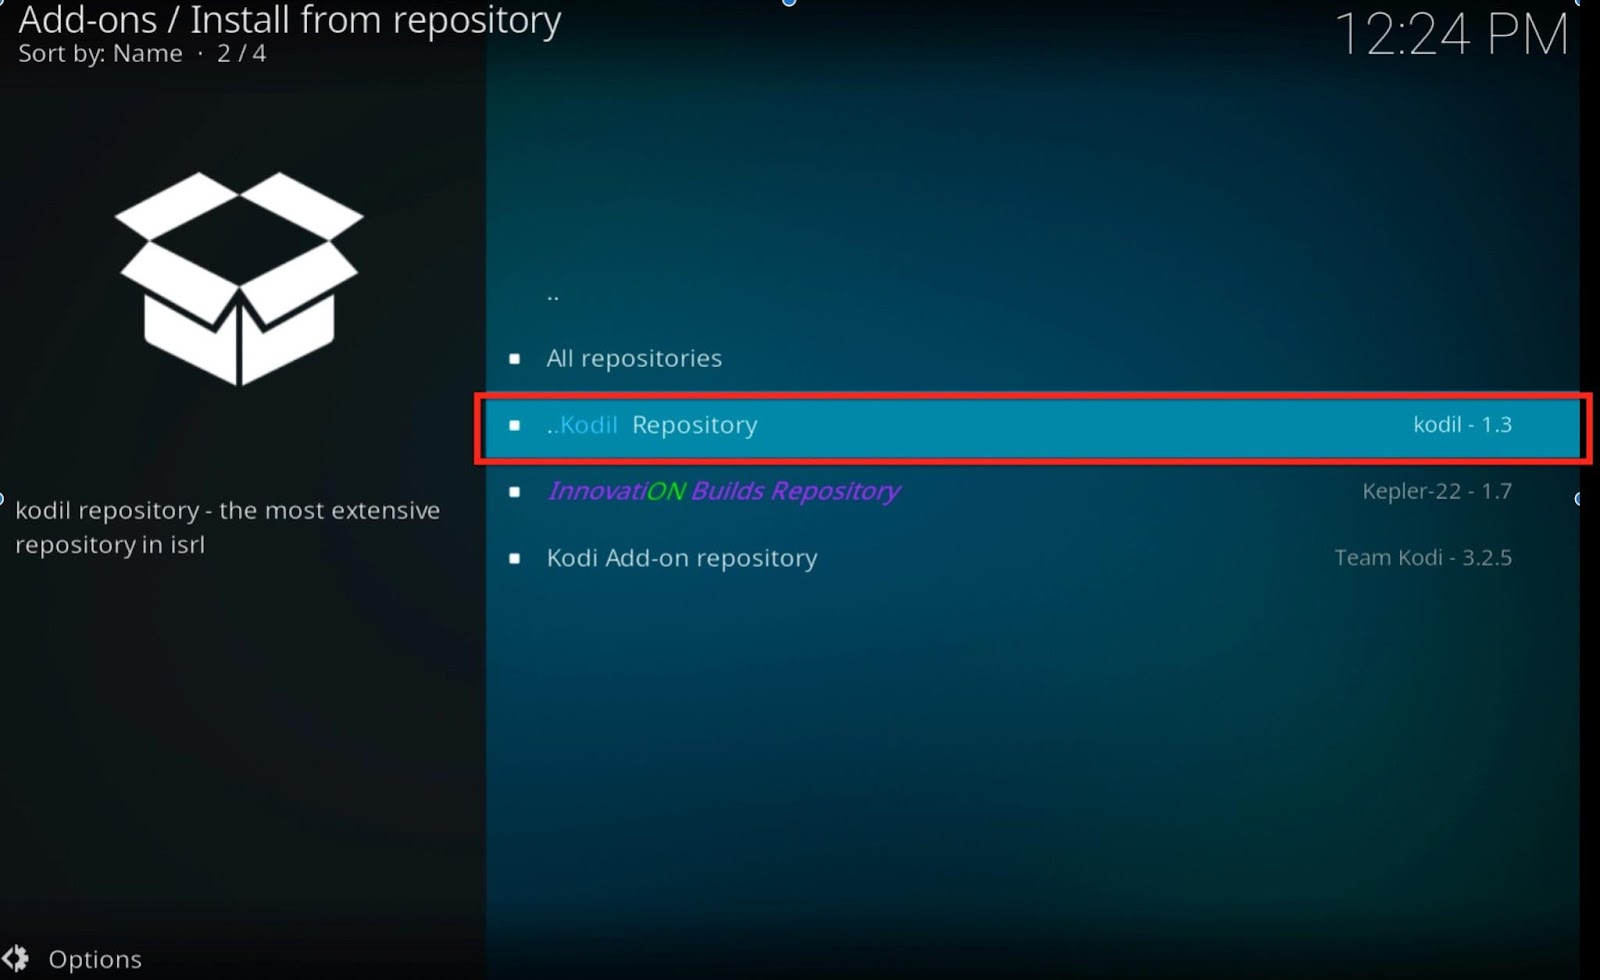
Step 9: Next, select ‘Video add-ons’.
You will have a long list of video add-ons in front of you. Let’s find the Star Wars Hero in this list.
Step 10: Click on ‘Yoda’.
Step 11: Next, select the ‘Install’ button from the bottom right corner. For those using the Kodi Leia version, select ‘OK’ after clicking on the install button.
Let’s wait for the “Yoda add-on installed” notification.
Well, that’s about it. You’ve successfully installed the Yoda Kodi addon on Firestick. Let’s try it out.
Go back to the Kodi home screen and find the Yoda addon there. You might not find it on the home page if you have a number of Kodi addons pre-installed on Firestick.
Head to Add-ons and select ‘Video add-ons’. You will definitely find Yoda there.
A note of caution: it would be best if you connect to a trusted VPN service before you start streaming online for free using Kodi addons and builds. Streaming content for free might land you legal trouble. Having a reliable VPN for Kodi will mask your IP address from cybercriminals and governments.
We personally use ExpressVPN and find it the most secure and fastest amongst all the other VPNs out there.
Before we begin the installation, we’d suggest you get an Express VPN annual Subscription. Express VPN is one of the most secure VPN services you can find. You can get a three-month free subscription and an additional 45% discount if you opt for an annual plan. You can also get a free 30-day trial with a refund guarantee.
If you’re not satisfied with the service, you can always get your money back.
Step 1: Open your Firestick and go to the home screen.
Step 2: Select ‘Find’ and click on the ‘Search’ option.
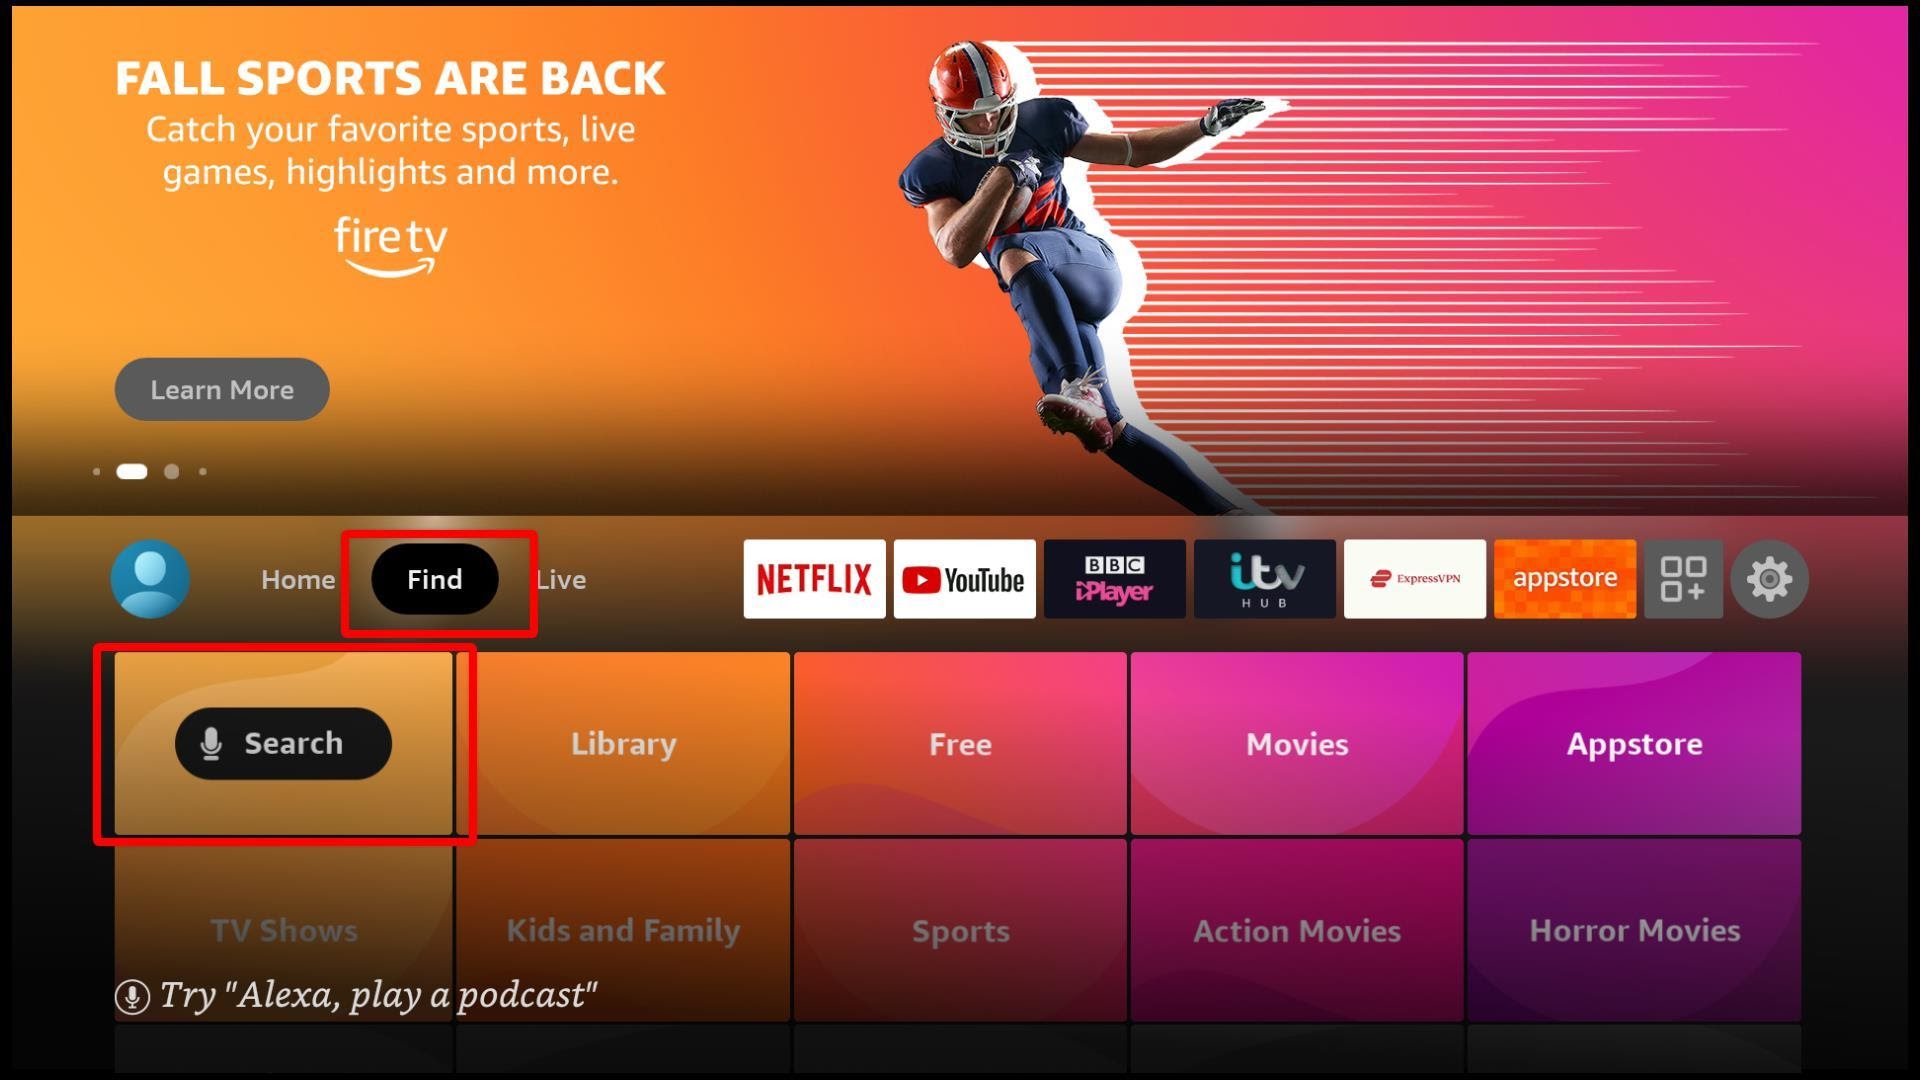
Step 3: A virtual keyboard will appear. Now, type ‘Express VPN’. You can also press and hold your Firestick remote to activate voice recognition.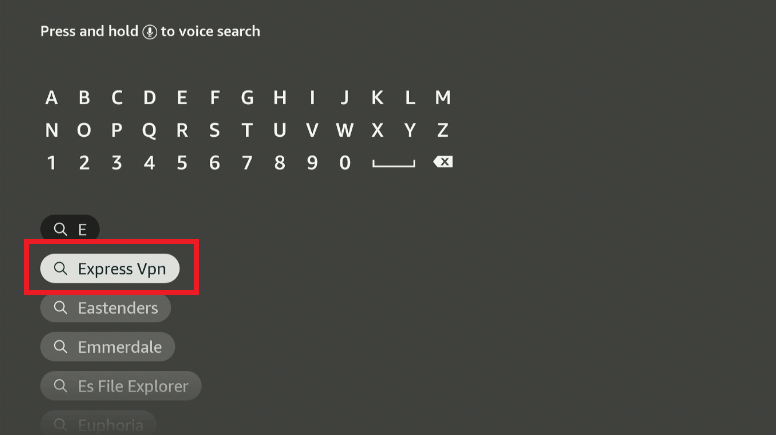
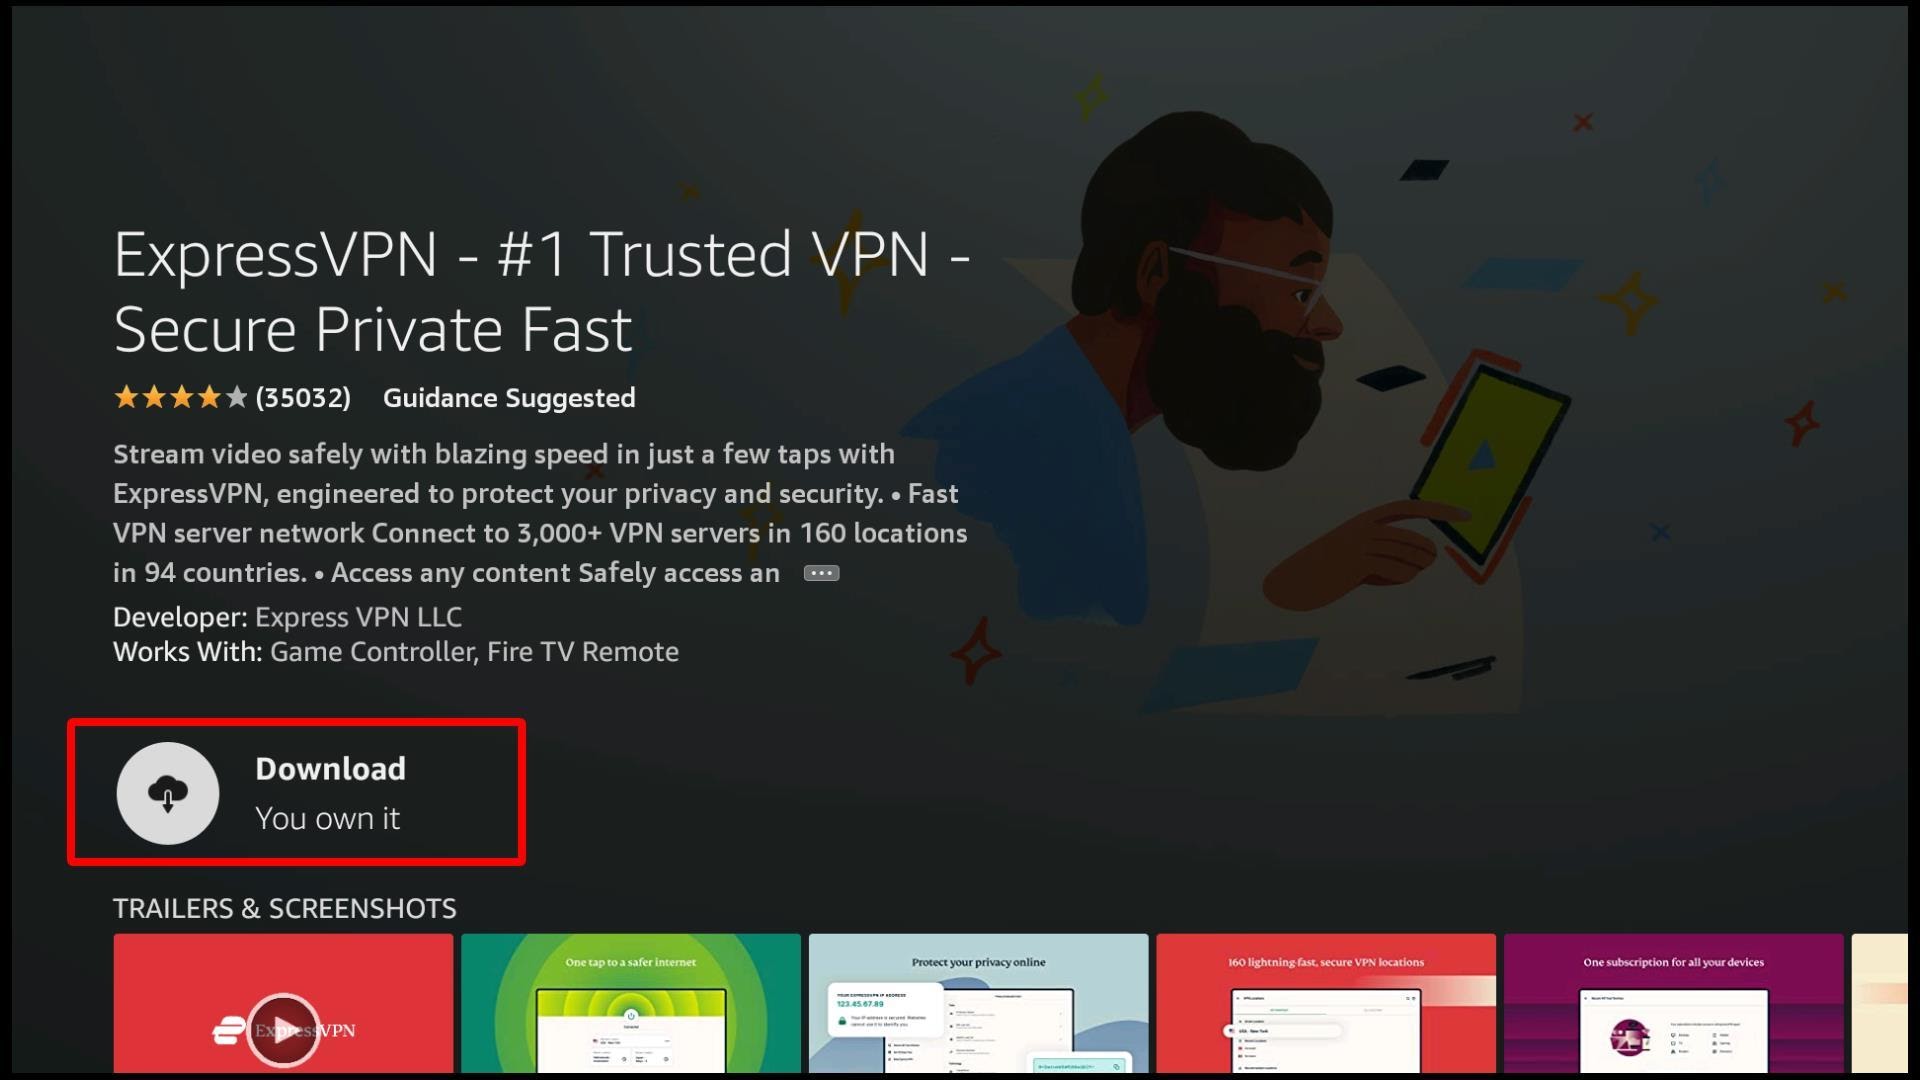
Step 4: Click on ‘Express VPN’. It should be among the first suggestions. Next, choose the ‘Download’ option.
Step 5: Now that you’ve downloaded the Express VPN app, it is time to sign in. Fill in the registered email and password you used when purchasing the subscription.
If you haven’t bought a subscription, now is the time.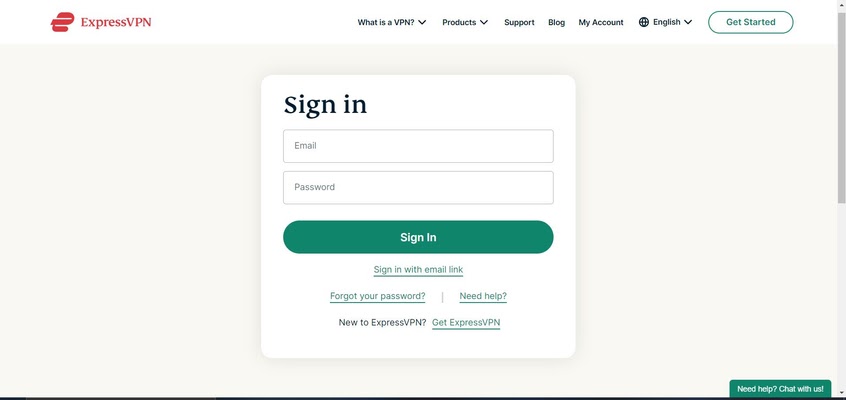 Step 6: On the home page, you will see a Power icon. Click it.
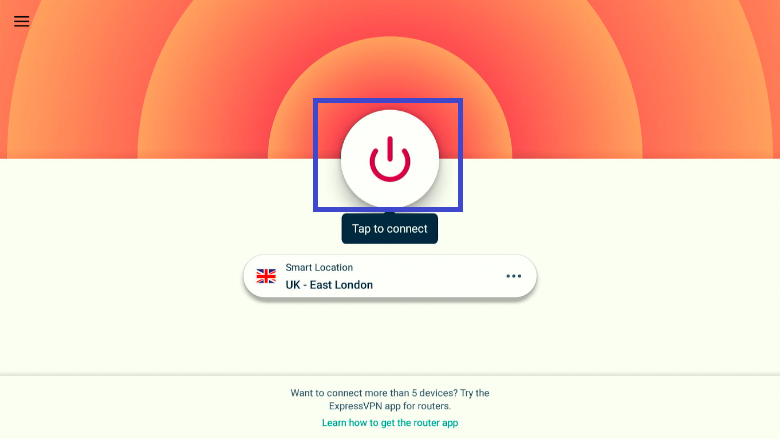
Voila! You can now stream unlimited free content without stressing about anyone tracking your online activities.

You need to load content from reCAPTCHA to submit the form. Please note that doing so will share data with third-party providers.
More InformationYou are currently viewing a placeholder content from Turnstile. To access the actual content, click the button below. Please note that doing so will share data with third-party providers.
More InformationYou are currently viewing a placeholder content from Facebook. To access the actual content, click the button below. Please note that doing so will share data with third-party providers.
More InformationYou need to load content from reCAPTCHA to submit the form. Please note that doing so will share data with third-party providers.
More InformationYou are currently viewing a placeholder content from reCAPTCHA. To access the actual content, click the button below. Please note that doing so will share data with third-party providers.
More InformationYou are currently viewing a placeholder content from Instagram. To access the actual content, click the button below. Please note that doing so will share data with third-party providers.
More InformationYou are currently viewing a placeholder content from X. To access the actual content, click the button below. Please note that doing so will share data with third-party providers.
More Information